Table of Contents
Contents
Problem: Create black and white value portrait using the rule of thirds, stable figure ground and a clear focal point.
Limits: Use a narrow value range in low (dark) key; achromatic grays
Materials: Sketchbook, pencils, Bristol Board 9×12″, acrylic paints, brushes, palette, rags, water container, photoshop
Concepts: Value, grayscale, achromatic, focal point, contrast, shadow, highlight, narrow value, broad value, high key, low key, open-value composition, closed-value composition, Rule of Thirds
Technical Skills: thumbnail sketching, painting techniques, photography & lighting techniques, digital tools
Vocabulary
- Value: Signifies the relative differences of light and dark
- Achromatic Value: Value with the absence of hue (color).
- Grayscale: The full range of values simplified into a graduated scale.
- Narrow Value Range: When the values congregate around the dark (low-key), middle (middle-key), or light (high-key) part of the grayscale.
- Broad Value Range: When the values are spread over the dark, middle, or light part of the grayscale.
- Shadow: Dark area of an object as a result of a disruption of the light source.
- Highlight: Portion of an object that receives the greatest amount of direct light
- Contrast: Occurs when elements are unrelated or dissimilar in value, size, shape, etc.
- Gradation: Occurs when elements incrementally (slowly) change in value, size, shape, etc.
- Chiaroscuro/Tenebrism: Forceful use of contrasting lights and darks, creating a dramatic mood.
- Film Noir: a cinematic term used to describe a visual style that emphasizes low-key lighting and unbalanced compositions.
- Focal Point: The elements or objects on which the viewer’s attention is focused.
- Rule of Thirds: A compositional guideline; an image is divided into nine equal parts by two equally spaced horizontal lines and two equally spaced vertical lines. Important compositional elements should be placed along these lines or their intersections to create tension, energy and interest, rather than simply centering the subject.
Step1:Source
Choose a high-quality portrait photograph to use as the basis for your assignment. Convert the photo to black and white, then add to a document tagged with “Project 2: Pattern Portrait” and “Step 1: Source”
Recommendations for images:
- high contrast (range between darkest/lightest areas) on face
- taken from the collarbone/shoulders up (like an ID photo)
- clear distinction between subject and background (check the hair especially)
YES: this an ideal image. There is strong contrast between the subject and background, and a high dynamic range (difference between light and dark) across his face.NO – there is very little contrast on the left side of the subject’s face, which makes the features challenging to define and flattens the appearance of the illustration.NO – highlights on the subject blend with the blown-out background, which would result in a portrait with a seemingly misshapen head and neck.
Step2:Convert
Use Illustrator’s Image Trace interface to convert your photo to a 6-color vector graphic (black, white, four shades of gray), then clean up/adjust the results using the pen tool. Post to OpenLab tagged with “Project 2: Pattern Portrait” and “Step 2: Convert”.
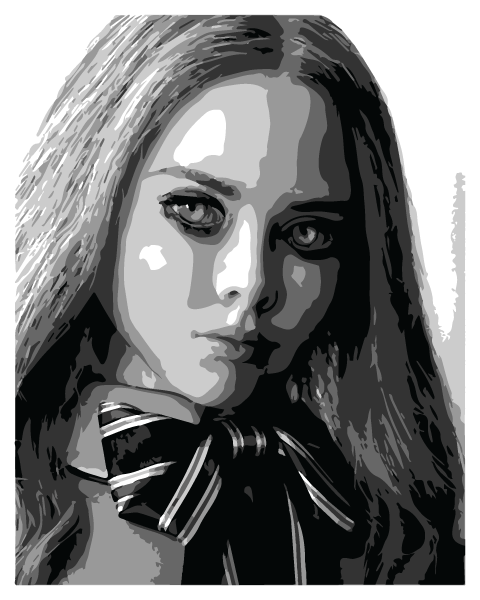
Portrait at the end of Step 2
- Create a new Illustrator document, sized 8″ x 10″ at 300ppi
- Place your photo in Illustrator (file -> place), making sure it’s scaled to fill the entire artboard. (click and drag on the white squares in the corners to resize; hold the shift key to scale it evenly)
- Use the “image trace” interface to convert your image to vector paths (object -> image trace -> make). You may get a warning about tracing proceeding slowly; it is safe to ignore this.
- Open the “image trace” window (window -> image trace), then choose the “6 color” preset from its dropdown menu.

- “Expand” your image (object -> image trace -> expand). This converts the image to vector paths – geometric shapes we can manipulate and edit.
- Ungroup the expanded vector paths so you can select them individually (object -> ungroup).
- Separate each color into its own group of shapes. Click on a vector shape, then all other objects of the same color (select -> same -> fill color), then group the objects (object -> group). Repeat this until all six colors (black, white, four shades of gray) are grouped together.
- Export your image as a .jpg, using the high-quality preset, and add this image to your submission document.
Step 3: Palette
Design four geometric patterns of different densities to replace the four shades of gray in the image. Use this template to create a simple layout showing a tile of each pattern alongside its corresponding shade of gray. Add this layout to your document tagged with “Step 3: Palette”.
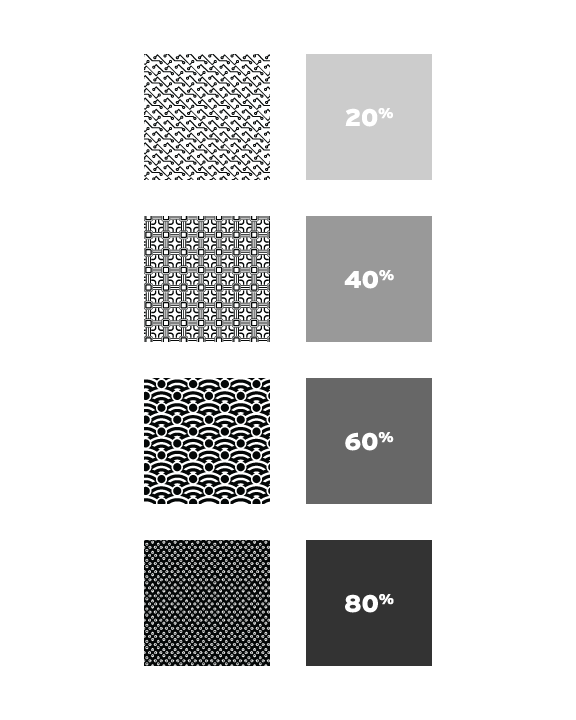
A completed pattern template for Step 3: Palette
This video/tutorial explains the process of creating patterns in Adobe Illustrator. The specific process and method you use will depend on the pattern you make. Only use black (#000000) and white (#FFFFFF) for the shapes and lines in your pattern.
Step 4: Present
Save your portrait in jpg format and upload to Drive.
Documentation and Feedback
Submitting in your work
Follow the Submitting Your Work guidelines and include the project-specific details below:
- Post Title: Value
- Images: Organize your post to include all content from the different phases for this project. Create headings for each phase and include images or a gallery, where appropriate.
- Written Project Reflection: In the Deliver section of your post, document your thoughts about this project. Think about what you learned, what you could have done better (planning, material use, craft), and how you will apply what you learned to your next project. Consider and respond to the comments made in class during the critique.
- Category and Tags:
- Category = COMD1100 Project #3
REMINDER: You will receive a grade and comments from the Professor on this post. Without this post, you will not receive a grade.
Providing Feedback
Part of your Project grade is leaving well-written comments for at least one of your peers. Follow the Providing Feedback for specific guidelines for leaving constructive feedback. Search for:
CREATIVE COMMONS LICENSE
Except where otherwise noted, content on site is licensed under a Creative Commons Attribution-NonCommercial-ShareAlike 4.0 International License.
You are free to share and adapt the content on this site if you provide appropriate credit, provide a link to the license, and indicate if changes were made.