Table of Contents
Contents
Project Overview:
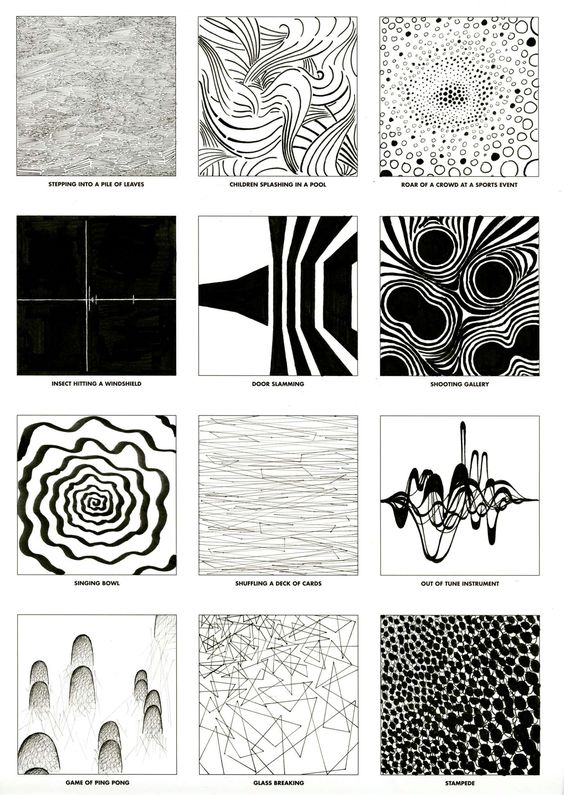
- Theme: Use the Design Element of Line to explore visual language. Evoke a specific mood, place or an atmosphere in an abstract composition.
- Problem: Create six line compositions using variety of line design with strong expressive qualities with only black and white. Final designs will be done in ink.
- Limits: Line used will be geometric in nature, derived from the shapes: circle (contains arcs of all sizes), square (contains all vertical and horizontals) and triangle (contains any diagonal).
- Variables: will include size, amount, direction, width, composition.
- Design principles used will be repetition, contrast, overlap, rhythm, scale, harmony.
- Materials: Sketchbook, camera/phone, pencils, marking pens, 1 sheet Bristol Board 9×12″, ruler/t-square, tracing paper.
Learning Outcomes
For the successful completion of this project, you should be able to:
- Practice design thinking using free sketching.
- Discover and communicate abstract concepts through writing.
- Develop multiple versions (iterations) using thumbnail sketching and refined sketches.
- Demonstrate an understanding the basic principles of composition.
- Demonstrate attention to detail and craft using precise ruler measurements, drawing techniques, and inking pens.
- Share each phase of the design process by posting to the class site and providing critical supportive feedback to classmates.
Design Process
- Discover: Make a Mind Map
- Define: Sketch + Iterate
- Develop: Inked Compositions
- Deliver: Post and Comment
Discover
- Prompts for Designing the project:
Choose a pair of words from the following list to act as prompts and which will suggest concepts, things, moods, or states of mind.- POWER and FRAGILITY
- CONFUSION and CLARITY
- ADVENTURE and CAUTION
- TRADITION and MODERNITY
- CAUSE and EFFECT
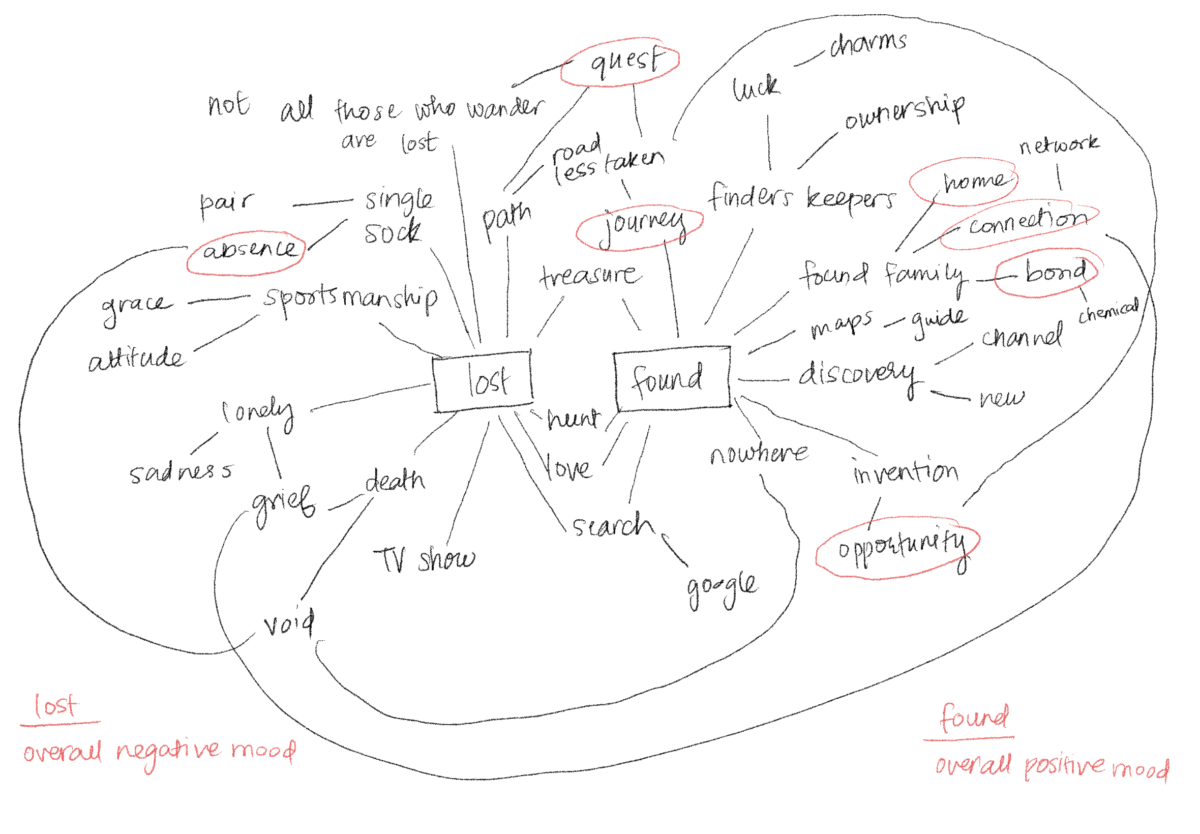
- Make a mind map
Mind Mapping is a research tool that helps designers to quickly explore a concept or design problem. Starting with a central term or idea the designer quickly finds associated words or concepts.- Open a fresh page in your sketchbook.
- Start with your chosen words: In the center of the paper write the two words you have chosen with some space between them.
- Branch out. Draw lines out from the central words. Add words that describe your chosen words, both individually and together; the things you do, think, feel, see, that give you that invoke their meaning.
- Organize. Are there certain word or concepts that hold more importance than others or that are actually subsections of a main concept? Visually group these in some way using boxes, circles, patterns, arrows, etc.
- Write about it.
In your sketchbook, write down your synthesis of the mind map. What do the words in your chosen pair mean to you, separately, and what relationships do you find between them? What objects, sounds, books, movies can you think of to represent them? Think upon how you might represent them visually.
Define
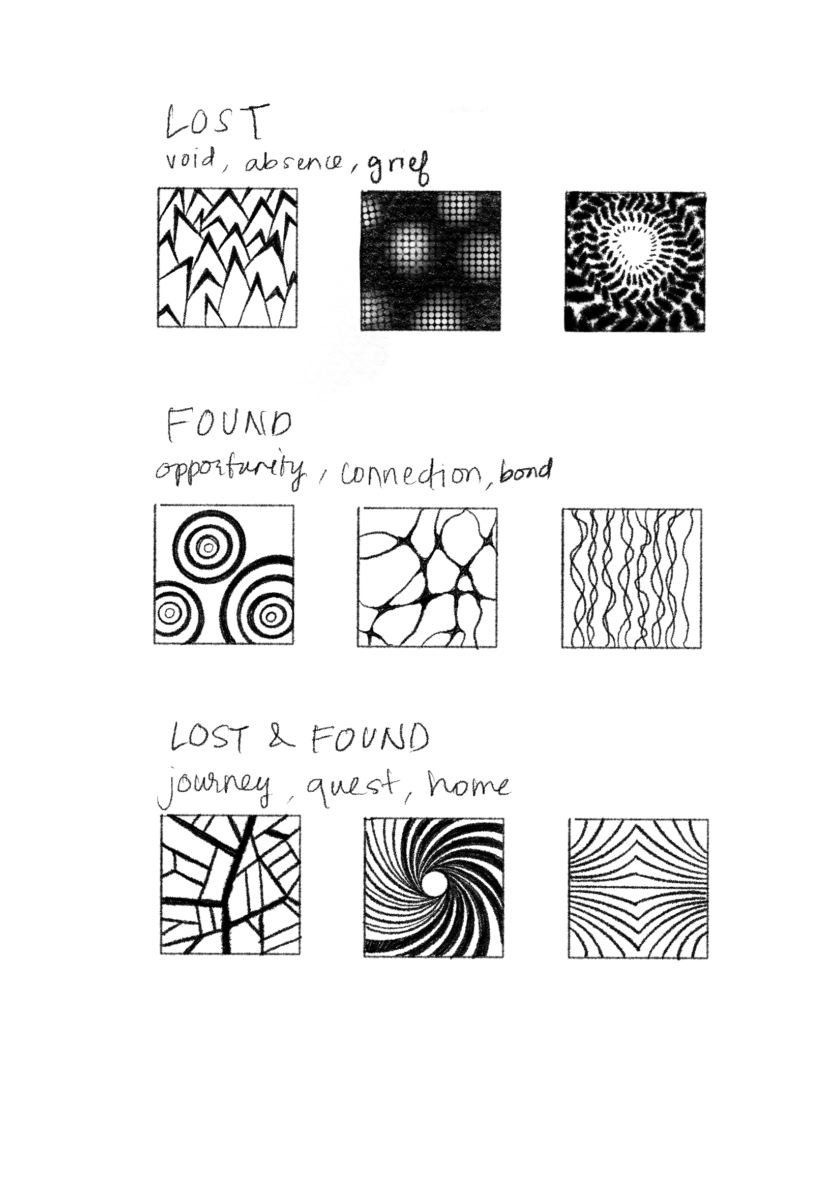
- Thumbnail sketches (small idea sketches) On sketch pages create between 6-10 squares per page. 3 pages total. So a total of 18-30 thumbnail sketches.
- Draw small square frames roughly 2” x 2”, with small borders between them. Try to draw them without using a ruler.
- Use one page each for each of your words, and one for the relationship between them, or together as a pair. In these frames, you will explore various line designs, coming directly or indirectly from the words you wrote down, which express your ideas visually.
- Critique: consult with a partner and get feedback on your thumbnails. With your partner, come up with a concept or a story related to your pair of words. Choose 2 patterns from each page to represent your concept.
- Refinement and Iteration: On a sheet of Bristol paper, create 4 rows of 3, 2”x2” frames which will result in a total of 6 frames, made with a ruler and borders.
- You can use hand drawn lines, but can also practice using drafting tools such as ruler, compass, templates, to create clean presentation.
- Draw your top 1st and 2nd choices in the first two rows.
- Then create 2 more iterations or possible variations of the design in each column. Alter amount, proximity, line thickness, proportions etc.
- Find ways to keep the theme but alter variables. This is an important design step.
- Critique: Consult again with your neighbor/design partner to pick the most successful design for each column.
- For more research on creating patterns read : Pattern Wong Principles
Develop:
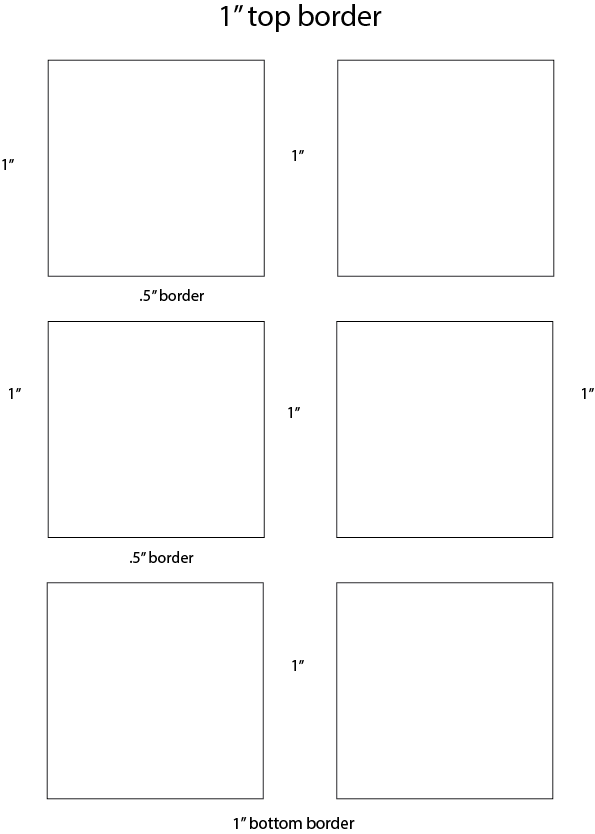
- Following the 6-square layout will help create a visual pattern.
- Top, bottom, and sides: 1″ margin
- Squares: 3″x3″ with 1/2″ margin between each square along the long direction of the page
- 1″ margin between two columns of thumbnails, along the short side of the page.
- Carefully draw your final patterns in these boxes. Ink them in with black pens.
*Designs should have variety of line density, thick to thin.
*Designs should use geometric drafting tools successfully to create clean presentation and strong visual impact.
*Designs should show strong use of the white space—the negative/positive areas should be in balance and act upon one another in a dynamic way to create effective composition.
4. Deliver
- Bring all parts of this project to class: Discover, Define, and Develop
- Be prepared to present, discuss and analyze your finished work in terms of concept, craft, what you learned, and the design process.
- State the following: your name, what you are presenting (title and design problem), which parts are successful and why, which parts are unsuccessful and why.
- Your peers and the professor will provide feedback. You will have an opportunity to revise your work based on the feedback to improve your work and your grade.
- Photograph all phases of project in even light, no shadows,
- Post all phases of to OpenLab in Gallery media setting.
- Add final reflection
- One paragraph synopsis of project
- One paragraph of personal reflection
- what you learned
- how you achieved the objectives
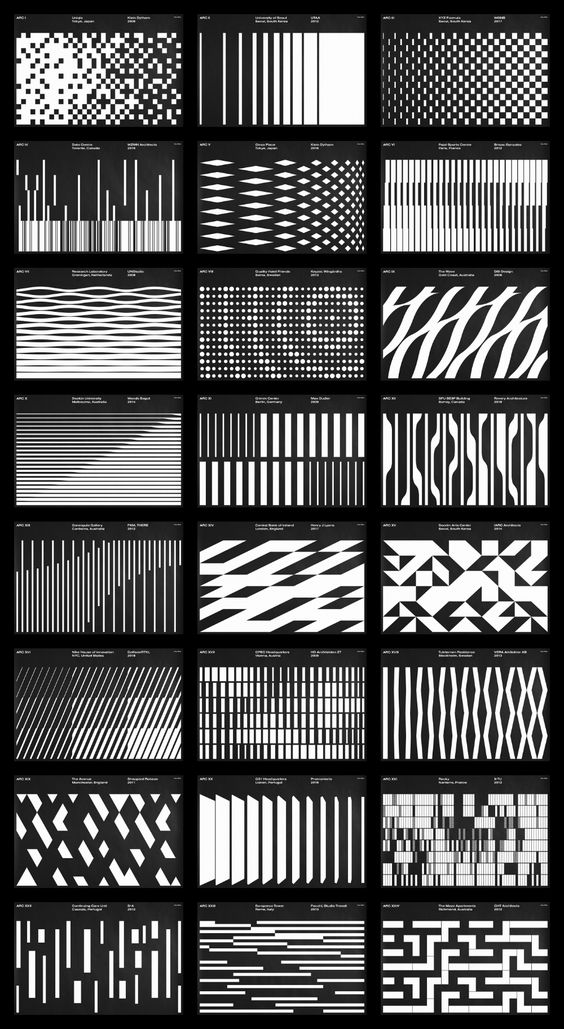
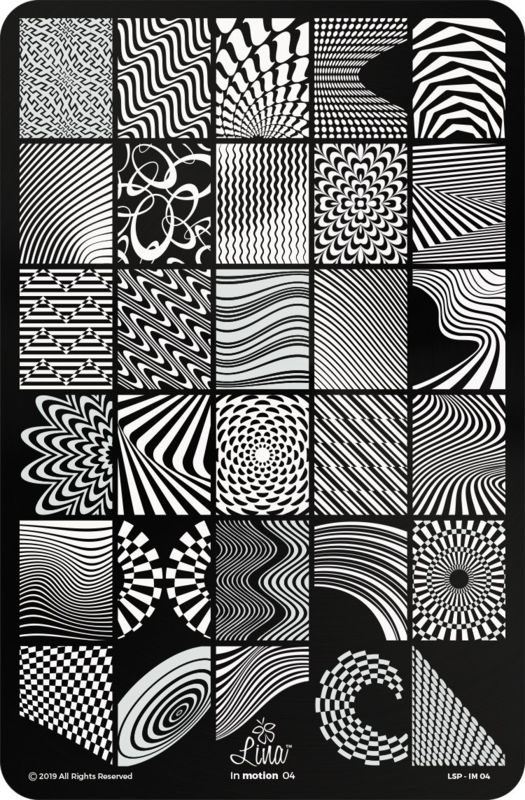
Inspiration