POV Fan Clock Group
NEW YORK CITY COLLEGE OF TECHNOLOGY
Class: INS AND OUT OF PHYSICAL COMPUTING
Project Title: Spinning L.E.D Clock
Project Members:
David Evangelista
Justin Seda
Marcello
Marckenly Montour
“Bluestar”
Evidence of Accomplishment(video):
http://youtu.be/eSDzNj35w8s
Project Summary: We are attempting to build a clock that displays the time using
L.E.Ds. The chassis of our project will mount to a rotating fan, and will display the time once the fan reaches the desired speed.
Goal Objective: we generated the idea for the project after encountering a similar project online, are main challenge is adding our own altercations to the project to give some form of originality.
Description of Steps:
Obtainment of Supplies:
Marcello and Marckenly found wood at the workshop in the basement of the V building. Professor Baker found the white leds for us. David, Bluestar, and Justin found both types of Ohm resistors in room V314. Marckenly found a wire needed for the project in room V321A. This room is also where we obtained the tinkerkit with the tinkerkit hall sensor. David obtained the 2 9v batteries from the 99 cent store. David supplied the plastic fan for the base of the project also.
Making Project
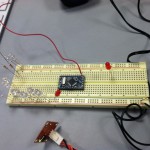
In the beginning of the project, we had to assemble the breadboard, testing it out with three different arduinos. We used the Arduino Mega, Arduino Duelove and the Arduino Mini. We didn’t have a clear idea of how we wanted to assemble this at first, we only had the simple idea so we spent a few days brainstorming how we would accomplish this.
When we finally had the idea for our project, we assigned Marcello and Marckenly to work In the construction of the fan itself while David And Bluestar worked on the coding. Justin took turns helping out with both sides, making sure to take pictures for the documentation.
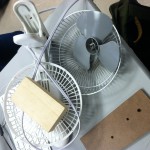
Marcello cut the wood to be the proportions we needed. He worked with Marckenly on drilling the holes onto the wood and playing the LED’s, making sure they were Secure with electrical tape. Marckenly soddered the LED’s to the ohm resistors and connected it to a 9V battery via wiring. Marcello then positioned the hall effect sensor in place, before the two of them attached it to the fan.
Problems we ran into:
We gathered all of the parts we thought we needed. We had a few problems, we couldn’t get the right hall sensor. Because of this, from the suggestion of Bluestar, we had to resort to using a tinkerkit hall sensor, which might of changed the outcome of the project.
http://www.tinkerkit.com/
Another problem we ran into right away was that we could not obtain plastic for being the propellor on the fan. We had to substitute it as a plank of wood of the same size. This might have also changed the outcome of the project. We also had a problem with coding for the fan. David and Bluestar ended up having to go through three different codes found online and used them as a template/reference to put together a working code.
http://www.instructables.com/id/Arduino-LEDs-fan-POV-APPLAUSE-sign/
www.arduino.cc
In the end of assembling the pov fan, it ended up not being strong enough to spin the propellers vertically, resulting in the words that were suppose to shown from the leds to not be shown at all. The result was the fan spinning in an extremely slow way, and the propeller falling apart due to the weight of the wood attached to it. Although the propeller fell out, we were able to put it back together.
Description of Responsibilities for Implementation
Marckenly and Marcello works on setting up the fan and wiring.
David and “Bluestar” gather materials and work on the coding
Justin is working on a little of both both mainly focusing on the documentation
Resources Needed:
Arduino
7 red LEDs
7 – 330
ohm resistors
Halls Sensor (tinkerkit)
1 10k resistor to be used with the Halls
US5881LUA
2
magnets
misc
lumber
a length of plastic 15 by 2.5 inches (substituted with wood)
1LUA
wire,
9v battery, screws, Loctite 5 min epoxy, small PCB from Radio Shack
Code : https://openlab.citytech.cuny.edu/pcomp/2012/12/18/808/code/


