
For our third project we were given four plates of designer drawings and two research documents for the “upcoming” show – a big comedy with a lot of door slamming, which will be performed on Thursday, April 3rd. Our mission, as the technical direction team, was to provide a complete paperwork package for the show, and to achieve a show as close as possible to the designer’s intention.
After taking a close look on the designer drawings, our group (Irene, Vin, Shannon, Marcelo) came up with the following list of key issues:
1. Curved flats;
2. Custom crown moulding;
3. Moulding on the curved walls;
4. Slamming door;
5. Shaking walls;
6. Jacks’ placement (might block the crossover);
7. Flats load-in and installation;
The first week we were working all together on the problem as a whole, then, when the approach to solving this problem was agreed upon the group, we divided our responsibilities as follows:
Irene – construction drawings creation;
Shannon – budget (materials and labor) development;
Marcelo – calendar creation (milestones, build, load-in, deadlines);
Vin – build process consultation and construction drawings help;
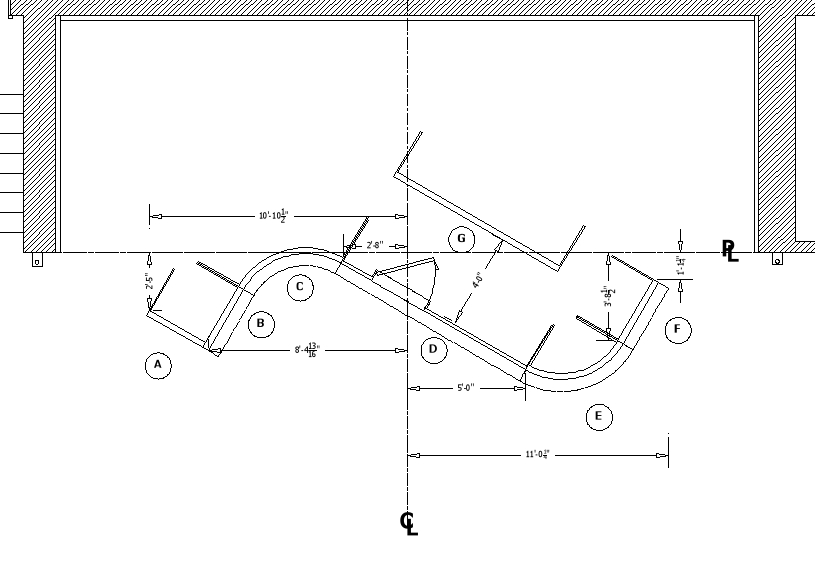
We decided to construct our curved wall out of five hollywood flats (A, B, C, E, F), and one flat (D) made of 1.5 x 1.5 x .065 Mechanical Tube and covered with 1/4″ lauan. Mechanical tubing was chosen for the flat that has a slamming door in it. After checking the Haunted Hotel curved flats, we decided to build ours the same way: 3/4″ ply sweeps, 1×3 pine for other framing members. We agreed to build the crown moulding out of lumber and Kraft Mailing Tube. All other moulding would be purchased from Dykes Lumber (flexible for the curved flats). Also, we decided that our masking flat (G) is going to be a simple soft-covered theatrical flat.
I thought, that the most efficient way to organize construction drawings would be to create one plate for the wall installation ground plan, and then to make separate plates for each flat. Because some flats were similar, I ended up with a total of 7 documents.
The first plate is showing the entire set loaded into the theatre, with jacks and all necessary dimensions:
 The second plate has construction drawings for Flat A – the only flat that doesn’t have any moulding. Notice double toggle at 8′-0″ joint:
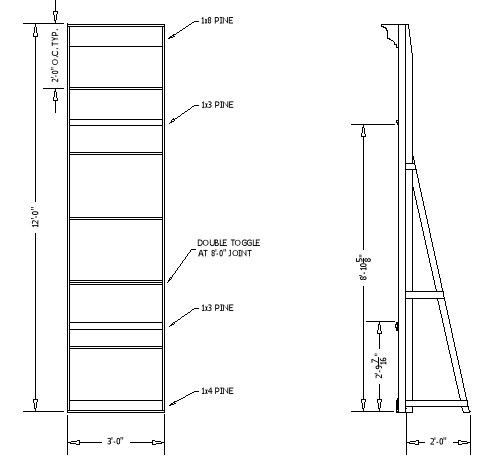
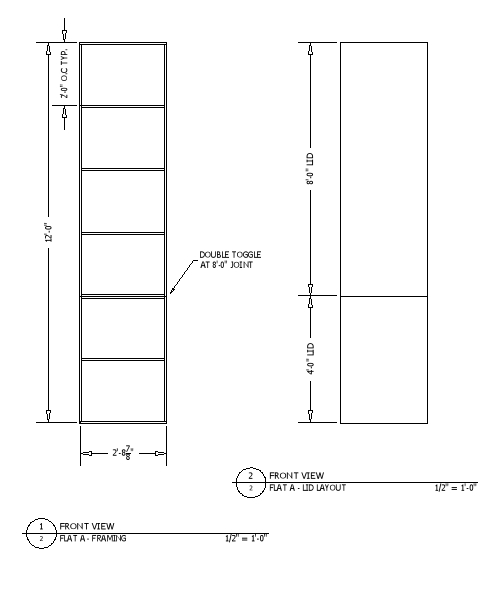 Plate #3 has construction drawings for Flats B and F, which are identical. Different size extra toggles are used for moulding placement:
 As I said above, we decided to build custom crown moulding out of lumber (3/4″ lauan, 1/4″ lauan) and Kraft Shipping tube. Also, Dykes #42 (half round 1/4″ x 1/2″) will be used. I built a sample structure 3′-0″ long out of 3/4″ and 1/4″ lauan, and it was looking pretty reliable:
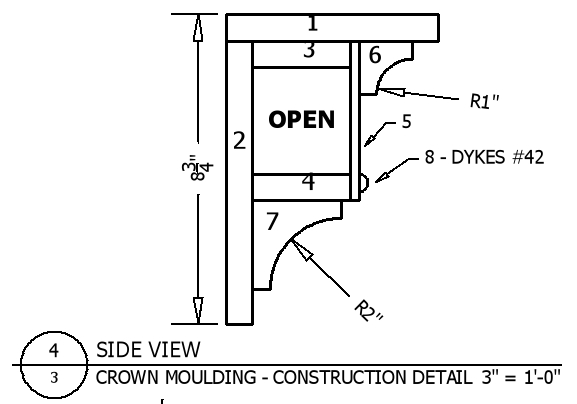
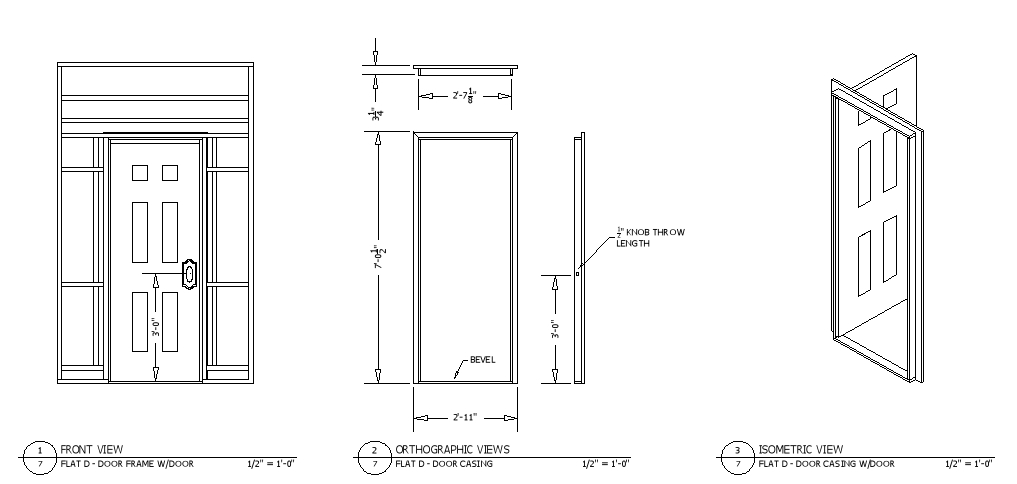
 Plate #4 was dedicated to Flat D, one of the hardest parts of the project. We decided to construct it out of three separate units, that will be bolted together. All framing is made out of 1.5 x 1.5 x .065 MT. Special jacks, also made out of MT, are used to secure this flat on place. Many extra toggles are needed for moulding attachment. Also, a door casing (with a door) is nailed to the MT with T-nails (Plate 7):
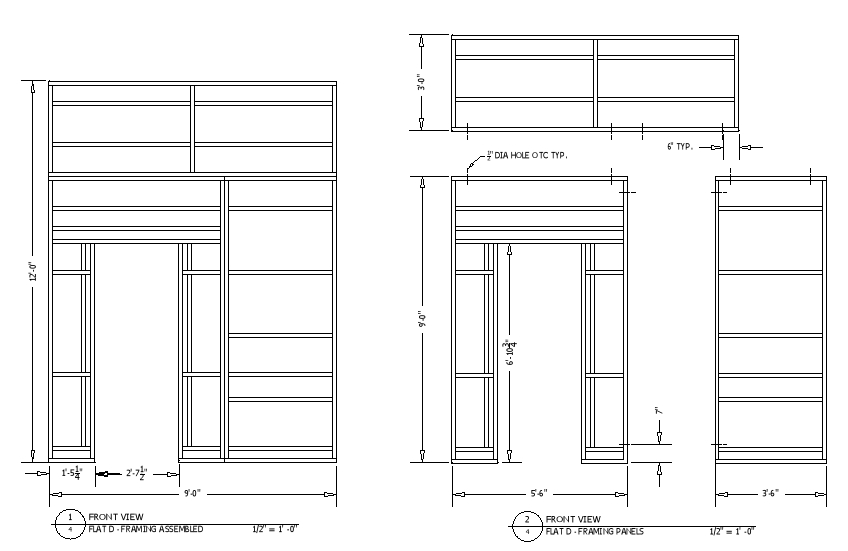
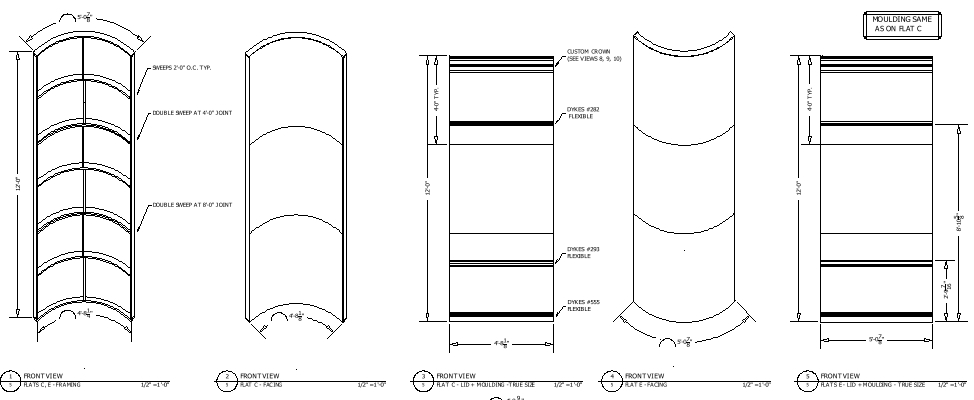
Plate #5 has construction drawings for curved flats C and E. These are very tricky, because despite the same radius, their arc lengths (and consequently the width of wiggle board facings and moulding) are significantly different:
 Below is curved crown moulding break-up by flat, which involved a little bit of math in order to figure it out:
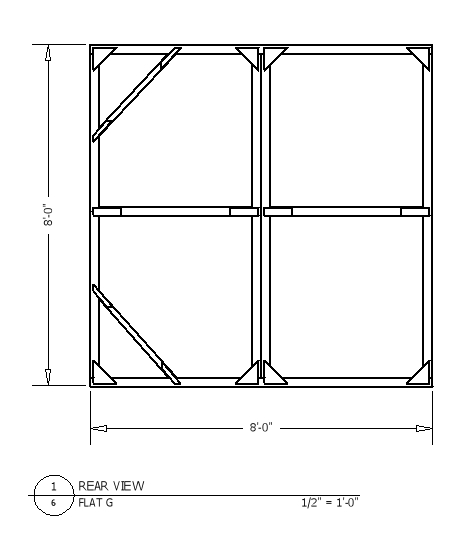
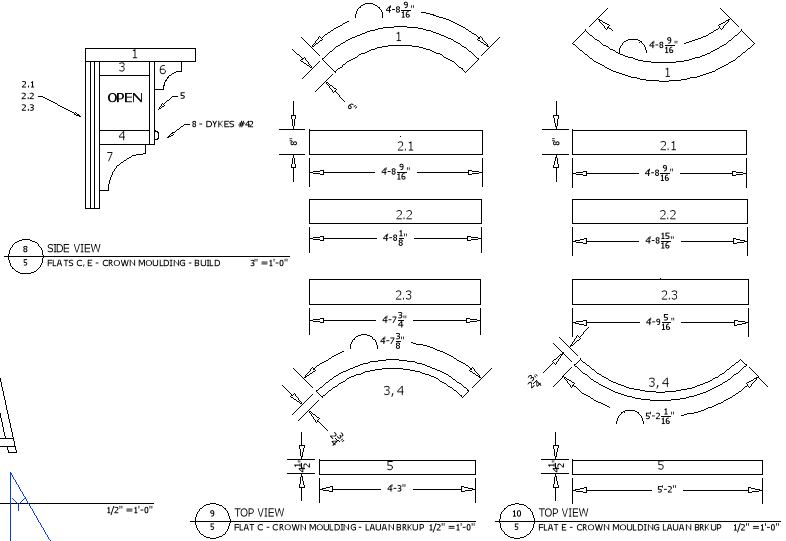 Plate #6 is showing Flat G – muslin-covered theatrical flat:
 The last plate, Plate #7, provides information on the door casing (Flat D) dimensions and installation:
 I think, our approach to solving this problem was good. Everyone did his/ her work on time, and presentation was efficient. Shannon prepared a nice budget (with City Tech logo on it), Marcelo compiled a calendar with milestones, Vin helped me a lot with figuring out how to construct things. What I liked the most, is that this project went beyond group limits: Laura called Dykes Lumber and provided pricing information for all groups, Mike and Sergio did a great demonstration on moulding for the entire class, and, in general, everyone was helping everyone else. I learned a lot of new things, such as curved flats construction methods, moulding (regular, custom and flexible) types and practices, better time management, new materials and tools: Kraft Mailing tube, wiggle board, duraflex, tough prime, gel stain, and, my favorite one –
 This project was more challenging and multidimensional than previous two, and involved a lot of thinking, planning and even building.
Links:
Problem 3 – Assignment
Problem 3 – Designer Drawings
Designer Docs – Door Pic
Designer Docs – Doorknob Pic
Problem 3 – 1st Draft Presentation
Problem 3 – 2nd Draft Presentation
Group Documents:
Problem#3 – Flats – Plates1/7
Baldwin Passage Knob Installation


Pingback: Theatre Flats | E-Journal