How to Draw Primitive Shapes with Processing
Syntax-
- A line of code consists of a function that we call, a set of parameters for that function (enclosed in parathesis and separated by comma’s) and a semi-colon that tells the computer that line of code is over.
- Every line of code must exist on its own line. Spaces are ok, as are multiple returns.
- Commenting is a very important part of coding. It’s a way of injecting normal English into your sketch to help other people read your code and remind you of your own logic. Comments can be written at the end of the line following “// Here’s a comment”, or they can be written in multiple lines if enclosed like this-
/* Here are
multiple lines
of comments. */ - Put a comment at the top of every sketch that includes your name, my name, the date, and the name of the assignment.
Drawing with Processing
- The coordinate system- The top left corner of a Processing window is 0,0 (x,y). X increases as you move the right, y increases as you move down.
- Computers start counting at 0, not 1! This is very important to remember and will come up again and again.
- Every location is a Pixel that is drawn with a color.
Color
- Color can be expressed in at least three different ways. color(grayscale), color(red, green, blue), or color(red, green, blue, alpha).
- In grayscale, color is expressed by a number from 0 to 255, with 0 being black, 255 being white, and 125 an even gray.
- In RGB, you can make any color by combing red, green, and blue values like this- color(R,G,B). Just like grayscale, the color gets brighter the higher the value- color(0,0,0) will be black, color(255, 255, 255) will be white, color(255, 0, 0) is red, color(0, 255, 0) is green, etc.
- Processing has a color selector under tools to make picking color easier.
- Color can also include a parameter for transparency called Alpha. This is like changing the opacity in a Photoshop layer. color(R, G, B, A)
- Transparency also goes from 0 to 255, with 0 being completely transparent and 255 being entirely opaque.
Shapes
- Processing has a lot of built in shapes that you can use in your sketch. Check them out at processing.org/reference/ under 2D primitive shapes.
- When you look up a shape, it will give you a set of parameters. A rectangle for instance will ask you: rect(xlocation, ylocation, width, height);
- By default, rectangles start drawing from the top left corner. You can change this by calling rectMode(CENTER);
- Alternatively, Ellipses are set to draw from the center point.
- Processing knows the dimensions of your sketch and you can call that with the built in variables “width” and “height” (oh my gosh, what’s a variable?! Don’t worry, we’ll talk about this more next week).
- To easily draw a circle in the center of the screen that has the diameter of half of the size of your sketch, you can write: ellipse(width/2, height/2, width/2, height/2);
- You can tell when you’re using a built-in processing variable because the text will change color.
- Order is very important. Processing will draw the last line of code as the top “layer”. You always want to put background(); as one of your first lines of code (typically after you declare the size) so that whatever shapes you draw after it will be visible.
How to export, upload, and embed sketches on class blog
First off, make sure you’re using Processing 2.0 or above. If you need to download the newest version of Processing, go to: http://processing.org/download/. See below for instructions for versions of Processing below 2.0.
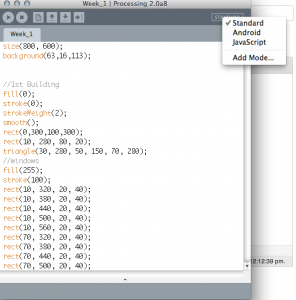
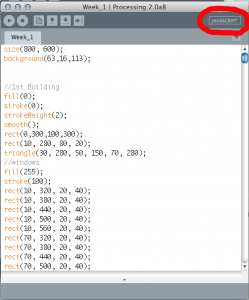
Switch to Javascript mode by clicking the box that says “Standard” in the top right corner of the Processing Window. You will need to save your sketch first. Remember, Processing sketches can’t have names with any special characters (i.e. !*%) or start with numbers. Underscores_are_ok!
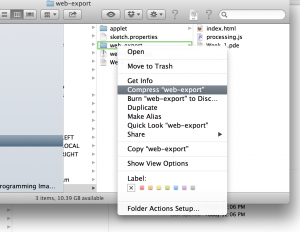
Now go to File -> Export. This will out a folder inside of your sketch folder called “web-export”. On a mac, right click on the folder and choose “Compress” to turn it into a zip file. On a PC, right click on the folder, choose “Send to”, then choose “Compressed (zip) folder”.
Now, go to openprocessing.org. Create an account if you haven’t done so already. On the home scree, choose “Upload from Processing”.
When asked to select a file, choose the zip folder you just created. Voila! Your sketch should appear. You can toggle between the play button and the code button to go back and forth between reading your code and viewing your sketch.
If you are using Processing below 2.0 (ex. 1.5.6): Create your folder by clicking “Export Application” and compressing the “applet” folder that Processing creates.
Now, we want to embed this on our class blog. Click the “Embed” link underneath your sketch. This will give you some html code that you want to select and copy.
Now, log into openlab.citytech.cuny.edu/ and go to our class page at openlab.citytech.cuny.edu/groups/problem-solving-with-computer-programming/. Under “Course Site” click “Dashboard”, which will bring you to openlab.citytech.cuny.edu/higginscst1101/wp-admin/, the dashboard for adding/editing blog posts.
Create a new post by going to Post on the left side menu and choose “Add new”. Name your post with the assignment number (for instance, Thursday’s homework on Week 1 should be “1.2”). Click on the “HTML” tab in the right corner. Now paste the HTML code that you copied from openprocessing.
Now click “Publish” on the right menu bar. Ta-da! Now you should have a post with your sketch embedded on it. You can click the link below the window to go back to openprocessing.org and browse the code used to create the sketch. I encourage you to check out each other’s sketches and code to learn from one another.


