- Write a brief paragraph to introduce yourself to your visitors and explain what they will find on this site. Be sure to add more developed content to your About Me page. (Edit this paragraph in Dashboard > Widgets > Text)
Learning Blog Archives
-
Recent Posts
Categories
Tags
pattern/ transparency project
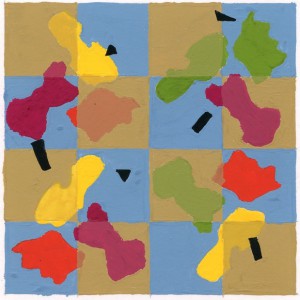
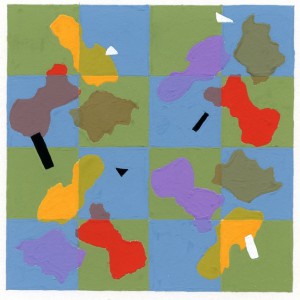
The pattern/transparency project was using “spots” to make it create that it has transparency and being opaque. First the class has to create “spots” by using ink and a brush. The professor picked 3 from the “spots’ we created. We cut out the “spots” and placed them on a blank Bristol paper. We positioned the “spots” the way we wanted but making them as close to each other but not too close as well. Four squares has to have 3 “spots” in it. There are 12 “spots” in total and have 4 groups of the 3 “spots”. Each of the 3 “spots” is to have in the original, a 90 rotation, flipped and flopped positions.
My first one, the checkered background I use orange mixed with gray and used ultramarine blue and primary blue mixed together with the gray. Every time the “spots” touches the tan color it becomes transparent and every time the “spots” touches the blue it becomes opaque. I didn’t mix any of the 3 colors, the only color I mix was to make green. The rectangles and triangles are for the accents and I use black for all the 6 accents.
The second time doing this project, I stick to the blue color for the background and changing the tan color into a green mixed with gray. I also did not change the composition of the “spots” and the accents. I mixed more colors this second round. I used orange, brown and a lavender color but the red was mixed. When the “spots” touches the green its opaque and when the “spots” touches the blue it becomes transparent. The accents I use 3 shapes that are black and 3 that are white.
Posted in Uncategorized
Leave a comment
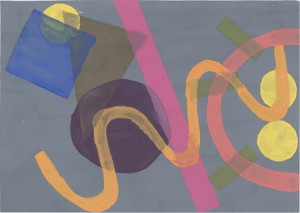
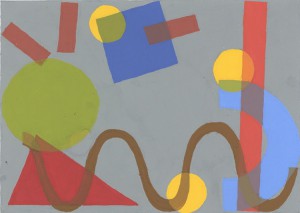
transparency project
The transparency project is about using shapes and overlapping them. The shapes we used in class was a square, 3 circles, an arch, 3 datch lines, a line, a triangle, a squiggly line, and a big circle. In the beginning of this project, in class all of us drew these shapes by using a sharpie. In each 9 of the squares it has to have the shapes that was given to us. After we looked at all of our first sketches, we made a second one. Each square has to be a different idea. We chose one idea from any of the 18 sketches and showed it to the professor. From that one idea, we all made 6 different tracings and pick out the one that has 3 shapes with 2 layers overlap and 3 shapes with 3 layers overlap.
The project for me was hard to understand even after re-reading the instructions several times. The first one, I did the whole thing wrong. For the background, the gray was too dark. Without outlining the shapes, I painted the whole entire background. Painting the shapes was difficult because of the gray background was underneath and the color became sheer or had streaks on it. I literally overlapped the colors instead of mixing the colors to make it transparent. There was a re-do for this project. I changed the whole composition, the colors and made the background into a lighter gray. I outlined the shapes for the background to be gray and by mixing the colors to overlap, the shapes looked at it was transparent.
Posted in Uncategorized
Leave a comment
texture/ figure/ ground project
The texture/ figure/ ground was taking texture and tracing them. The texture was mostly shoes that I traced. The professor checked which texture would work and chose 12 textures. I cut out 2 by 2 inch squares and positioned them and trying to make it flow into the page. By taking tracing paper I could transfer into the right side of the bristol paper. I use ink to make it smooth and to have great pigmentation instead of using a sharpie. All the squares is been split in different ways to make it 50/50.
This project was a love/hate relationship. The project took too long to finish than the rest of the projects we’ve done thus far into this course. Also having re-read the instructions over and over again to fully understanding the project. At the end, to see the finish results was unexpected and different when its being compared side by side.
Posted in Uncategorized
Leave a comment
Welcome!
This is the first post on your Learning Blog. Edit or delete it, then start blogging!
The ePortfolio is both a Learning Blog and an Academic Career Portfolio. Use the Learning Blog to document your learning experiences and class assignments each semester. As time goes by, add content to the Academics and Career sections to show your department, graduate institutions, or future employers how well prepared you are for your chosen career.
NOTE: Remember to add appropriate Categories and Tags to your posts. This will help your professors and other visitors find the content they are looking for. The Categories “Coursework” and “Field Trips” and the Tags “OpenLab” and “City Tech” have already been applied to this post. Feel free to make changes!

