Posts are used to publish dynamic information, such as weekly updates, announcements, or student work. They typically appear in reverse chronological order.
Preset Categories are used to organize Posts on your site into logical groupings in the menu; this important function helps you and your students find information easily and keeps the site organized. Categories are like shelves or drawers in a closet: imagine what your closet would look like if you didn’t organize your clothes in some way!
Class Agenda posts
To meet distance education best practices provide agendas for each class or unit in your course. In most model courses, suggested agendas have be provided for the entire semester or for the first for few classes to get you started. Note that Class Agenda posts have the category “Class Agendas” and will show up under the menu Activities > Class Agendas in reverse chronological order, with the most recent post first.
Edit the areas that are unique to your class, such as meeting dates and times.
- Go to the Dashboard and click Posts in the menu. All the posts will be displayed.
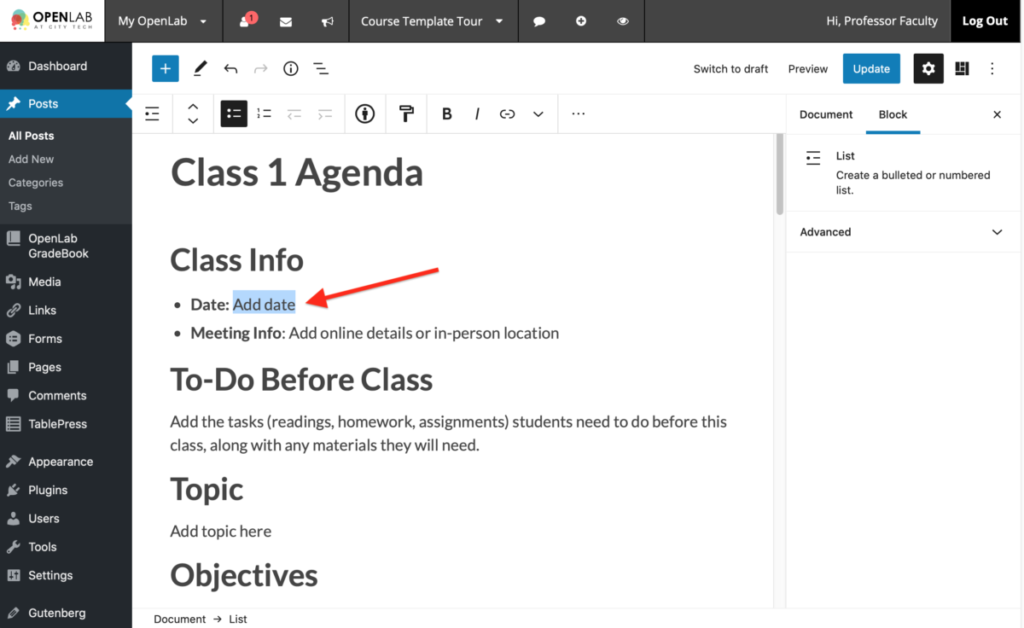
- Choose Edit (Block Editor) to open the post “Class 1 Agenda“.
- Add the required information, and make any other changes you wish so your first Class Agenda is accurate. You can add image galleries, links to videos, links to Google slides or slideshare, or any other resources. Remember to delete the informational block at the top of the post.
- In the Document settings use the pull down menu to change the Author of the post to your name.
- Reset the Publish date to the current date or set the date you want the post to appear in the future (or the past).
- Click Update, Schedule, or Switch to Draft to publish later.
Tip: If your model course has only an example agenda, you can clone your agenda posts for Class 2, Class 3, etc. by clicking on the clone or new draft button below the post in the Posts list. If you don’t see the option to clone a post or page, go to Settings > Duplicate Post > Permissions and check the box for Administrator.
Edit the First Day Posts
Welcoming students to your course is another best practice. Now that you know how to edit Posts, you can edit the Welcome post that appears on the Home page and under Announcements along with the other first day posts.
- Go to the Dashboard and click Posts to edit the Welcome post.
- Add some text – and perhaps an image! – to welcome students to your class.
- This post is “Sticky” which means it appears at the top of the Home page. To “unstick” the Welcome post, uncheck “Stick to the top of the blog” in the post Settings.
- Again, remember to delete the informational block at the top of the post.
- In the Document settings use the pull down menu to change the Author of the post to your name.
- Update the publish date and click Publish, Schedule, or Switch to Draft to publish later.
- Repeat the process with the Student Survey post and the Discussions: Introduction post.
Tip: Your Welcome post appears under Announcements in the menu because it has the Category “Announcements” selected. You can clone this post, giving it a different title, or create a new post with the “Announcements” category each time you have something to announce to your class.