Category: Resources

Color Studies How to

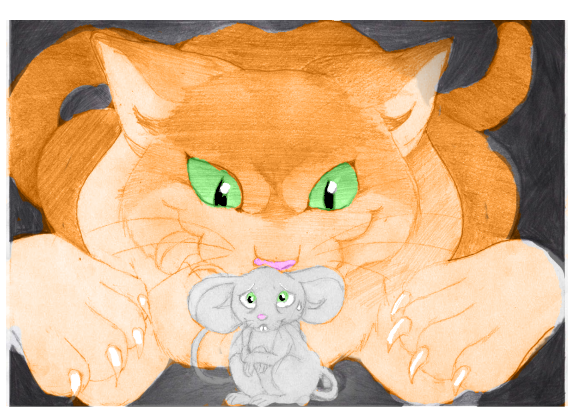
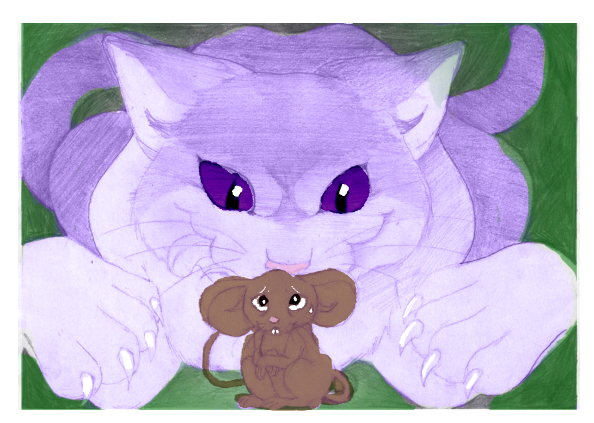
Color Studies are a necessary step in the illustration process. This allows the artist to test out different color schemes quickly.

Ideally, these should be done AFTER Value Studies.

Instructions:

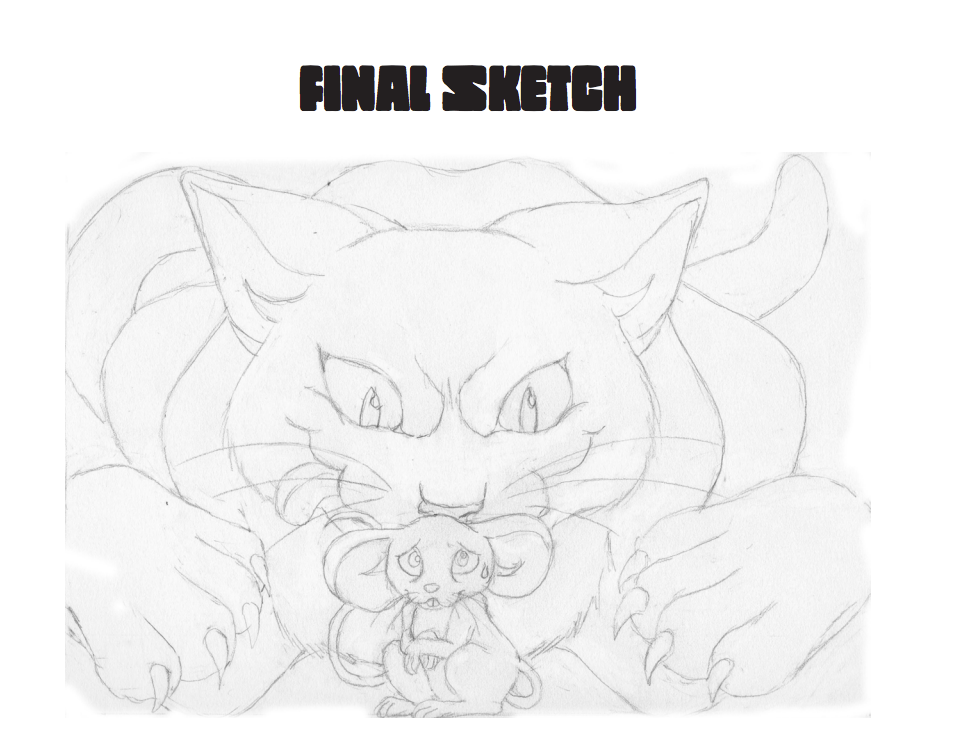
  • Refine and finalize your drawing based on feedback and suggestions you have received.
    • Do not shade your drawing. Focus on drawing clean line art only.
    • Do tape off the edges of your composition.
  • Edit your drawing by using photo editing software.
    • Scan or Carefully Photograph final art.
    • Adjust Brightness and Contrast
    • Carefully Crop Art
    • Save your Artwork as a HighRez file (to continue working on)
    • Save a Copy as a LoRez file (to post to Openlab)
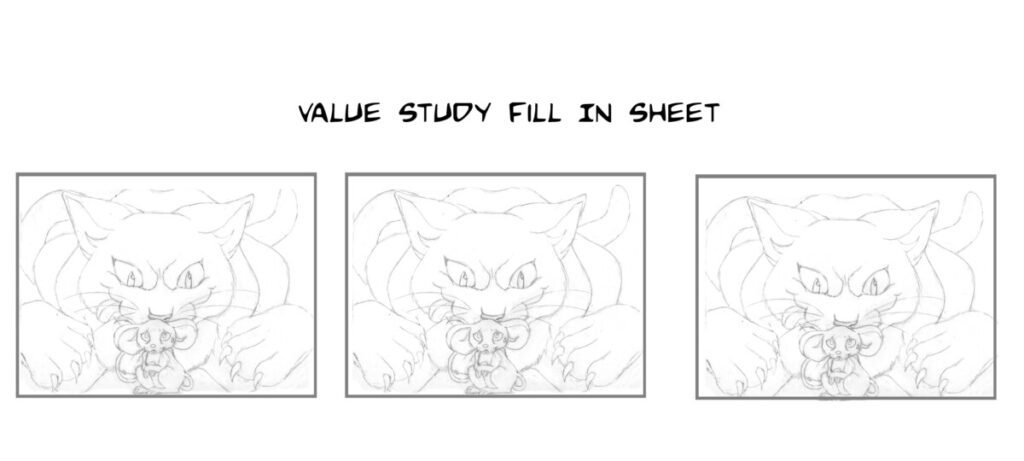
  • Create fill in sheets for Color Studies using one of the following methods:
    • Using a Adobe PS, copy/paste your design to create a fill in sheet.
    • Reduce the size of your artwork, using Adobe PS or Photocopier.
      • There’s no hard and fast rule, but studies should be small enough to fill in quickly.
      • About 25% of the FINAL ILLUSTRATION SIZE usually works
    • Copy and Paste the artwork so that you have 3 or more to Fill in .
    • PRINT this sheet, so you can and fill in traditionally with colored pencils or markers, OR create DIGITAL COLOR STUDIES by using Adobe PS/ or Procreate etc. to color.
  • Color each Color Study.
    • Create one Lo-Key, one Middle-Key and one High-Key Design.
    • Consider Focal Points, Image Hierarchy, and Contrast.

PRO TIP:

*Try coloring digitally in Adobe PS on a transparent layer on top of your Value Study. Try setting your layer to “COLOR”.
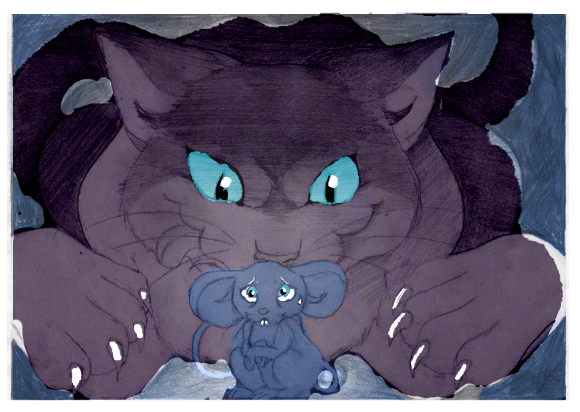
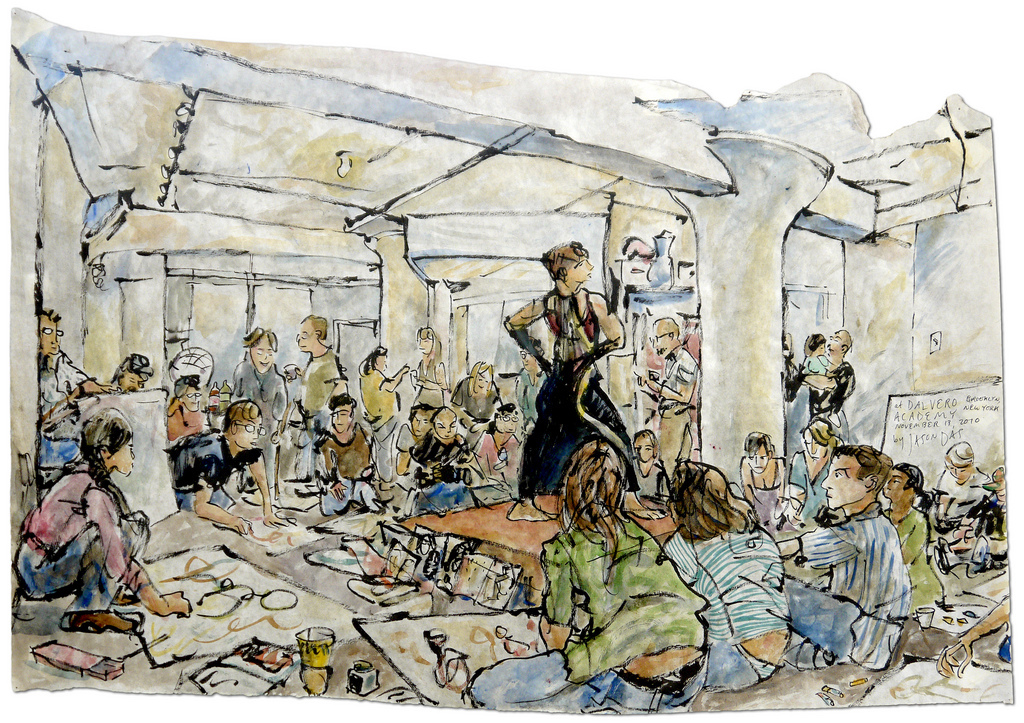
Examples:

Dana Moreno Final Pencil Drawing

Color Study (1 of 3)

Color Study (2 of 3)
Color Study 3 of 3

Simple Digital Coloring

Class-

There is no hard and fast rule on HOW to digitally color.  Digital coloring in infinite and there as many different methods to work as there are artists out there.  I wish you the best of luck in finding the method that works for you.

Here are a few tutorials just to get you started.  If you find some good tutorials, please share them in the class resources!


Coloring Line Art in Photoshop…

Simple animated painted style in Adobe PS:

Heres one for Procreate:

Getting Started

New to Openlab?

Follow these instructions to create an account and then join the course.

Follow these instructions if you need help joining this course.

Remember that your username and display name can be pseudonyms, rather than your real name. Your avatar does not need to be a picture of your face–just something that identifies you on the OpenLab.

Questions

If you have any questions, please reach out via email.

If you need help using the OpenLab, you can consult OpenLab Help or contact the OpenLab Community Team.

Uploading Instructions

Upload your Portfolio Projects from this semester into your ePortfolio.  


Be sure to give the artwork a title. 

How to Post to our class: On this class site, go to Post located on the left > Give post a title in the subject line  > Write a brief description of the art work in the Comments space > Just above your title click on the Add Media icon (it looks like a camera on top of a music note) and browse for your image file > Click Insert > Choose the appropriate Category from the list on the right > Click Publish at the top right.

How to Post to your ePortfolio:  Go to Dashboard > New Page > Pages > Add New > Locate “Parent” in the Page Attributes > choose “Academics” from the pull-down menu. In the Title area of your ePortfolio, be sure to write the course code COMD 3363.  Also be sure to Publish, and invite me to join your ePortfolio.  In settings, be sure to state either “Public” or “Private>visible to City Tech members.”  Otherwise no one will be able to see what you’ve posted.

To take photos of your work, find a spot with even light so that you will have no shadows or strange light gradations across the drawing.  Frame the drawing so there is a small even frame on all sides.  Optimize the file, or reduce it to 72 dpi, with a file size no more than 1MB (about 8-9 inches on one side). Rotate it if necessary to it uploads right-side-up. USE photo-correcting apps.  Increase the contrast so that delicate drawing lines are visible.

Life Drawing in New York

Since we are in New York City artists have many options to improve their life drawing skills by drawing from a model outside of this class.  The only way to improve your drawing is to practice!  Practicing our craft is VITAL!  Take advantage of the resources in our city!


IN MANHATTAN:


The New York Society of Illustrators is an incredible resource for up and coming commercial artists.  The sketch night is a great way to get to know this institution.  Its lively with great models, live music, pro illustrators, and often comes with FOOD!  This one is wonderful and is the cheapest option I’ve found for students!


sketch11sept


IN BROOKLYN:


Shoestring Studio is a membership-based art studio serving painters, draftsmen, illustrators, and other artists in need of workspace, community, and shared resources. Their primary mission is to provide affordable, accessible workspace for artists in Crown Heights and the greater Brooklyn area.  They host figure drawing sessions several days per week at a very affordable rate.  You do not need to be a member to attend.  Be sure to ask about student discounts!