Gravity Forms
Gravity Forms is a very robust plugin that allows you to create and embed forms on your OpenLab site. Through these forms, you can do many different things, from polling users, collecting contact information, to organizing reservations for events, and more. To use these different functions, you’ll first need to activate the plug-in, and then follow the steps below to create new forms:
1. Once activated, you’ll see Forms appear in the left-hand menu of your Dashboard. Click Forms and then New Form. Add a title, and click Create Form.

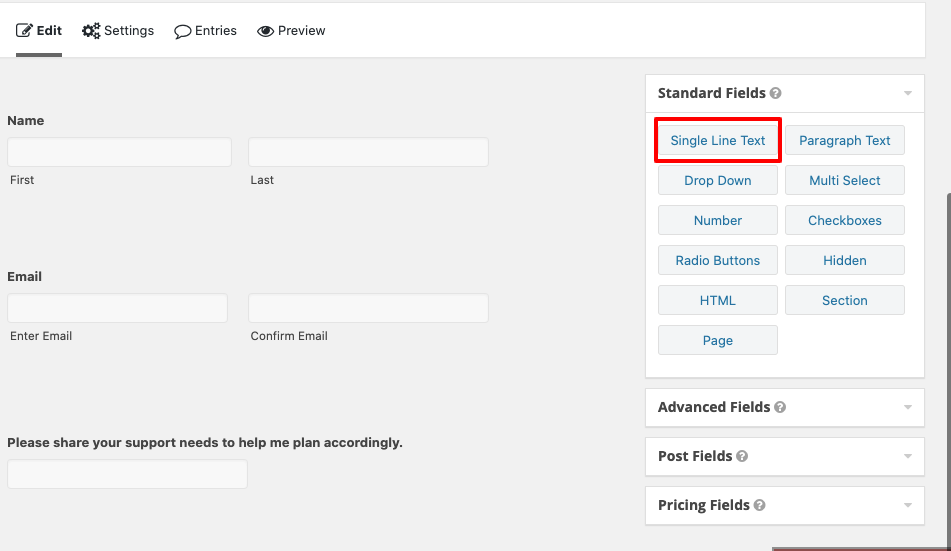
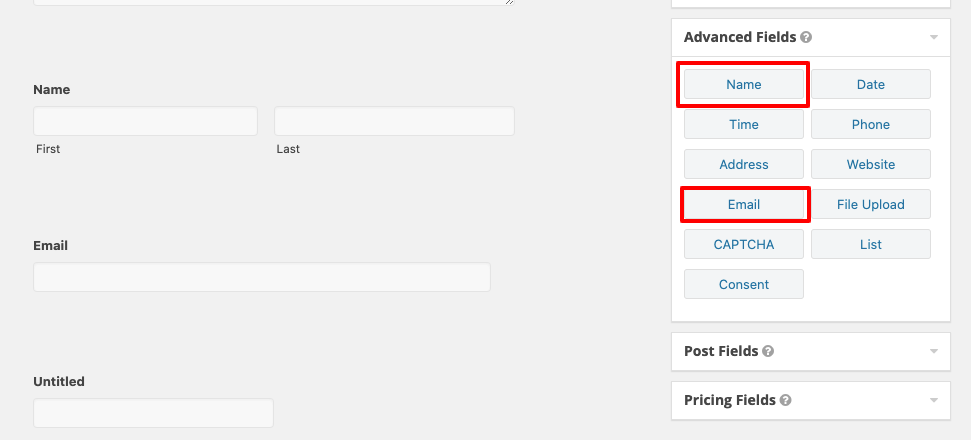
2. When you do that, you’ll see that there are a few areas to help you build your form. Standard Fields and Advanced Fields are the important ones. You can choose whatever you would like to add to your form here – clicking on any of these individual fields will make them appear in the main left hand area. In this example, we are creating forms to collect contact information, so we clicked Single Line Text under Standard Fields and Name and Email in the Advanced Fields.
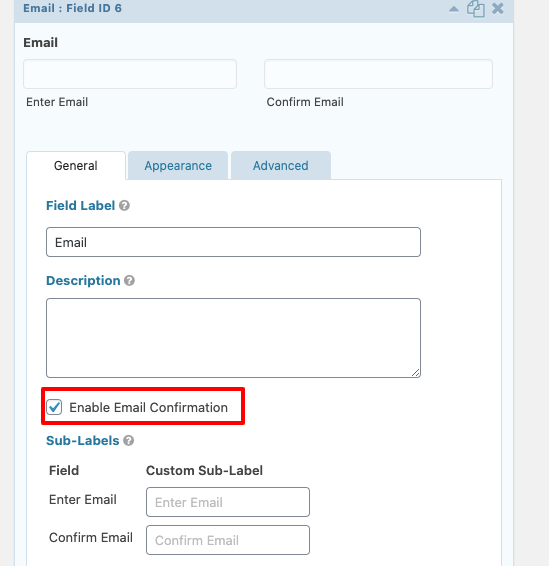
3. To edit and customize the individual forms fields, make sure you’ve selected Edit from the top menu toolbar and hover over the field you would like to edit. You can edit the language in the Single Line Text and adjust the settings of any other field. For example, we’ve edited the Email field here by selecting the option to Enable Email Confirmation. This requires the user filling out the form to enter their email twice, to make sure they’ve done so correctly. Once you’ve got things the way you’d like, click Update Form.
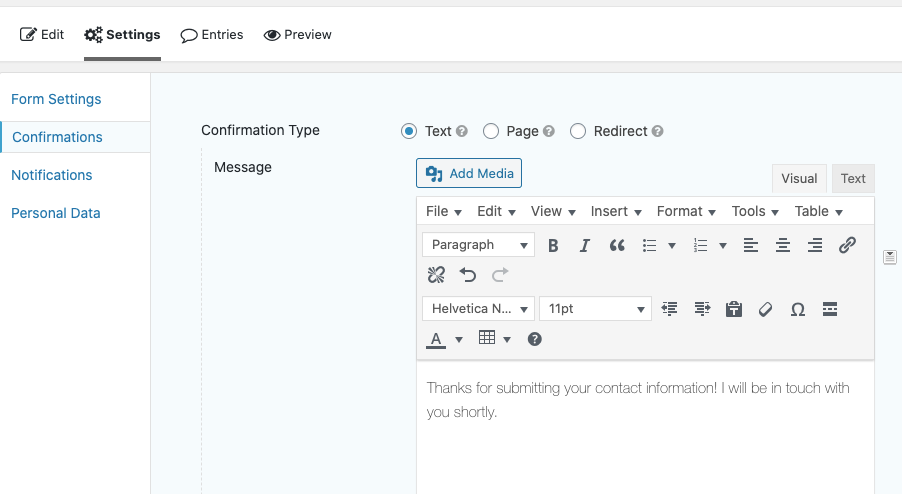
4. By selecting Settings from the top menu toolbar, you can further customize your form. For example, you can require users to be logged in to the OpenLab before filling out the form, and you can activate notifications for both admins and users when the form is filled out. Below, we have customized the confirmation message that will appear once a user has filled out the form.
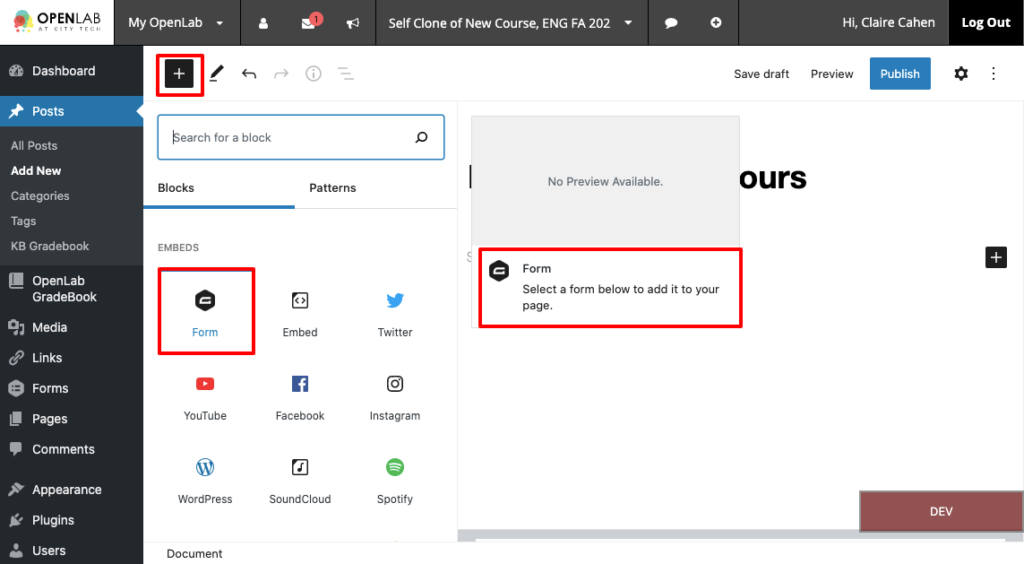
5. Now create or edit the post or a page where your new form will appear. Add a Form block by adding a new block and choosing Form as the block type. In the dropdown that appears, select the form you want to add in the dropdown, and you will see it appear in the block.
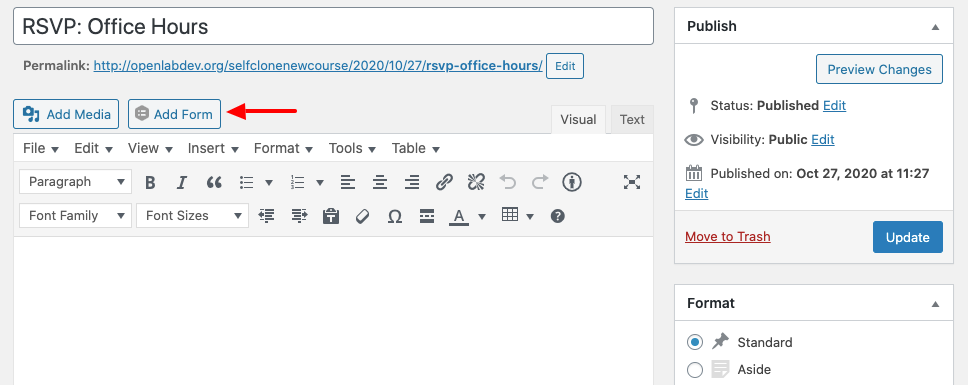
If you are using the Classic editor, create a new post or a page. When you do, you’ll see that a new icon has appeared next to the Upload Media button. Click that, choose the form you want, and it will appear in your post.
6. Click Publish, and your form should appear. Here’s what a user will see:

7. When you’re ready to view your form entries, go to your Dashboard, and in the left-hand menu under Forms, click Entries. All the submissions will appear there.
You can also use Gravity Forms to create forms to (Block editor links):
- Collect Work
- Create Quizzes
- Schedule Appointments
- Have users upload files to Dropbox
- Receive paragraph responses to a prompt (select Paragraph Text in Standard Fields)
- Receive short-form responses to a prompt (select Single Line Text in Standard Fields)
- Receive answers to a multiple choice question (select Drop Down/ Multi Select/ Checkboxes/ Radio Buttons in Standard Fields)
- These answers can be images in addition to text [insert link to Image Choices help documentation]
Classic Editor: You can also use Gravity Forms to create forms to:
- Collect Work
- Create Quizzes
- Schedule Appointments
- Have users upload files to Dropbox
- Receive paragraph responses to a prompt (select Paragraph Text in Standard Fields)
- Receive short-form responses to a prompt (select Single Line Text in Standard Fields)
- Receive answers to a multiple choice question (select Drop Down/ Multi Select/ Checkboxes/ Radio Buttons in Standard Fields)
- These answers can be images in addition to text [insert link to Image Choices help documentation]


