Working with blocks
What are blocks?
Blocks are individual elements containing all the content you add to a post or page. They can be easily rearranged by dragging and dropping within the editor. Blocks include text such as paragraphs, lists, headings; individual images and image galleries; embeds from YouTube, Vimeo, Soundcloud, Prezi, Twitter, and more; and visual elements such as separators and buttons. This makes it much easier to customize page layouts to create beautiful layouts without any coding.
Where do I find blocks?
You will use blocks when creating or editing a post or page, in the Dashboard of your site.
Intro to the Block Editor screencast
Frequently used blocks
Paragraph
Each paragraph of text is a separate block. This is the default block type, so when you finish a paragraph and press enter/return, a new paragraph block is automatically added.
The paragraph block includes all of the formatting options available in the Classic editor, plus more, including adding background colors, changing font size, adding a drop cap, and more.
Read more on WordPress.org about the paragraph block and its formatting options.
Heading
Headings are important for readability and accessibility because they help to structure the information you present, making it easier to scan and easier to navigate with screen readers. In the Block editor, each heading is a separate block, which you can add and then choose the appropriate heading level (e.g. H1, H2, H3).
Read more on WordPress.org about the heading block and its formatting options.
Image
Each image is added as a separate image block. In the block settings you can add alt text, and customize your image in many ways, including resizing, changing the alignment, adding a caption, and more.
Read more on WordPress.org about the image block and its formatting options.
Video
To embed an image from YouTube, Vimeo, or another video hosting service, you will add a Video block, click Insert from URL, and paste in the URL for the video.
Read more on WordPress.org about the video block and its formatting options.
Additional blocks: PublishPress Blocks plugin
The PublishPress Blocks plugin adds many additional blocks when activated on your site. These include accordions, tabs, different types of lists, and many more.
Adding a block
There are many block types to choose from, which you’ll see organized by category and by most recently used when you add a block. Individual blocks often come with their own formatting settings for even greater control over layout and function.
There are multiple ways to add a block and choose the block type you need.
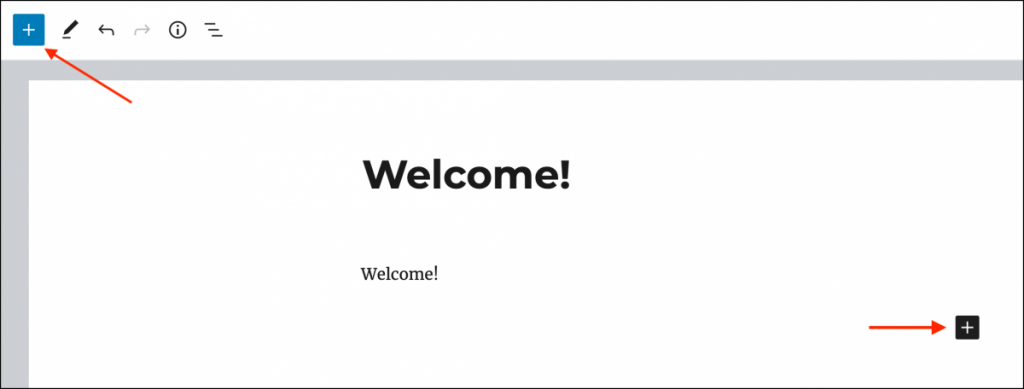
1. Click the black + icon on the right side of any empty block.
2. Click the blue + icon in the upper left corner of the editor.
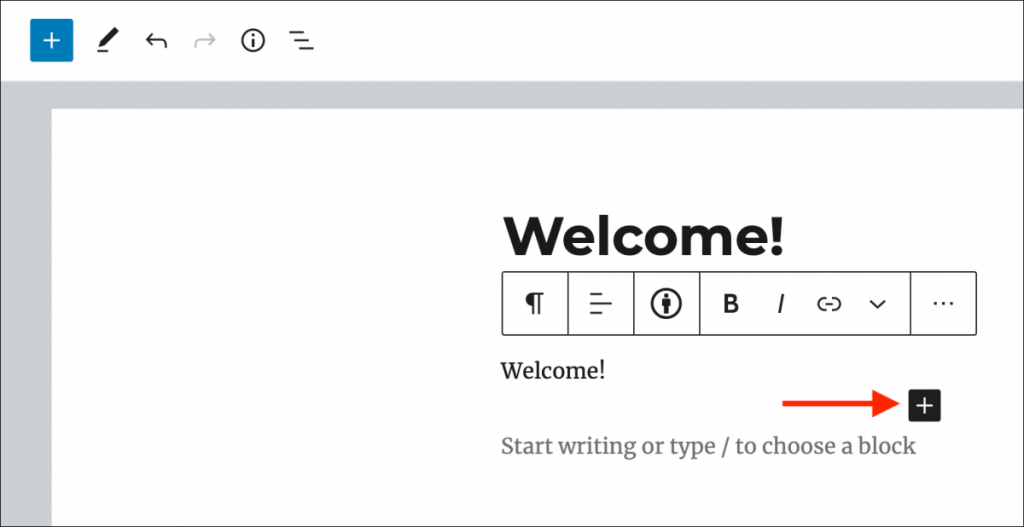
3. Press the Enter/Return key from a selected block to create a new block below it. The new block will be a paragraph block by default, but you can change this.
4. Click the black + icon at the top center of an existing block to add a block above it.
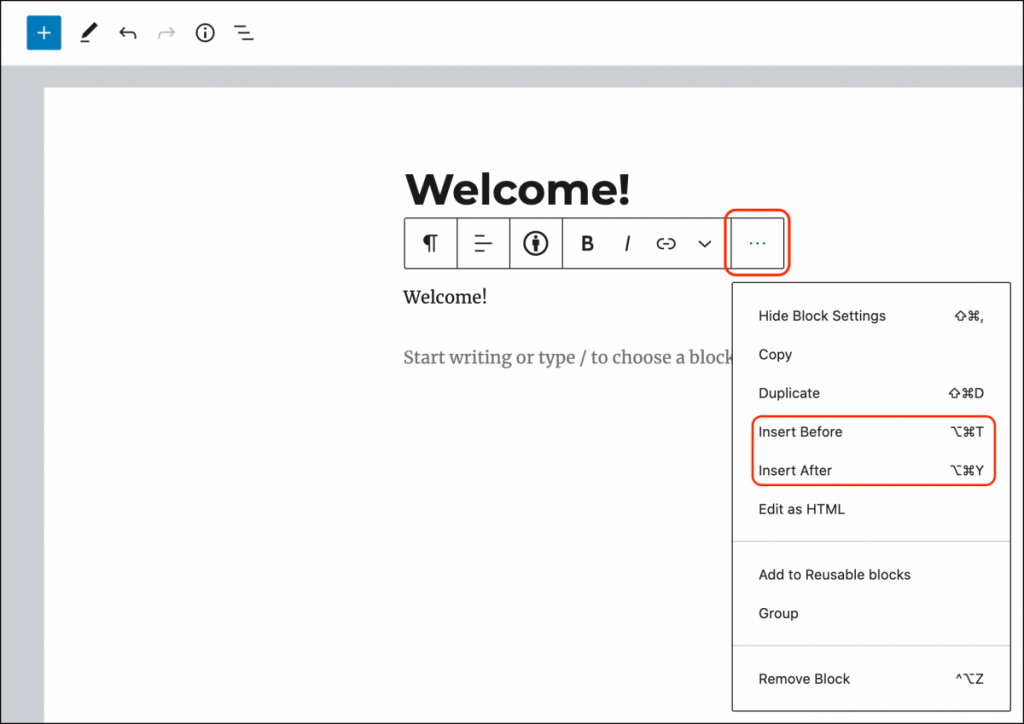
5. Click the three dots just above a selected block and choose to add a block above or below the current block.
The default block type is a paragraph—which you’ll use for writing text—but you can choose a different block type from any of the + buttons. You can also search blocks by typing a forward slash followed by the block name—for example: “/image” or “/heading.”
Moving a block
You can use the up and down arrows in the block toolbar to move a block up or down on a post or page.

Customizing a block
Each block has its own settings. To find them, click on a block and you will see a toolbar appear at the top of the block. There are also more settings in the sidebar on the right side.
Examples of Block Toolbars for different block types
Paragraph block
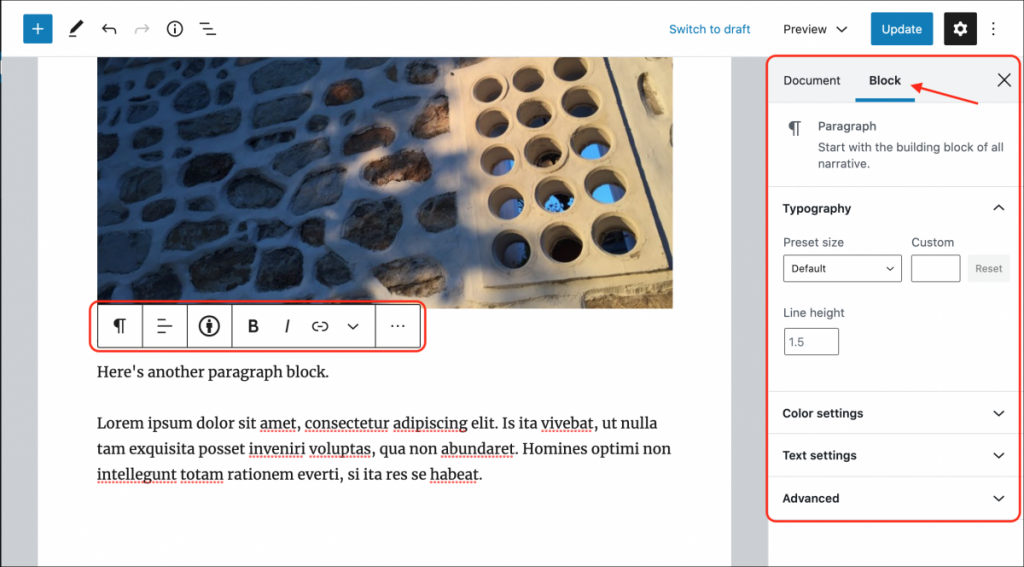
Image block

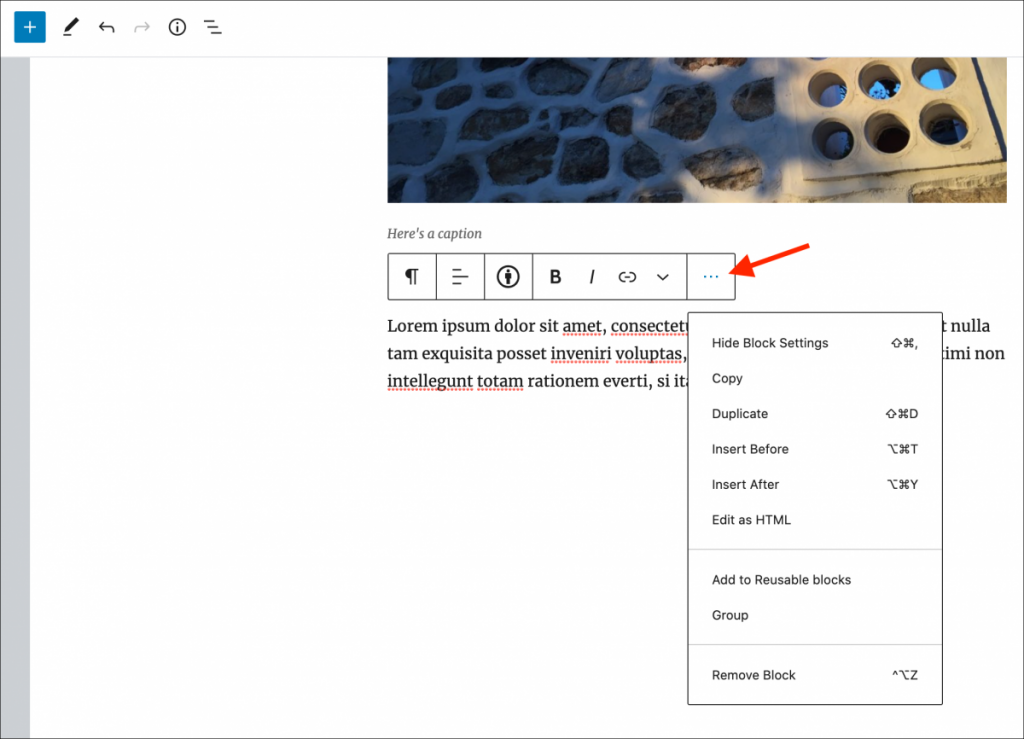
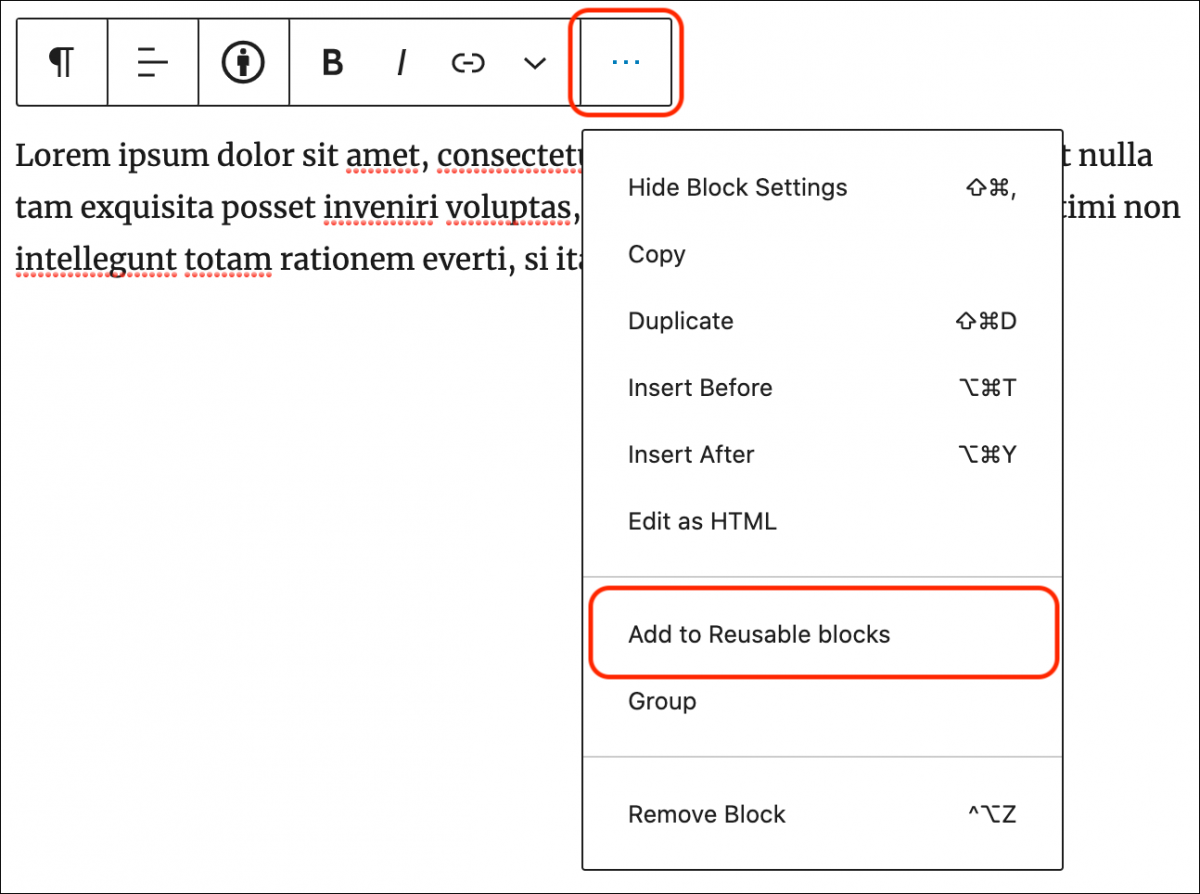
Block Toolbar: More options menu (3 dot menu)
Click the three dots icon on the far right side of the block toolbar for more options.
- Hide Block Settings closes the Sidebar settings menus.
- Duplicate creates a second block on the same page with the same content.
- Insert Before/After adds a new block before or after the active block.
- Edit as HTML switches the block to HTML rather than the visual editor so you can edit the HTML directly.
- Add to Reusable Blocks allows you to create a block that can be used on other posts or pages with the same content and styling of the active block.
- Remove Block deletes the active block from your post or page.
Block Settings: Sidebar
The Block settings in the right sidebar provides different options based on the type of block you’re using (i.e. paragraph vs. image, etc).
In the screenshot below, the active block is a Paragraph block, so the options include changing the font size, font and background color, as well as advanced options.
If you don’t see the Block settings on the right of your editor, click the Settings gear icon (next to the Publish/Update button) to expand the sidebar menu.
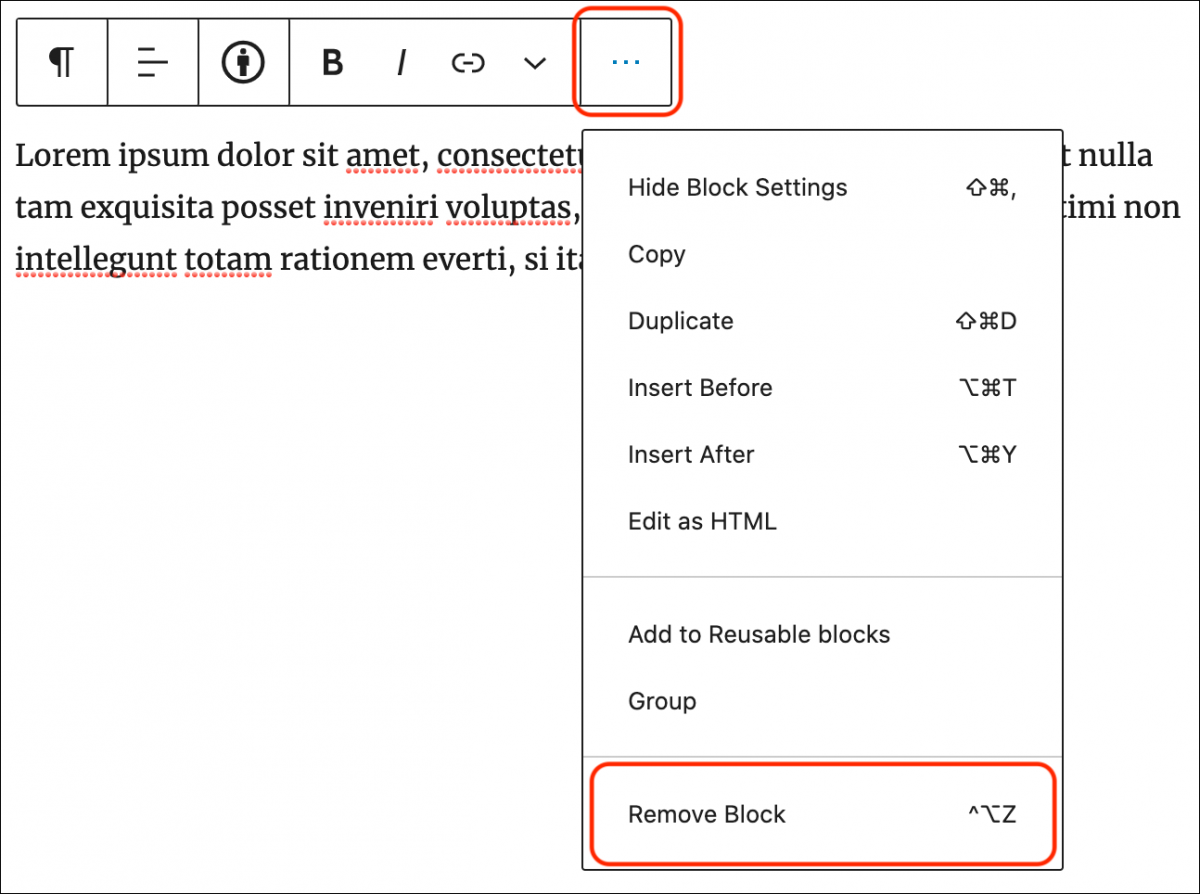
Deleting a block
To delete a block, select the block and click the three dots icon on the right side of the block toolbar to access the More options menu. At the bottom of that menu, you’ll see the option to Remove Block.
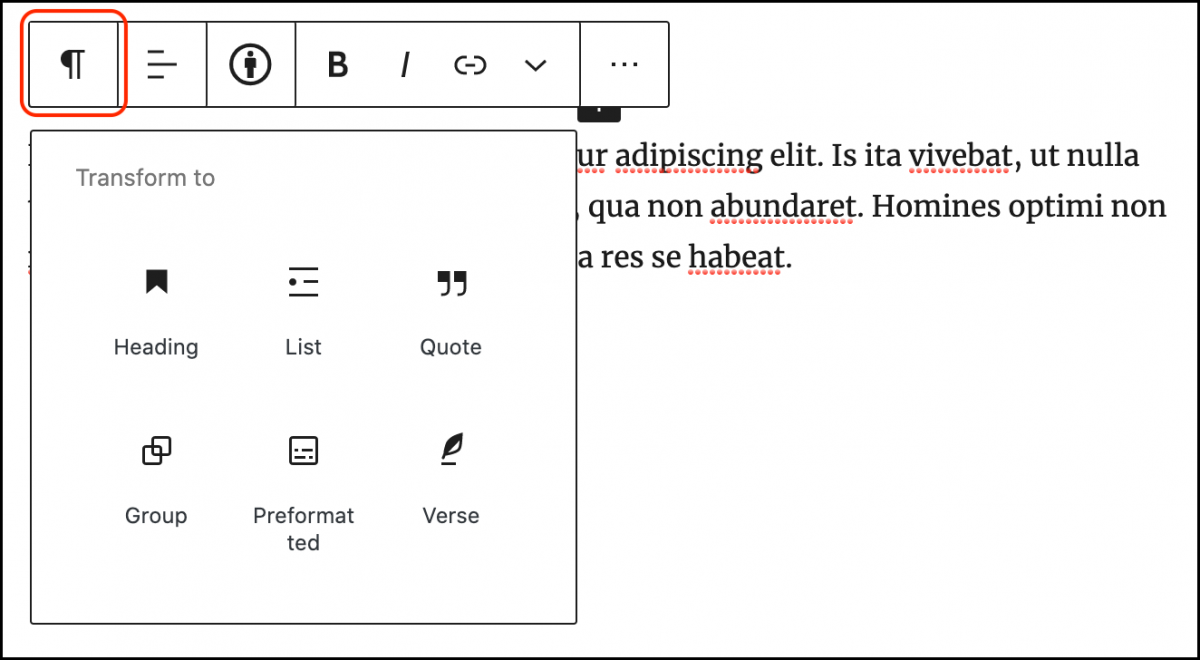
Changing a block to a different type
You can transform any block to another similar block type. For example, you can change a paragraph to a heading, a list, or a quote.
Click the first icon in the block toolbar, and choose the type you’d like to transform to.
Reusable blocks
Reusable blocks and blocks that have been saved with all formatting and content to be used again on your site, even in a different post or page. These can be extremely helpful if you tend to use the same content and/or formatting in multiple places.
To create a reusable block, select the block you want to save, click the three dots icon in the block toolbar, and click Add to Reusable Blocks.
To use a reusable block, add a block as usual, and in the block library, you’ll see a section for Reusable Blocks, where you can find all blocks you’ve saved.
Block navigation
Block navigation is a list of all the blocks you have included in your post or page. It makes it easy to see the structure of your page, and easily jump to a block you’d like to work on.
To access the block navigation tool, click on the icon with three horizontal lines in the top toolbar. It is the left-most icon in this toolbar.
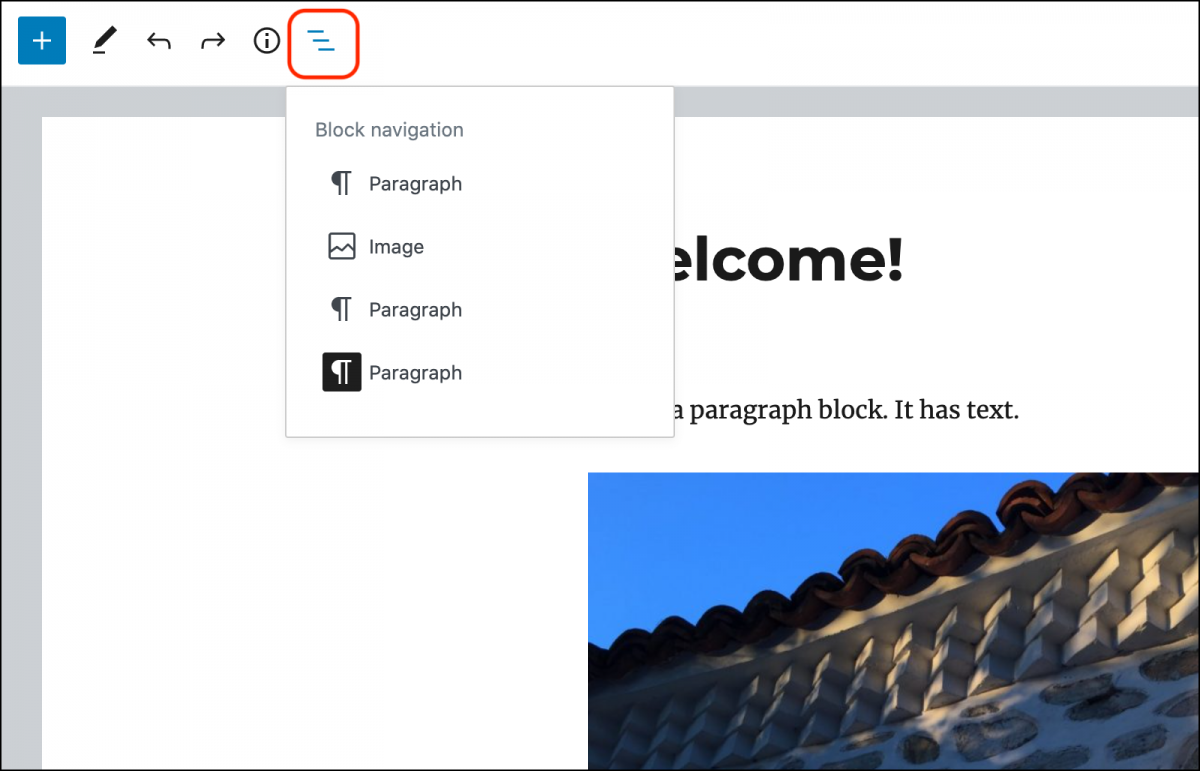
The block navigation is especially useful for selecting hard to reach blocks, such as an individual block inside a group block.
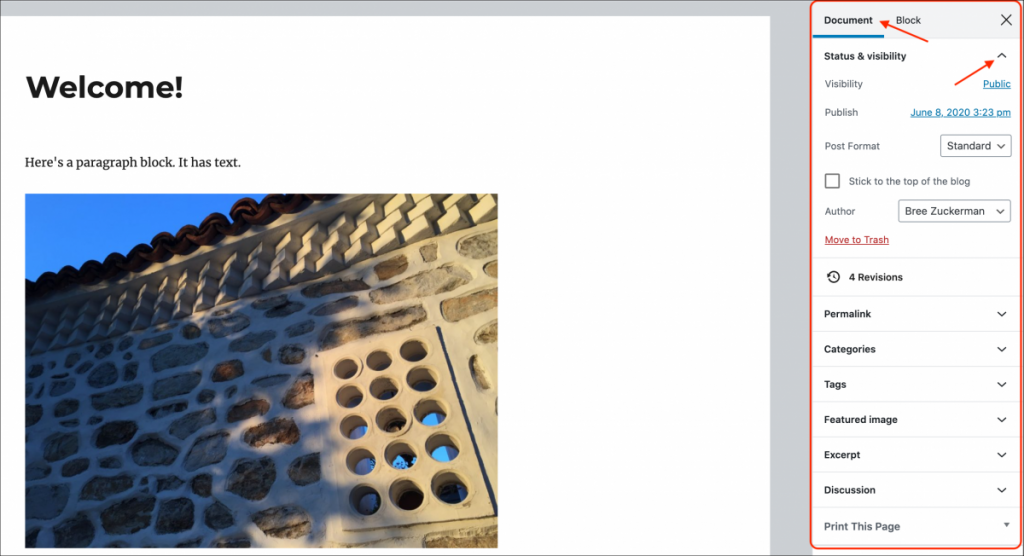
Document settings: Sidebar
The Document settings menu in the right sidebar is where you can add categories and tags, choose a featured image, see and change the status of your post, and more. These are options that apply to the entire post or page, rather than an individual block. You can find these settings in the same place as the Block settings. They’re in a different tab, so click Document or Tab to toggle between the two kinds of settings.
Click the down arrow next to each header in Document settings to edit the specific options.
- Status & Visibility
- Document Revisions
- Permalink
- Categories
- Tags
- Featured Image
- Excerpt
- Discussion
- Page Attributes
- Publish
Credits:
Parts of this page were remixed from WordPress Editor: Working With Blocks, by WordPress.com and Blocks, by WordPress.org, licensed under a Creative Commons Attribution-NonCommercial-ShareAlike 4.0 International license.


