Flexible Pedagogy at Bronx EdTech 2021

On May 7, I presented on “Choose Your Own Grading Schema: An Online Learning Experiment” at the 2021 Bronx EdTech Showcase. Keynote speakers at the showcase included Mariana Regalado (Brooklyn College), Maura Smale (City Tech), and Matt Gold (Graduate Center).

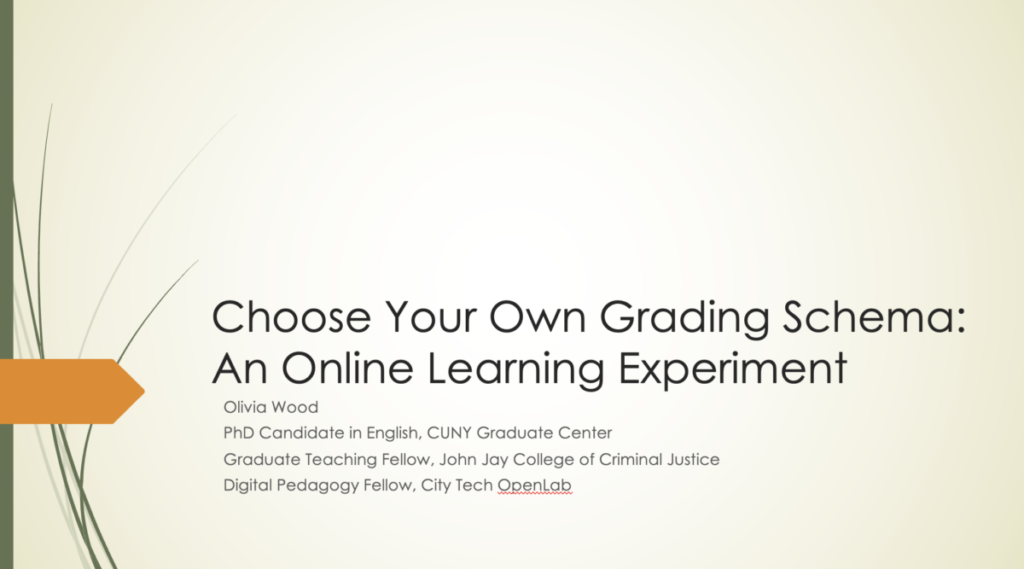
You can download my slides with the link below or by clicking on the image of the title slide.

Alt text is in the caption
The title slide of a Powerpoint presentation. Text reads “Choose Your Own Grading Schema: An Online Learning Experiment” Olivia Wood, PhD Candidate in English, CUNY Graduate Center, Graduate Teaching Fellow, John Jay College of Criminal Justice, Digital Pedagogy Fellow, City Tech OpenLab

Last semester, after teaching mostly asynchronously with no penalties or cutoffs for late work, the responses I received in students’ end-of-semester reflections were mixed. About half said they were incredibly grateful for the flexibility my class structure offered. The other half said they wished I’d required attendance at the optional Zoom sessions and held them to their deadlines under pain of grade penalty. They recognized that while ideally they would be self-motivated to participate as much as possible, external pressure would have been helpful.

In my presentation, I shared how I revised my syllabus for Spring 2021 to account for both strands of feedback, and how students have responded.

At the beginning of the semester, students chose via Google Form which grading plan they wanted: Structure and Accountability, or Maximum Flexibility. Students on the Structure and Accountability plan were required to attend the weekly Zoom sessions and complete all assignments on the syllabus. Students on the Maximum Flexibility plan were not required to attend Zooms and were only required to complete select assignments marked in bold on the syllabus– unit projects, unit reflections, and a few other smaller tasks– but were still welcome and encouraged to attend class and complete other activities. After each unit, students were given the opportunity to switch grading plans if they wish, after reading an overview of the exact assignment and points breakdown for each plan on the coming unit.

Students responded very positively to this method. About one third chose the Structure and Accountability plan for the first two units, and most students chose the Maximum Flexibility plan for the third unit. Additionally, several students on the flexibility plan also regularly chose to attend the synchronous classes and participate in ungraded activities.

This new system does not appear to have affected the distribution of final grades compared to the Fall 2020 semester, nor was there a clear correlation between the grading plans a student chose for each unit and that student’s success in the course; I have several students making As who chose Structure and Accountability two or more times, but I also have several students making As who chose Maximum Flexibility for all three units.

While the numerical outcomes do not seem to have changed significantly under this new grading system, the students have almost unanimously reported feeling less stressed about the class, feeling trusted and understood, and feeling empowered to make the choices that are best for their own individual lives and situations.

I’m also extremely happy to report that for the first time in my three years of teaching, I don’t have a single student who has withdrawn or “disappeared.” Every student who stopped participating in the course in the middle of the semester has since returned and is turning in work again. While one might assume that no late work penalties will lead to most students leaving the bulk of their work to the last minute (and this is true of a few), most of my students have been turning in their assignments only a few days past the recommended deadlines, and several routinely turn in their assignments early.

After each unit, I asked students to respond to a series of reflection questions, including “What did you do during this unit that helped make you successful?” and “What additional resources/supports do you wish you had had during this unit?” Just as I give them feedback on their writing and ask them to revise, I also asked them for their feedback on my course design that I could use when revising for future semesters.

All but one of my students said that they think I should continue this “multiple-path” grading system in future semesters and wish other professors would do the same. (The other student said they didn’t like the stress of having to choose how they would be graded.)

Take a look through my slides for quotes from my students’ reflections, and if you choose to adapt my system for your own classes, please tell me about it in the comments!

How I Work: Distance Learning Edition

Cat and human using a computer mouse together.

Due to COVID-19, City Tech (and all of CUNY) shifted its in-person classes to online, distance learning instruction. In this post, I reflect on my current class’s transition to distance learning, show how I have configured my office and computer for screencasting and video conferencing, describe some software and services that support distance learning, and give instructions for uploading a video to YouTube.

My Transition to Distance Learning

For my current Science Fiction (ENG2420) class, this was not too much of a disruption, because I was already leveraging online technologies to support student learning and course material accessibility. I designed the course as a zero textbook cost class, meaning I find resources that I can make available to students via PDFs and handouts, and choose readings that are available freely online, such as the unparalleled Archive.org.

Also, I redesigned some of the course assignments to emphasize the importance of note taking by teaching good note taking practices and evaluating students on the quality of their notes. To support this, I recorded each lecture during our earlier in-person classes and posted them on YouTube after class ended, so that students could use the videos to fill in gaps in their notes and allow those students who missed a class to make their own notes based on the video lectures.

I collect student work via email and on OpenLab, “an open-source, digital platform designed to support teaching and learning at City Tech (New York City College of Technology), and to promote student and faculty engagement in the intellectual and social life of the college community.” I joined the OpenLab team as a co-director of the project this year, but I have been using OpenLab in all of my classes since joining City Tech in 2014.

Now with classes meeting asynchronously online, I have tweaked assignments and the schedule to accommodate students accessing materials and completing their assignments. I hold office hours once a week at a regularly scheduled time via Google Hangouts, and I can hold private office hours by appointment with students. I use email to respond to questions and concerns on a daily basis.

Now that I have reconfigured a space in my apartment to support my class and the many other online meeting responsibilities that I have with OpenLab and other projects, I wanted to share some tips and ideas to help others transitioning to facilitating their classes with distance learning.

Office Configuration

I know how easily distracted I am by busy backgrounds, I wanted to provide as neutral a space for my lectures and online meetings. To this end, I appropriated my apartment’s closet as a distance learning and video conferencing studio.

Computer desk with monitor, webcam, lamp, and chair. The desk is 2 feet away from the wall.

I positioned the Logitech C615 webcam so that I am centered in the frame when video conferencing or recording myself lecture. Above the camera, I positioned a white light to illuminate my face.

Looking over the monitor towards the wall.

I arranged the desk so that my back would be against a solid white wall as pictured above looking from behind my monitor towards where I would be sitting facing the monitor and webcam.

Webcam with carboard flap taped above it to reduce light glare.

Notice that I taped a small piece of cardboard above the webcam. This blocks glare on the camera lens from the light above that illuminates my face. I was careful to cut and position it so that it is out of frame of the camera lens. Depending on your webcam, be careful not to cover the microphone if you build a similar lens shade.

Two lamps--one lights the subject and the other lights the background.

To the side of my desk, I have a larger lamp that points against the wall and behind me. This reduces my shadow from the desk lamp in front of me.

The end result looks like this:

An example image taken by the webcam of Jason.

Software and Online Services for Distance Learning

As mentioned above, I use email and the OpenLab for interacting with students, disseminating materials, and collecting student work. And, I am using Google Hangouts for regular office hours since it is a far easier lift for students than official CUNY supported video platforms like Skype and WebEx.

To create my class lectures, I do the following things.

Google Slides example.

First, I create a presentation slide deck using Slides in Google Docs.

Screenshot of OBS Studio capturing the desktop.

While presenting my slides in full screen mode, I use OBS Studio, a “free and open source software for video recording and live streaming” that supports Windows, Mac, and Linux, to record a video of my desktop (the Slides presentation) and my webcam video and audio in a smaller picture-in-picture that positioned in the lower right corner of the screen, which produces a video like my recent lecture embedded below.

Before I can post the video to YouTube, I like to edit it (though, editing isn’t absolutely necessary). I like to use Shotcut, a “a free, open source, cross-platform video editor.” After trimming the video, I then upload it to YouTube, get the video’s sharable link, and embed the video with the link in my class’ OpenLab site.

OBS Studio and Shotcut have steep learning curves, but each have extensive online documentation and there are communities of users online who share tips and advice about how to setup and use these powerful tools.

There are many other options for working with video. On Mac OS X, one can use Quicktime Player to record a screencast or iMovie to create something more advanced. On Windows 10, the built-in Xbox Game Bar can be used for creating a screencast movie. Also, there are commercial solutions, such as Screencast-o-Matic.

In some cases, you might not even need a computer. iPhones with iOS and Android phones can use video recording software that’s built-in or with an app to record and edit video, and there’s a YouTube app for both platforms that you can use for uploading the resulting video.

In the next section, I will show you step-by-step instructions for uploading a video made on a computer to YouTube.

Uploading a Video to YouTube

Once you have a video ready to share with students, the following step-by-step guide for uploading your video to YouTube shows you how to upload and share a link to your video.

First, navigate to YouTube.com and login to your account. Then, click on the camera icon in the upper right corner and then click "Upload Video."

First, navigate to YouTube.com and login to your account. Then, click on the camera icon in the upper right corner and then click “Upload Video.”

Second, drag-and-drop your video from your computer into the center of the window that opens, or click on "Select File" to navigate to and select your video file on your computer.

Second, drag-and-drop your video from your computer into the center of the window that opens, or click on “Select File” to navigate to and select your video file on your computer.

Third, while your video is uploading and processing (updates are shown along the bottom edge of this window shown above), fill out the Title and Description boxes and choose a thumbnail for how the video will initially display before the play button is pressed. Then, scroll down the window.

Third, while your video is uploading and processing (updates are shown along the bottom edge of this window shown above), fill out the Title and Description boxes and choose a thumbnail for how the video will initially display before the play button is pressed. Then, scroll down the window.

To comply with the COPPA law, select if your video is for kids or not. Then, click Next in the lower right hand corner.

To comply with the COPPA law, select if your video is for kids or not. Then, click Next in the lower right hand corner.

Fourth, you can skip the options on the Video Elements screen and click Next in the lower right corner.

Fourth, you can skip the options on the Video Elements screen and click Next in the lower right corner.

Fifth, select the Visibility option for your video. The most versatile choices are Public (this is what I choose) and Unlisted. In these cases, you will have a sharable video link that you can send via email or easily embed in a webpage. Private is also an option, but you have to choose who is permitted to see the video, which requires students having a Google account and you knowing those accounts to grant permission to each one. After making your selection, click Publish in the lower right corner.

Fifth, select the Visibility option for your video. The most versatile choices are Public (this is what I choose) and Unlisted. In these cases, you will have a sharable video link that you can send via email or easily embed in a webpage. Private is also an option, but you have to choose who is permitted to see the video, which requires students having a Google account and you knowing those accounts to grant permission to each one. After making your selection, click Publish in the lower right corner.

Finally, highlight and copy the video link on the resulting screen, or click on the copy icon on the right to automatically copy the video link to the Clipboard. Click "Close" on the lower right to return to your list of videos on YouTube. With the link on your Clipboard, you can go to email, OpenLab, or another platform to paste and share the video link with your students.

Finally, highlight and copy the video link on the resulting screen, or click on the copy icon on the right to automatically copy the video link to the Clipboard. Click “Close” on the lower right to return to your list of videos on YouTube. With the link on your Clipboard, you can go to email, OpenLab, or another platform to paste and share the video link with your students.

On OpenLab and WordPress-based sites, pasting the link into a post or page will automatically embed the video so that students can simply navigate to your class site and watch the video on the class site instead of going over to YouTube as an additional step.

If you’re working on transitioning your classes to distance learning, it’s okay to feel overwhelmed and frustrated like Miao Miao below. Just don’t give up. We’re doing good work for our students, and it takes time to think through and implement distance learning. Also, it’s okay to let your students know that this is a work-in-progress and things might change based on what works and what doesn’t.

A cat collapsed from overwork and anxiety onto the pages of an open book.

  This post originally appeared on Jason’s teaching and research blog here.

Open Pedagogy 11/7 Recap: Access Pedagogy

Participants at the 11/7 Open Pedagogy event on Access Pedagogy, gathered around for a roundtable discussion.

Last Thursday, November 7, we met for our second Open Pedagogy event of the semester. Our theme for the evening was Access Pedagogy. Against the backdrop of austerity and persistent budget crises at CUNY, we considered how we could make ourselves accessible as teachers. We asked:  To what extent are our classrooms accessible, and what can we do to center access and equity in both in-person and online teaching?

We began the evening by exploring how our day-to-day experiences in the classroom and with students continually challenge our assumptions about teaching and learning. One participant shared that, as an instructor, they assumed that students would contact them or come to office hours if something weren’t clear. Other participants nodded and laughed in agreement as this same instructor then explained that this was 1) false; 2) untrue of even their own behavior as a student. Many of us admitted that, when we were in college, we were often too shy, intimidated, or busy to go to our professors’ office hours ourselves. The implication? It’s actually our job as instructors to make sure we are being clear and to check-in regularly with our students!

More generally, our students continually and productively challenge our assumptions. At CUNY, many of our students balance careers, caretaking, and college. In many ways, they are expected to be superhuman. As instructors, we learn again and again that our most engaged and creative students may be frequently absent or late for class. We learn again and again that access to basic technology—including a computer and safe and stable internet connection—is not a given. Nor can we take for granted that our students will have had the time and resources to complete all of their coursework. This entails a need for some malleability and ingenuity on our part.

Fortunately, we can work to reduce barriers to student learning; we can work to improve access. At the event, we discussed softening the language in our syllabi, such that policies around punctuality, attendance, and late work submission are made somewhat flexible and always compassionate. We can provide students with laptops and other forms of accessible technology, including by using open and free software and open platforms (like the OpenLab!). We can help our students seek out resources and list these on our OpenLab course/project sites. Moreover, we can do all this while still teaching students the importance of advocating for themselves, and of making their own needs clear to their instructors.

Of course, not all of the problems we face in higher learning today have straightforward solutions. Despite our enthusiasm for open learning platforms like the OpenLab and, especially for Open Educational Resources (OERs), a participant reminded us that we must be careful to not simply replicate the textbook format. Working digitally gives students an opportunity to express themselves not just in formal essays, but in memes, gifs, and blogs. We should not shy away from multimedia, nor from opportunities to make students co-creators of a course. Moreover, while we can all strive to make ourselves more accessible as instructors, we also have to confront the harsh realities of the trauma, racism, and poverty many of our students face, as well as the high workloads and precarity many of our adjunct instructors live with.

Let’s continue the conversation! Please comment on this post with thoughts/ questions.