Animated GIFs: The Birth of a Medium (PBS)
Why More Illustrators are Embracing Motion Design
Guy Brings Everyday Objects To Life
Other Software (Not Photoshop)
Motion Artist from Smith Micro
AfterEffects and more…
DEMOS
Bring Your Webcomic To Life (Skillshare)
How to make an animated GIF from a video file:
Step 1 — Find a good video sequence with which you want to make a GIF. This can be practically anything, but try to opt for a clip that is not too long, as longer video generally leads to a larger file size.
Step 2 — Download/upload the video clip you’ve chosen to your desktop. Trim the footage down to only the length you want the GIF to play. Two or three seconds is great, five is pushing it, and 10 or more is possible with the right chopping, but the file will be massive and hard to work with.
Step 3 — Open the video with Photoshop. To do this, just navigate to File > Import > Video Frames to Layers. Select the video file you want and Photoshop will open it as a series of still frames. You can choose to import the entire video from beginning to end, or use sliders to select a smaller portion of the clip. Limiting the frames will make the file smaller, but will also make the video more choppy.
Step 4 — Mess with the settings. You can adjust color balance and whatnot with Photoshop at this point if you’d like. When you have everything looking perfect, head to File > Save for Web. You’ll then be met with a window that looks something like this:

All of these settings can be tweaked to make your GIF smaller. Ideally, you’ll want to make it no larger than 1MB so that it won’t take ages to load on webpages. Play with all of these until you find a sweet spot.
- Colors: This limits the number of colors used to create the image, so the higher the better. Only drop down to 128 or lower if you must, or if your GIF doesn’t have much color to begin with
- Dither: Dithering scatters different colored pixels in an image to make it appear as though there are intermediate colors in images with a limited color palette. Higher settings will yield better looking images, but will also make the file larger
- Lossy: Use this setting to apply an intentional drop in quality. A lower setting is better, but some loss of quality might be necessary to make your file small enough
- Size: Changing the dimensions of your GIF can have a huge impact on the size of the file
Step 5 — Save and share! Hit the save button to finalize your creation and save it to your folder of choice. Once that is done, you can upload it to a free image hosting site like Imgur to share it with your friends and embed it into blogs and websites.
How to make an animated GIF from still images:
Step 1 — Collect the still images that you want to sequence for your GIF and put them in a single folder. Then open File > Scripts > Load Files into Stack. From there, click Browse and select the images on your desktop that you want to string together into a GIF. Select “OK” and a new composition should open with these stills now rendered as individual layers in a single image. Arrange them accordingly; your first frame should occupy the very bottom layer and so forth.
You can also create each layer individually in Photoshop itself, rather than simply batch uploading your stills as layers. Run Photoshop and create a new image by clicking File > New and then selecting “OK.” Then, unlock the background layer by double-clicking the lock icon, create a new layer by opening Layer > New… > Layer and design each frame accordingly. Again, string your animation from the bottom up. This process works if you are using an older version of Photoshop that does not feature a “Load Files into Stack” option. Simply load your stills into Photoshop, drag them into your new project, and resize the newly created layers accordingly using Photoshop’s free transform tool (edit > free transform or Ctrl + T, then drag the corners to resize the object).
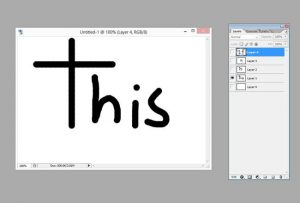
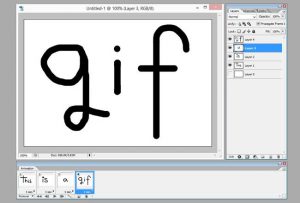
You want your end result to look like this, with each frame of the animation separated as a layer and arranged chronologically from the bottom up:
Step 2 — Now that you’ve arranged your layers accordingly, you can began sequencing your layers. Again, this process will vary depending on what version of Photoshop you are using. For Photoshop CS5 and lower, access the animation window by opening Window + Animation. Likewise, click Window + Timeline in Photoshop CS6 and Photoshop CC to access the Timeline window. For Photoshop CC, click the drop-down menu in the middle of the Timeline window and select “Create Frame Animation.”
Once you’ve opened Photoshop’s sequencing tool, click on small, right-facing arrow in the upper-right hand corner, and then select Make Frames From Layers.
You can also click on the right-facing arrow to create a new frame manually (or you can simply use the hot-key command Ctrl>Shift>Alt>F). From there, use the eye icon next to each layer to hide the layers you don’t want to appear in the frame you’ve created.
Step 3 — Congratulations! You’ve created an animated GIF using still images and now all you have to do is export it out of Photoshop using the process outlined above. For a quick recap:
Head for File > Save for Web. Remember to keep your GIF no larger than 1MB. If necessary, tweak the color, dither, loss, and size settings until your GIF has been resized accordingly. Once you’re happy, save your newly minted GIF.
Demo via Digital Trends

