Taking Advance Scenery Construction this semester was a fun and interesting experience. There are different ways on taking on a project, there isn’t a right or wrong way of going about it.
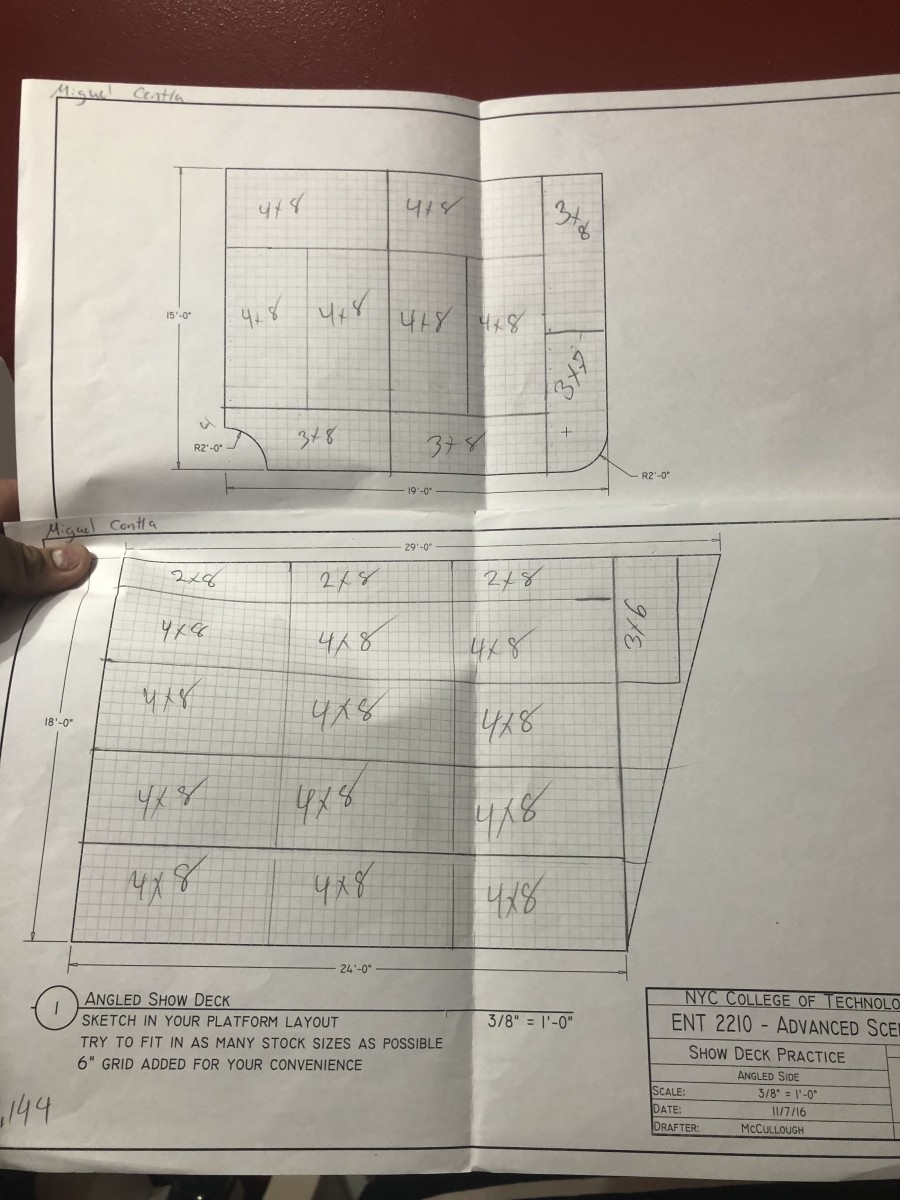
The deck break up assignments was a good exercise to see how one would go about breaking up a deck into smaller pieces. Ideally going with stock pieces would be fast and easy compared to making custom pieces. But not every location will have an easy break up without any custom pieces.
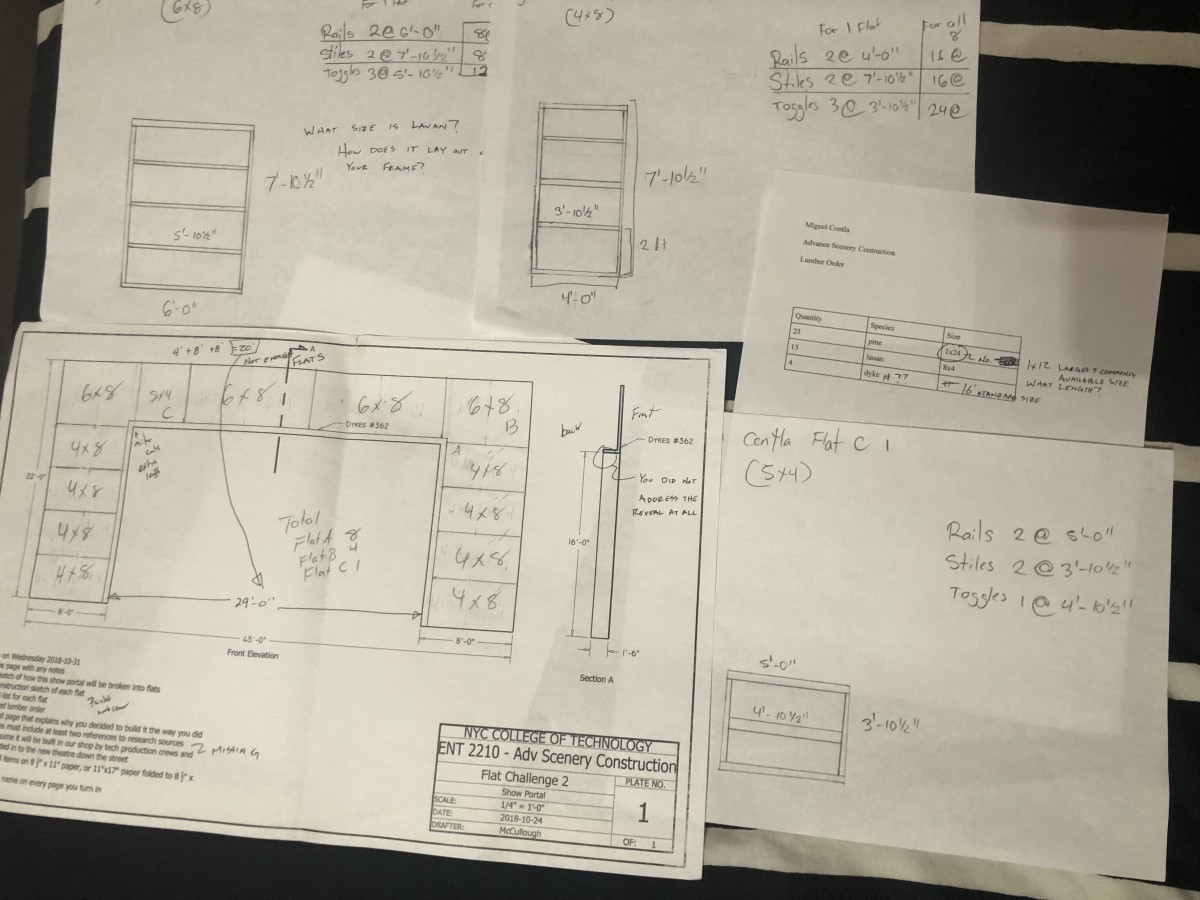
The Flat Challenge 2 was a like the name indicates a challenge. I was able to break it up it the best of my ability. I manage to break it down to 3 types of flats, 4×8, 6×8, and 5×4. I actually missed the important part of the flat, which was the lauan. When targeting this project again I must make sure I have all the necessary parts to execute a good finish project. I was able to sketch out the types of flats I was going to be using. I need to improve on my lumber order. Not sure why but that always been a struggle for me.
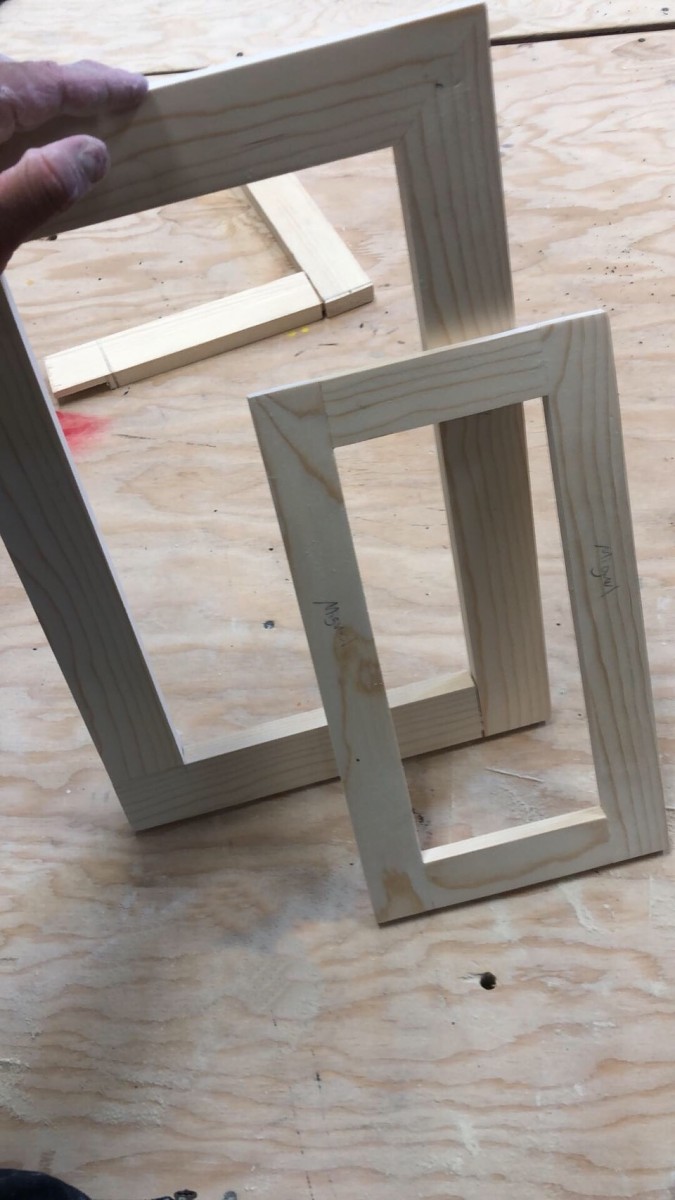
Building the Frames was a good way to use miter cuts, the biscuit joiner, lap joints, mortise and tenon joints and the planer. Something I would do different when doing a project like this, would be to have my wood size down to the correct thickness before cutting it to pieces . Doing this 1st would just save some time doing it all in one go, instead of doing it 4 separate times. Something I need to be careful of is when I use clamps on my finish product. The clamps I used left markings on the pine which looks bad. To prevent this placing scrap wood between the frame and the clamp would solve that issue.
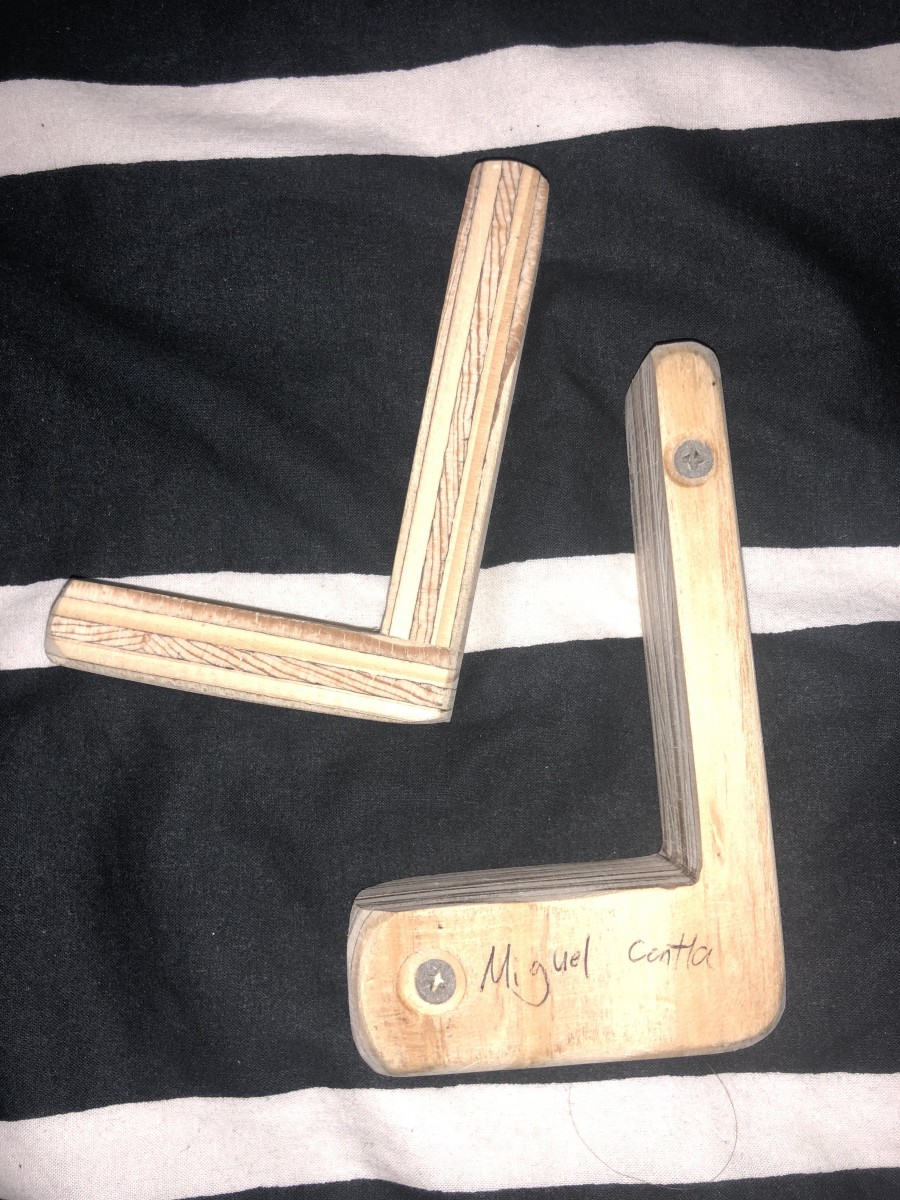
The Self made Jig was a fun task to do. I went with a simple one, but surely was difficult to get correct. This L shape jig is suppose to help make 90 degree holes. Using this with your power drill, when the drill press isn’t available or you just need a portable way to get that perfect 90 degree hole. The guide i found requires you to use pine, but i decided to go with plywood, since in theory its stronger and tougher than pine. As I used it I noticed that that regardless of the type of wood I used the jig isn’t a permanent solution but good to use for a limited amount of times. Also things to considered is when sanding down the jig there is also room for error. Sanding could actually shift the angle around slightly depends on how much you take off.
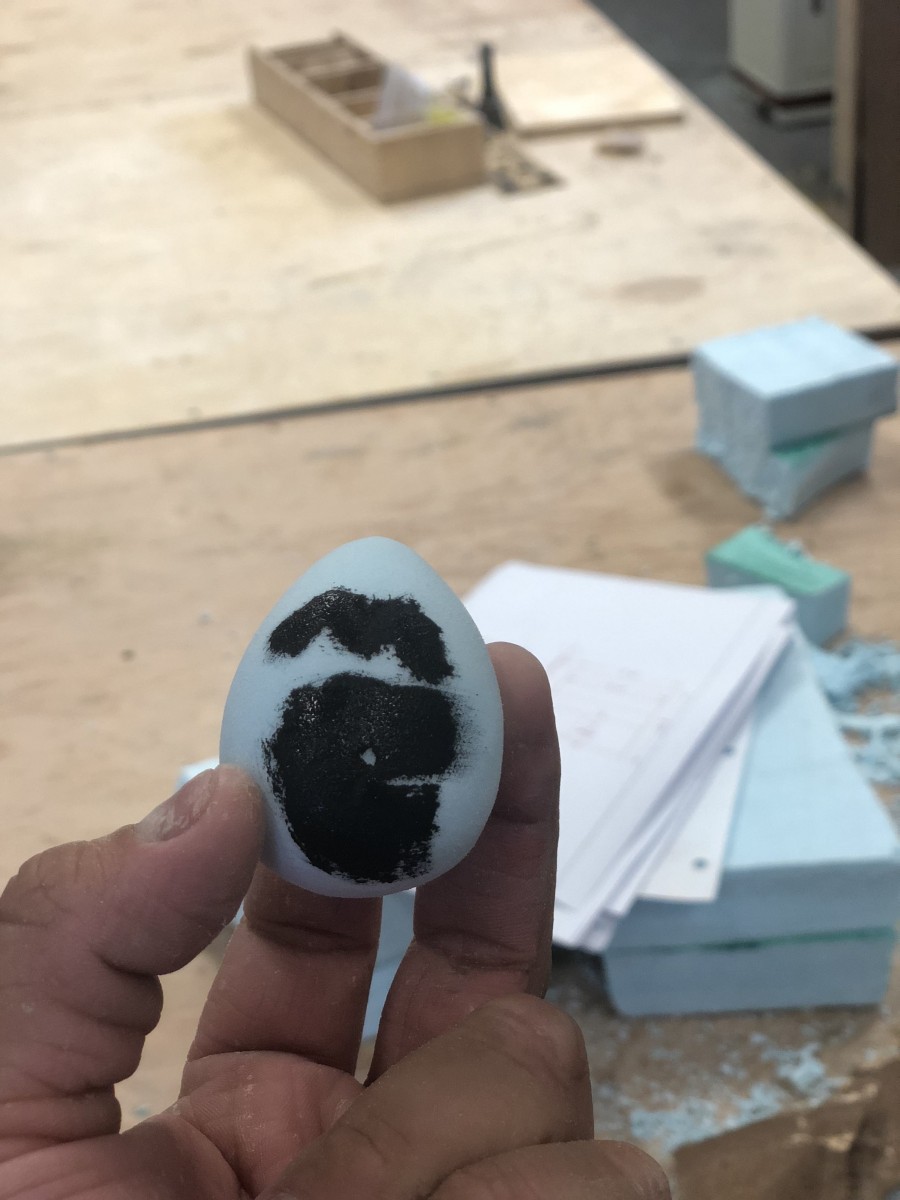
The Styrofoam egg challenge was a fun task to do. Styrofoam is used to mold/shape things to almost anything you can think off. When handling Styrofoam, be careful on how rough you might be since you could easily warp the shape or scuff your piece. Like anything you could remove as much material but you cant add it back. I found it interesting how many people did what they did to achieve the egg look. It’s best to look online for a reference to make sure certain key elements are there. For me, what i decided to do was got the block of Styrofoam into a somewhat decent size before sanding it down. I did shave certain parts of the “egg” and then sand it down with a rough and finishing it off with a finer sandpaper. I did had to consistently rotate the piece around and keep its shape so I kept on sanding everywhere and not focused on one side since it could warp 1 side more than the other. One thing i could say, you must be focused on what you are doing. You could achieve it fast, of course not recommended cause you might overlook some stuff. Taking your time and making sure the shape is what its suppose to be is whats important.