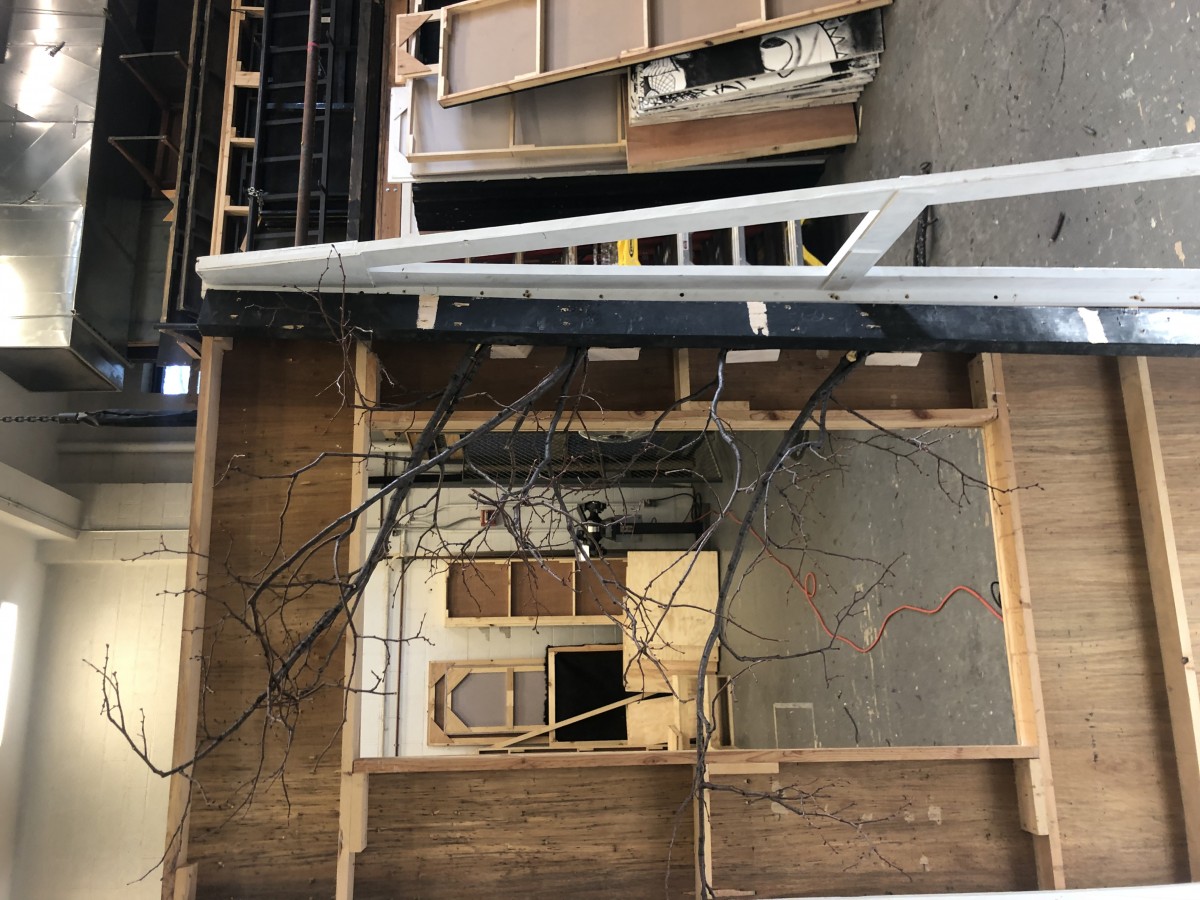
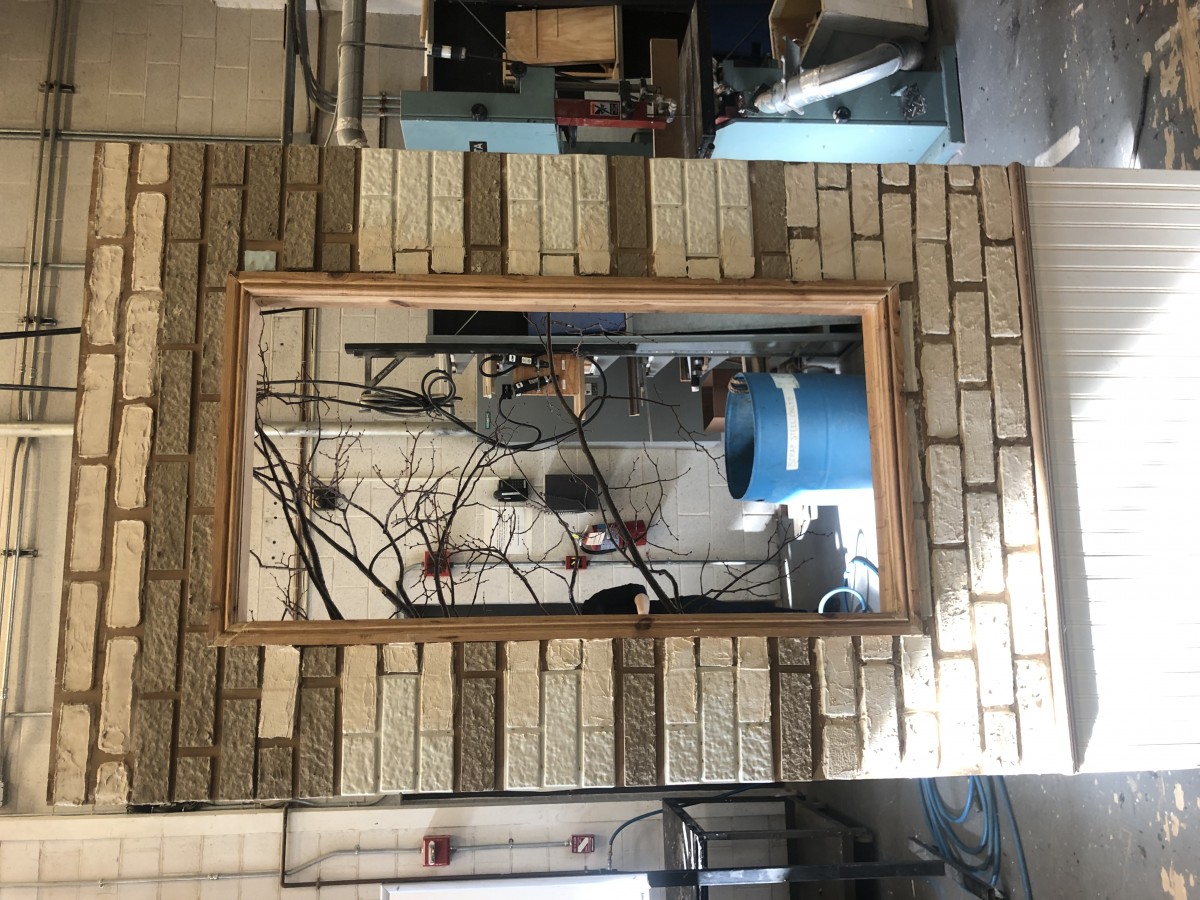
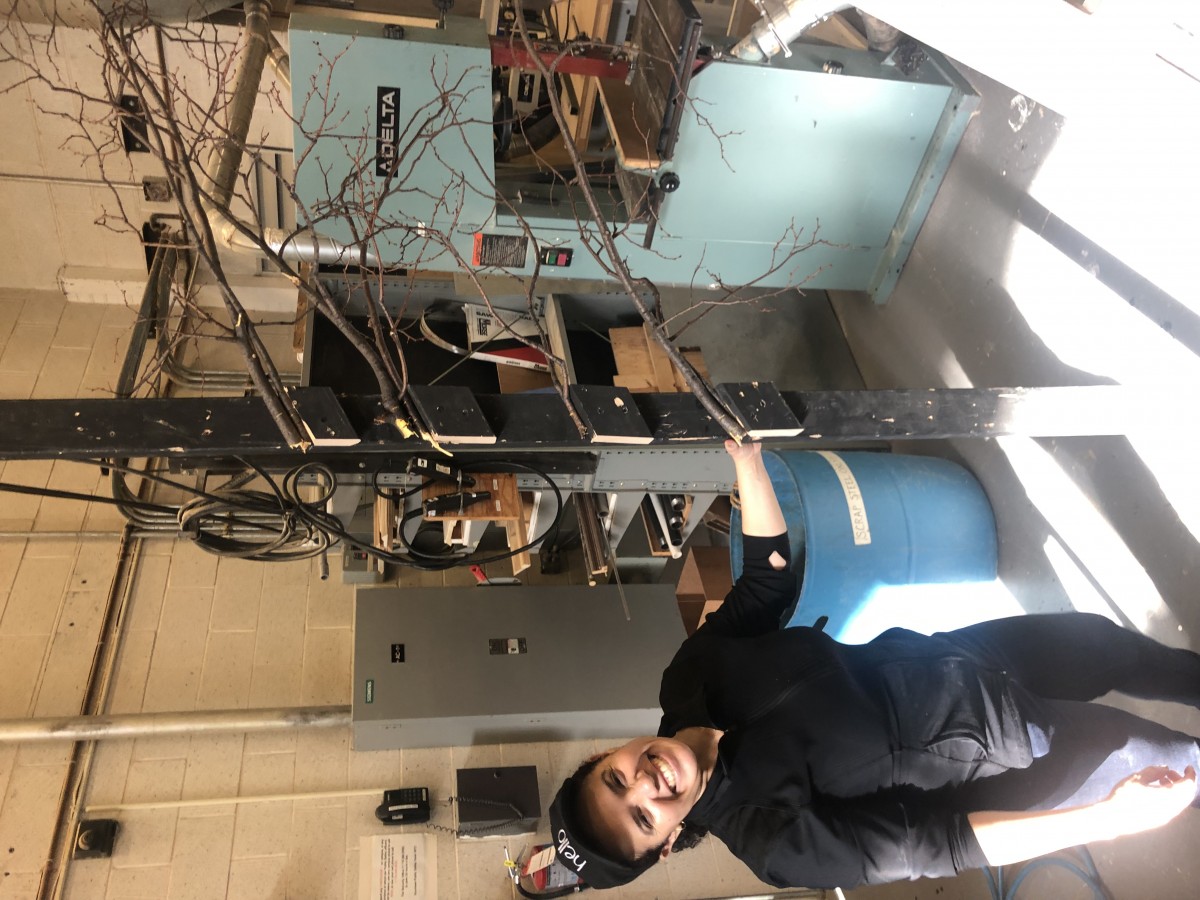
 This one by far was a challenging project to tackle. Challenging in the aspect that we needed to come up with our own budget based on what we wanted to get for this show. We needed to be close to accurate to be able to not limit ourself to being under budge and then struggle to make things happen. There was so much to keep track it was insane, from paints, wood materials to buying props, to figuring out whos going to be hired to be working on what days. So much going on. My team sat down and pretty much brainstorm what needed to be bought or what would be ideal to be build in the shop. Once we figured out our budgets we was hit with another restrictions. to make and add missing stuff with less money than originally planed. This got us to go back and check up on all the numbers. Seeing if maybe some flats at hand was spending much more time than it should. After those revisions we planned on ways to create the tree by building it by 2×4 lumber and attaching branches to make it seem like there is a tree there. The reason for going about it this way was since the tree was only going to be seen part of it. it doesn’t make sense to try and make it big and waste so much material and time to do it. Something that needed to be worked into this project was how to get water running to the sink that was going to be used. our solution was to have the shops sink attached to the prop sink and have it running water. and for the water to be drained into a bucket. For prototypes we decided to actually build the mock tree and use a window flat to see if it looks realistic enough and it was a fun and interesting approach. Overall it was a challenging project with so much that was involved but its good experience overall. Everyone is different and see things different. some solutions are better than others, as long as it get done thats all that matters. Research is key for a good type of production, lack of knowledge for stuff thats needed could hurt the production badly.
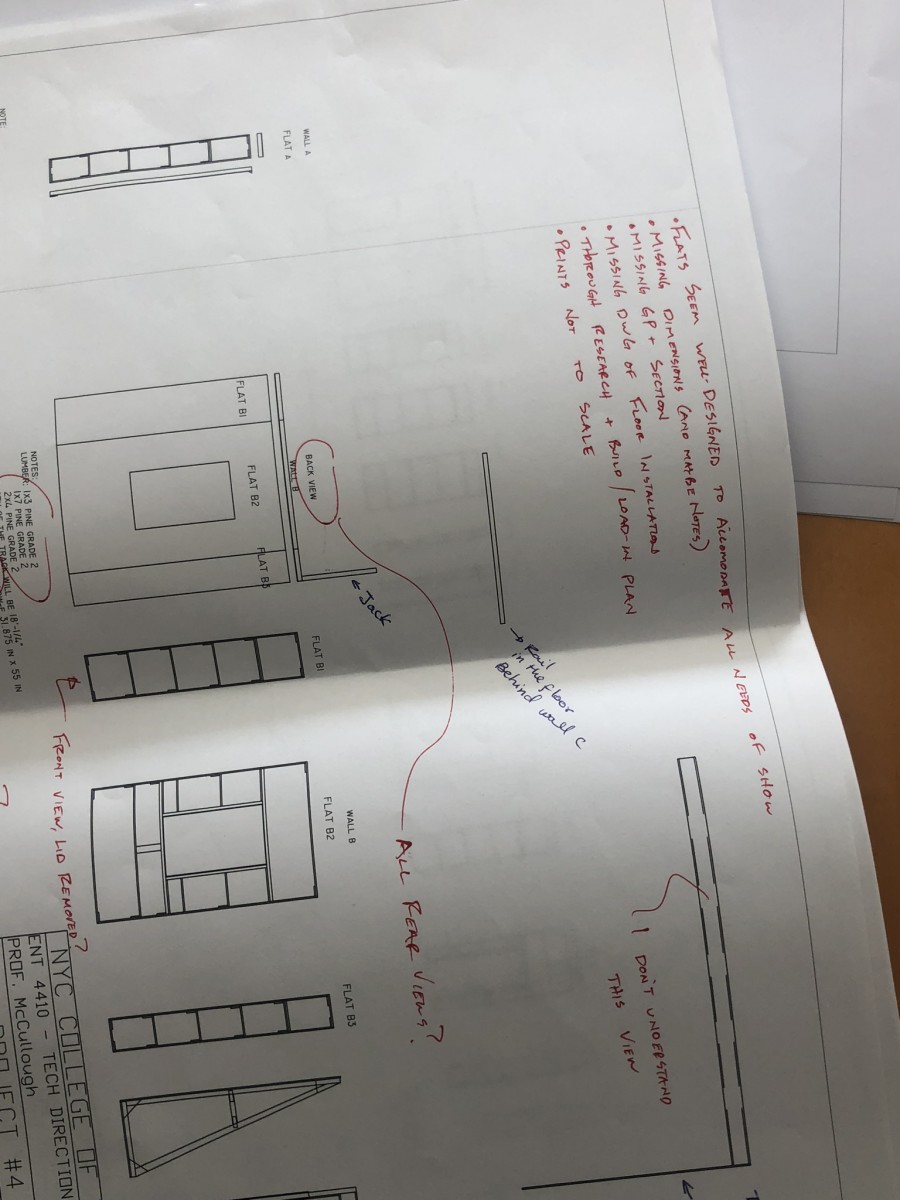
Problem 3 FLATS (TD)

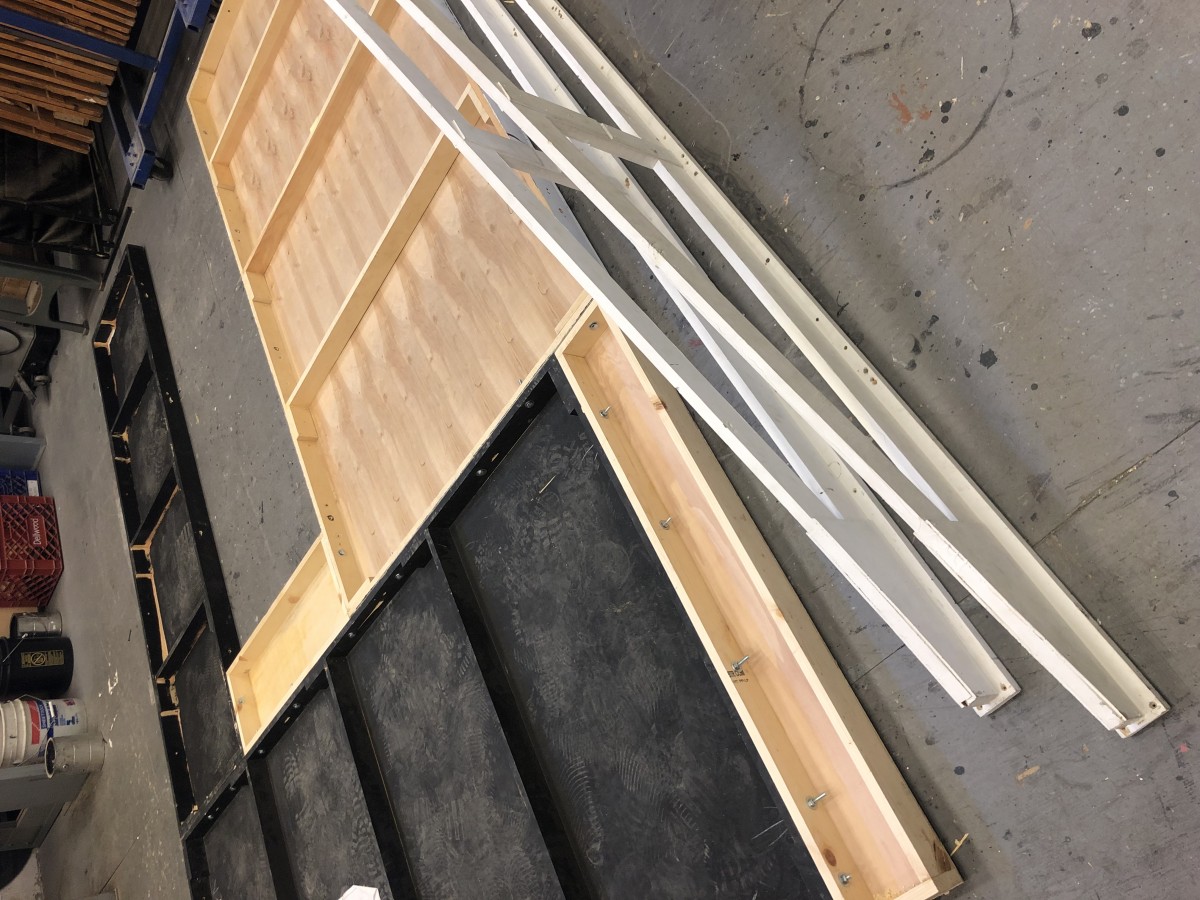
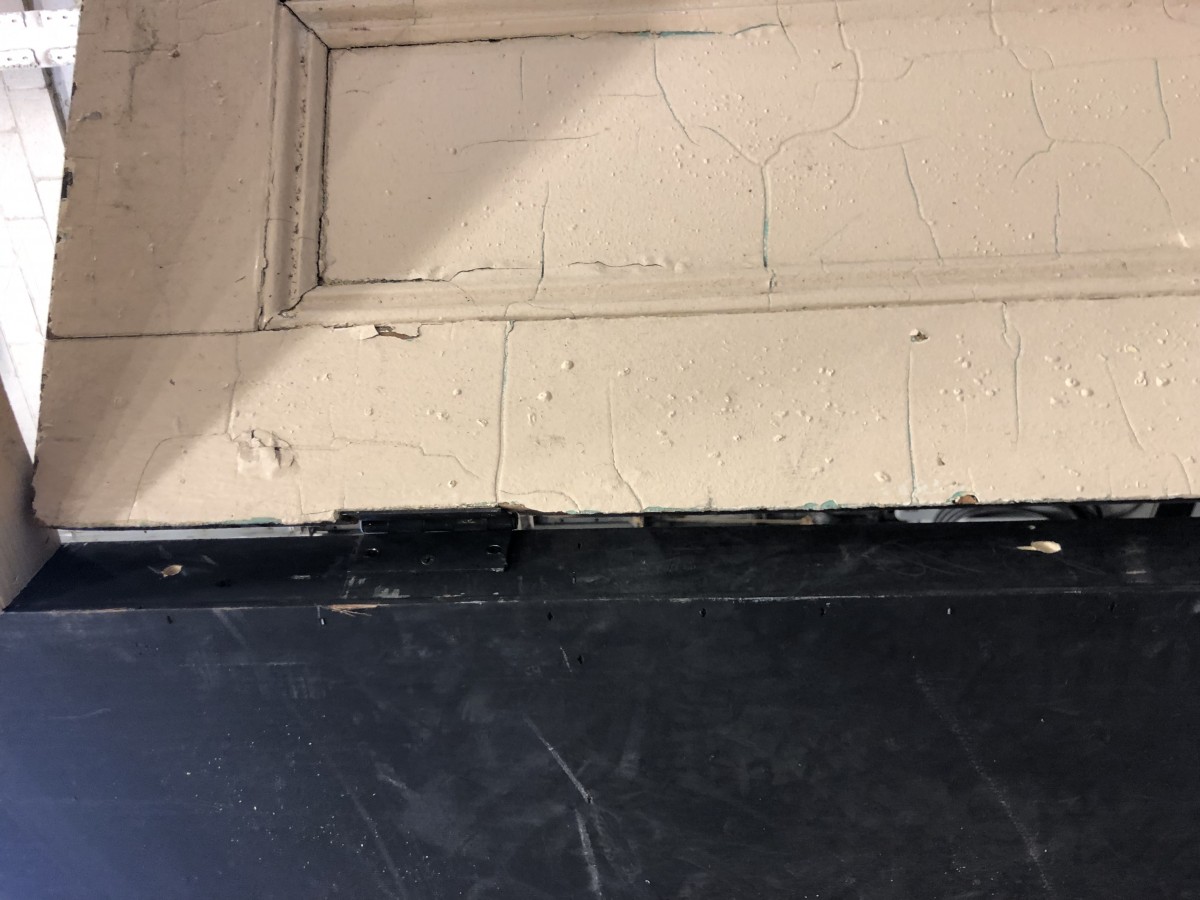


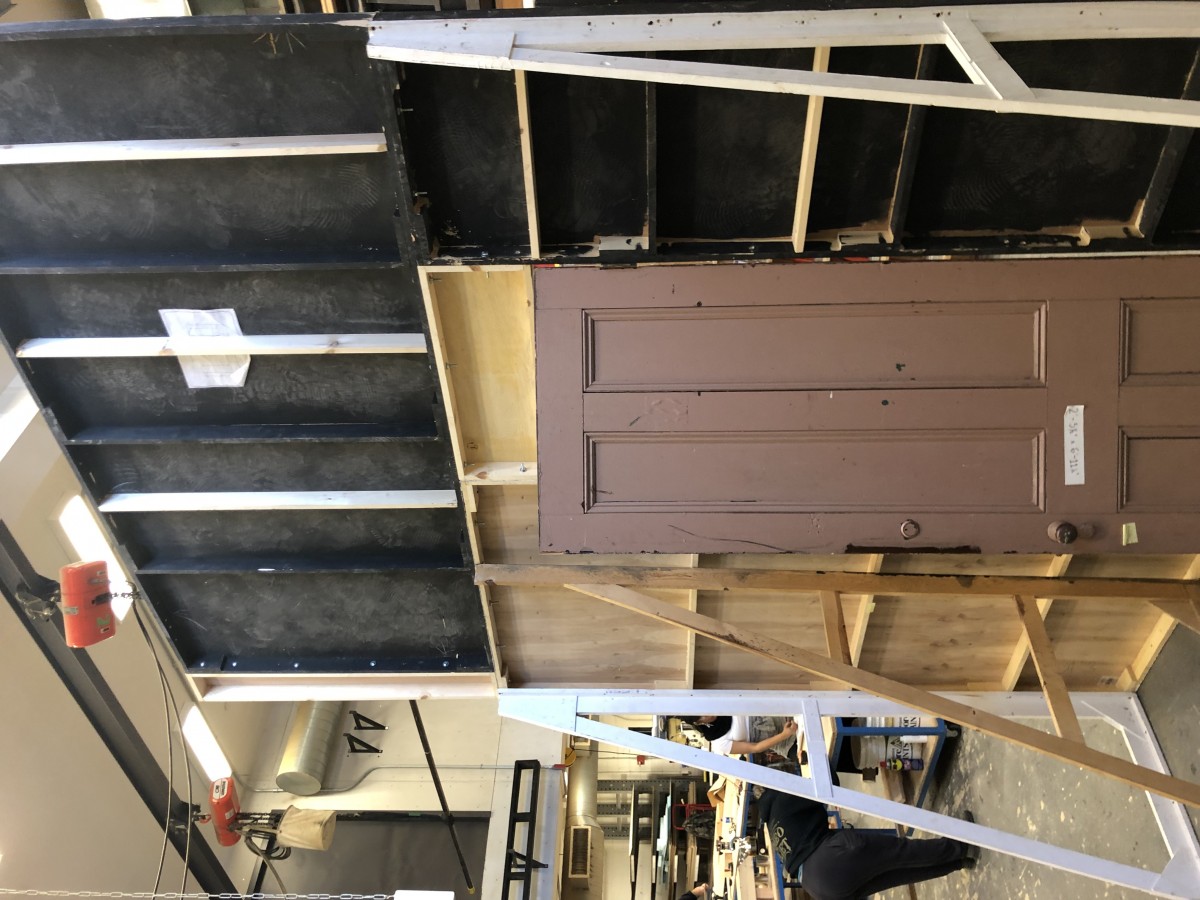
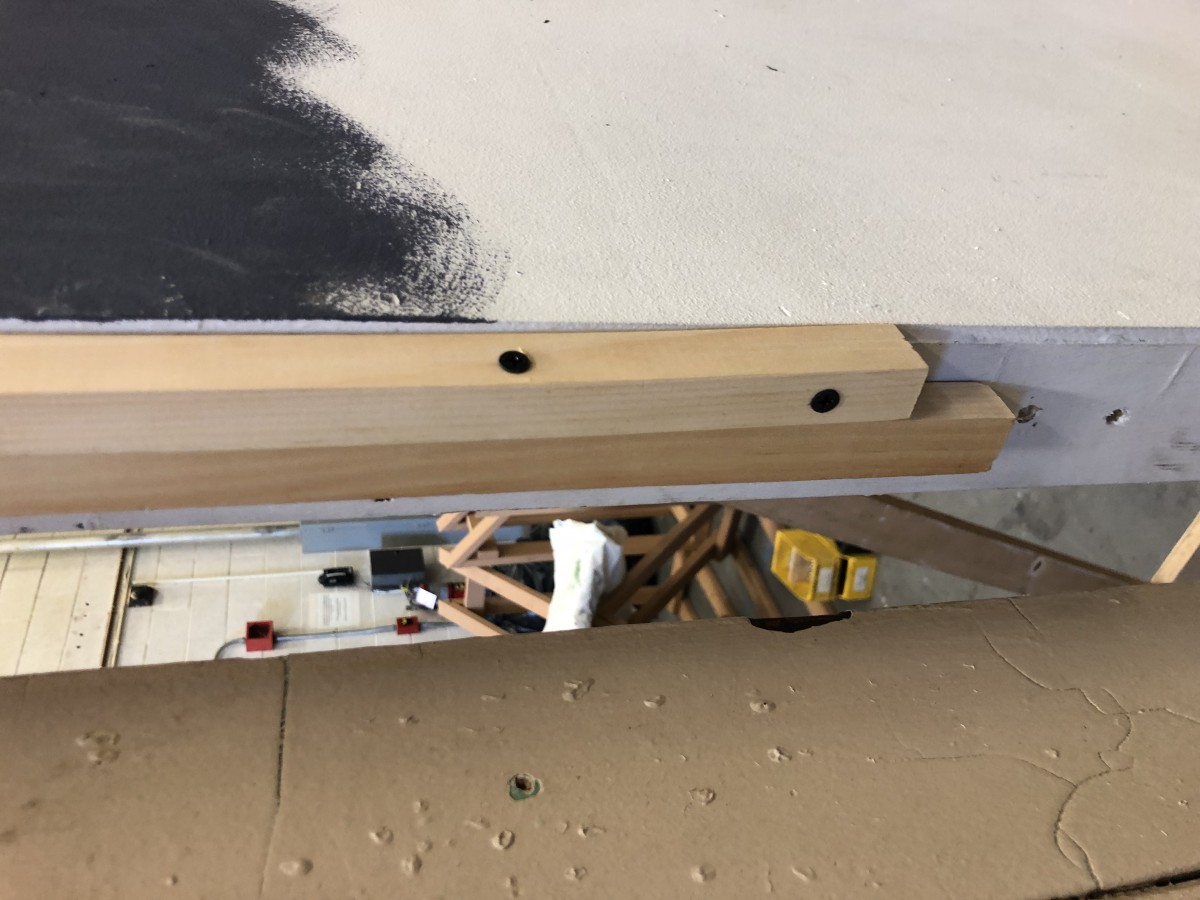
 For this project It was challenging base on the fact that we dint know how we would build curved flats. We tried different methods each group tried to do different things for this project. My team was in charged of making sure the flats holding the door was going to be strong enough to hold the weight of the door. Something else that needed to be tested out was to prevent the vibrations caused by the door when its been slammed. Like any project we decided to plan out what needed to be done. we decided to use stock flats , 2 4×8 flats and made 2 custom flats to be able to get the desire flat at hand. Something that we deciding on going about this to prevent vibrations was to have 2 x 4 pine to be used as braces BUT something that we noticed was the way you use the 2×4 could help the vibrations much better than how it was originally placed. our team placed the 2 x 4 the long side flat instead of the thiner side flat which help making the flat stable. Something that needed to be done was to create a stopper for the door to stop and not swing outwards. since does in real life don’t really go a full 360. Something else that needed to be keep in mind when designing the door flat was that we needed to create jacks that aren’t too long to have a safe space for the actors to be able to walk behind and not hitting their legs on the jack that we used as a prototype. i speak from experience when i was walking behind the flat i ended up helping my leg multiple times even tho i knew it was there, but not only that we simulated the 4 feet where another flat was going to be and it was going to be a tight work place to be able to walk around. The solution for a stable flat with thinner jacks was to build ones that cover the whole height of the flat. but have more than the standard 2 jacks
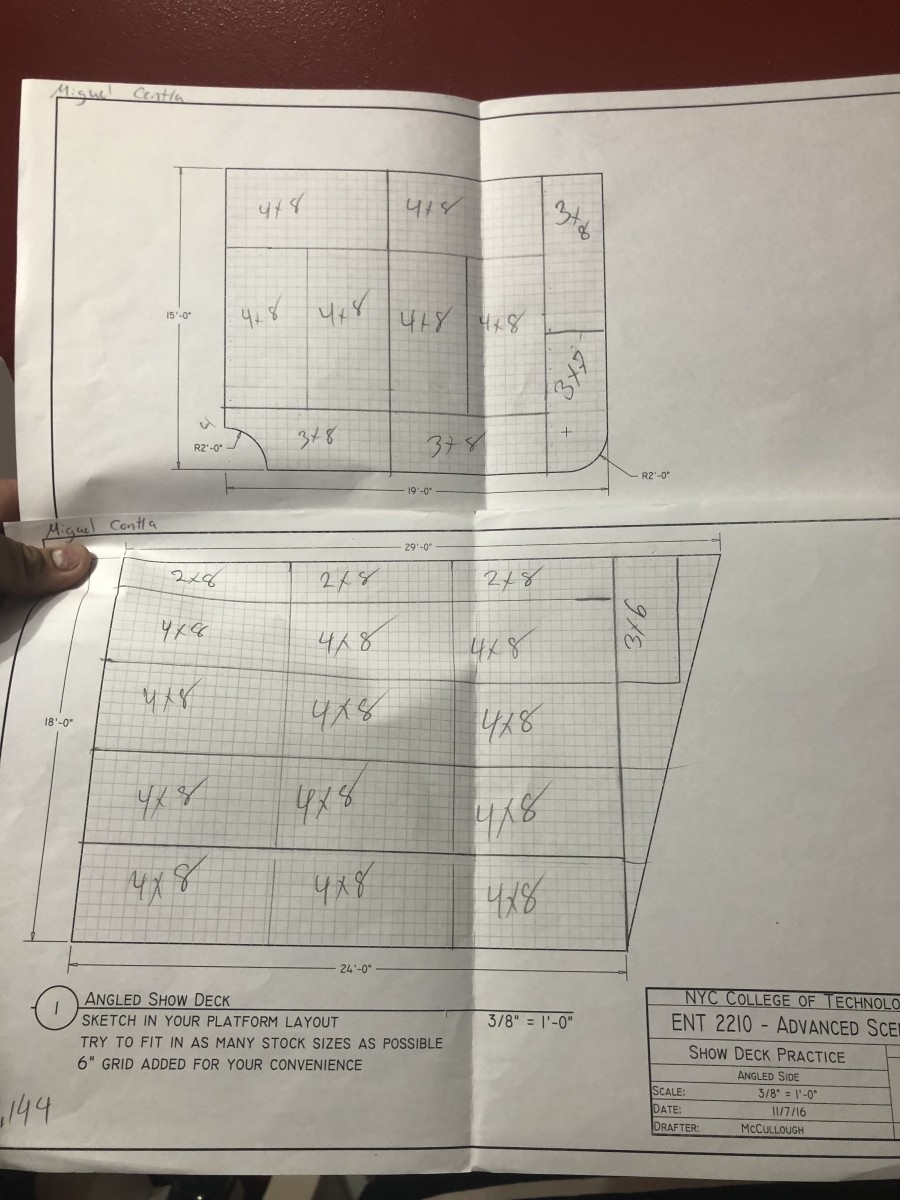
Problem 2 DECK (TD)
Like any project establishing the problems at hand is a great way to tackle whats at hand. For this project there was an issue about having such a short amount of time to be able to prepare for another show. A major change was that a marching band wanted to have their logo on the stage floor. After that was done and over with the next show wanted a blacked out floor. The limitation for this one was that the logo cant be a projected onto the floor. A way around being able to save time since time was another factor was to have the floors covered in vinyl with the logo and once thats over with we would just remove the vinyl completely to have it ready for the talent show. Painting on a muslin couldn’t have been another solution but painting something that covers the entire stage will be time consuming. Something else that was an issue was that the stage was being built on a slope. Time was an priority in this project, taking that into consideration deciding on what kind of flats. based on experience some flats are easier to build but require time to set up, some are difficult to build build but some are faster to install. Different solutions with many possible outcomes.

Sandwich Shop (TD)
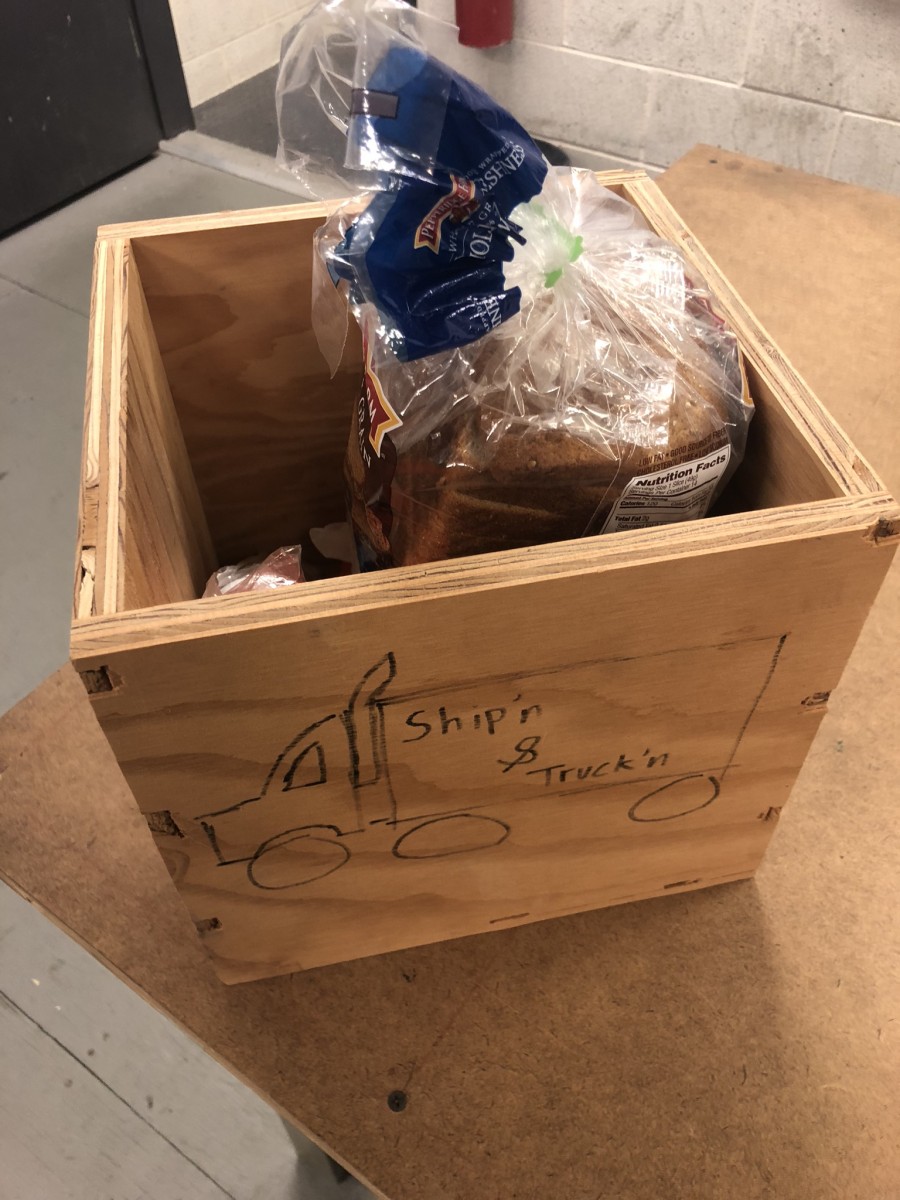
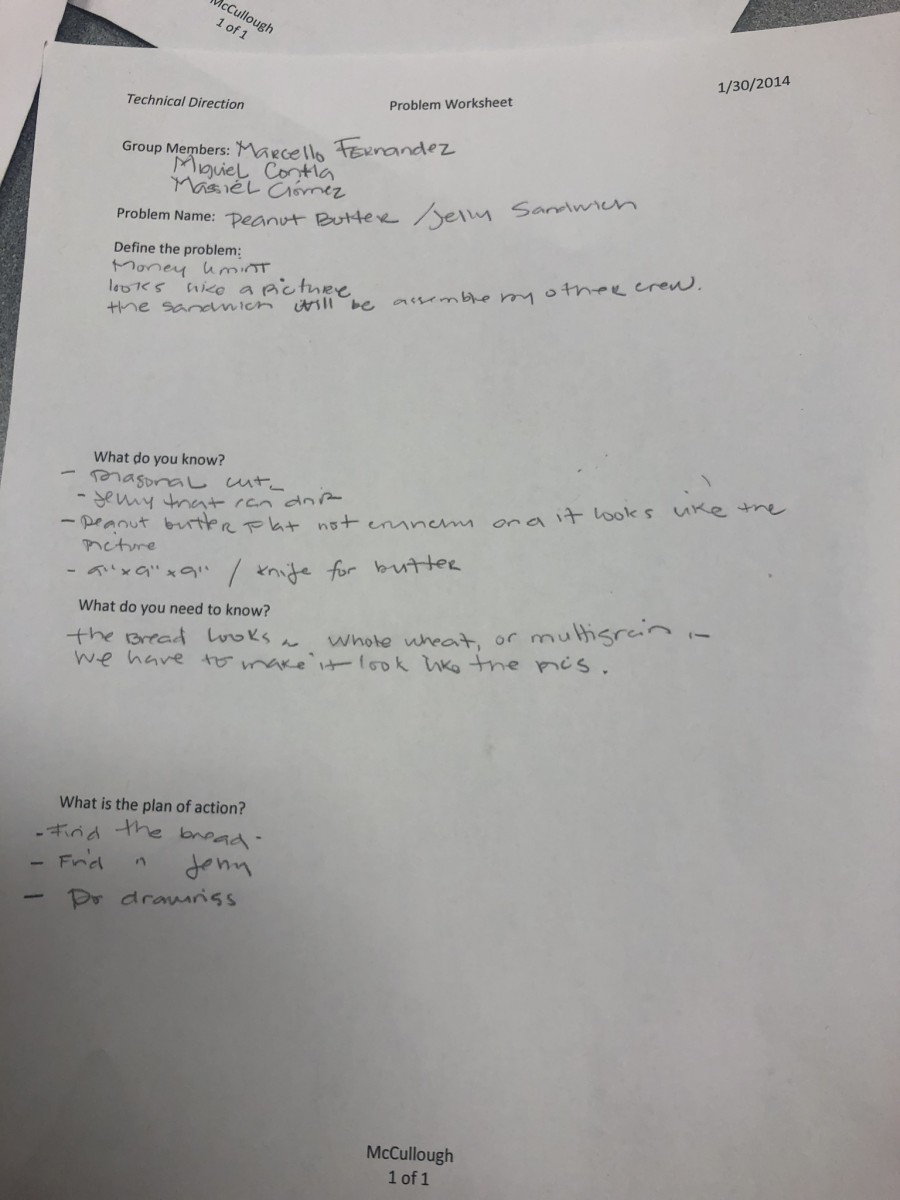
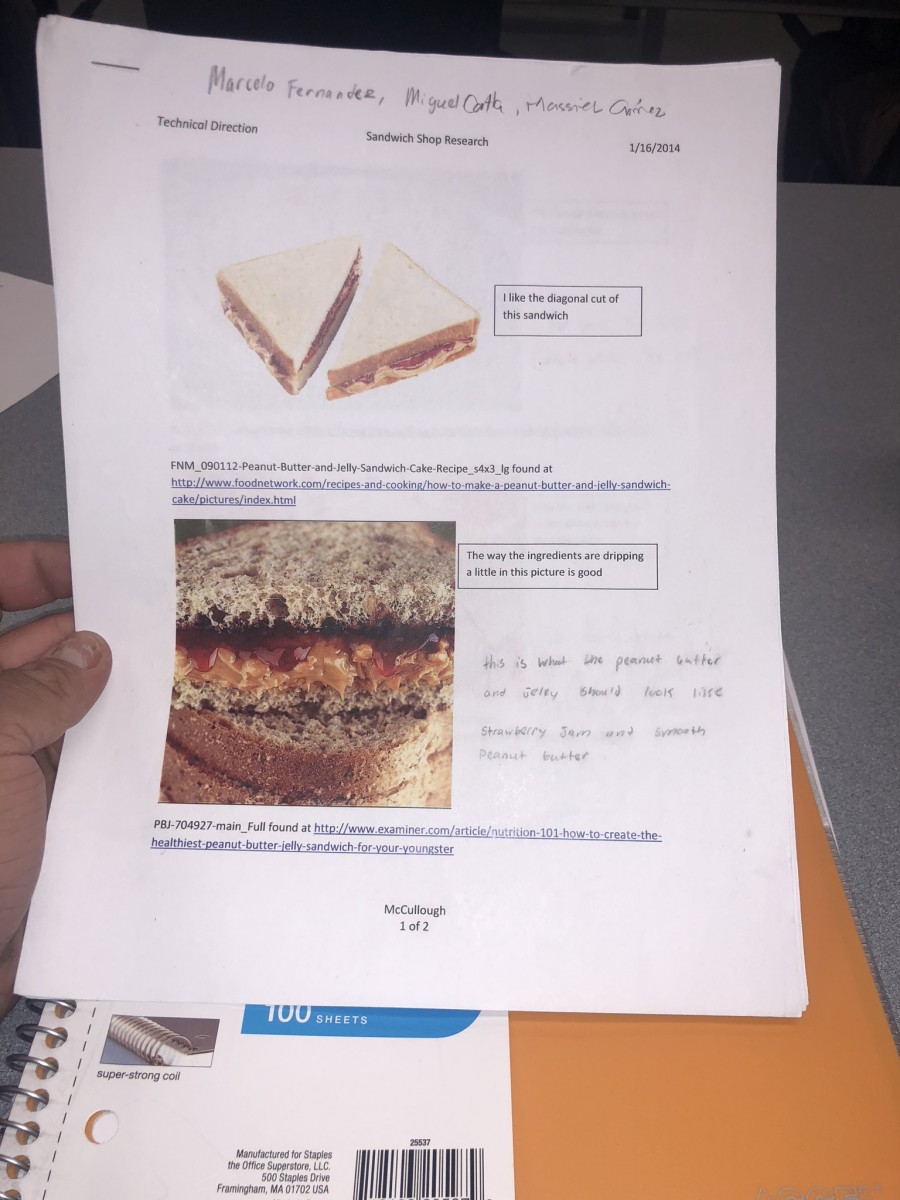
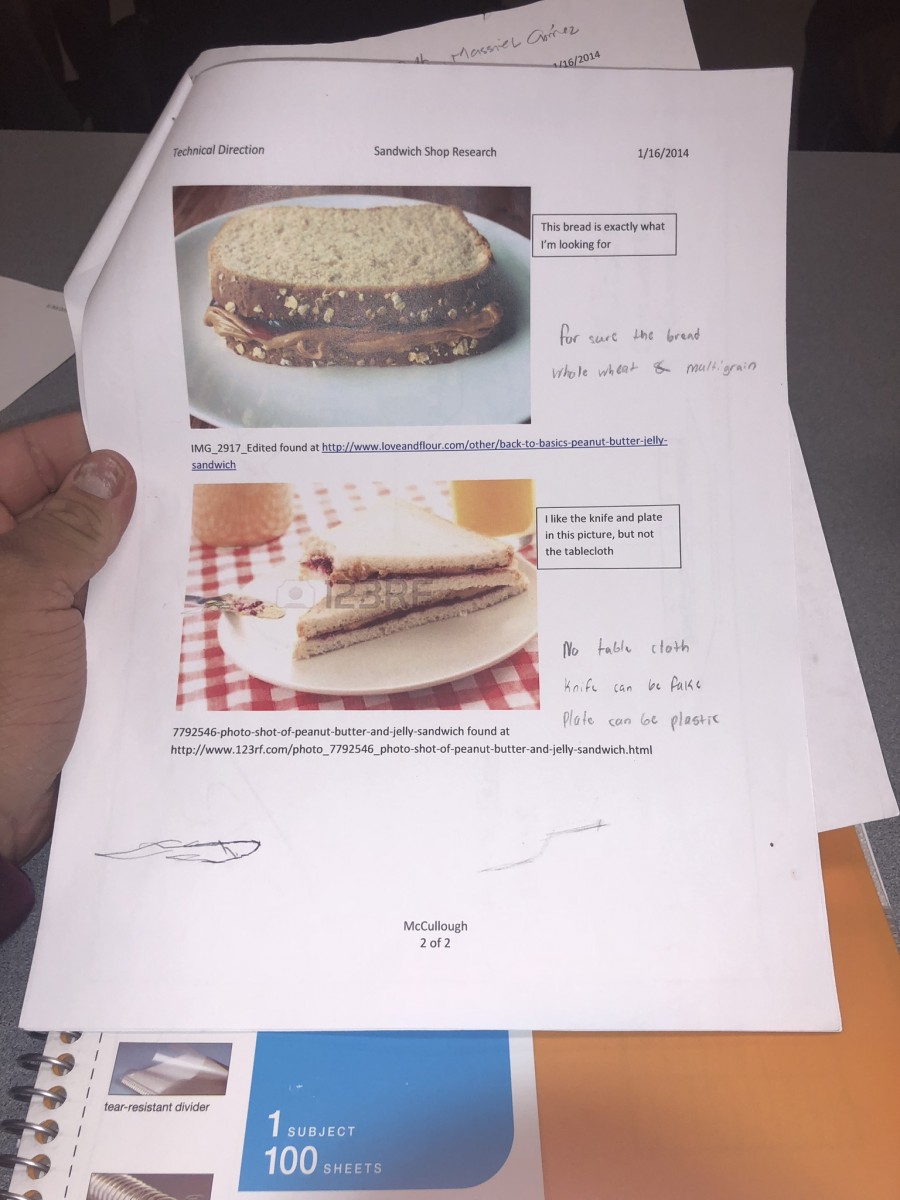
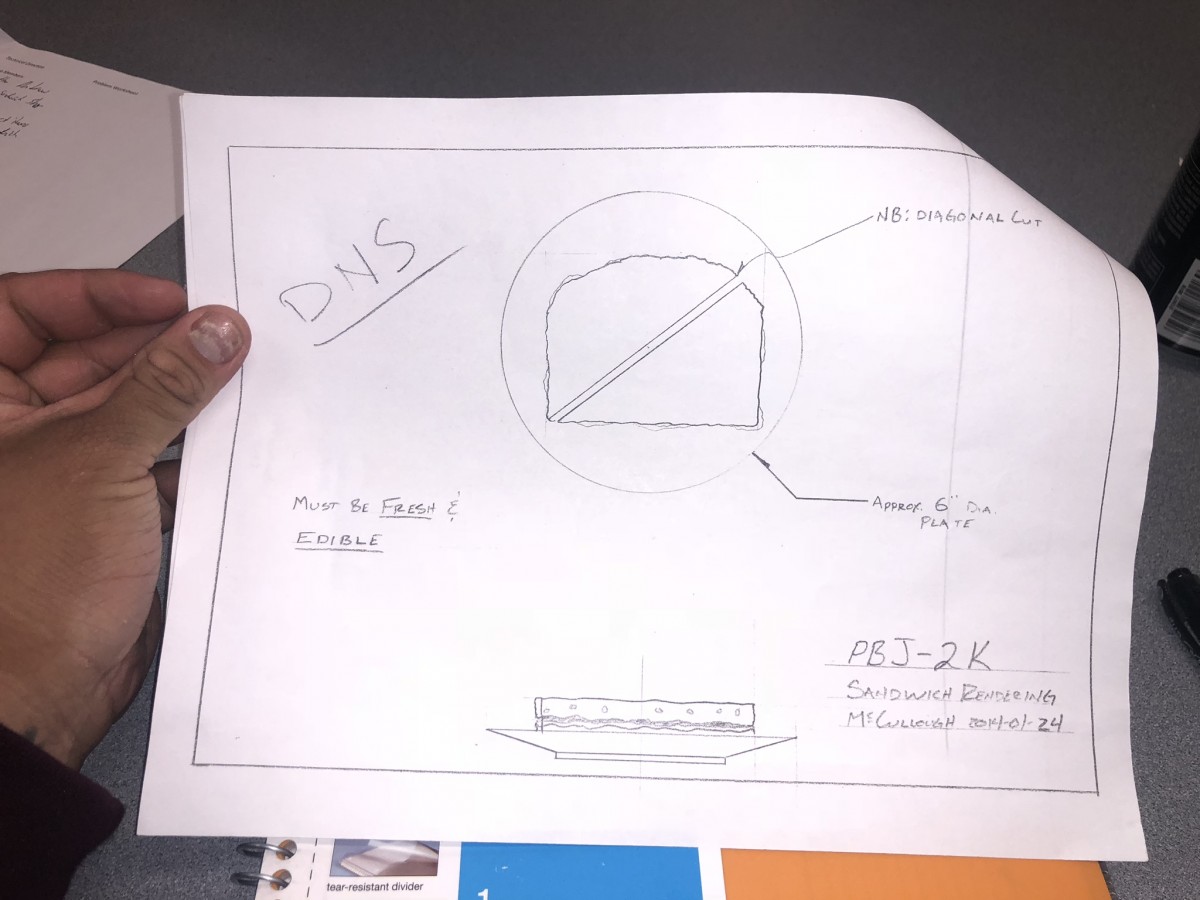
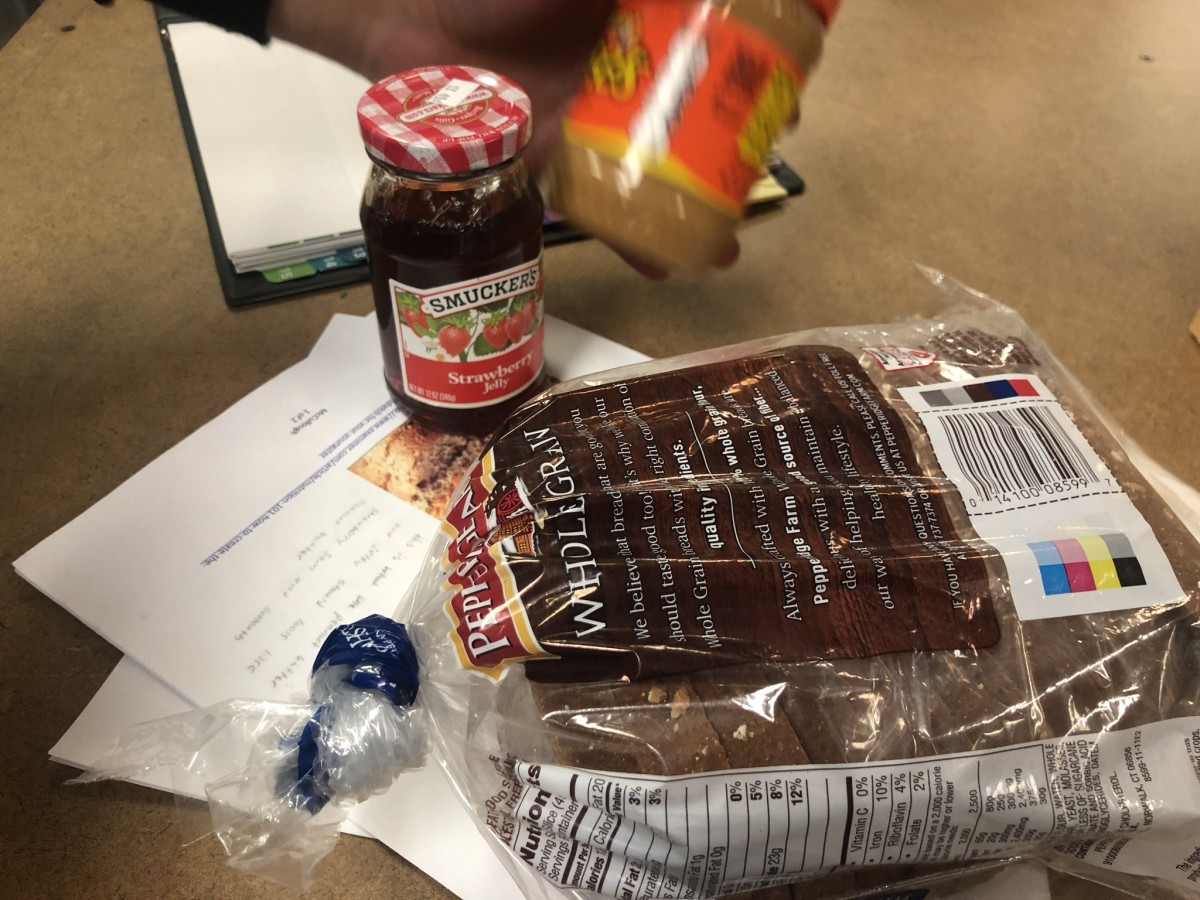
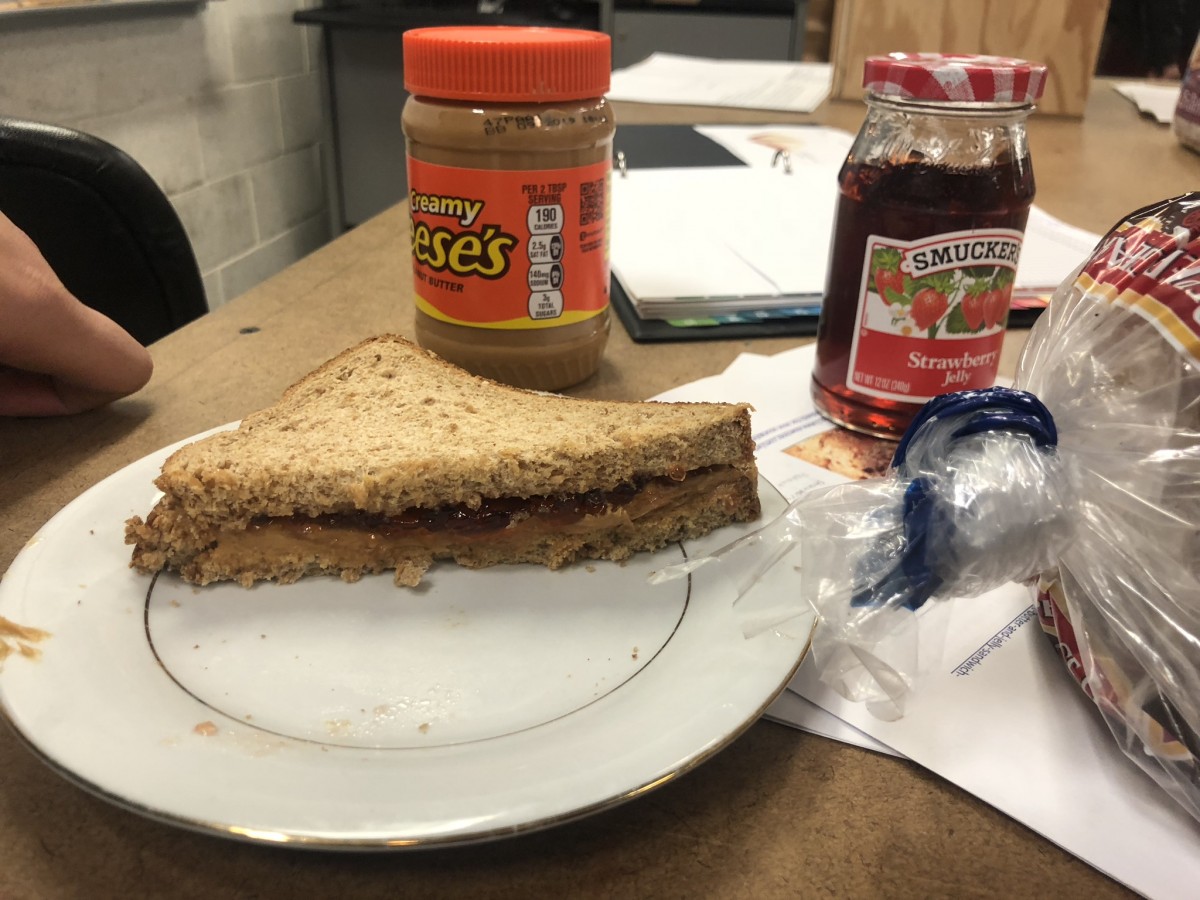 This project was a fun one for sure. Even though the task at hand seemed simple enough, there was some things that needed to be specific. We were given references to the kind of peanut butter need, as well as what jam or at least jam color. The type of bread was based on what we thought look close to the reference photo given at hand. The main thing that I think was very crucial is to be able to write clear instructions. It easy enough to assume everyone knows how to make a sandwich or at least know how to put it together with the ingredients at hand. This project help me realize that making clear instructions is a must especially since not everyone is the same. The limitation on this project was that we couldn’t verbally inform the person making the sandwich. we had to figure out a way to get those instructions across. In finding a solution writing a step by step was the best way to go about it.
Overall Self-assessment
What i learn this semester is that there are different methods on solving problems thats in front of us. There isn’t a right or wrong way of going about it. Another things is that practice makes perfect, like anything the amount of time you invest in learning/using the tools will make your job a bit easier. Take the time to plan makes the job easier. Of course it could be done without it but you will work much efficiently with one.
Planning is something I need to incorporate into my life. I tend to be all over the place and sometimes lose track of what i need to get done. So keeping myself in check making plans will help me ensure I get/ hit whats required in any class or job in general.
As for the my skill of mastery in taking this course, I could safely say i’m in between. I do feel comfortable Building and creating stuff base on the drawings that are given to me. What I still need to practice on is building flats and being able to not miss anything like, lumber orders, and also taking into account the type of hardwares such as nails, screws, nuts and bolts.
My lack of knowledge has to be due to me not actually finishing all the readings. I need to read through all of it so I have a better understanding. As for homework assignments i believe i missed a few due to me being absent or just not remember their due dates. I’m not satisfied with my attendance, it’s pretty bad since this class was a noon class and I always seen to be late or miss due to real life stuff. Taking this course definitely has opened my eyes in being more organized and that there are ways of solving stuff. I need to be able to plan out what needs to be done for my classes or job in general. My binder for all my classes for sure fell apart close to the end of the semester. I will come in strong and end strong, not the other way around !
Advance Scenery Construction
Taking Advance Scenery Construction this semester was a fun and interesting experience. There are different ways on taking on a project, there isn’t a right or wrong way of going about it.
The deck break up assignments was a good exercise to see how one would go about breaking up a deck into smaller pieces. Ideally going with stock pieces would be fast and easy compared to making custom pieces. But not every location will have an easy break up without any custom pieces.
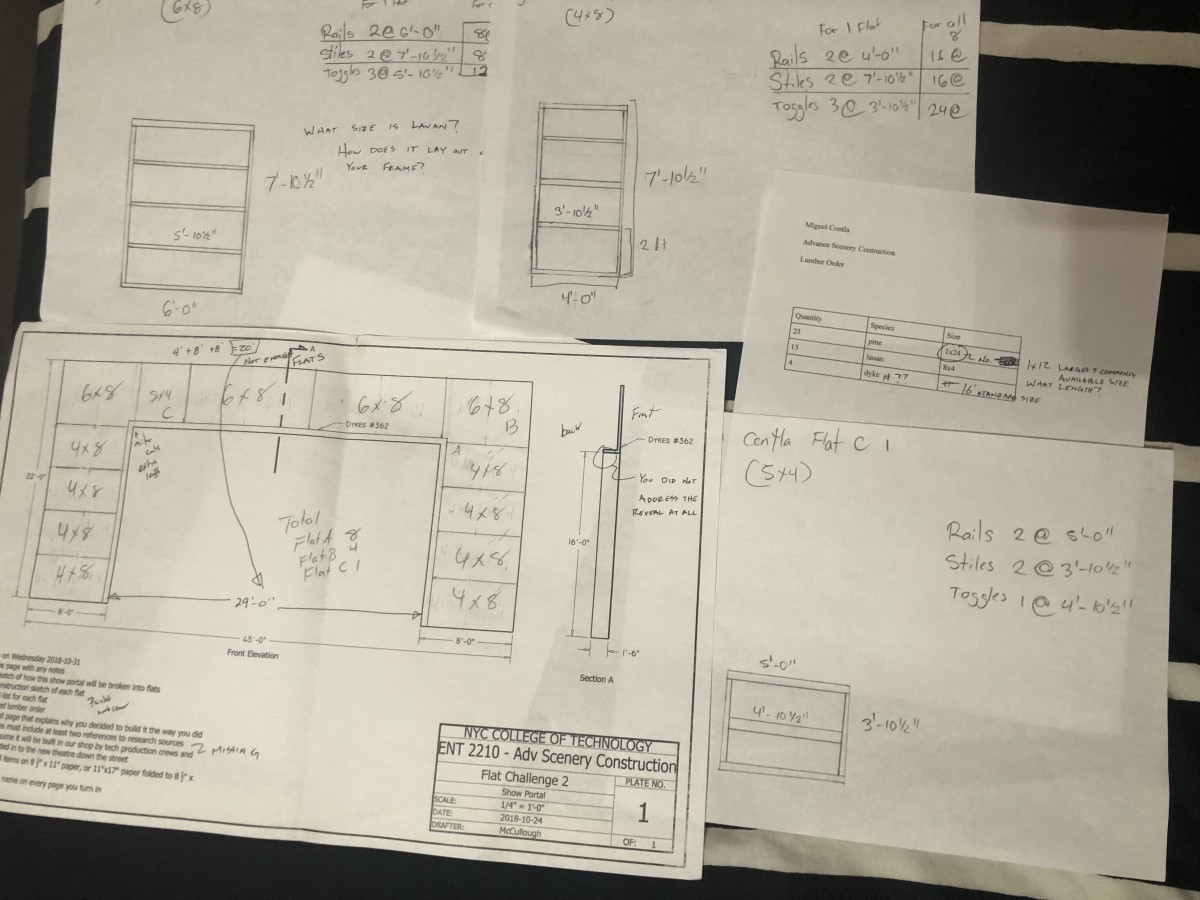
The Flat Challenge 2 was a like the name indicates a challenge. I was able to break it up it the best of my ability. I manage to break it down to 3 types of flats, 4×8, 6×8, and 5×4. I actually missed the important part of the flat, which was the lauan. When targeting this project again I must make sure I have all the necessary parts to execute a good finish project. I was able to sketch out the types of flats I was going to be using. I need to improve on my lumber order. Not sure why but that always been a struggle for me.
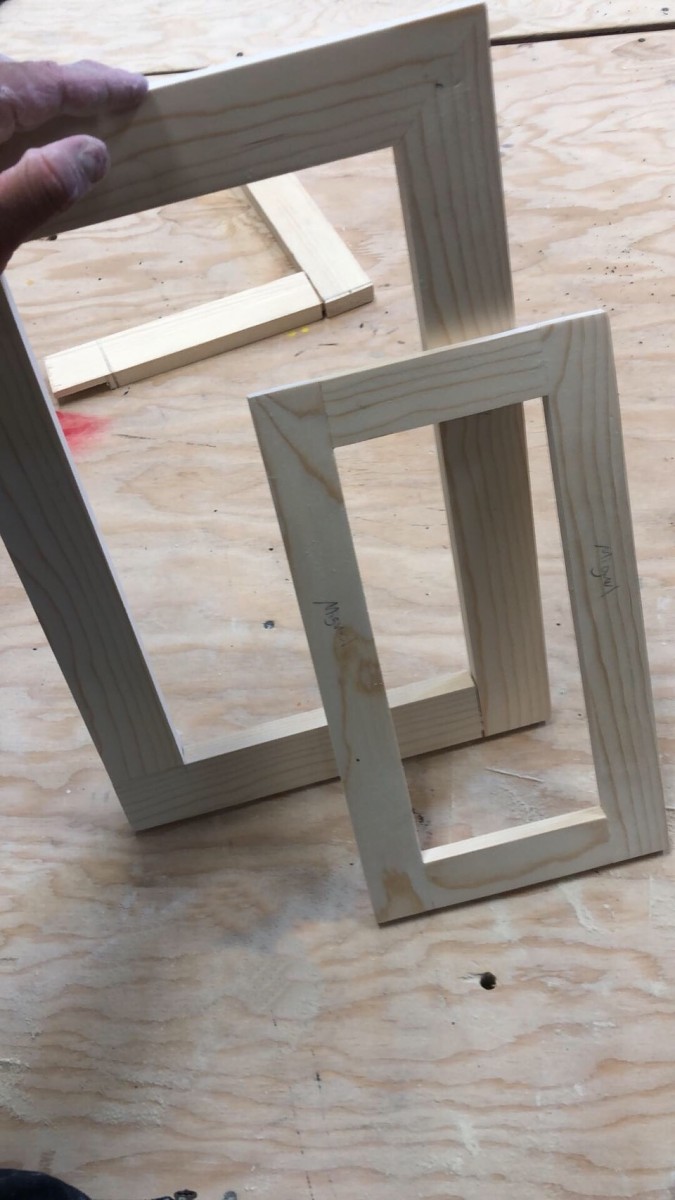
Building the Frames was a good way to use miter cuts, the biscuit joiner, lap joints, mortise and tenon joints and the planer. Something I would do different when doing a project like this, would be to have my wood size down to the correct thickness before cutting it to pieces . Doing this 1st would just save some time doing it all in one go, instead of doing it 4 separate times. Something I need to be careful of is when I use clamps on my finish product. The clamps I used left markings on the pine which looks bad. To prevent this placing scrap wood between the frame and the clamp would solve that issue.
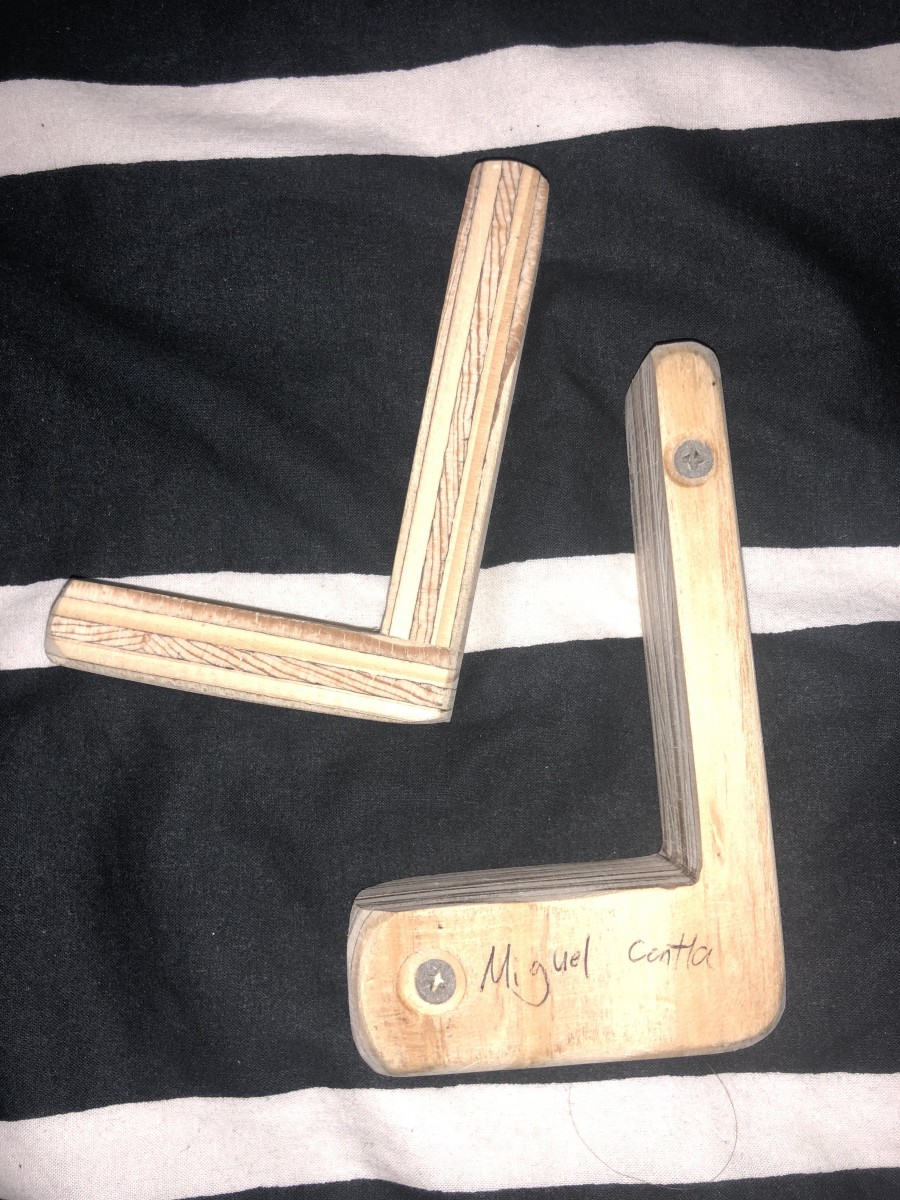
The Self made Jig was a fun task to do. I went with a simple one, but surely was difficult to get correct. This L shape jig is suppose to help make 90 degree holes. Using this with your power drill, when the drill press isn’t available or you just need a portable way to get that perfect 90 degree hole. The guide i found requires you to use pine, but i decided to go with plywood, since in theory its stronger and tougher than pine. As I used it I noticed that that regardless of the type of wood I used the jig isn’t a permanent solution but good to use for a limited amount of times. Also things to considered is when sanding down the jig there is also room for error. Sanding could actually shift the angle around slightly depends on how much you take off.
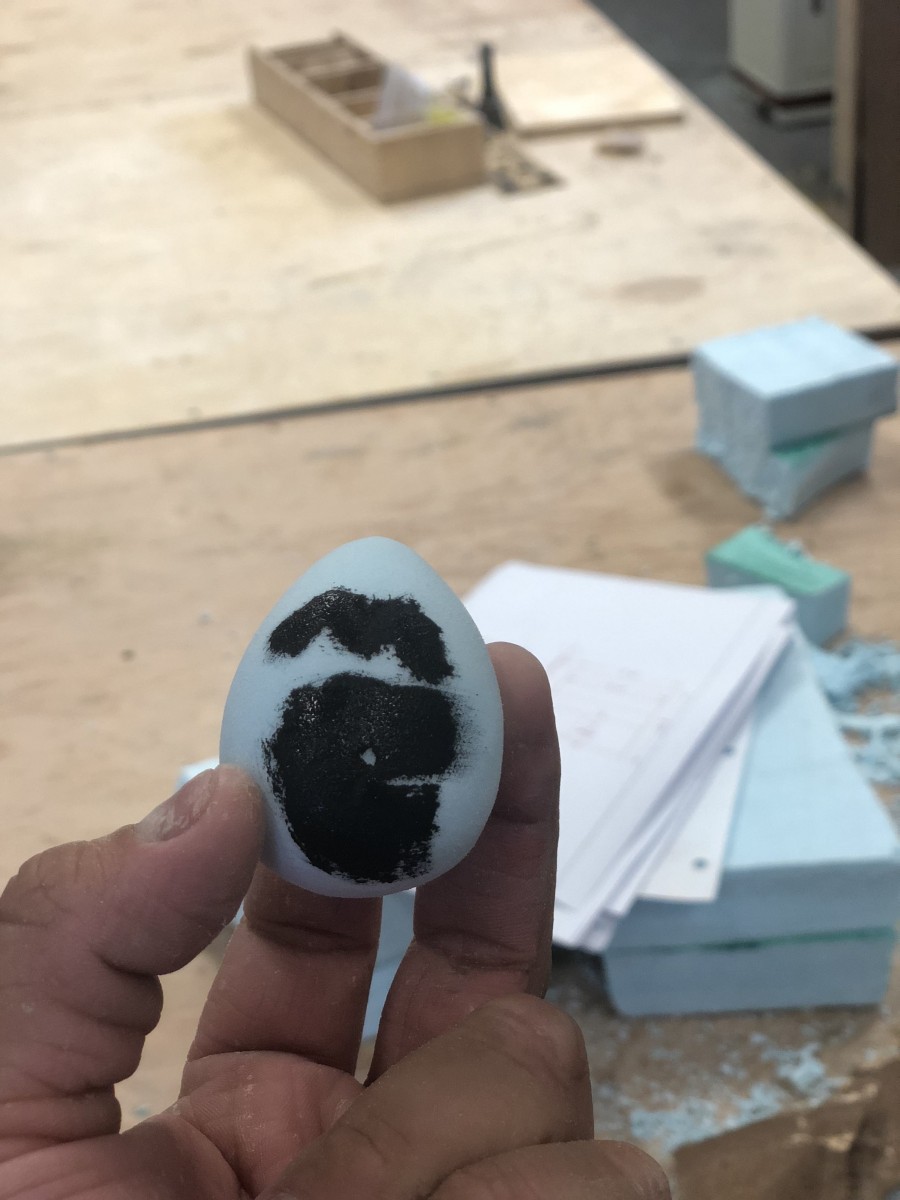
The Styrofoam egg challenge was a fun task to do. Styrofoam is used to mold/shape things to almost anything you can think off. When handling Styrofoam, be careful on how rough you might be since you could easily warp the shape or scuff your piece. Like anything you could remove as much material but you cant add it back. I found it interesting how many people did what they did to achieve the egg look. It’s best to look online for a reference to make sure certain key elements are there. For me, what i decided to do was got the block of Styrofoam into a somewhat decent size before sanding it down. I did shave certain parts of the “egg” and then sand it down with a rough and finishing it off with a finer sandpaper. I did had to consistently rotate the piece around and keep its shape so I kept on sanding everywhere and not focused on one side since it could warp 1 side more than the other. One thing i could say, you must be focused on what you are doing. You could achieve it fast, of course not recommended cause you might overlook some stuff. Taking your time and making sure the shape is what its suppose to be is whats important.