Link to download Powerpoint (Final Project)
Reply
For business owners, the entrance door of their business is as important as breathing. For customers, the front door’s look is as important as the service they get. Hence, Mini Markets acknowledge such fact and for this reason, they are currently trying to renovate every aspect of their business.
The door frame and the door itself was ordered from a local supply located in Bronx, New York. Our job was to remove the old one and install the new one. As you can see in the pictures, a noticeable change occurred after the change of doors.

All the credit goes to De la Cruz Construction
If you haven’t read the posts before this one, please do so – Read ‘Introduction‘
http://www.solidworks.com/
Materials used: Oil-base paint, brushes, masking paper, tape and a heavy-duty scrapper.
As you saw on Part 1, the process for a storefront renovation is very straight-forward. If you use the right equipment and materials, and maintain your eyes open to small details, it is almost a guarantee that your project will be a success. For this specific project, the team worked very hard trying to bring quality into this Mini Market. Below you can find ‘before and after‘ pictures.
All the credit goes to De la Cruz Construction
Would you like to continue reading? Read Part 3
This past summer I faced a very challenging project during the remodeling process of a Deli-Grocery located at the Bronx (New York). I needed to build a small office room from scratch in a basement in a limited time. The office was going to be used by the owner of such business. As one can imagine, I had a lot of tension built up inside me. I knew that I needed to perform at my best; being as careful as possible and paying attention to details. This is because of the responsibilities that I had in addition to the pressure of having my father looking into my progress at the end of each day.
It took me exactly 6 days to build my first office! The process I went through is as follows
After the competition and approval from my dad, we contacted a licensed electrician so that he could install all the necessary outlets. My father was very content with the outcome and as a result he increased my salary. I could honestly say that this has been one of my biggest achievement throughout my whole life. It is to be acknowledged that I am very content with the competition of this project.
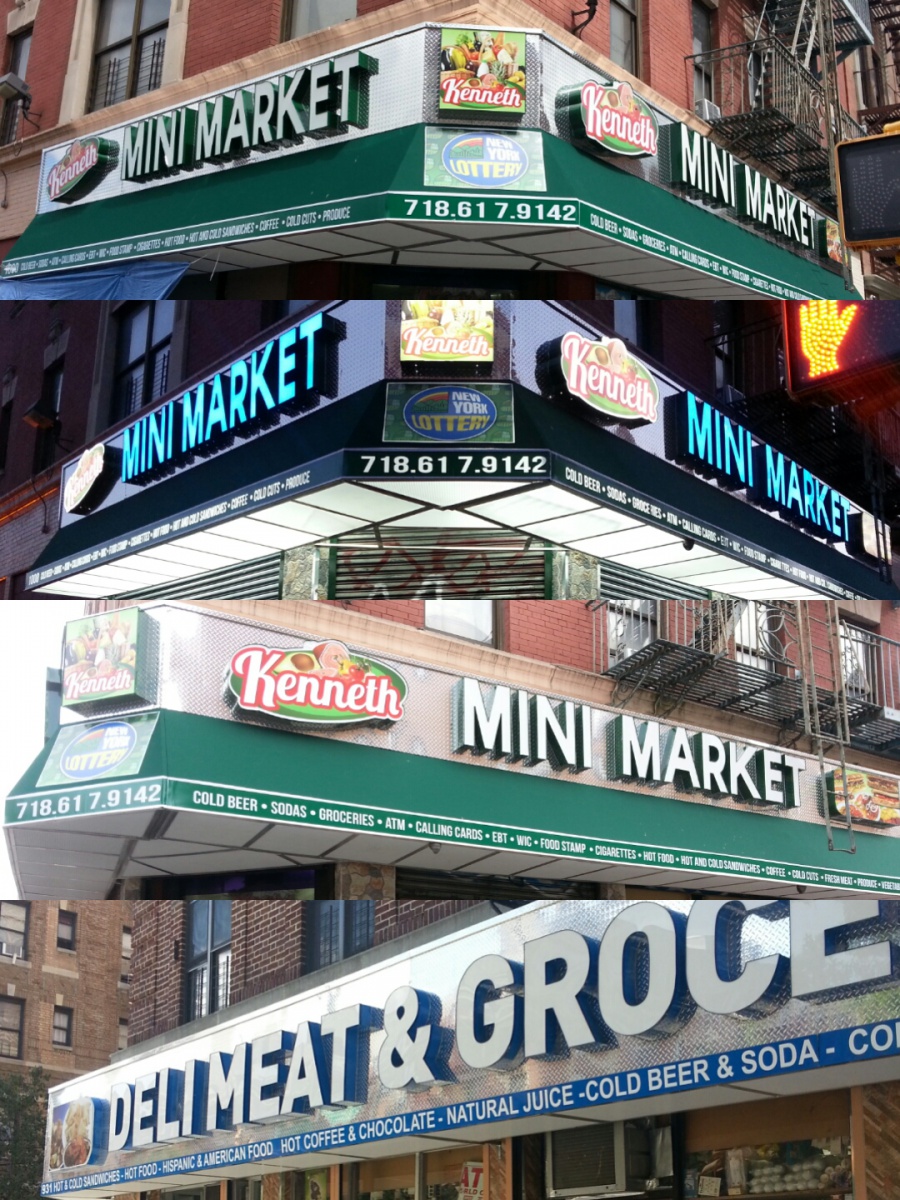
Today, I wrote a guess post on a friend’s blog called “New York Type” where I went in detail about certain similarities that can be found in Light Boxes in NYC Deli-Groceries. The similarities help this type of business to differentiate them from other businesses since they are very eye-catchy and aesthetic. As a result, numerous owners of Deli-Groceries are renovating their business so that they can attract more customers and hoping to increase their sale percentage. Two of the main similarities are as follows:
By Josel De la Cruz (De la Cruz Construction)
To find more information, please read the detailed and informational post on “New York Type“
The Typography used in the signage of a business whether small or big, plays an important part when it comes to attracting costumers and when creating an unique image for your business.
![signs-businesssigns2[1]](https://openlab.citytech.cuny.edu/delacruzconstruction/files/2013/11/signs-businesssigns21.jpg)
Take this signage of Focused Advocacy for example: The contrast of the white with the blue works perfectly; the blue gives a calm yet sophisticated feel to the logo, while the white gives the logo a simple and innovate look. The typeface use for this signage is very simple and bold, again helping achieve the look this company was going for ( Innovate Simplicity). This signage is a great example of how simplicity can help achieve a sophisticated look.
![signs-businesssigns1[1]](https://openlab.citytech.cuny.edu/delacruzconstruction/files/2013/11/signs-businesssigns11.jpg)
Another good example is this signage for Telvent Caseta: The San Serif Font used on this signage creates a modern look. The red color use for the word Telvent helps create an energetic feel, while the black for Caseta creates a balance between both colors. What I like about this signage is how they succesfully used scale for the two different typefaces, and the way the scale interacts with color giving this signage a modern yet energetic look and feel.
About the blogger- Hi, my name is Perla Sanchez and I am currently a junior graphic design student at the NYC college of Technology with a passion for Typography design.You can check out my blog at https://openlab.citytech.cuny.edu/typellustration/.
Materials used: 12″ x 12″ ceramic, powder plaster mix, 5/8″ plexiglass panels, polished aluminum L-Shapes, oil-based paint (gray and green), white colored grout, 1/2″ rubber window frame and 1/2″ x 8′ wood board.
Step 1: Attach wood boards to the existing wall along the desired area with a 0 degree angle. This will allow the ceramic to rest and avoid any vertical movement.
Step 2: Using a grinder and a concrete disc mounted to it, create lines all around the space where the ceramic will be applied. This will allow the plaster to penetrate through the concrete wall and as a result, the ceramics will be held in a stronger manner.
Step 3: Mix the powder plaster with water and start applying it to the wall. Then, pass the spatula through the plaster leaving an uniform thickness of material.
Step 4: Mount one ceramic after the other.
Step 5: With an sponge, apply the white colored grout. Then, wait 30 minutes so that you can proceed to remove the grout with the application of water
Step 6: Put aluminum L-shapes in every corner. This will cover the intersections between two ends of the ceramic.
All the credit goes to De la Cruz Construction
Would you like to continue reading? Read Part 2
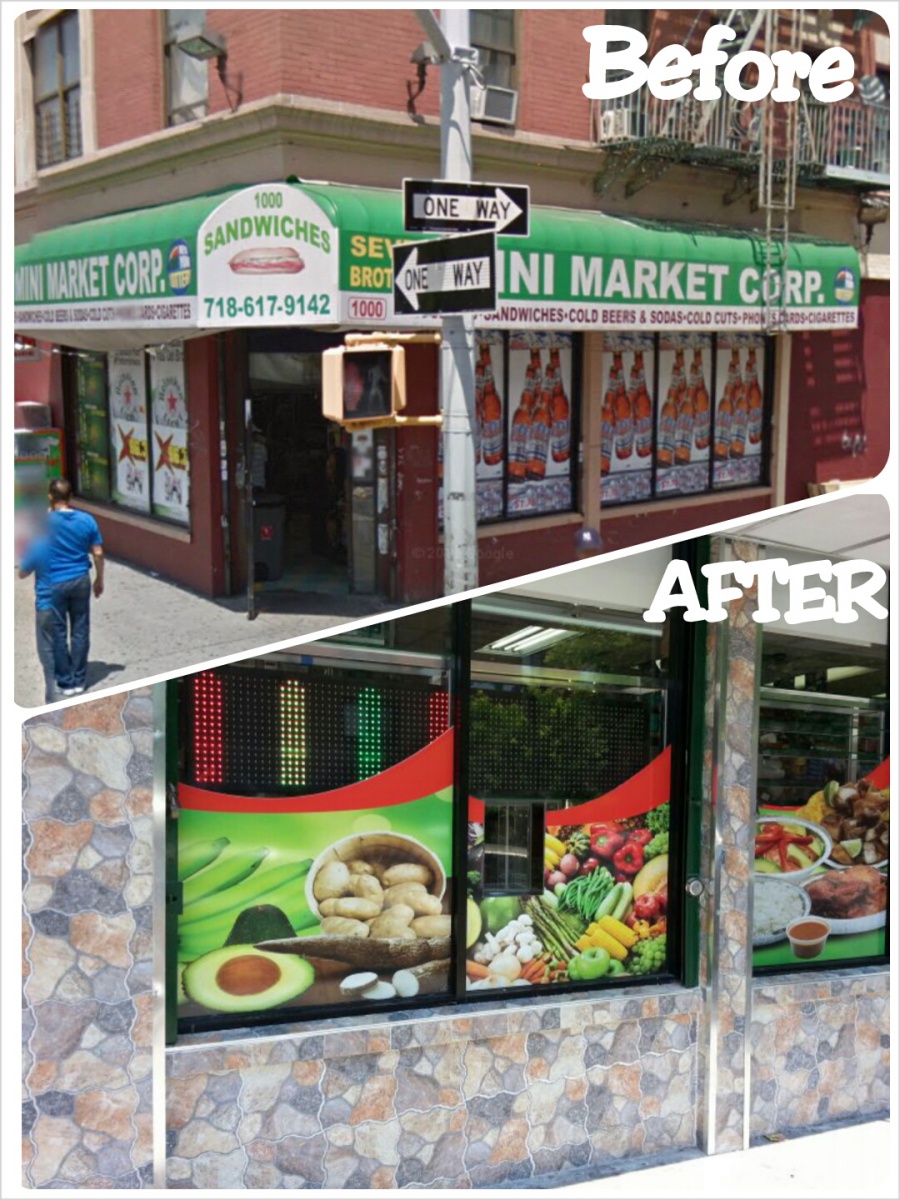
To invest in renovating your business can be one of the most intelligent decision an owner could ever make. By doing so, they will be improving the pedestrian environment and attract more customers. Therefore, it is almost a guarantee that it will benefit the owner economically by bringing them a noticeable return in their investment.
With the intention to help and inspire you, I decided to create a series of posts that will contain pictures of a project done by a company called “De la Cruz Construction“. The completion of this project was a success and I am personally going to talk about the different processes and materials that were used. Below is a ‘before and after’ picture:
Would you like to continue reading? Read Part 1
If at any point you have questions, comments or suggestions, please send me an Email to Joseldelacruz@hotmail.com
Stay tuned!
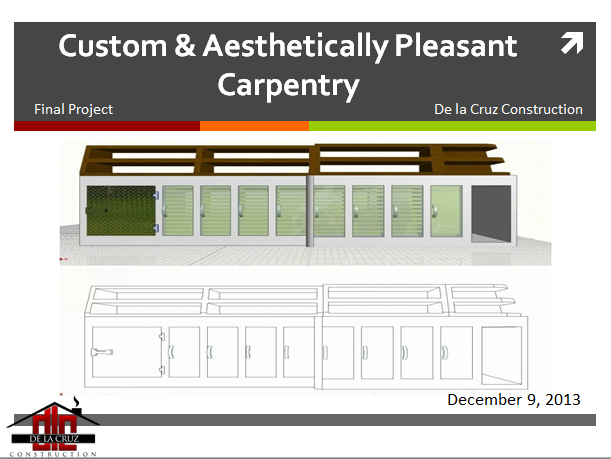
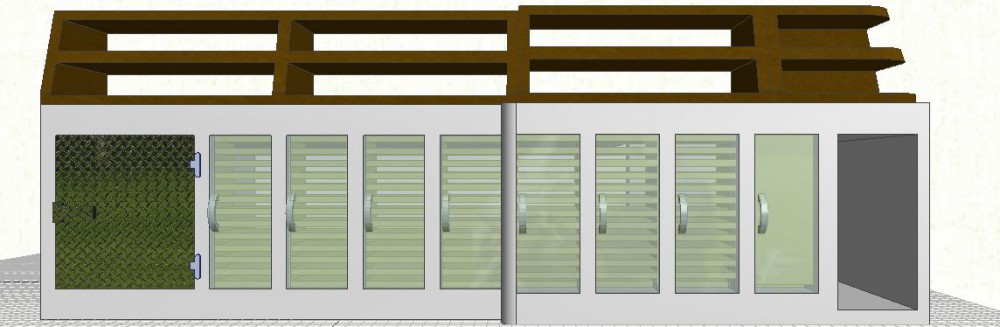
Two semesters ago, I took a college course called “Industrial Design 2” which focused on designing 3D-Model sketches with the use of a software called “ProEngineer“. Two weeks before the semester ended, the professor assigned a final project for which it needed to be as detailed as possible. I decided to challenge myself to design a complex model. I designed a very aesthetic boat.

Designed by Josel De la Cruz
Furthermore, I presented this masterpiece in front of the class and my professor loved every part of it. After a round of applause and a lot of smiles, my professor told me “To be honest, that has been one of the best projects I have seen throughout this passed years“.
The OpenLab is an open-source, digital platform designed to support teaching and learning at City Tech (New York City College of Technology), and to promote student and faculty engagement in the intellectual and social life of the college community.

