Specifications
“The specific attributes of the robot you build will depend slightly on the type of electronics and motors you buy for the system. The numbers shown below are for the version of the robot that contains exactly the parts that we suggest in our build documents and parts list. Below, you can see which parts could be changed for which spec upgrades.”
“Again, the above statistics depend on which components you select when buying parts. One potential change is for the motors; you can, for example, select higher RPM motors (to drive your rover faster) at the sacrifice of max stall torque, which would potentially limit your rover’s ability to climb. A selection of motors that would integrate easily with the rest of the suggested rover design can be found at Motor selection sheet, where any of the 12V motors would work easily in the robot. Note, however, that it is important to also asses the electrical current draw and make sure that all the electronics and battery can supply the power required for any change in motors.”
Features
“This rover is designed to function similarly to the 6 wheel rover designs on Mars and employs a few of the major driving mechanics that the mars rovers use to traverse rocky surfaces:
- Rocker-Bogie: The Rocker-Bogie suspension system allows all 6 wheels to continually be in contact with the ground while climbing over obstacles
- Differential Pivot: Allows weight to be mechanically offloaded from one side of the rover to the other while climbing
- 6-Wheel Ackerman Steering: Driving and steering/turning mechanism that governs where the wheels point and how fast each of them will move.
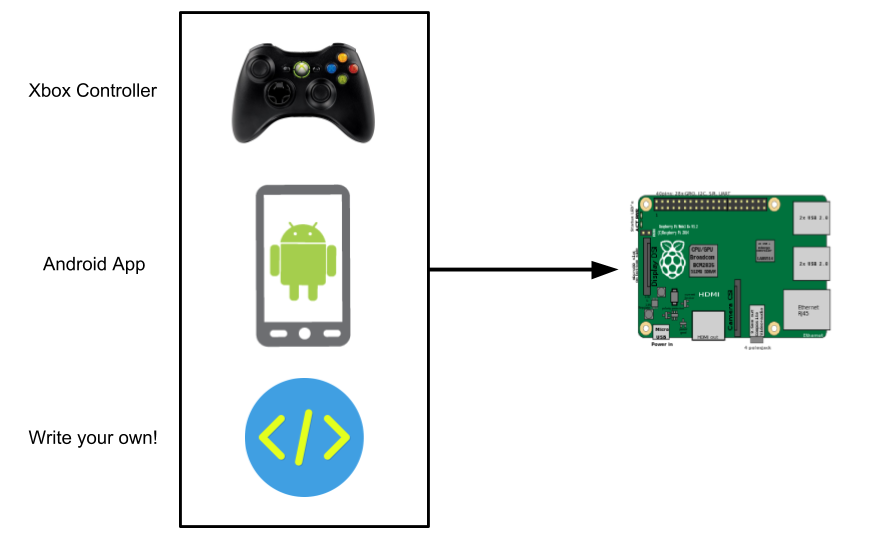
We chose a Raspberry Pi to be the “brain” of this rover for its versatility, accessibility, simplicity, and ability to add and upgrade your own modifications. Any method with which you can communicate with a Raspberry Pi (bluetooth, WiFi, USB devices, etc) can be interfaced into the control system of the robot.”
“In addition, here are the open communication ports and hardware on the Raspberry Pi:
- 4 USB ports (3 if using Xbox controller)
- RPi Camera port
- 1 I2C Bus (0 if using LED Matrix screen)
- 2 SPI Bus (1 if using LED Matrix screen)
- 3.5mm Audio Jack
- 13 GPIO pins (6 if using LED Matrix screen)
Using the above ports, you could theoretically drive the rover autonomously from the camera, via a USB dongle attached to anything (your own video game controller, a USB microphone, or many others… be creative!), or through any interface using the Pi’s GPIO ports (distance sensors, accelerometers, and much more). We’ve only given you two simple ways to control the rover to start… we want you to come up with even more!
For the power system of the rover, there is also ample spare power which can be used for your own addons and upgrades. See the Electrical subsystem documentation for more specific details.”


Recent Comments