Picture from JPL
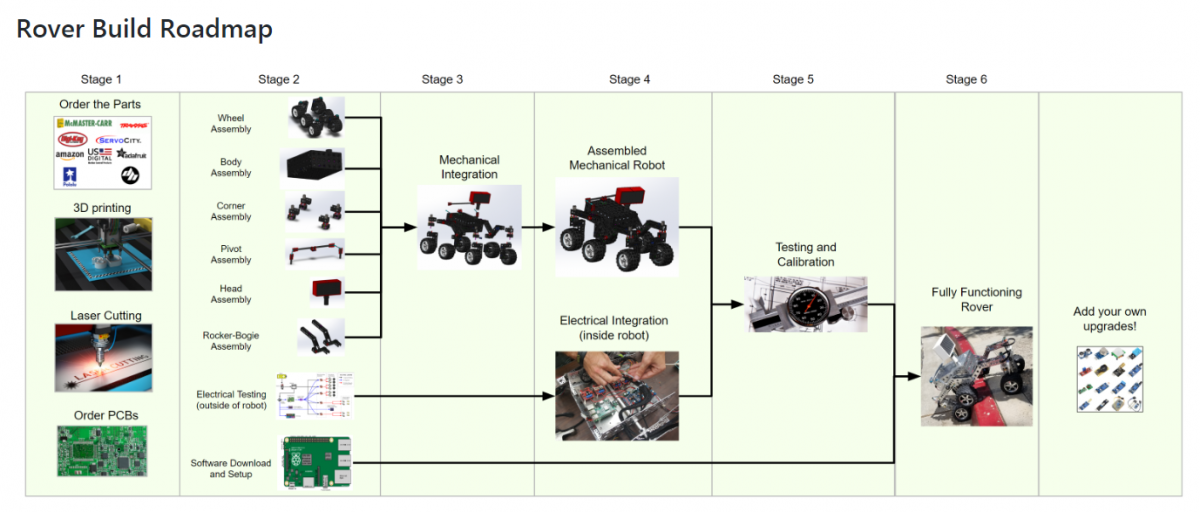
“Above is an example roadmap of how you can build the rover and which parts of the build are dependant on the other sections. It is broken down into 5 stages:
- Stage 1: Start getting all the parts!
- Stage 2: Once you have all the parts, everything in stage 2 can be completed in parallel. It is highly recommended to start on the electrical testing of components outside the robot before doing any electrical work inside the completed robot body. You can also work on the software at any stage between here and the end.
- Stage 3: During stage 3, the mechanical subassemblies should all be assembled and start to be integrated together. There should be some amount of testing done on the electrical system, as well as some progress on the software.
- Stage 4: The rover is mechanically built and all subassemblies integrated together. During stage 4, you begin the integration of the electrical components and the various power and data wires that run throughout the rover.
- Stage 5: Once the electronics are all powered and communicating, you need to test and calibrate all the motors in the system.
- Stage 6: After everything has been tested and calibrated and the software is up and running, the robot will be fully functioning and built!
- Stage 7: Add your own upgrades! We chose Raspberry Pi as the brain of the project so that it should be easy to add, change, and upgrade to build exciting things on top of this already cool robot. Some upgrade ideas to get you brainstorming: sonar for collision detection, IMU for orientation / closed-loop driving / obstacle mapping, camera for object identification and tracking, sensor packages (temperature, pressure, humidity), solar panels, or even a robotic arm!
Happy building!!”


Recent Comments