In-class exercises based on Simple Forms post.
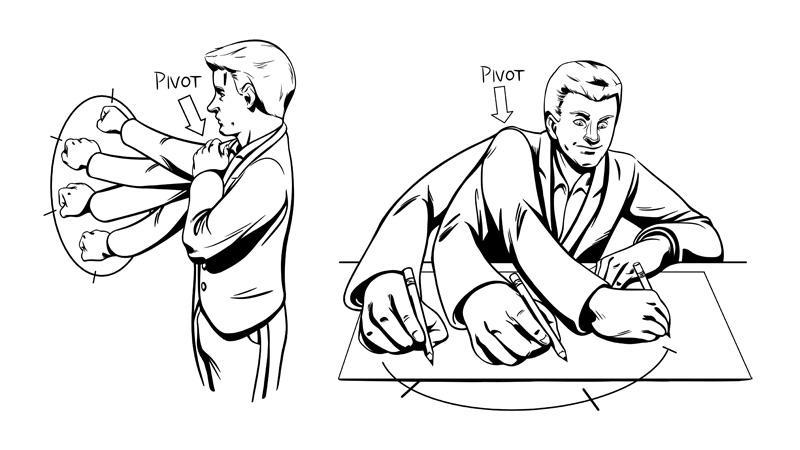
- Draw from the shoulder.
Grab your pencil and do some circles with your arm, pivoting from the shoulder. Get a feel for it.
2. Lines
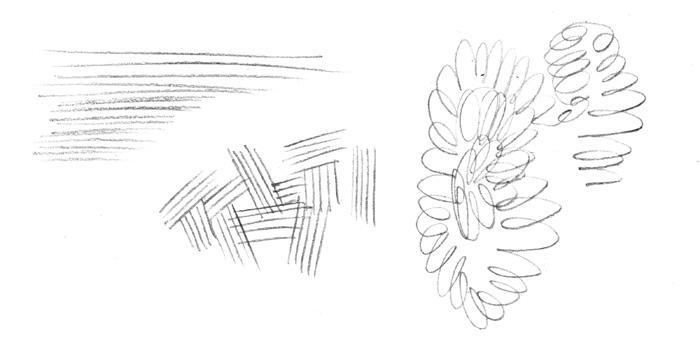
- Start by drawing a series of parallel lines equally spaced. Draw from your shoulder, and don’t focus on the line as you make it, focus on the motion.
- Next, draw a group of offset parallel lines. Draw about four or five parallel lines, then draw another grouping rotated in a random direction. Then do it again. Keep the offset groupings close to one another, touching if possible.
- The final variation is an unbroken, looping line. As you draw, alter the trajectory of the line while maintaining regular loops. Try and think about the line as an object that exists in three-dimensional space.
3. Circles
- Try to produce a curve that is completely equidistant from an imagined center point at the heart of the circle. You may be tempted to draw quickly, which is fine. However, you might find it beneficial to actually slow down and make your mark more deliberately. Don’t worry if your circle isn’t perfect.
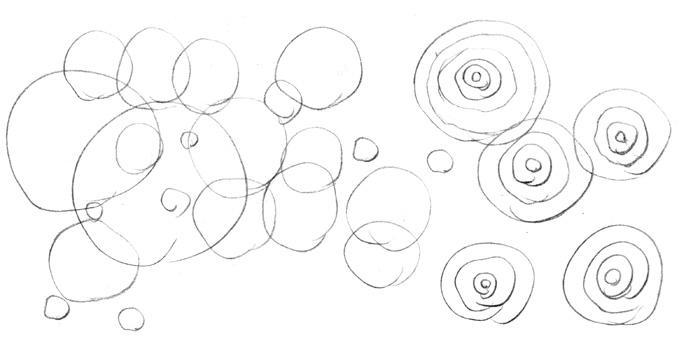
- Next, draw many circles of vastly different sizes. It’s fine if they overlap. You may notice that by jumping at random between drawing small circles and large ones that your control of the motion increases over time
- Finally, try drawing concentric circles. You’ve already practiced size control so your focus should be on equal spacing between the layers of circles as you draw. Don’t get discouraged if you have difficulty- it’s a challenging exercise!
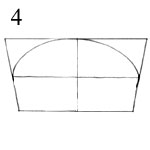
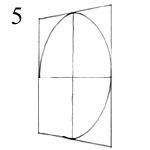
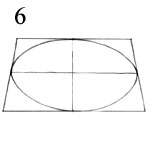
4. Ovals
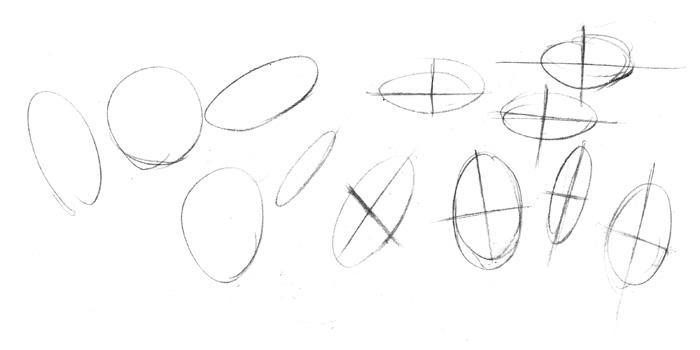
Drawing an oval is just like drawing a circle except you make two “sides” closer in distance to the imagined center. It’s best that you think of ovals as circles rotated in space.
- Draw multiple ovals of varying sizes and widths. Bisect your circle between it’s thinnest and thickest axes. This will show you the center point and the change in spacing as the far edge of the circle recedes in space.
- You can also try drawing squares in space, bisect them, and draw ellipses.
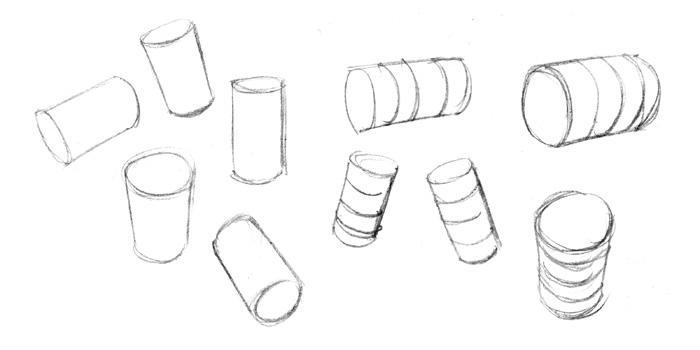
5. Cylinders
- Begin by drawing an oval (the thickness of the oval is up to you). This is the end of the cylinder that faces you. Like a can of soup!
- Next, add two lines for the sides of the cylinder.
- The lines of the “can” will not be parallel unless you are looking directly from the side. The more extreme the pitch of the can away from you, the sharper the angle of the lines that form the sides of the can.
- The last element is a curve that terminates the other end of the cylinder.
- Practice drawing many cylinders of varying sizes. Change the pitch of the can by changing the appearance of the facing side (oval width).
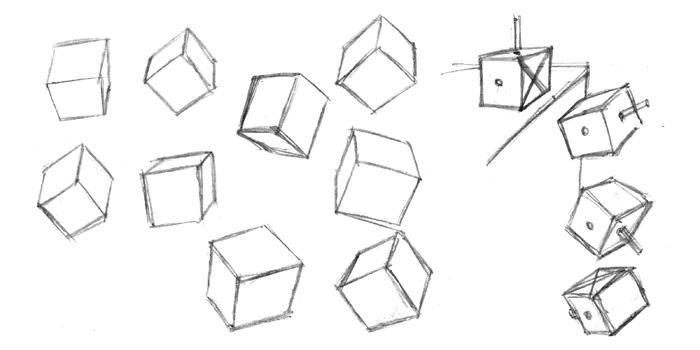
6. Cubes
- Start by drawing a square turned away from you in space. Regardless of the angle of the side, one edge will be closer to you than the rest. Use that as your starting point.
- Draw the remaining four edges that form the square and remember that parallel lines actually appear to converge on an imaginary point in the background. Edges that are farther away from you will appear smaller than edges that are closer to you.
7. Compound Objects
Draw several groupings of basic shapes that relate to one another in space. Whereas in previous exercises it was fine to draw through your sketches, try to avoid doing so now (it defeats the purpose).
Choose a variety of shapes- spheres, cubes, cylinders- and rotate them various ways before drawing them in overlapping positions. Be deliberate and remember that as objects recede from you they get smaller. More than anything this is a thinking exercise.


Leave a Reply