With finals week fast approaching, most of us don’t have time to attend a workshop to figure out the inner workings of the e-sims successor known as CUNYFirst. Since we really don’t have a choice in the matter, here’s a quick tutorial on registering for classes.
I.GETTING INTO CUNYFIRST
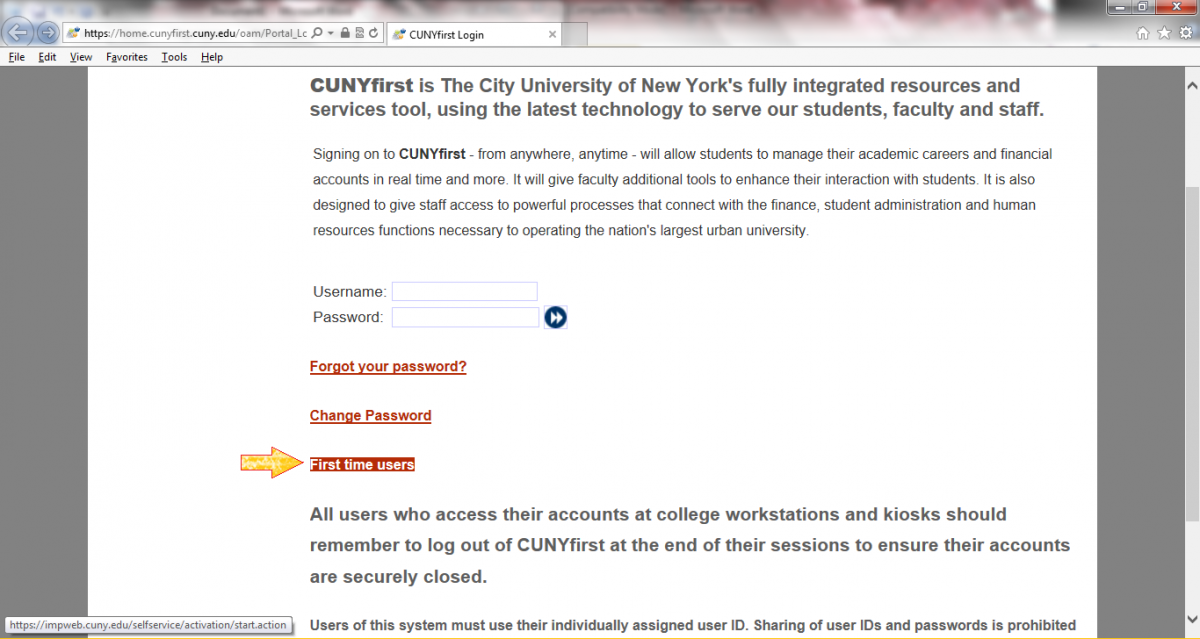
First and foremost, you have to have a CUNYFirst account. If you don’t already have one, go to https://home.cunyfirst.cuny.edu/oam/Portal_Login1.html and click First Time Users.
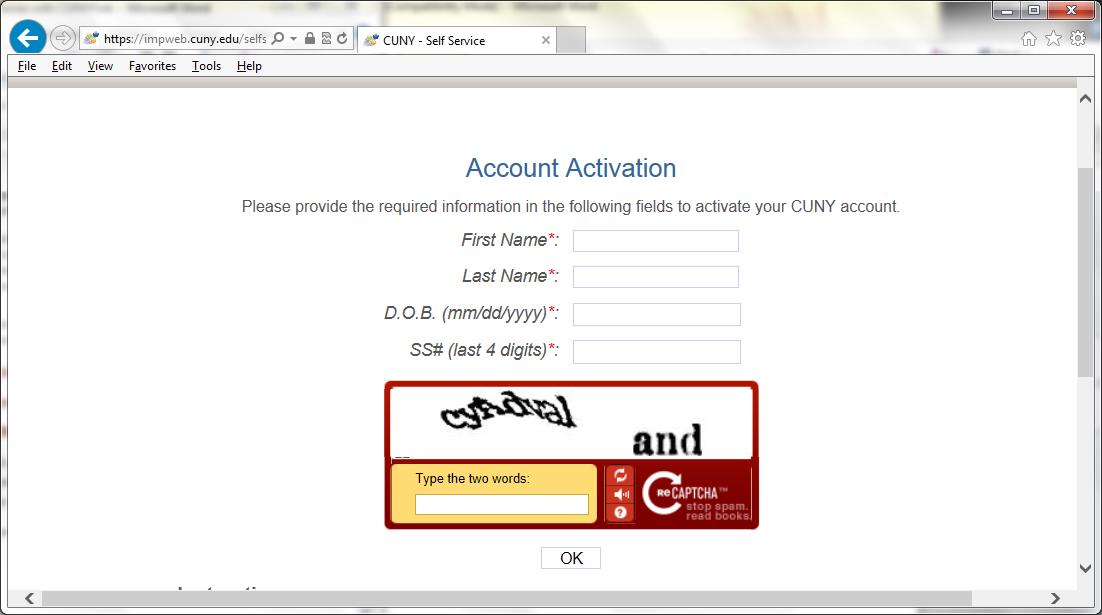
From there, fill in the required fields – First name, Last name last 4 of social, etc.
From there, follow the instructions on your screen to activate your account.
Once you’re set up with an account, go back to the login page: https://home.cunyfirst.cuny.edu/oam/Portal_Login1.html
Enter your username and password and hit the sign in button.
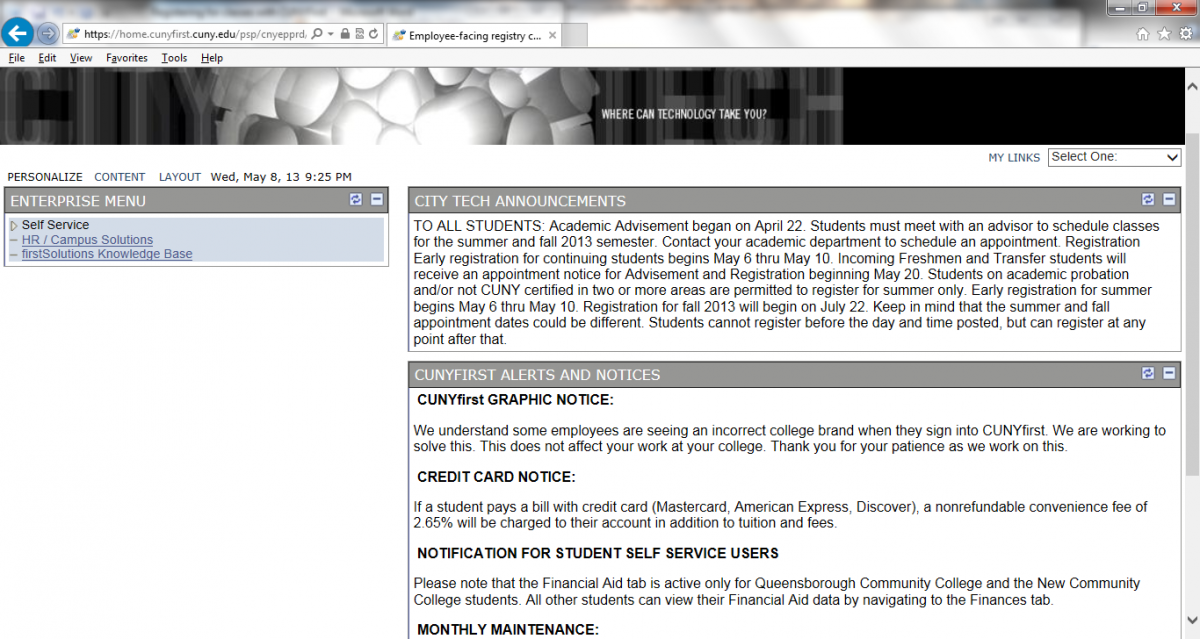
You’ll land on the home page of CUNYFirst pictured below:
II. COURSE PLANNING (Optional)
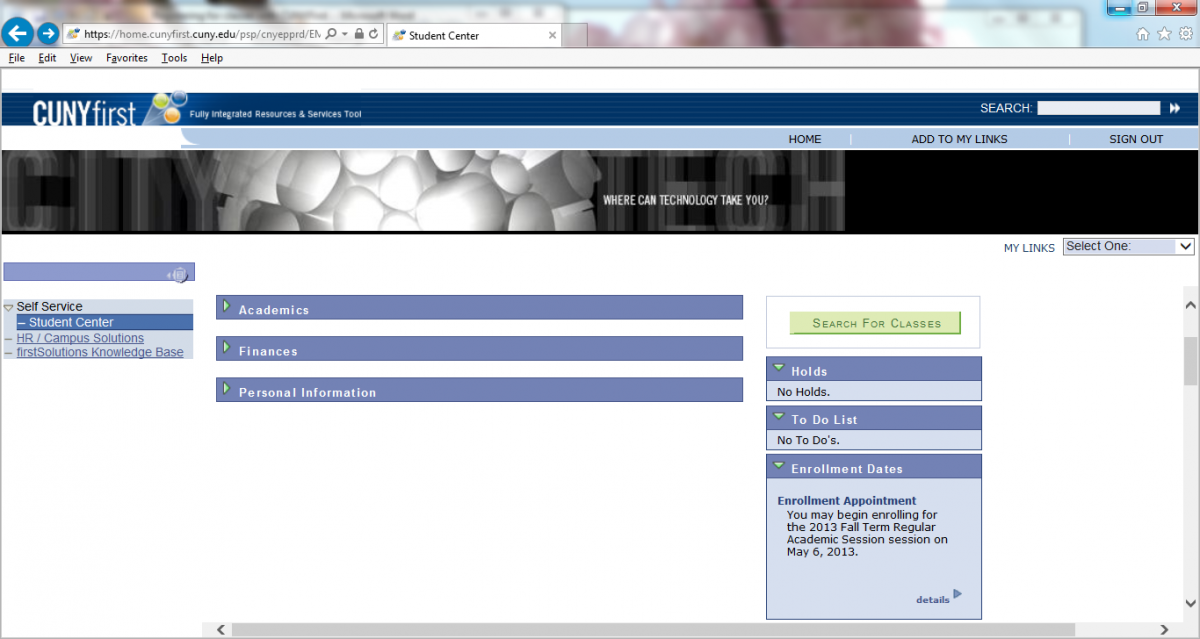
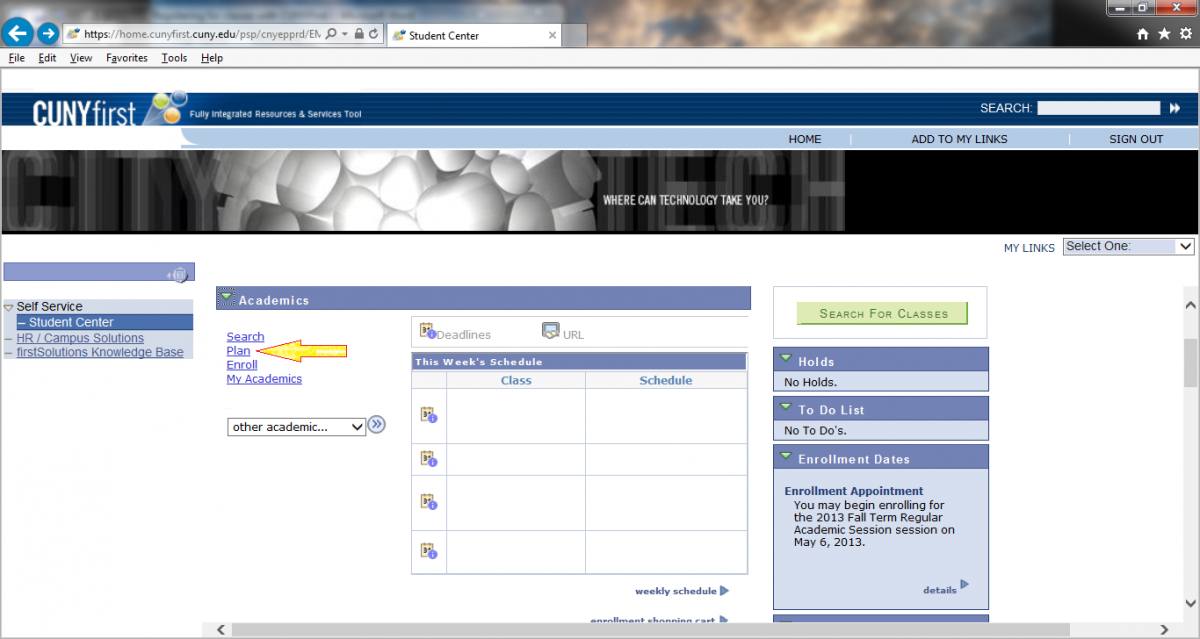
Click on the arrow that says ‘Self Service’ to extend the menu and click on ‘Student Center’.
The student center is sectioned off into 3 sections main: Academics (which will list the classes you’re enrolled in), Finances (which lists and gives links to financial aid, awards, your account status and loan processing forms), and your personal information (which lists your home address, mailing address, phone number and campus email). On the right side of the page hold information about your academic account like your enrollment appointment, you academic advisor and links to order your transcript, view your degree audit, your FAFSA and your tuition payment plan.
To begin registration, go to the Academics tab and click the green arrow to show the entire section.
Click Plan.
NOTE: You can skip planning and go straight to enrollment, but I don’t recommend it. Unlike e-sims, CUNYFirst adds classes to a shopping cart before you can enroll so you will at some point, still have to go through the planning process.
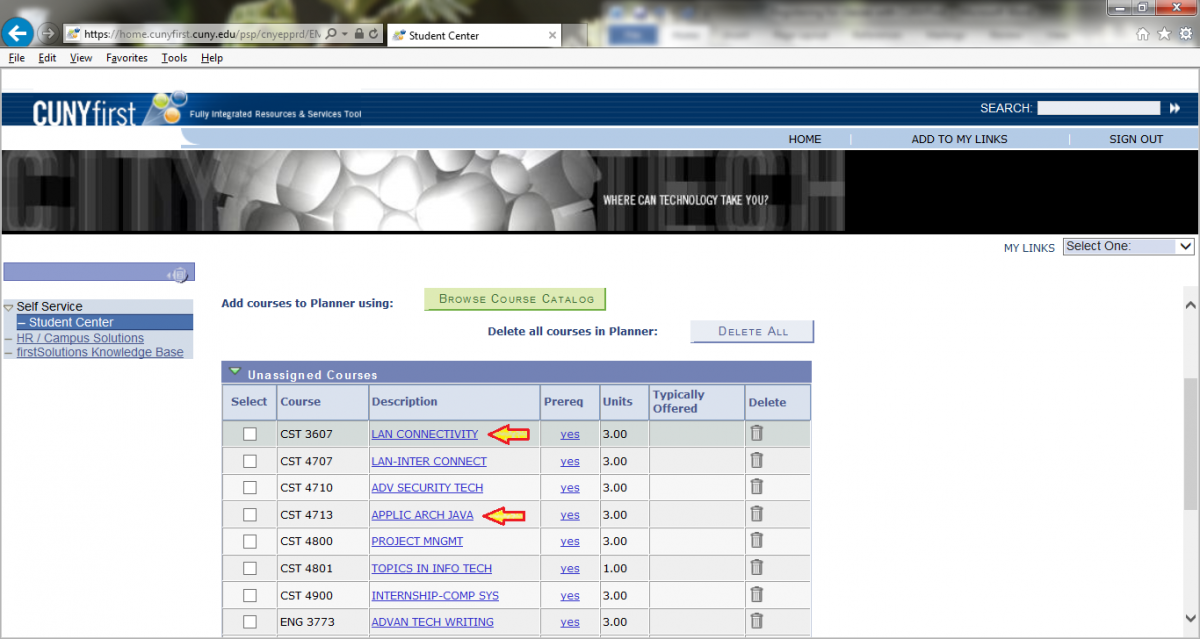
Once you click plan, the My Planner page will come up. Once you’ve selected the courses you plan to take, they will appear on this page. Adding courses to your planner is like making a favorites list. It gives you quick access to information on the courses you need.
To add courses to your planner, begin by clicking “Browse Course Catalog”.
Courses on this page are sorted alphabetically by department Consult your degree audit via CUNY Portal to figure out which courses you need to take.
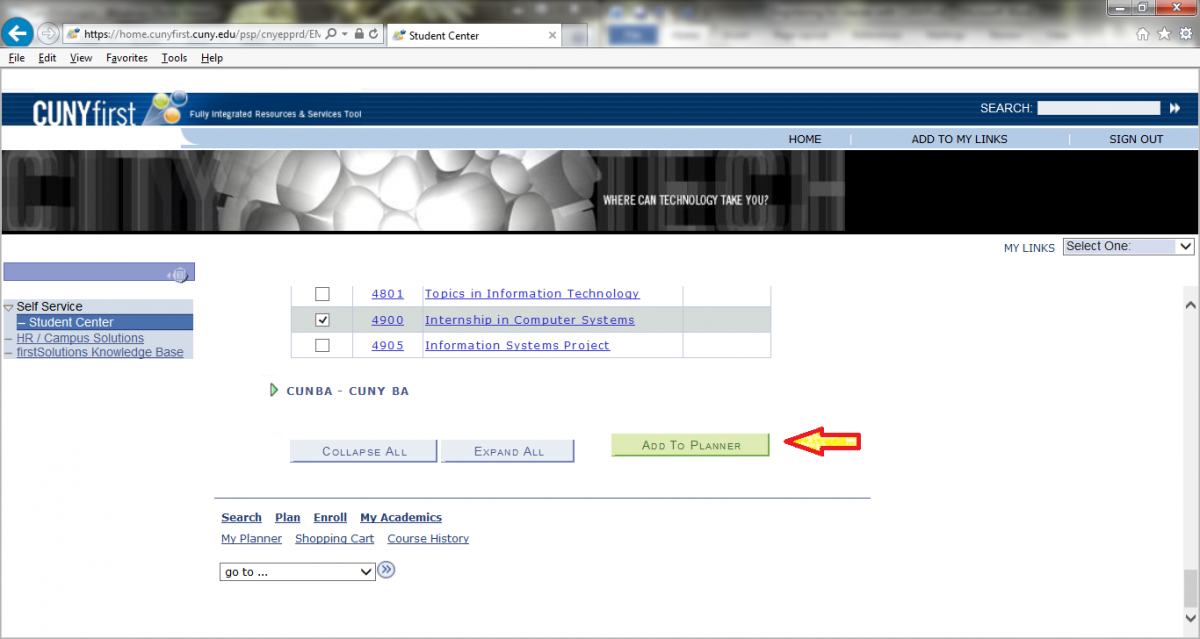
Click the arrow next to the department to show all the classes available. Then select the classes you want to add to your course planner. You can either add the courses you need for the rest of your degree, or just the ones for the upcoming semester. When you’re done selecting, scroll down to the bottom of the page and click “Add to Planner”.
Next you need to add your courses to your shopping cart. Return to the Self Service page and click plan. Click on the description link of the course you want to take and browse through the available sections to
Once you’ve added everything to your course planner, go back to the Self Service page and click enroll.
You will then be asked to select a term. If you’re signing up for summer classes, select summer term and if you’re registering for fall classes, select fall term then click continue.
From here click the green view class sections.
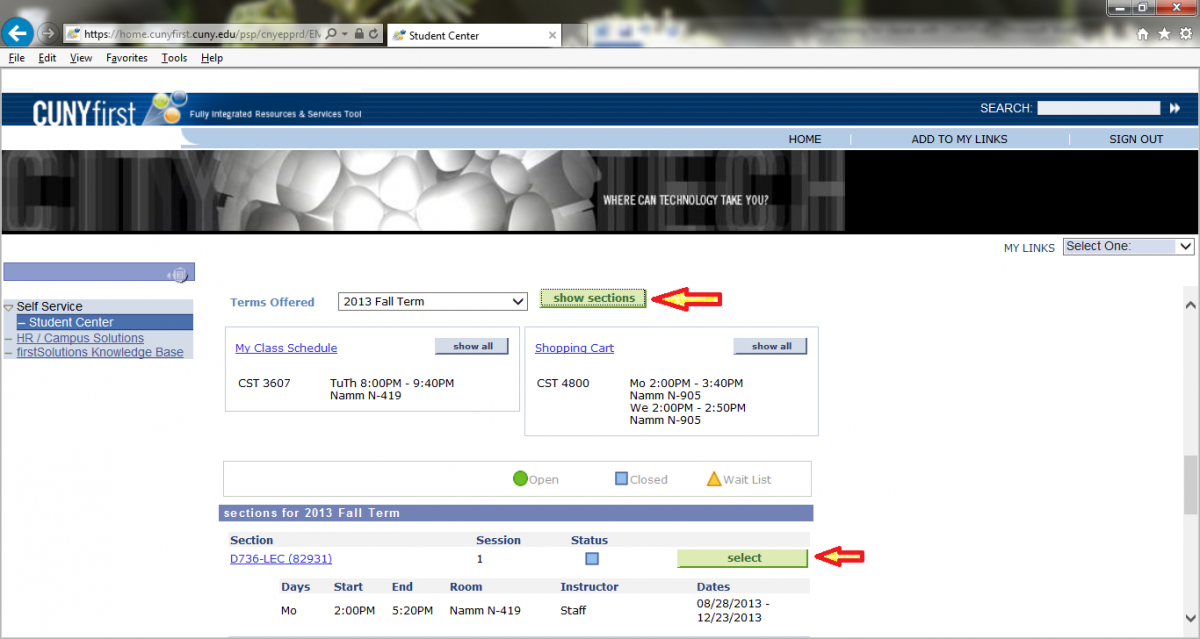
Make sure you have the right semester selected before you click the green show sections button. When you find a section that you want to take, click ‘select’ and then ‘next’ and you’ll see a message that says the class has been added to your cart.
III. ENROLLMENT
From the above page, or from the Student Center page, now click enroll.
Select your term and click continue.
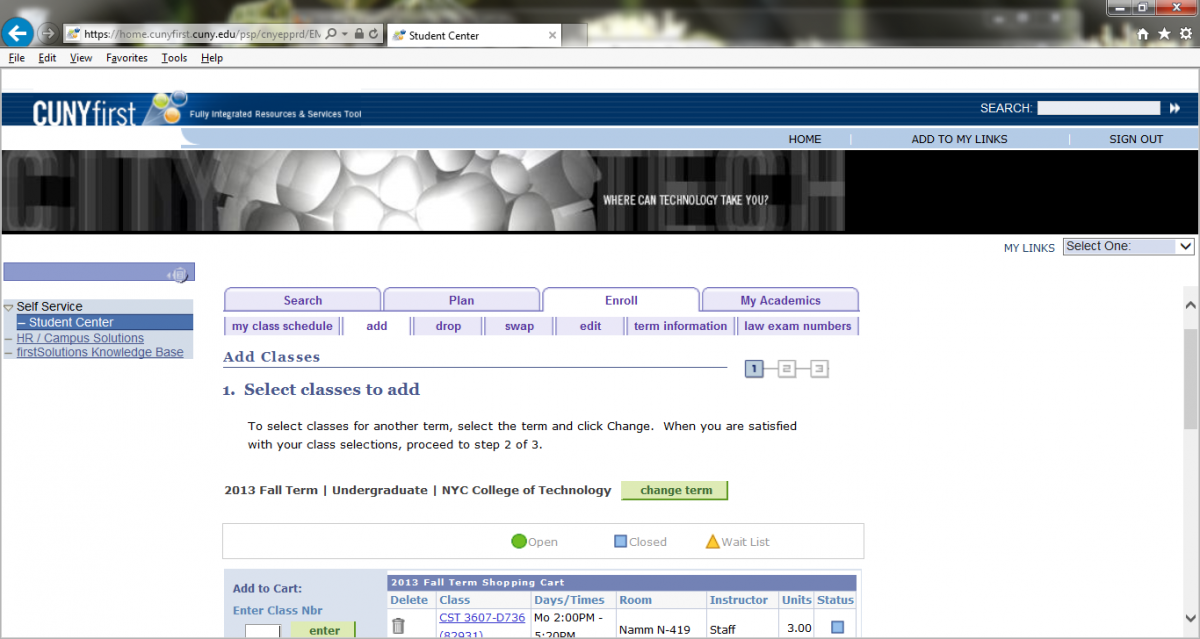
Click on the ‘add’ tab underneath enroll and double check the courses and times listed. Once you’re satisfied with your schedule, scroll down and click “Procced to Step 2 of 3”.
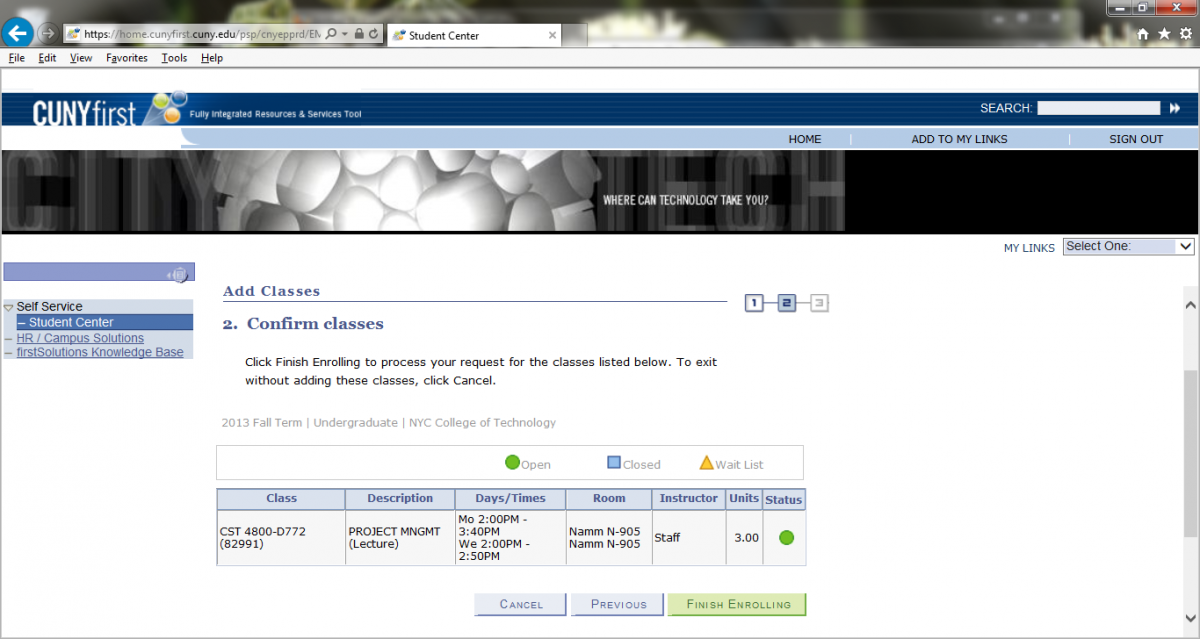
Confirm that these are the classes and sections that you want and click ‘Finish Enrolling’ and you’re done!






Greetings! Very useful advice within this post! It is the little changes that produce the largest changes. Many thanks for sharing!