Try-Unique Cycle

Try-Unique Cycle is a product developed in Senior Design Project class. Professor Angran Xiao, elected me as the team manager consisting of 19 members to work on one single project as a team. As the team manager, I had a lot of responsibilities. For instances, I had to develop, communicate, and enforce a schedule; divide each team members into three groups- they were design team, manufacturing team, and documentation team; assign tasks to each members (depending on their teams, strengths, and weaknesses); communicate regularly with team leaders and team members, etc.

Introduction: The purpose is to design and build a functional tricycle for use in the Human Powered Vehicle Challenge (HPVC). Human-powered transport is often the only type available in underdeveloped countries and other inaccessible parts of the world. If well designed, it can be an increasingly viable form of sustainable transportation for a majority of people. A project plan will be developed and submitted to the project Sponsor for approval. The project plan will include: scope statement; schedule; cost estimate; budget; and provisions for scope, resource, schedule, communications, quality, risk, procurement, and project control. The challenge is to develop a vehicle that is capable of satisfying all the rules yet preform efficiently and well enough for the scored obstacles in the event. Our design will entail a different approach than many other teams. With minimal funding, resources and teammates, compared to other teams, we will design our human powered vehicle accordingly. Our product will be able to accommodate riders up to 250lbs from 5 feet to 6’2” tall and be capable of being brought on a commercial airline for traveling.

Design Process: The design idea was decided on a decision matrix table that display the grading of each concept and its effectiveness in each category. ‘Cost’ is the one that resonates with the consumers’ budget. If the price of the product is too high, it limits the customer base and the amount of retailers that would be willing to hold a floor model with the hope to eventually sell. Due to this element ‘Marketability’ had to be included in the category listing. This not only factors in price but also quality, features, and other major points about such a trike in its class. ‘Durability’ was placed to take note of how long the product stays in great working condition, as well as how it deteriorates over time with use. We don’t want to sell an expensive product that has to be completely replaced frequently. It has to be able to withstand the wear it will be subjected to in its use. ‘Safety’ is included to touch upon retaining the well being of the customer, even in the event that something happens to disable the trike; the rider needs to be kept safe and protected. ‘Mobility’ is really important in this product, because a bike is supposed to be one of the freeing methods of traveling or transportation in terms of being able to move at whatever pace you feel comfortable with. The rider is the engine and heart of this product. Our motive is to sell a lifelong investment that enriches the user’s life, not a costly expense that does not reap a benefit. Then based on the decision matrix, we narrowed the design to two types of three wheeled vehicles: Delta and Tadpole. We also analyzed how each design holds up in these features (stability, braking, turning, etc.) Then begin the CAD works (draft and create parts on solidworks) and documentation works (draft the HPVC report).

Manufacturing: Before we begin the manufacturing process, the conceptual design for the project finite element analysis (FEA) testing must be done. FEA is a computer based method of simulating and analyzing the behavior of engineering structures and components under a variety of conditions. It is an advanced engineering tool that is used in design to augment experimental testing. Real world forces will be applied to the material. After running the program, we observed how the pipe react to the static load then begin the manufacturing process.

Machines used: Johnson® Horizontal BandSaw, Powermatic®-Drill Press, Cincinnati®-Surface Grinder, Bridgeport®-Vertical mill, Clausing®-Vertical Mill,Clausing®-Horizontal lather, Powermatic® -Vertical Bandsaw, Dimension® sst -3s BP machine, Miller®-AC/DC Arc welder, and Fortus® 400mc-3D BP machine.

Delivery: The final product was delivered on the last day of class. Final presentation was prepared and every team members got a chance to presented about their part in front of everyone in the department.


Entire final report here: Final Report.
trike

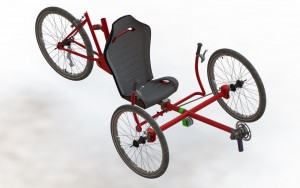
Final CAD model


prototype

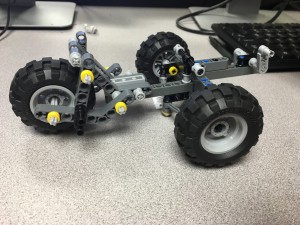
Prototype


final trike

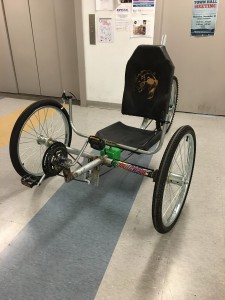
Final physical model


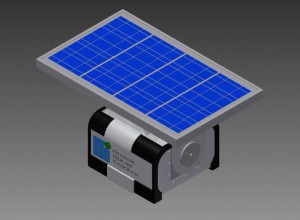
Global Solar Tracker

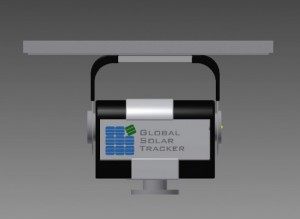
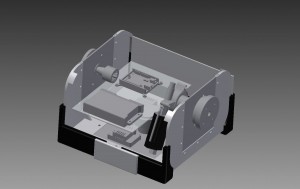
Global Solar Tracker (GST) is the product developed in Cad Plant Layout class of the Industrial Design Department. The objective of this group project is to design and fabricate a tilting mechanism for the solar powered street lights that can tilt the solar panel towards the sun. Our hope is to create a housing component that will hold all the electronics (batteries, motors, micro-controllers, etc.), while keeping the weight of these components from affecting the weight of the panel, and still supporting it during inclement weather. 

Challenges: Most solar panels used in solar powered street lights are attached to the post with a fixed angle. As the Earth circles the sun each day, only portions of the sunlight can shine on the solar panel directly. Most of the time, the solar panel is at an angle with the sun. As a result, the solar panel does not take advantage of the solar energy emitted from the sun efficiently. 

Benefits of two axis: When solar panels are perpendicular to the sun or the other light source, the intensity of the light is absorbed more completely. However, the dual-axis sun tracker can be even more efficient as it can move horizontally and vertically to capture all the available sunlight. Additionally, the sun tracker keep the solar panels pointed at the sun all the times, and the voltage and power stays higher throughout the day. 

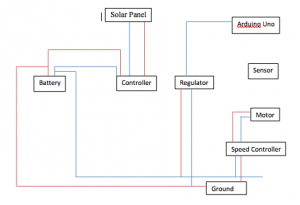
Wiring Diagram:

Screen Shot 2015-04-09 at 10.47.14 PM

                    Wiring Diagram

Components: Genesis NP- 18-12B 12V Battery(2), Desno-12V Window Motors (2),  Sunforce 8.5m Charge Controller (1), Light Sensors (4), Arduino-Uno (1), TALON SR Speed Controller (2), Ricon 12-5V Regulator (1)

Manufactured/ Designed Parts: Sensor holder, Bearings (3), Shafts (3), Different kinds of spacers(5), Plexi side and top, Rotation Base Plate, Rotation Base, Mount Plate, Logo Side, Motor Mount, Gears (2), Corner Brace (2), Caps (2), Brace Connectors (2), Bottom base Connectors (2), Box Base4 (2), Box Base4 Side, Box Base4 Side Motor, Box Base4 Motor, Bottom Brace (2), Arm Top Plate, Arm Side Plate(4), Arm Ear_Left, Arm Ear_ Right, Arm Bends (2), Arduino Holder

Finished Product: 

Isometric View

               Isometric View

                    Front View

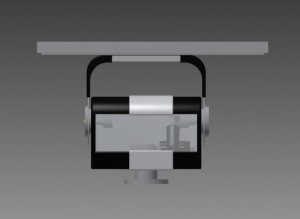
                    Back View

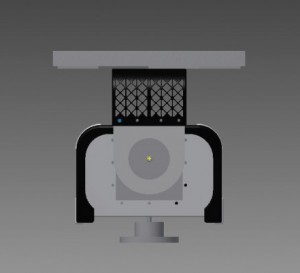
                    Side View

inner view

                     Inner View 

Continue reading

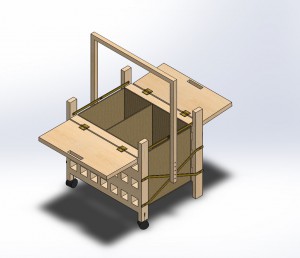
D.T.S Designs- Laundry Basket

Abstract: The purpose of creating a multifunctional laundry basket is for people to adjust to something that is more convenient when it comes to doing laundry. My team and I have done our research and discovered that most people that do laundry, either at home or a Laundromat, normally use the single laundry basket or bag to place their dirty clothes in, and then clean clothes after they are finished. D.T.S designs have come up with a solution to fix most people’s problems, by creating a laundry basket that will be designed for an all-in-one purpose.

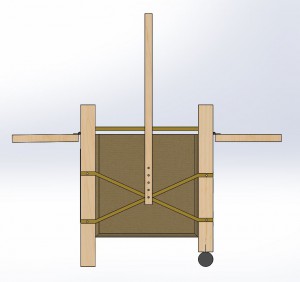
Introduction: Our objective plan is to create and design a multifunctional laundry basket to fit everyone’s daily needs; from having a simple laundry basket which is used to place unclean/clean clothes into it; compared to something that is an all in one purpose. D.T.S Designs has come up with a great idea that can be more convenient for you! We have transformed a simple laundry basket, to a multifunctional laundry basket, which includes: wheels – better movement, one large hamper separating into two- it can hold your white and color clothes, a kangaroo sized pouch – to hold your detergents, a foldable axis – to simply place into small places, adjustable rods – to hang clothes, and a flat table top – for you to fold your clothes. Our product will blow your mind to know that you have an all-in-one basket to make your weekly routine laundry day much easier. We want to make sure that the design is fully tested and it is ready to be published on the market without any mechanical failures that could cause injuries. We also designed the front and back layers of the laundry basket to be made out of maple wood, and the bags are made from cotton.

Project Boundaries: To make sure it’s fast and safe to use. And that it’s able to support a large amount of clothes. We also want to make sure that its environmental friendly by using 80% or recycled resources to have the designed mass produced.

Target Market: Anyone who does laundry in their- houses, apartments, laundromats, hospitals, dorms, hotels

Design: For our design, we want to primarily catch local Laundromats attentions because they would be the first set of companies to purchase and test the product out and ship them to the local laundromats. We figured it would be a great idea to let the local laundromats test them out first, therefore people in the neighborhoods could get a better hands on feel towards them.

Screen Shot 2015-04-10 at 3.32.08 PM

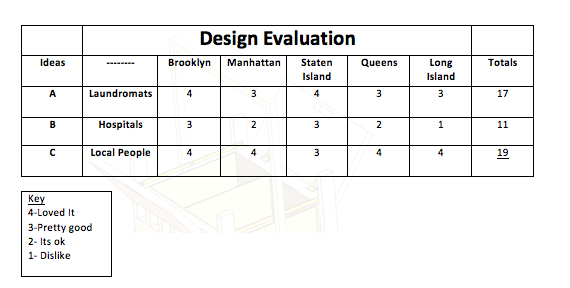
By understanding our Design Evaluation, our first idea we tried was to release our product in the 5 boroughs in New York. As you can see Laundromats have a scale number of 17 which is good level. But when we released to the hospital they were a scale number of 11, they were the lowest counted some hospitals requested a better material and all attachable wheels for better movement. The last scale rating was local people, we found surprising that it was the highest among the rest. We knew that people would love the design because we were the first to create it. The way we evaluated our numbers was once we released the product, we attached a survey for feedback for us to create to satisfy you.

Final Assembly 


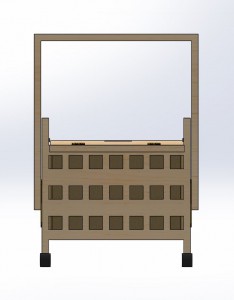
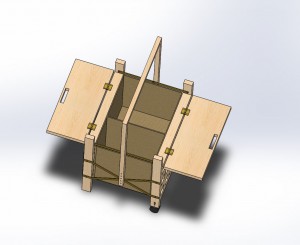
front view iso top isometric view side view

Continue reading

Folding Bike

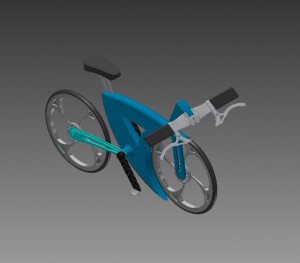
As being part of an urban environment; my team and I decided on design a folding bicycle for Advanced Solids Modeling class. Our purpose on this design decided on the expansion of bike share programs, easy storage bike solution, elegant and simplistic function. 

Benefits of the folding bike offer: free and unrestricted carriage on public transport, space-saving at home and elsewhere, urban multi-modal travel, and high resale value

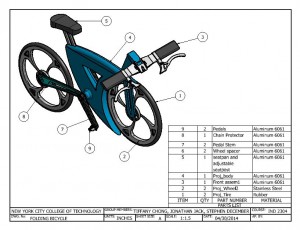
Material and apparatus: 1- Body Frame (Aluminum), 2- Pedal Stem (Carbon Fiber), 2- Pedals (Aluminum), 1-Chain Protector (Aluminum), 2- Wheels (Steel), 2- Tires(Rubber), 2- Brake Levers (Aluminum), 2- Handle Bars (Aluminum & Foam Rubber)

Final Assembly 

full assemexploded_dwg

Continue reading

Infinite Rock

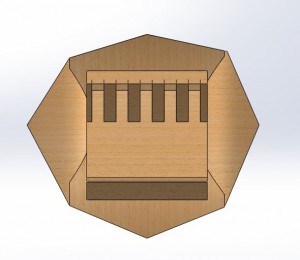
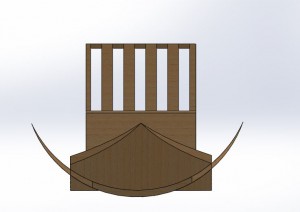
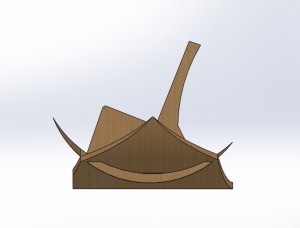
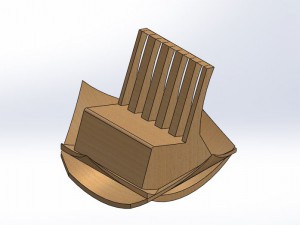
The purpose of this project is to follow the 8-Steps Design Process to design a rocking chair.

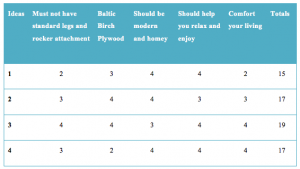
Step 1: The objective of this project is to design a rocking chair that does not use a standard rocker. I stated my problem statement as “How can I design a chair that will help you reduce stress?” My constraints are the chair has to be a rocking chair, it can only use by one material, the CAD model should scale it to 4x4x4 or less, and it should has an oversized seat. My criteria are the chair must not have standard legs or any rocker attachment, and the material should be Baltic birch plywood. In addition, the chair should look modern and homey, it should also help people relax and enjoy while seating and adapt to a better comfort living.

Step 2: Research can be done in many different ways, such as: internet searches, books, magazines, surveys, etc. My solutions were created based on the internet searches. I research on the health benefits of rocking chair, how rockers aid rehabilitation, how massage can prevent high blood pressure, ways to relieve stress and standard dimensions of rocking chair.

  • List of health benefits of rocking chair:
    -Motion help to achieve muscle tone. Shifting body-weight back and forth can help slowing respiration and lowering blood pressure.
    -Rocking help students with ADD and ADHD to focus better in learning environments.
    -Rocking a couple of minutes during pregnancy helps in the development of the nervous system of the fetus.
    -Reducing stress and anxiety, studies show those who rock regularly need less or no medication to deal with depression related issues. Rocking improves balancing skills, preventing accidents due to falling.
    -Rocking helps reduce pain after an abdominal hysterectomy. It also helps patients to recover from a knee surgery with light exercise.
    References:
    http://www.furniturenewyork.org/blog/?p=283
  • How rockers aid rehabilitation:
    -Rocking aids in strengthening and keeping the affected areas flexible. Patients with hypertension can benefit from rocking to reduce blood pressure, respirations and the heartbeat. As one rocks and relaxes, tension is released and the major organs slow. For people who suffer from chronic lower back pain, rocking releases endorphins that improve mood and increase comfort.
    References: http://denisehandlon.hubpages.com/hub/The-Healing-Effects-of-Rocking-Chair-Therapy
  • How massage can prevent high blood pressure:
    -Massage is one of the ways to reduce stress and relax the body in order to prevent high blood pressure and an increase in heart rate. There have been quite a few studies done that have shown that massage can reduce both stress and heart rate. These studies have shown that after receiving a message, there has been a significant increase in the parasympathetic nervous system of the test subject. This system, also simply called PNS, counteracts any stress response produced by the sympathetic nervous system (SNS) in order to allow the body to come back into balance. In a study done by New Zealand researchers who were testing the role of massage therapy on migraine headaches, levels of stress were measured through levels of cortisol. A daily log of the participants’ own perceived levels of stress were also recorded after each massage session. The study concluded that, “compared with control participants, massage participants showed decrease in heart rate, anxious mood and salivary cortisol right after the massage.”
    References: http://www.inadausa.com/resources/benefits-of-massage/
  • Ways to relieve stress:
    – Listen to calm music
    -“Breathe out” negative emotions. “Breathe in” positive emotions
    -Massages/ Spa
    -Watch the sunsets/ sunrises
    -Go for a walk/ Explore nature
    -Sit and read a book.
    -Visualize stress floating away with the “hot air balloon method”
    References: http://www.audiotranscription.org/how-to-relieve-stress/

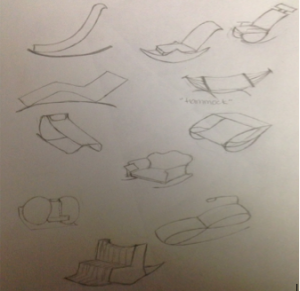
Step 3: After research my problem, I started to develop my ideas by brainstorming and look for inspirations around my surroundings. I began looking at any rocking chair and started to doodling any shape of rockers and chair designs.

Screen Shot 2015-04-10 at 1.45.55 PM

                    Fig. 1

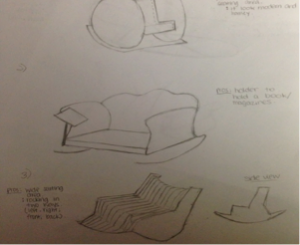
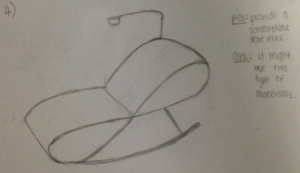
Step 4: I started narrow down my designs by going back to the list of my criteria and constraints. In addition, I record the pros and cons on the side for each design. 

Screen Shot 2015-04-10 at 1.46.03 PM

                     Fig. 2a

Screen Shot 2015-04-10 at 1.46.08 PM

                      Fig.2b

Step 5: In this step, I used the chart below to select my final decision. I listed all my criteria on the top row then evaluate each design from 1-4 (1 is the lowest and 4 is the highest). I decided to select idea #3 as my final solution because it came out as the highest point.

Screen Shot 2015-04-10 at 1.46.24 PM

                    Criteria

Step 6: I began modeling my solution by using the 3D software called Solidworks. (Figures below showed the top, front, side, and isometric result of the solution)

project3-topview

                  Top View

project3-frontview

                  Front View

project3-sideview

                  Side View

project3-isoview

              Isometric View

Step 7: Furthermore, in this step, I will make a prototype to test whether my solution works or not. I will use the 3D printer or CNC machine to manufacture a scaled model to test whether it can rock on two ways and it can hold amount of the weight. Also, I will use the “Finite Element Analysis” to test how much stress it can hold on the seat pan and seat back while rocking so I can get the best fitting rocking chair result.

Step 8: Communicate and redefine the design.
Bill of material
-Baltic birch plywood
Specification sheets
-Dimension: 48”H x 67”W x 22”D
-Color: Warm light color
-Rocking chair constructed two layer crossed base to rock on two ways (left-right, front-back).
Drawings
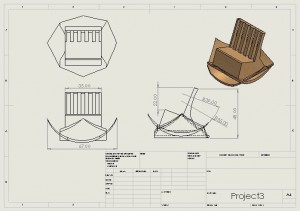
-This drawing is in a real world dimension.

project3-drawingfile

          Dimension is in inches.

Reverse Engineering Project

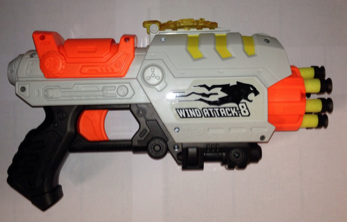
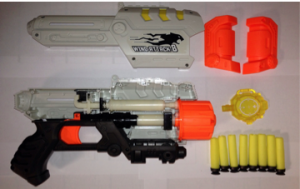
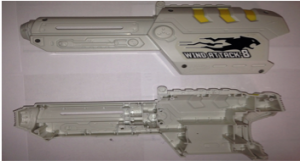
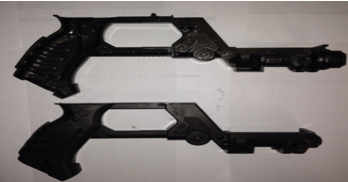
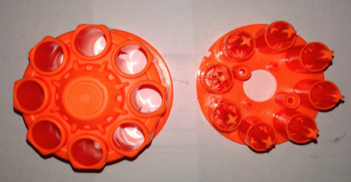
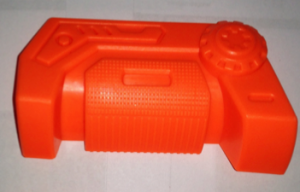
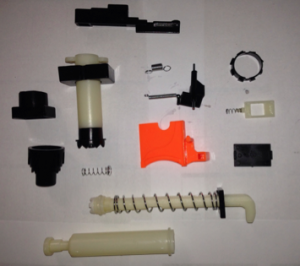
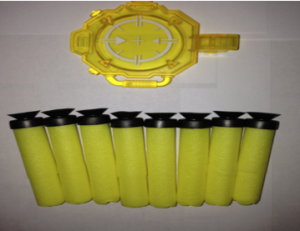
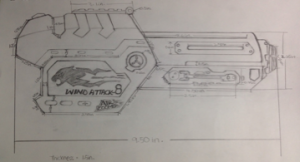
Overview: The object that I chose for this reverse engineering project is Nerf Gun. (Fig. 1) This object contains about 23 components and the material of this object is mostly made out of polyester resin. The company designed this twin-pack nerf gun package attached along with two scopes, 20 darts and 2 plastic cans. This nerf gun can hold up to 8 darts at once and it’s easy to pump. I began by taking apart and started to document all the components. (Fig. 2a-2g)

Screen Shot 2015-04-10 at 10.33.01 AM

                           Fig. 1

Screen Shot 2015-04-10 at 10.33.01 AM

                       Fig. 2a

Screen Shot 2015-04-10 at 10.33.13 AM

                        Fig. 2b

Screen Shot 2015-04-10 at 10.33.13 AM

                          Fig. 2c

Screen Shot 2015-04-10 at 10.33.23 AM

                         Fig. 2d

Screen Shot 2015-04-10 at 10.33.33 AM

                          Fig. 2e

Screen Shot 2015-04-10 at 10.33.39 AM

                           Fig. 2f

Screen Shot 2015-04-10 at 10.33.45 AM

                          Fig. 2g

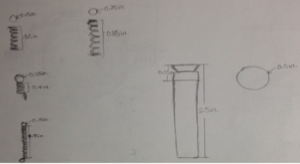
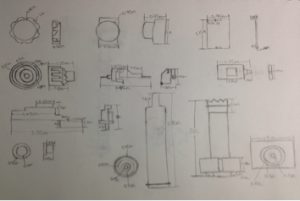
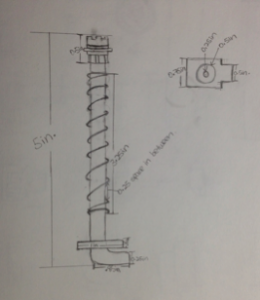
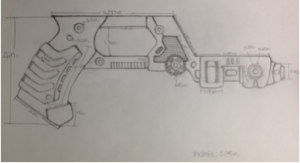
Procedure: I started up with sketching the components by using my hand. I drew the front view and side view of most the components so I can keep track of all the thickness. This object has a lot of minor details that couldn’t capture the dimensions by using ruler, therefore, I use caliper to measure and label the dimensions in inches on the sketches I did. But overall, I used ruler to measure all of the components. (Fig. 3a-3h) 

By sketching out the components, it helped me understand the geometric shape. It was helpful and able to understand more of which features to use and works for the best to which components. Cache, barrel tubes, handle and pulley were the main components that I focused on the most. In order to have an accurate reference point, I began all my drawings from the origin point.

Cache, handle, barrel tubes and pulley have a lot of details to work on. I used Extruded Boss feature to create the bodies on most of my parts. For the handle and pulley, it was done with Extruded Cut feature, Chamfer, and Fillet to create the angular shapes and details and I also used Hole Wizard to drill holes to insert the hardware.

Barrel tubes were created by Extruded Boss feature, Extruded Cut, Chamfer, Reference Geometry Plane and Circular Pattern tool. I used the Reference Geometry Plane to create the surfaces by offset to the height on part. In addition, I used Circular Pattern for the circles so I don’t have to sketch it one by one.
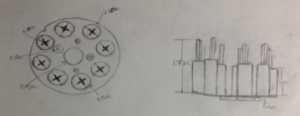
Cache was done it with Extruded Cut feature, Extruded Boss feature, Chamfer, Reference Geometry, and Shell. I used Shell feature after I done created the whole details of part and shell it inside of the part.
To create the dart, I used the Right Plane to sketch on and used Revolved Boss/ Base the solid part then Extruded Cut the inside to create a hole. However, most of the components, such as: Barrel, Base, Rect_Ring, Circles_Ring, Trigger_Support, Rect_Support, Valve Plug, Cap, Cylinder_Tube, Trigger, Scope, Ring and Air Restrictor were created by using the Extruded Boss feature, Extruded Cut feature, and Reference Geometry Plane. The springs were created by Helix/ Spiral and Sweep feature. The Helix/ Spiral can create the circle into spring and sweep to add or remove the thickness.
Screen Shot 2015-04-10 at 10.50.01 AM

                     Fig. 3a

Screen Shot 2015-04-10 at 10.50.09 AM

                    Fig. 3b

Screen Shot 2015-04-10 at 10.50.16 AM

                     Fig. 3c

Screen Shot 2015-04-10 at 10.50.21 AM

                     Fig. 3d

Screen Shot 2015-04-10 at 10.50.26 AM

                      Fig. 3e

Screen Shot 2015-04-10 at 10.50.30 AM

                      Fig. 3f

Screen Shot 2015-04-10 at 10.50.35 AM

                      Fig. 3g

Screen Shot 2015-04-10 at 10.50.40 AM

                   Fig. 3h

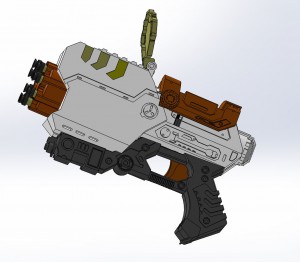
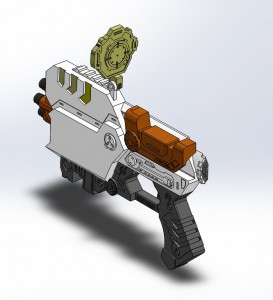
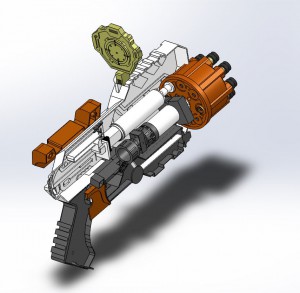
Results: Final Assembly- 23 components

iso side

                Isometric View

sectional left

                 Side View

sectional side

               Sectional View

Screen Shot 2015-04-10 at 11.04.58 AM

                Detail View

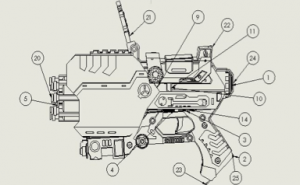
Discussion: The final assembly of nerf gun was necessary fully defined but it didn’t combine well. I tried to make it as realistic as possible. I learned that every component must create in order to achieve the assembly results. What makes me struggle the most is mating every components together; it has to match every angle limitations to work for a motion analysis. In fact, the process of creating the components was much easier than doing the assembly. I also learned the difficulty of reversing an existing object to a drafting design and perhaps into a new motion designs.

Continue reading