Objective: Explain UV coordinates and show how to make a UV map really quickly and give a brief explanation about how it works.
Materials:
- Blender
- Sample Blender mesh
- Screen capture
- My memory
UV coordinates:
Also known as a pain in the neck. You know how the model you’re making is probably made up of a bunch of points with X, Y, and Z coordinates? You know how the image you want to stick on to it has X and Y coordinates? These have zero correlation, which is where UV coordinates come in. UV coordinates are how you map the image to your model. Because we are human beings and have an easier time off the bat with visuals more so than numbers, we make a UV map with these coordinates. Here’s how that’s done!
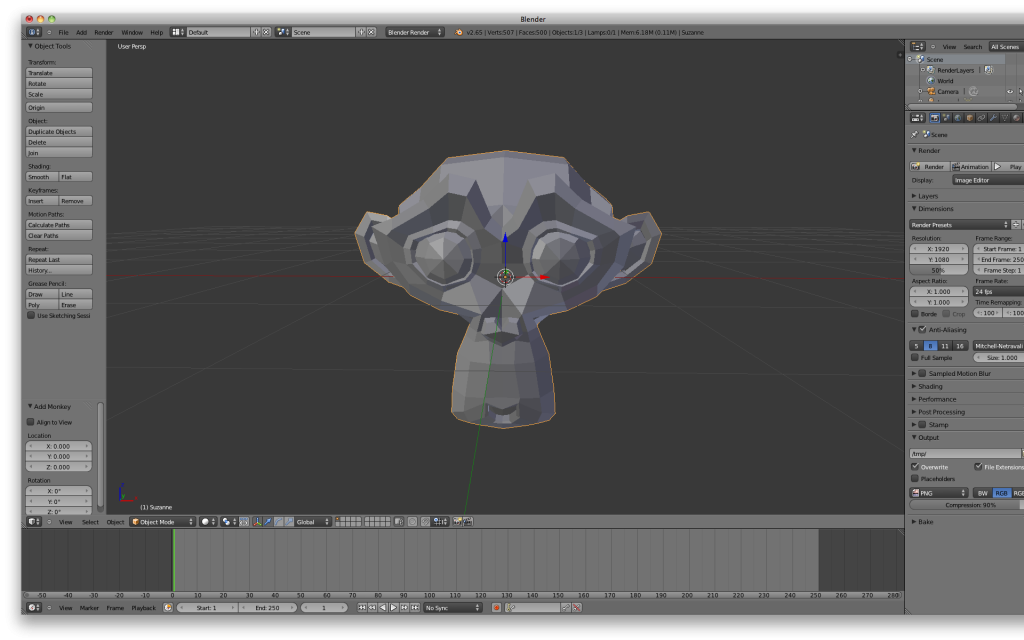
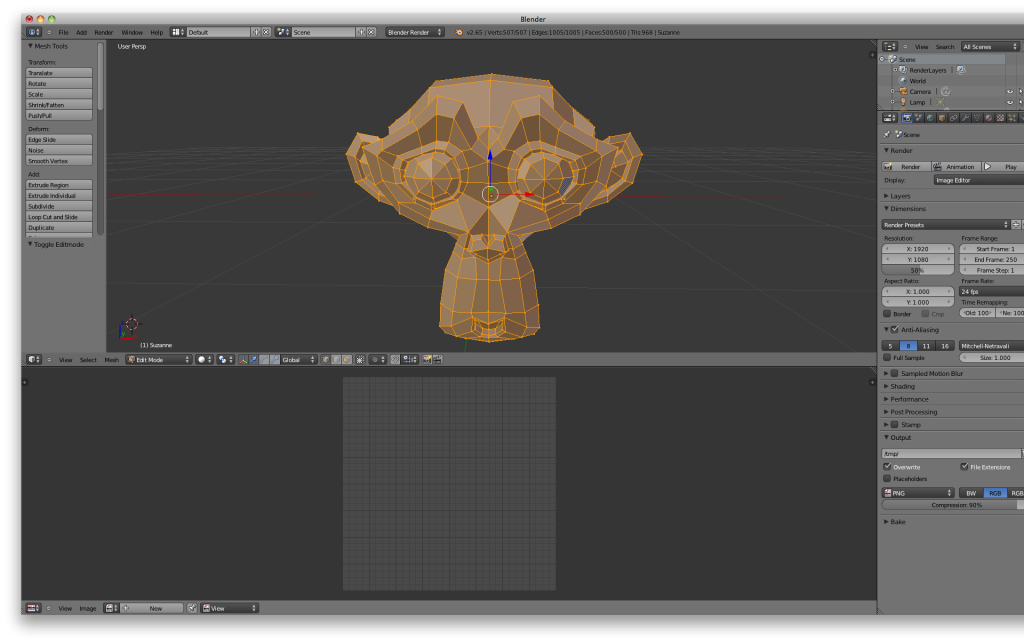
Starting out, we’ve got our model. Here, we’re in edit mode with all of our faces selected.
Make yourself a window for the actual UV mapping. In this case, I got rid of the timeline. Do what works for you.
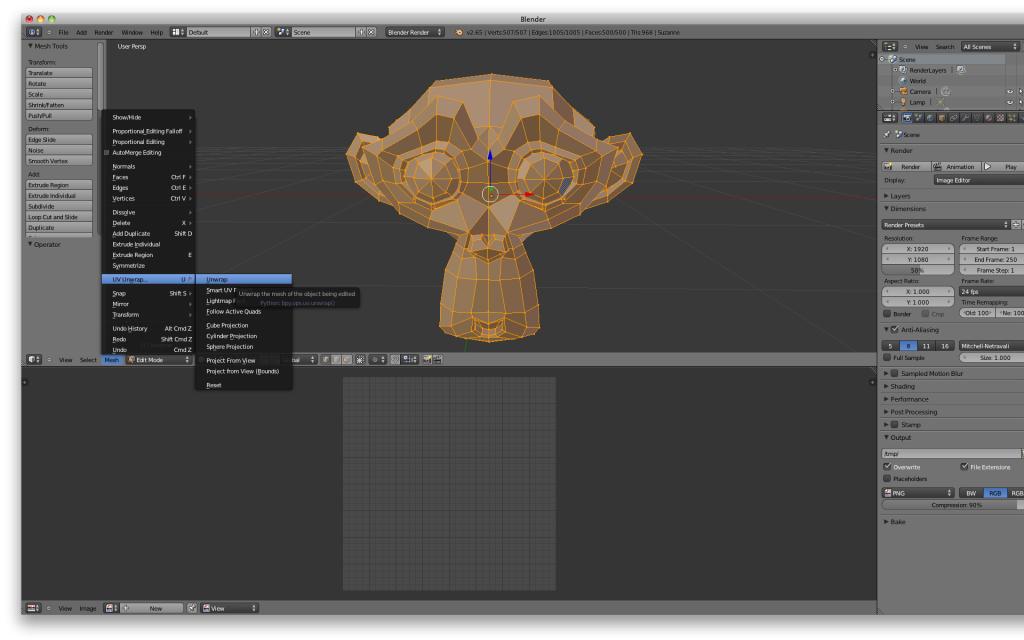
In the Mesh menu, you’ll find UV Unwrap… with a bunch of options. The quick and dirty way is to just click unwrap. You should experiment with these on your own tim
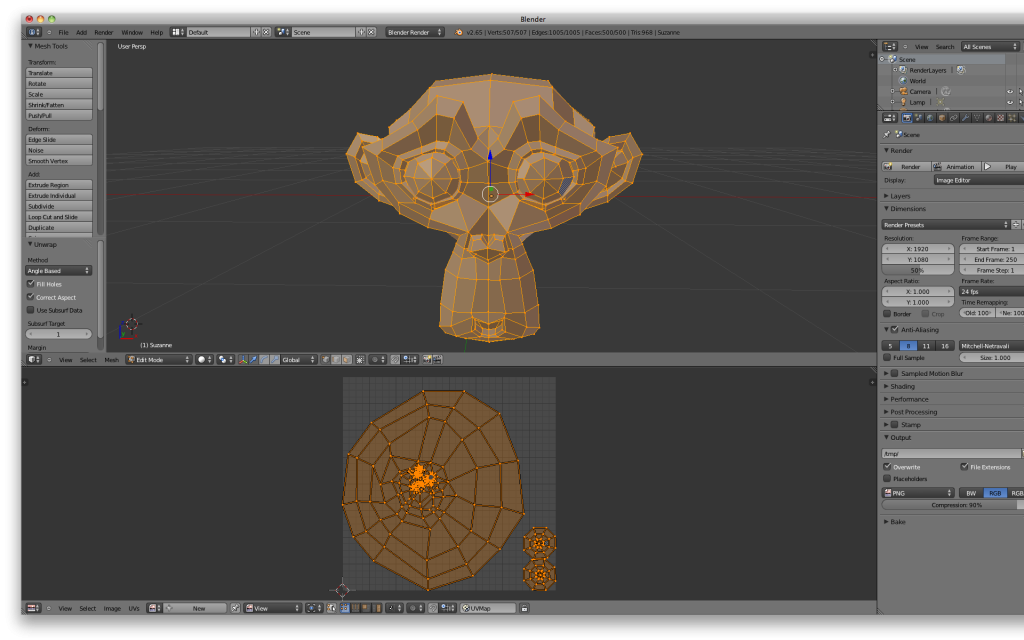
Bam! Now this model has a UV map. See those points? Those correspond directly with the model. There are parts of this called islands, these are parts of the model that don’t unfold very well onto a flat surface and are separated.
In a bunch of modeling programs, you can export this as an image and fit the image you actually want on your model on top of it, according to the lines.
Fun fact: This doesn’t have to be your final UV map. You can mess with the options when you’re making your map, or you can manipulate the UV map very similarly to how you would in blender. You can move islands and points around, change the geometry, and make a map that makes the most sense to you.
Once you’re happy, click UVs at the bottom left, and export your UV layout. Now you’ve got a template to slap things on to and give your model pretty colors and details!
Discussion: I could have included more comprehensive mapping, but I was aiming at getting this done inside of 40 minutes. Mostly worked!

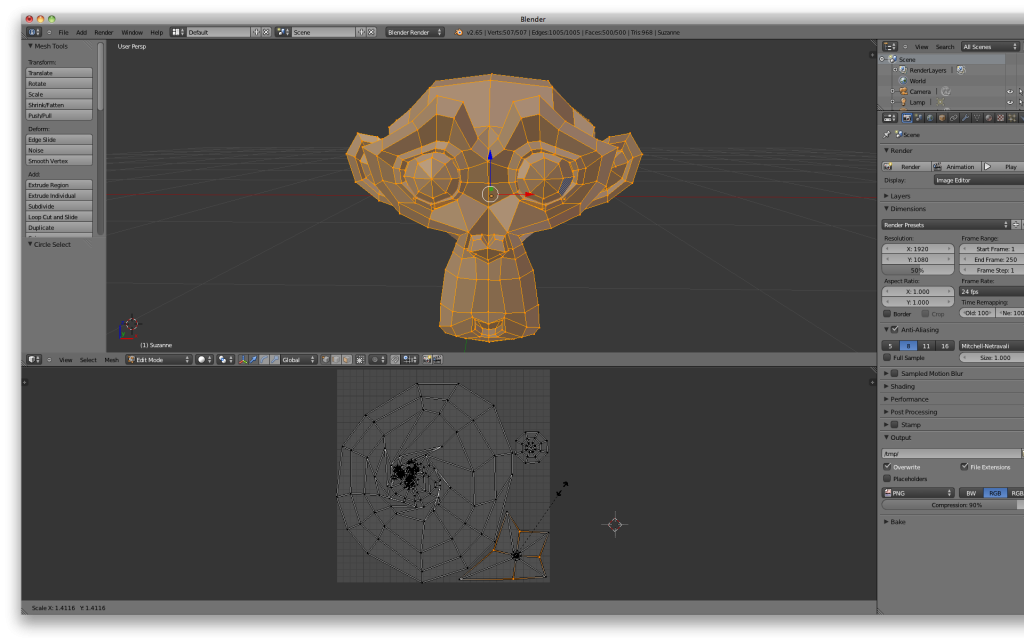


that’s a beautiful monkey
Pretty sweet tutorial, Remy; I’d like to see you do a tutorial of this on Youtube with spoken words and captions!