For this project I used a charcoal pencil, an 8X 11” paper, drew 12 squares and went around the room looking for textured surfaces. Out of those 12, I chose 6 that showed the most visible texture to work with. The first square being the surface of a paper cutter, the second one being the vent on the air conditioner, the third one being the “popcorn” texture of the wall, the fourth one being the outline of an outlet, the fish one being the marks of an old Macintosh computer, an the last one being being the texture of a printing block that I found in the classroom during this assignment.
The paper cutter, the air vent and the Macintosh had a noticeable rough texture that prints right away, while the outlet and the wall has more of a prickly to smooth texture.
Once I got my selected collage, I used tracing paper to trace the airlines and create shapes to the textured charcoal prints. By doing this, a different variation of shapes were starting to form. Which then will help me come up with a different unique pattern.
For this, I used the sample work shown in post for this project to give me into how the outcome should be at the end. Once I traced the outlines to the 14X17” Bristol Pad, I then shaded the shapes and patterns accordingly.
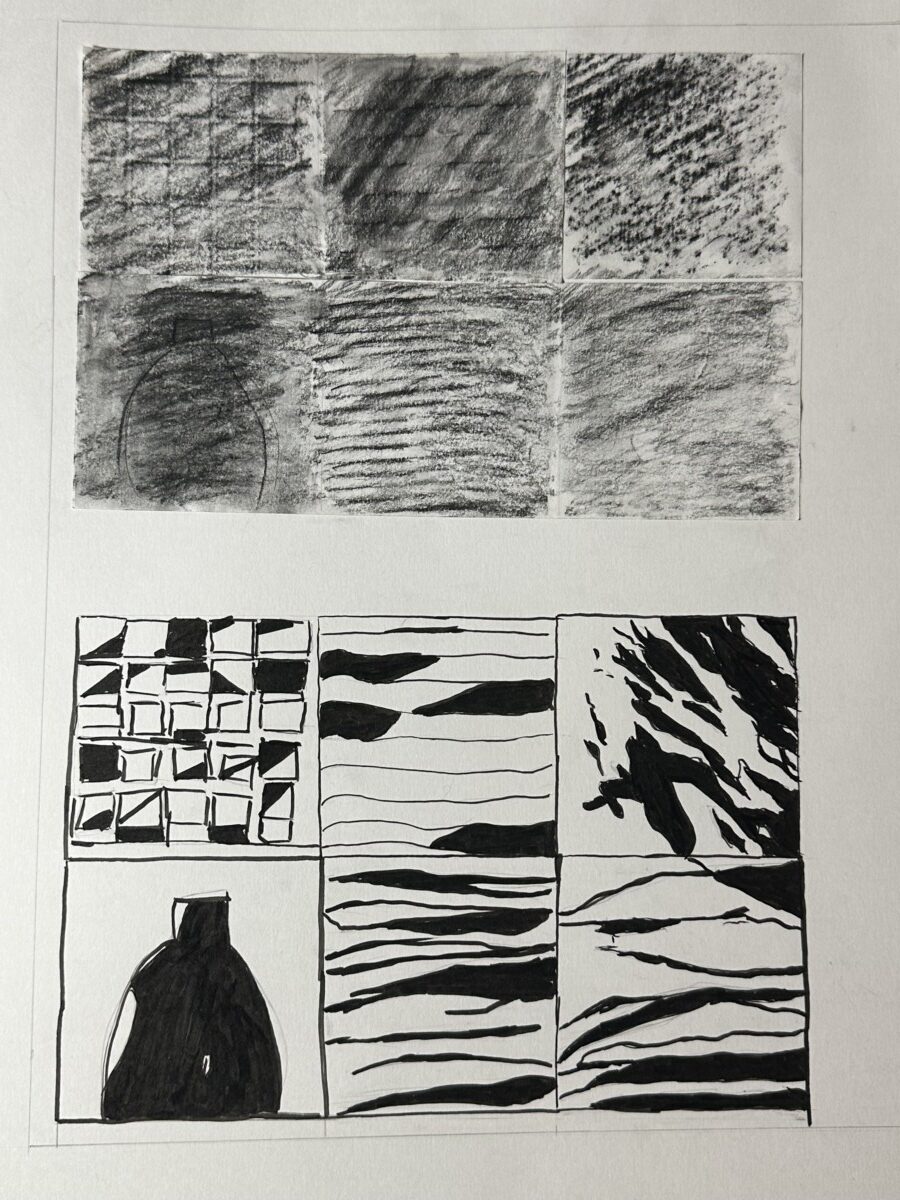
Above is the charcoal prints of the patterns, while below is the finished product.
This project used similar techniques as the first project we did in this class. I considered this project to be interesting and straightforward. The challenging part was definitely interpreting the charcoal prints with outlines and shapes since some surfaces were difficult to find a texture or path to work with. Luckily since we did not have to use all 12 squares, this made it easier to carefully pick what would work best for the final collage.


Leave a Reply