Week 10

Exam 2 Today

Rules:

  • Exam must be taken during the class period.
  • You must begin the test on-time and no time extension will be granted if started late.
  • You have 1 required attempt, and 2 optional attempts
    • The highest grade of all attempts will be counted.
    • Once the class period is over exam must be finished and submitted even if Blackboard indicates there is time remaining for the attempt.
  • Exam is on Blackboard.

Week 5

Access to On-Campus Lab Computers:

Please make sure to complete the following steps to gain access to the lab computers on-campus: https://openlab.citytech.cuny.edu/mech/files/2022/01/Student-SSPRLogin-Information-2.pdf

Exam 1 Today

Rules:

  • Exam must be taken during the class period.
  • You must begin the test on-time and no time extension will be granted if started late.
  • You have 1 required attempt, and 2 optional attempts
    • The highest grade of all attempts will be counted.
    • Once the class period is over exam must be finished and submitted even if Blackboard indicates there is time remaining for the attempt.
  • Exam is on Blackboard.
  • You must use the Respondus LockDown Browser. See Week 1 link on Blackboard for details.

Access to On-Campus Lab Computers and WiFi

For in-class sessions you need access to the labs PCs or bring your own device. Below you will find instructions for both scenarios. It is strongly encouraged that you bring your own device in case of technical difficulties.

In order to gain access to the labs computers on-campus please follow the steps in the following tutorial: https://openlab.citytech.cuny.edu/ellis-eng2575-sp2022/files/2022/02/Student-SSPR.pdf

If you bring your own laptop, you need to connect to the College’s WiFi. Please follow these steps once you are in the building: https://www.citytech.cuny.edu/alc/docs/NYCCT-WiFi-MAC-Laptop.pdf

How to Create a CodeStepByStep Account

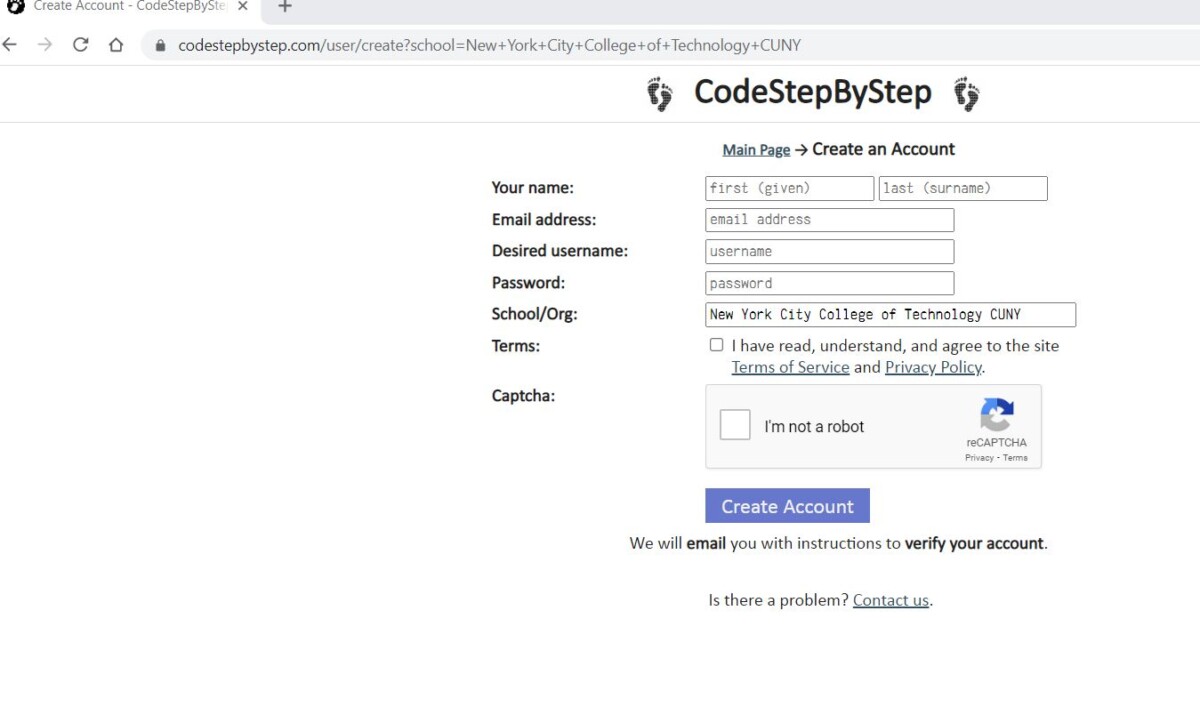
In order to create a CodeStepByStep account for this course please click this link and follow the instruction below:

Once you click the link you should see the page to enter your account details. You must use your City Tech email address for your account and make sure the School/Org says “New York City College of Technology CUNY”. See the image below for reference.

Once you create your account, you will receive an email to verify it. Please go to your City Tech email account and click the link. Sometime it might go to the junk/spam folder so please check there too. Once you do you will see a screen with your information as the one below:

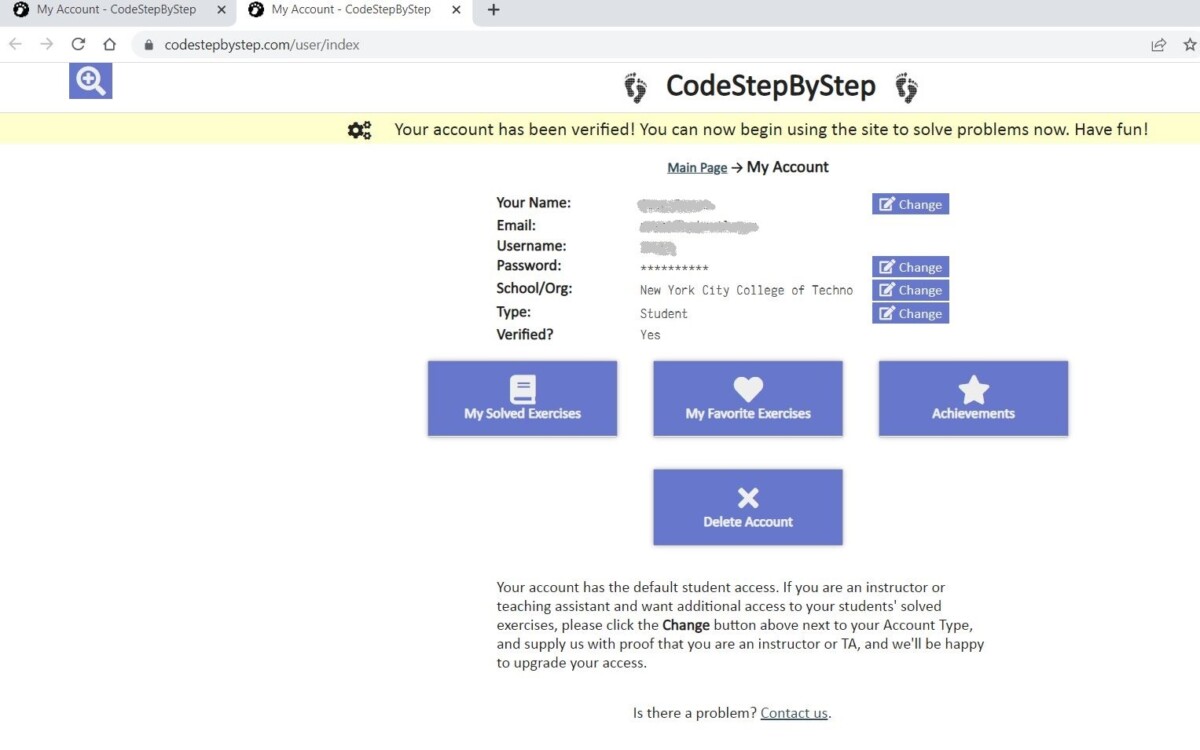
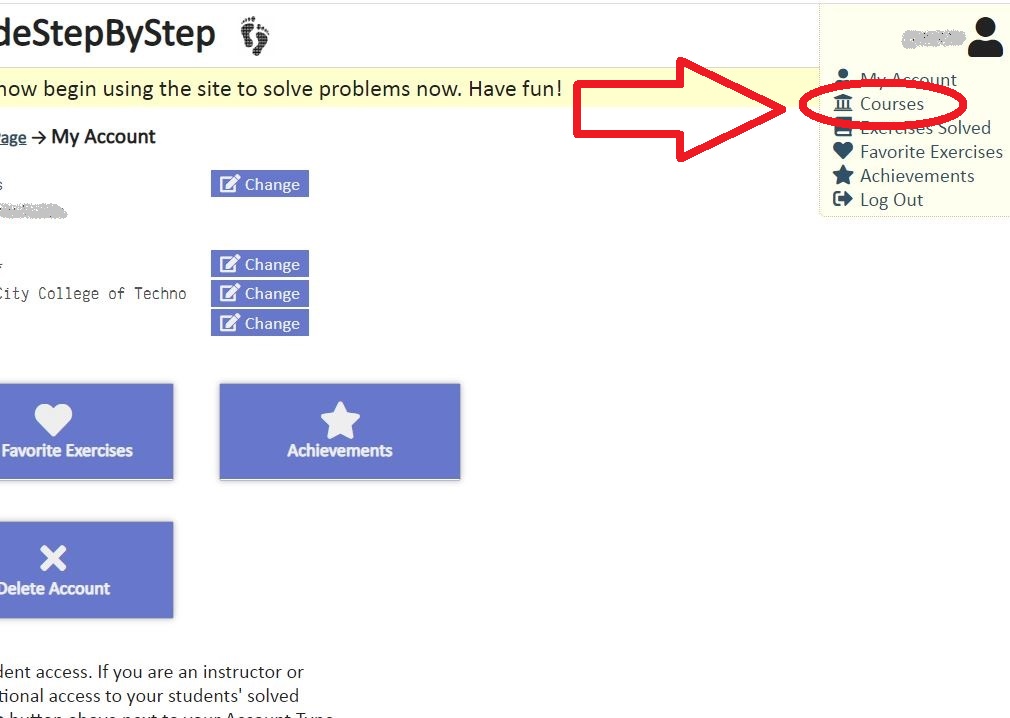
If the platform says that your account is not verified but you clicked the link, please log out and log back in. This is know bug that happens occasionally. Once you are verified, the you need to proceed to add this course to your list of courses. In order to do that go to the upper right corner of the page and click on your username. Once you do, you will see a menu. From the menu select the option Courses as shown in the next image.

Once you click on Courses, you will see another page with a drop-down menu. Click on it to see the list of available courses. Select your course and section number from that list. Then click the button Add as shown below.

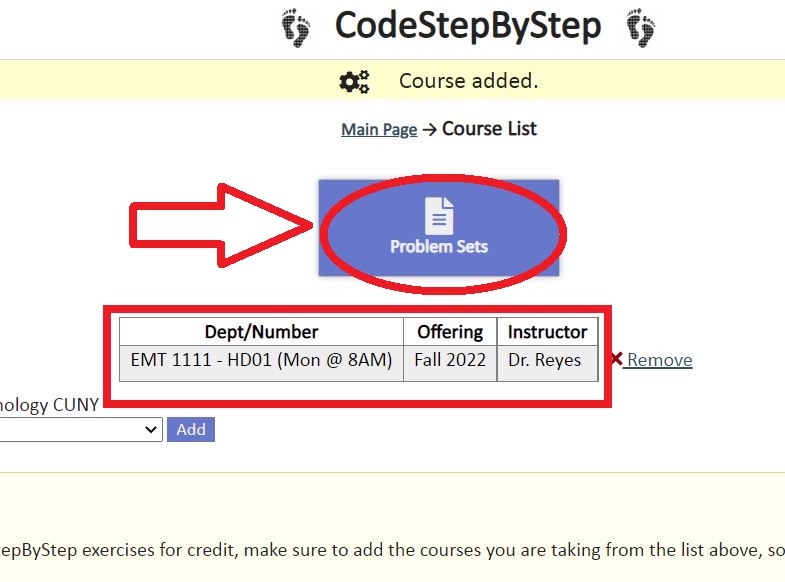
You should see your selected course in the Course List page. Make sure it is the right course and section, otherwise I will not be able to see your completed work. Once you confirm that, then click on the Problem Sets button as the next image shows.

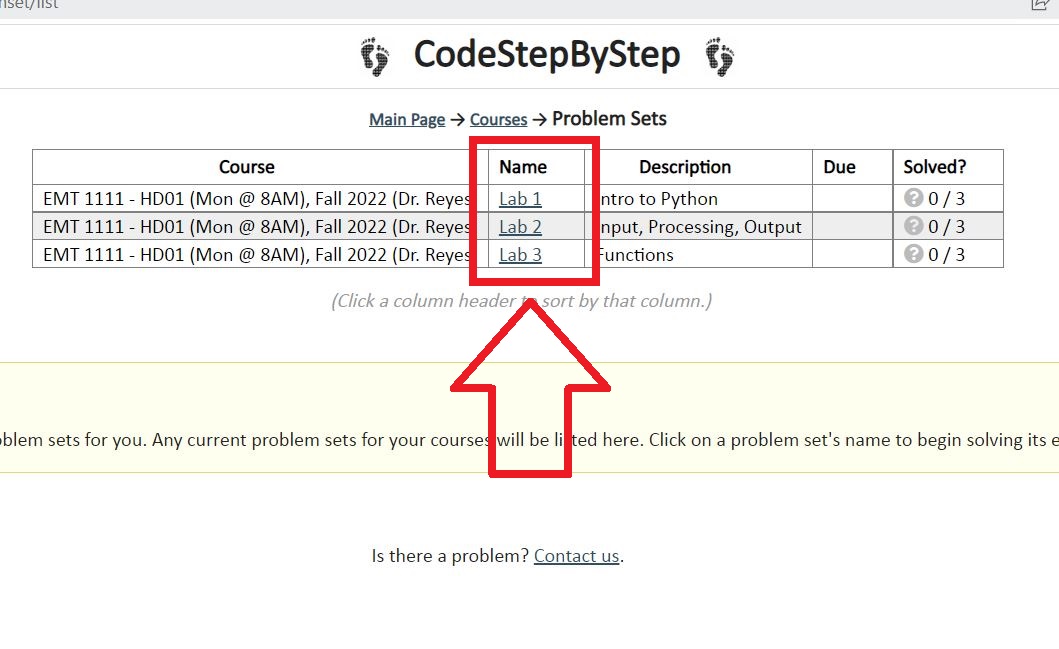
After clicking the Problem Sets button you will see a list of the assigned labs. Click on the corresponding lab and complete the problems there. See an example in the image below.

With these steps you should be up and ready to complete the homework assignments for this course. If you experience any technical difficulty please reach out.

Labs Grading Criteria

Labs will be graded as follows:

CodeStepByStep Problem Sets:

  • 1 point each

Programming Using Eclipse:

  • 5 points: If program is executing correctly, a unique solution is provided, and coding standards were followed.
  • 4 | 3 points: If program is executing but contains some logical errors and/or software engineering shortcomings (see coding standards below).
  • 3 | 2 points: If program is executing but has several syntax and/or logical errors and/or software engineering shortcomings (see coding standards below).
  • 1 points: If program is not executing correctly, is incomplete, or has major syntax and/or logical errors and/or doesn’t follow coding standards.
  • 0 point: Otherwise, including copied/pasted or copied/pasted/edited labs even if executing correctly. Discussions of problems with classmates is encouraged but all work must be your own.


Coding Standards: Points may be deducted due to poor software engineering and adherence to coding standards, bad indentation, poor classes, variables and methods naming, using commands not taught in class, using strategies not relevant to the current lecture/lab, and related items. Focus of labs is on the application of specific strategies as learned in class to reach the right answer, not just the answer itself.

How to Find the Source Code Files in Eclipse

In order to correctly submit the labs on Blackboard, you need to provide the source code. In java the source code is stored in files with extension .java. Do not submit screenshots as the instructor must be able to run and test your code. Also once you test your code, the JDK will create bytecode files that have a .class extension. DO NOT submit those, as although they are executable by the JVM, the source code is not available and therefore cannot be properly assessed. In this tutorial I will show you how to find the source code files you need to submit for your labs.

The first step is once you are done with your lab, go to Eclipse and identify one of the files that is part of your solution. Position the mouse over it and make a right-click. In the context menu go to Properties as shown in the image below.

Once you click on Properties you will see a Window with the properties of the file. As an alternative to reach this Properties Window, you may press ALT + Enter.

Under the Resource sections you will see that one of the properties is Location. that property gives you the exact location of the field in your PC. You will also see a button to the right of it that says Show in System Explorer. Click that button as the next image indicates.

That will automatically open the File Explorer of your respective OS, in the path where your files are currently saved, as you can see in the following image.

On Blackboard, once you select the Lab you are about to submit, you can browse to that location or drag and drop the files from there.

How to Create a Package in Eclipse

One of the best ways to keep your code organized is by using packages. A package is just a fancy name for a folder where you store related classes and apps. Sure you can create a project for every lab, but then you’ll have too many projects. An alternatives is to create a project for the class (e.g. CET 3640) and multiple packages within it (e.g. lab1, lab2, lab3, etc). In this tutorial you will learn how to create a package in Eclipse.

To create a package go to your project, and move the mouse over the src folder. Once you do that right-click on it. You will see a context menu. From the context menu select New then Package. Use the next image as a reference.

After you click Package a window will show up asking you to provide a name. Package names are generally all lowercase and the same rules for identifiers such as variables apply: begin with a letter, can use number, no spaces, no special characters. See an example in the image below.

Once you’re done you will see your new package with your project like in the next image.

To create classes within a package is very similar to creating classes within the src folder. You can right-click on the package, then from the context-menu select New, followed by Class as shown in the next image.

As you can see packages give you another tool to you manage your code and organize your labs better.