One of the best ways to keep your code organized is by using packages. A package is just a fancy name for a folder where you store related classes and apps. Sure you can create a project for every lab, but then you’ll have too many projects. An alternatives is to create a project for the class (e.g. CET 3640) and multiple packages within it (e.g. lab1, lab2, lab3, etc). In this tutorial you will learn how to create a package in Eclipse.
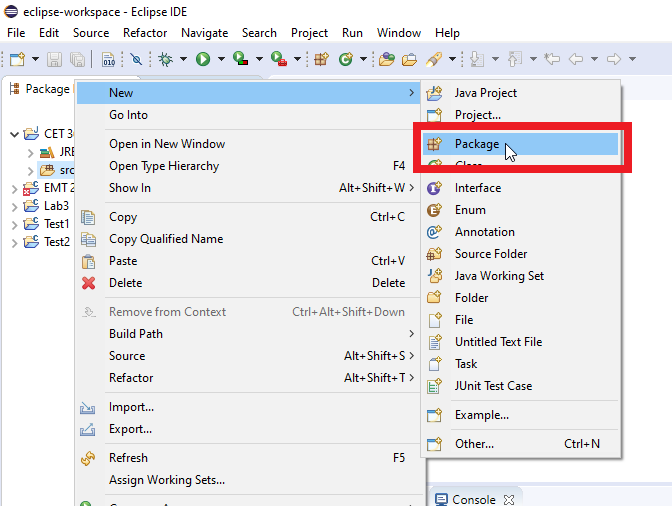
To create a package go to your project, and move the mouse over the src folder. Once you do that right-click on it. You will see a context menu. From the context menu select New then Package. Use the next image as a reference.
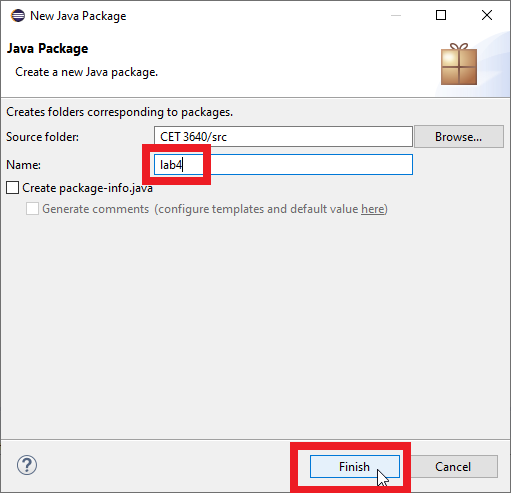
After you click Package a window will show up asking you to provide a name. Package names are generally all lowercase and the same rules for identifiers such as variables apply: begin with a letter, can use number, no spaces, no special characters. See an example in the image below.
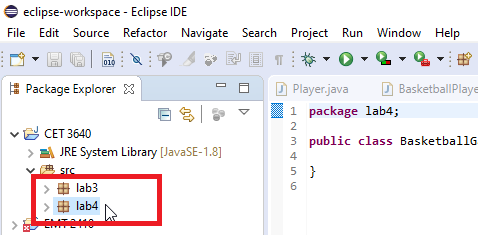
Once you’re done you will see your new package with your project like in the next image.
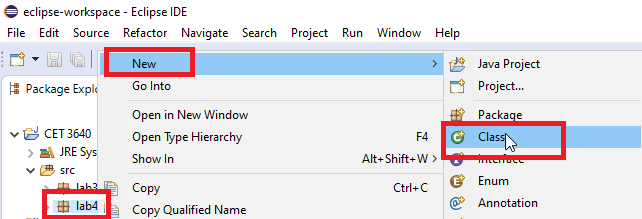
To create classes within a package is very similar to creating classes within the src folder. You can right-click on the package, then from the context-menu select New, followed by Class as shown in the next image.
As you can see packages give you another tool to you manage your code and organize your labs better.


