To continue problem 4, we switched bids with other teams. Our group needed to complete the remainder of the other group’s work. The groups needed to communicate with each other to ensure they had all the necessary information to complete deadlines.
For problem 4, we were presented with a hypothetical task of building two parts of the scenery components for the set design of the annual Pace University showcase. The rest of the scenery build would be outsourced to an outside fabrication company called Showman Fabrication. We were responsible to build two pieces of scenery; a rolling cart and a bed. Both pieces of scenery needed casters and needed to be able to handle a load of 160 lbs. Attached to this post, I’ve included a copy of our proposal bid.
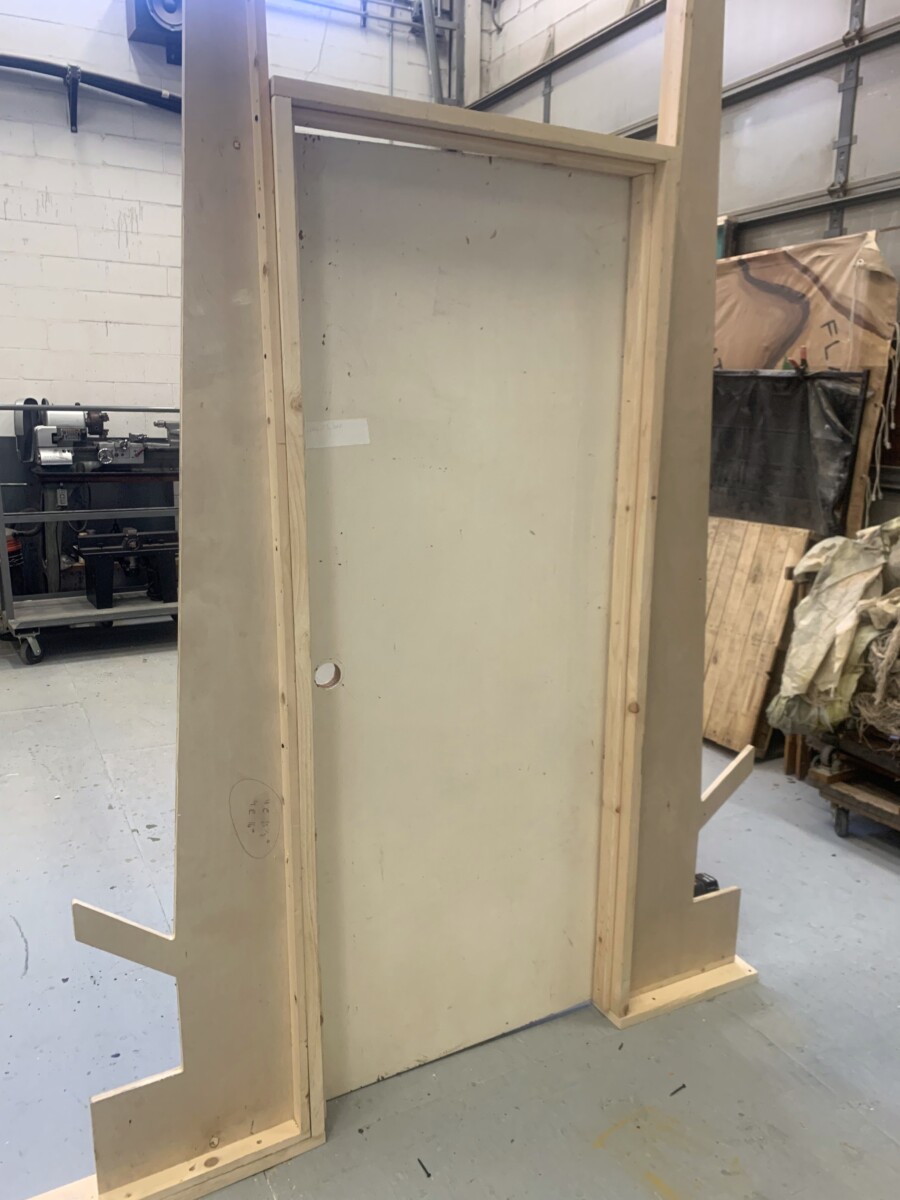
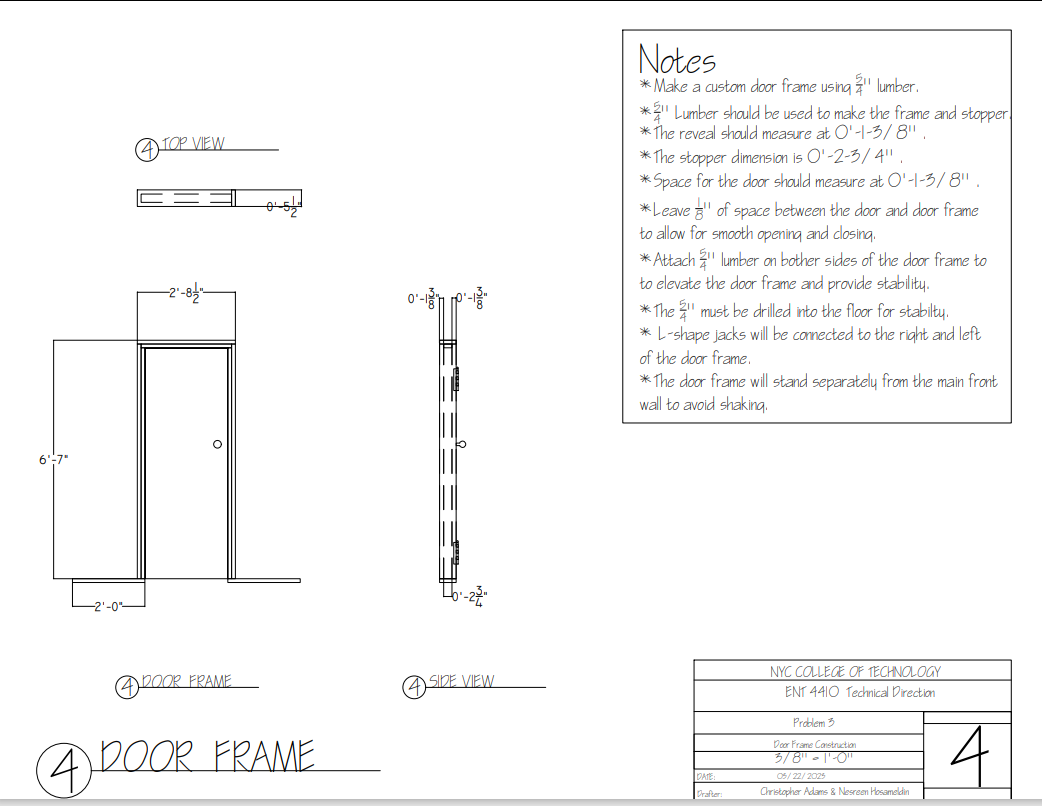
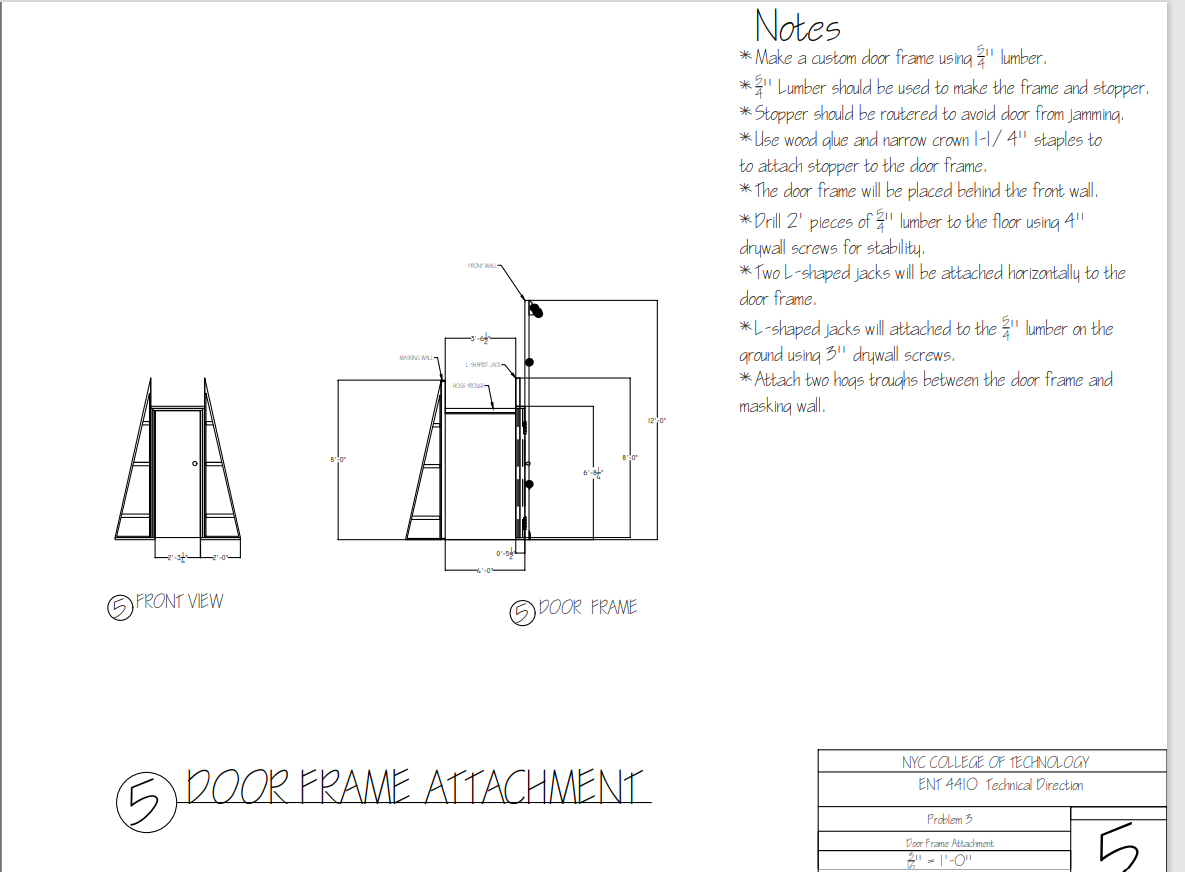
In this assignment, my teammate and I were given a number of different challenges to solve. The challenges included: coming up with ways to create crown molding on a curved wall and creating sweeps. Our main objective was to discover how to prevent a set wall on stage from shaking during a performance. The show we were presented with is a comedy in which a door is consistently slammed throughout the show. Our team proposed that we build a door frame separate from the wall to minimize the entire set wall from shaking. We only focused on this singular task due to time constraints. We decided to build a doorframe that would stand independently from the main wall. There needed to be 4′ of space between the main wall and the masking wall behind it. We discovered that constructing a doorframe was not an easy task. Adding a door and adding hinges to a working doorframe presented a number of challenges. This assignment taught us a lot about everyday objects like doors, and to not take for granted how they are built.
Construction Drawings for Problem 3
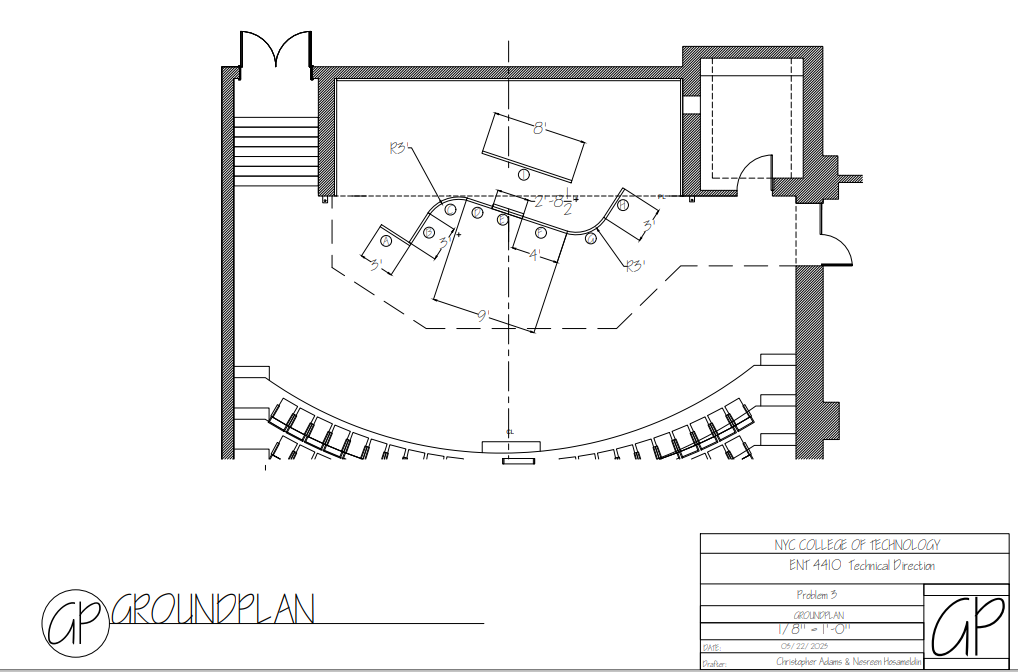
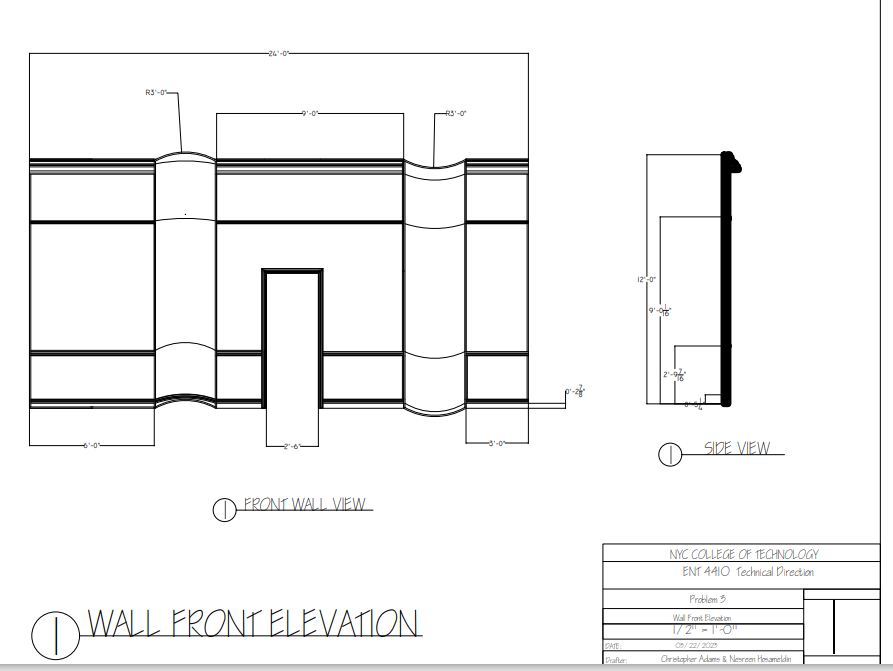
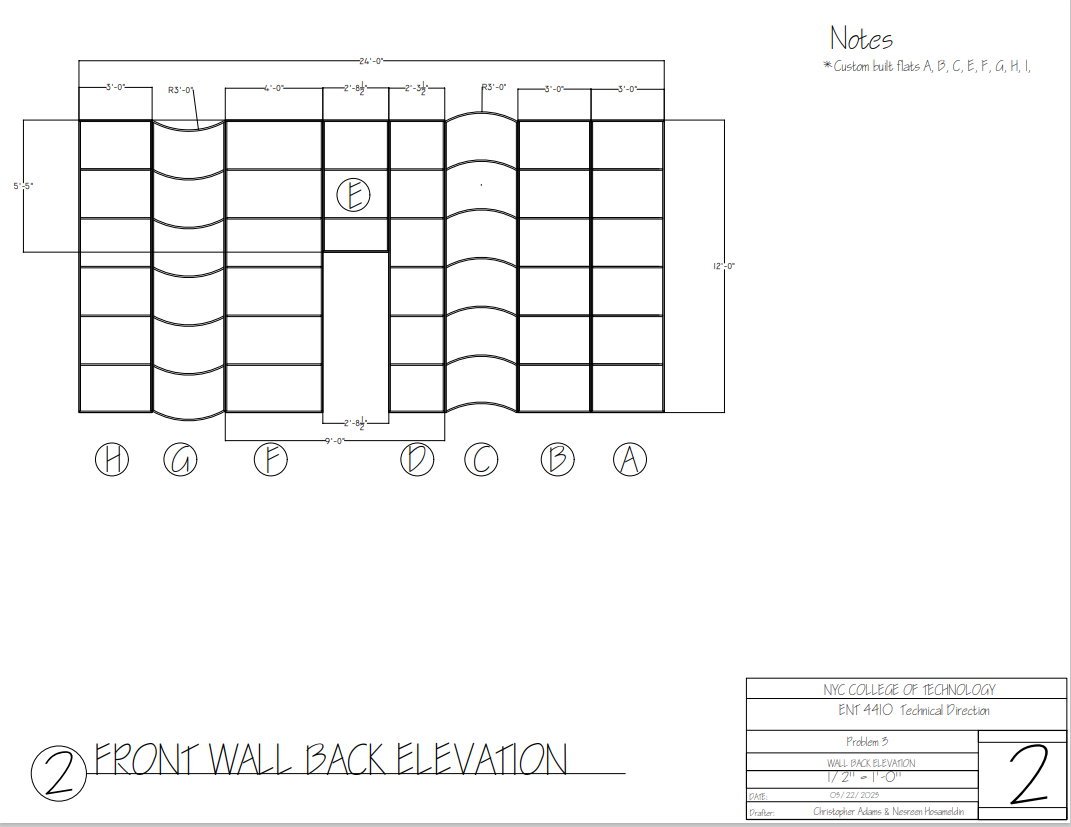
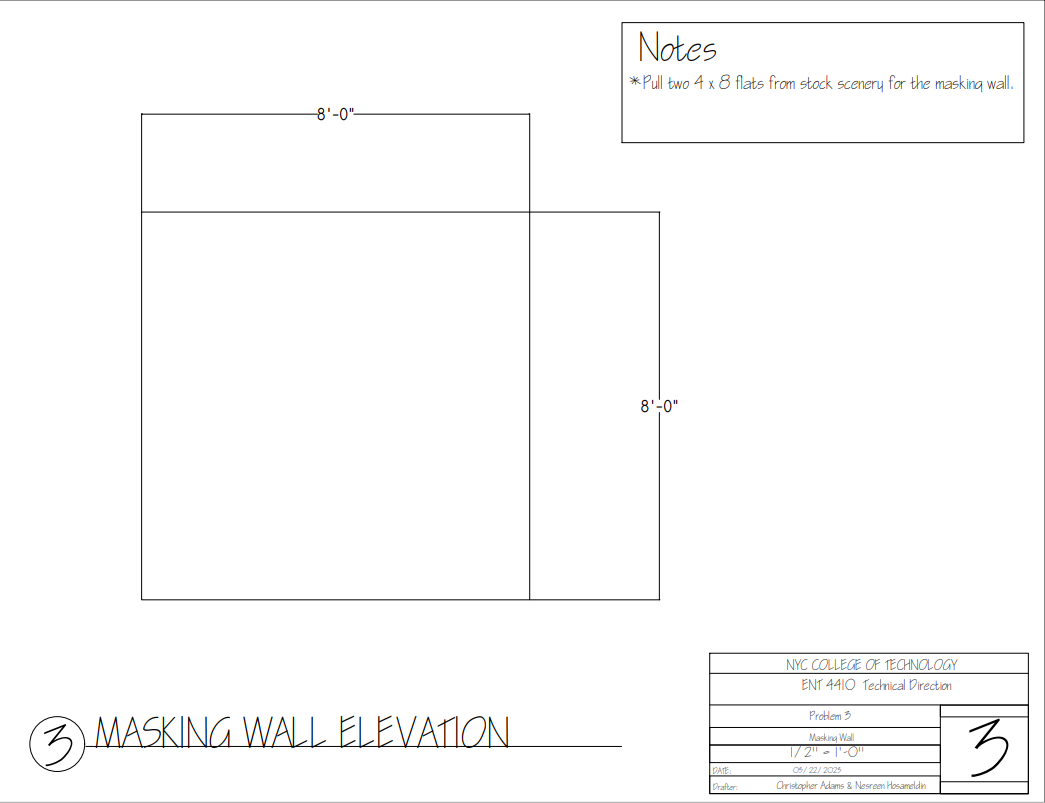
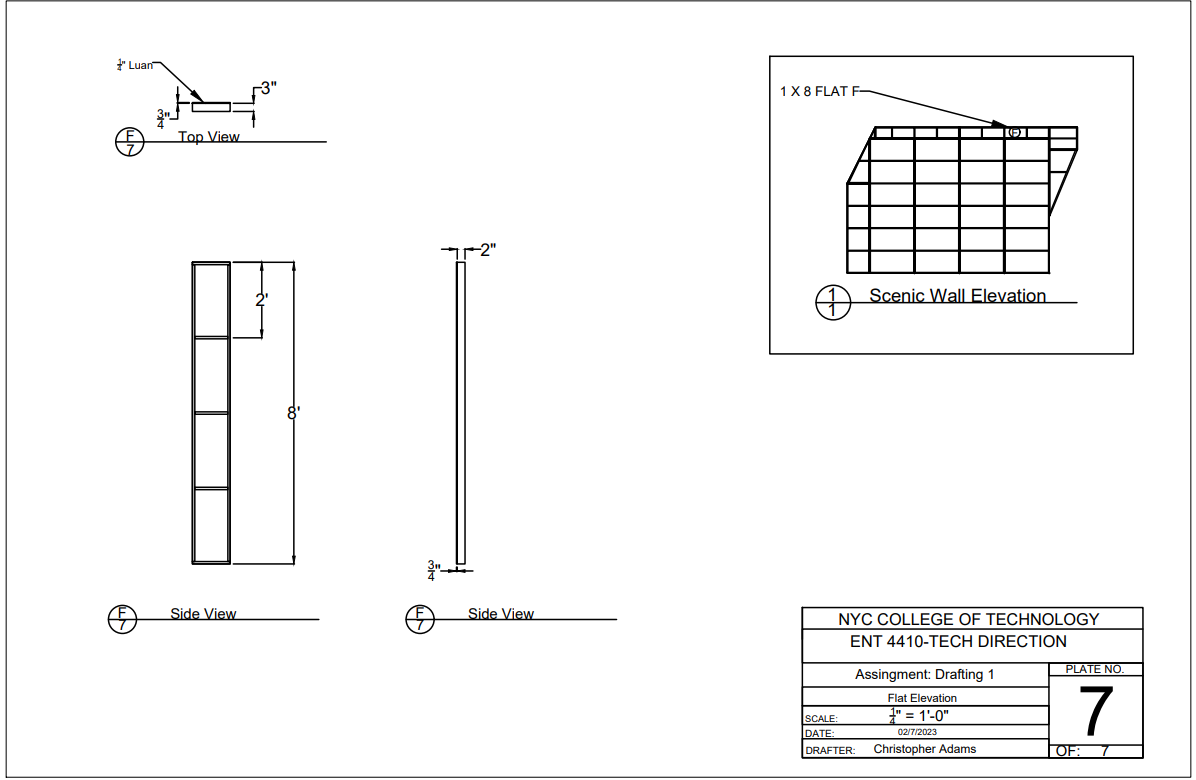
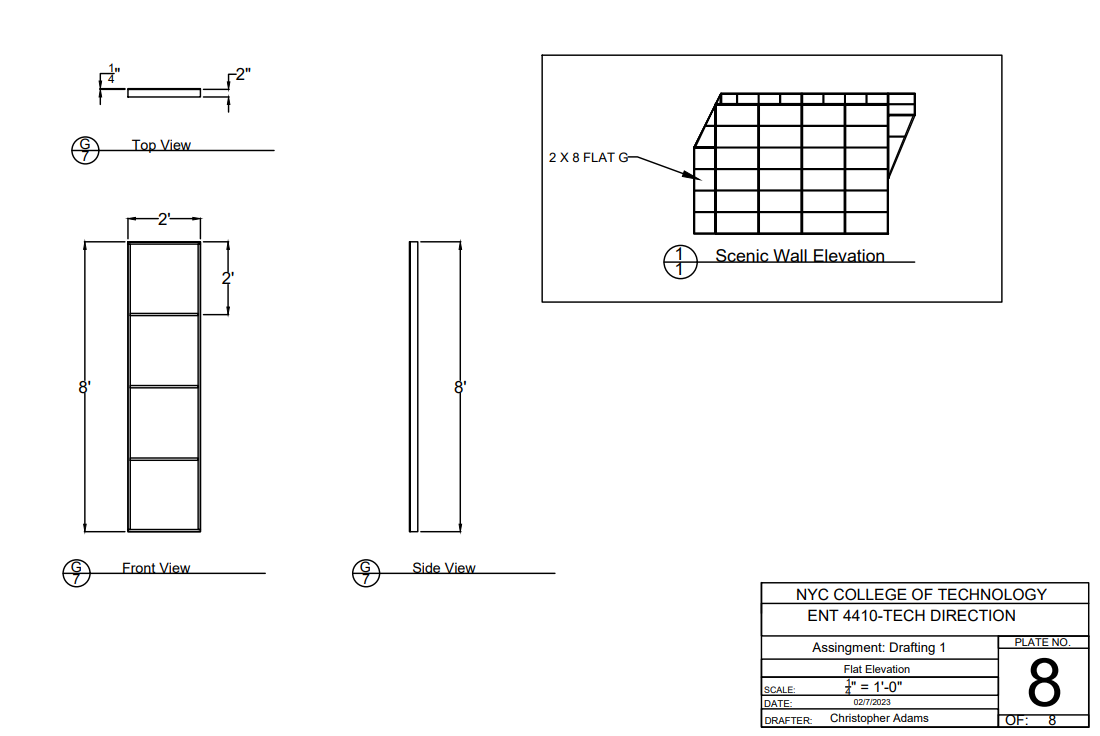
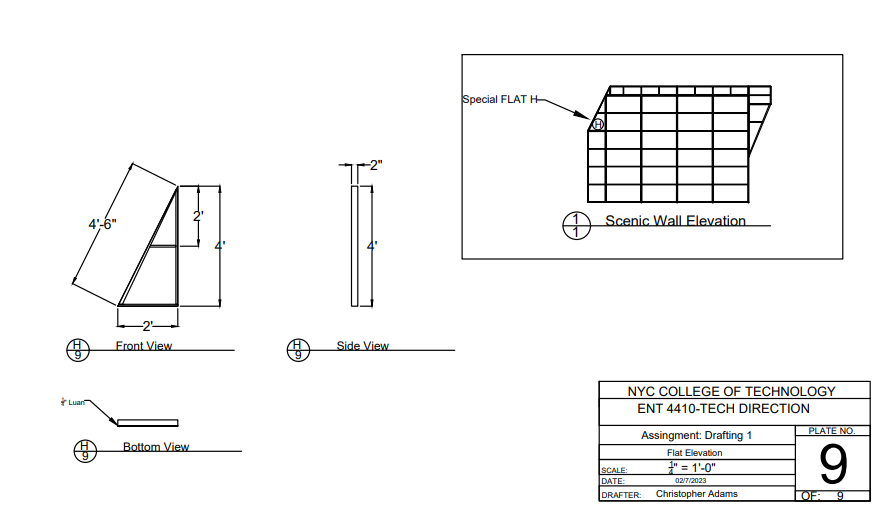
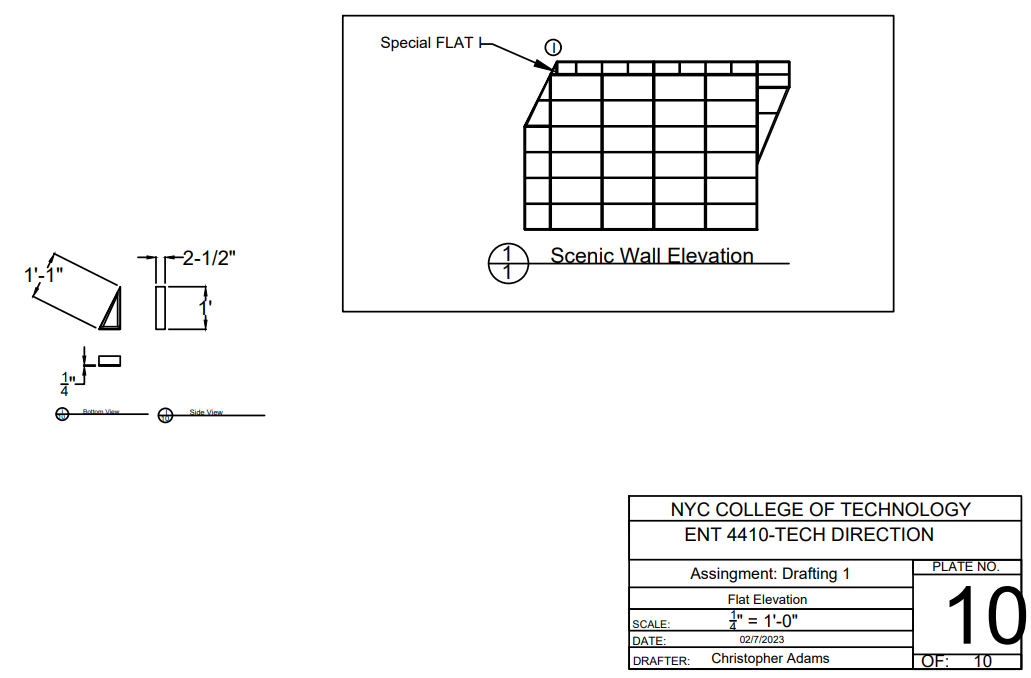
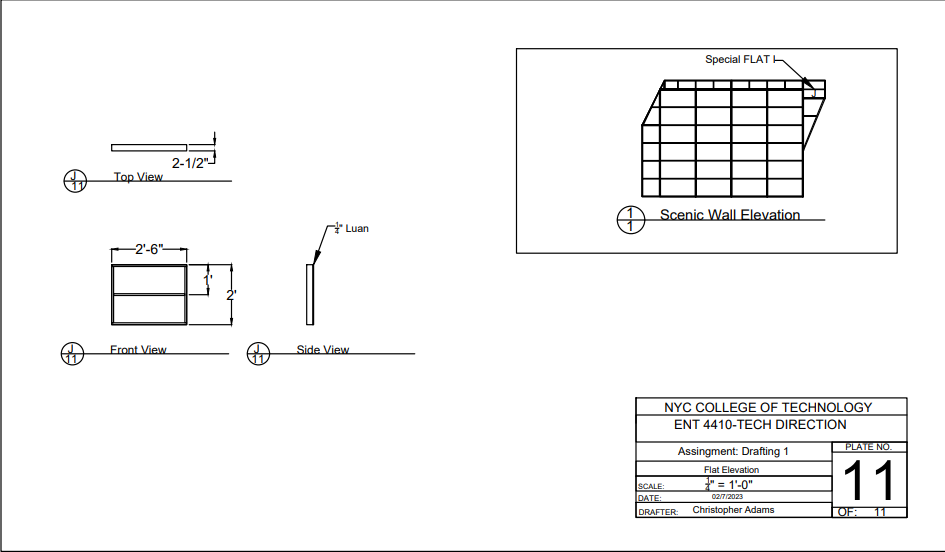
For this AutoCad assignment, we were tasked with arranging the flats used for a wall with an angled corner. The exercise helped me revisit using the AutoCAD software tools used for technical drawings. Breaking down the wall structure and reconfiguring it in a way that made sense. Additionally, I had to remember how to create a layout to complete the process.
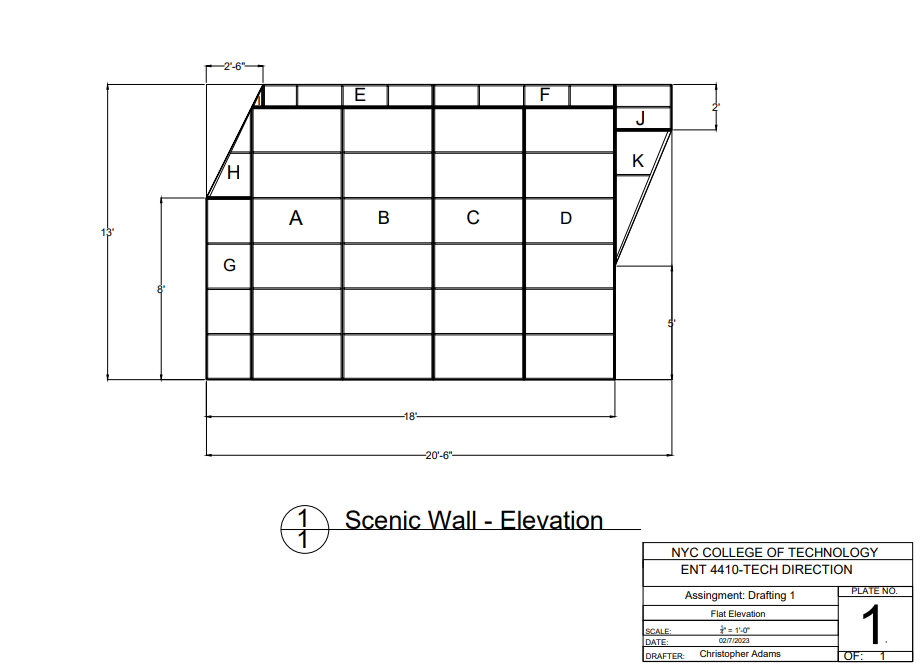
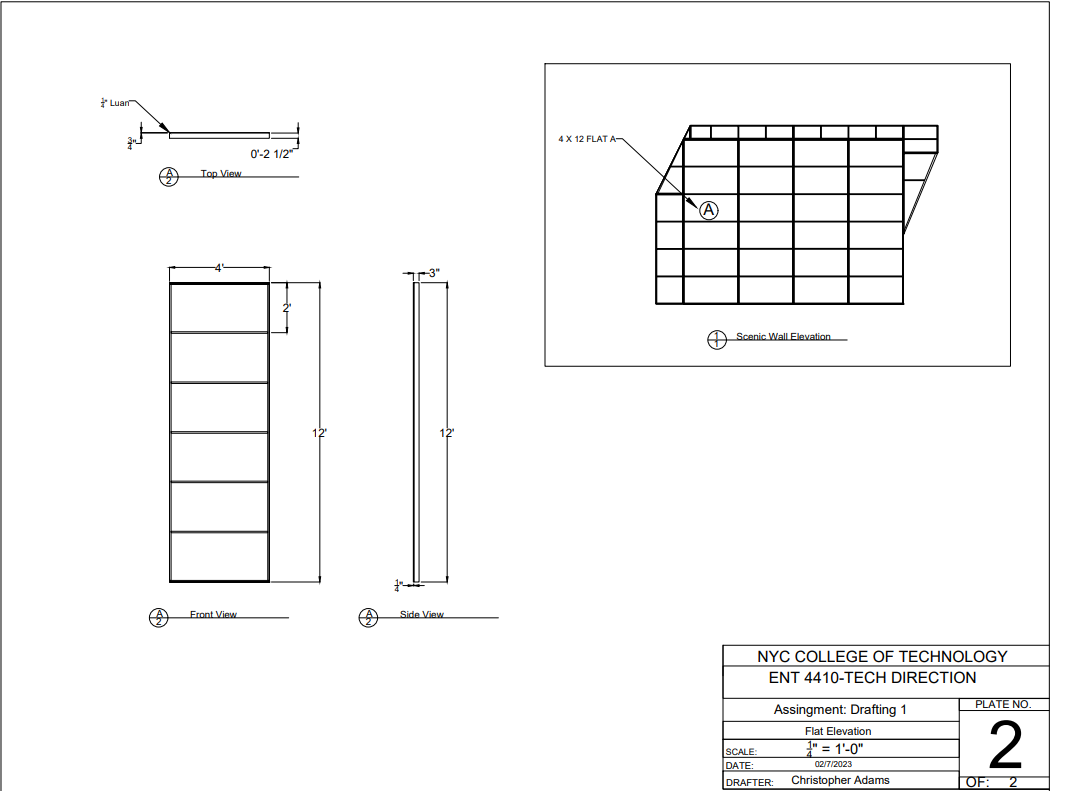
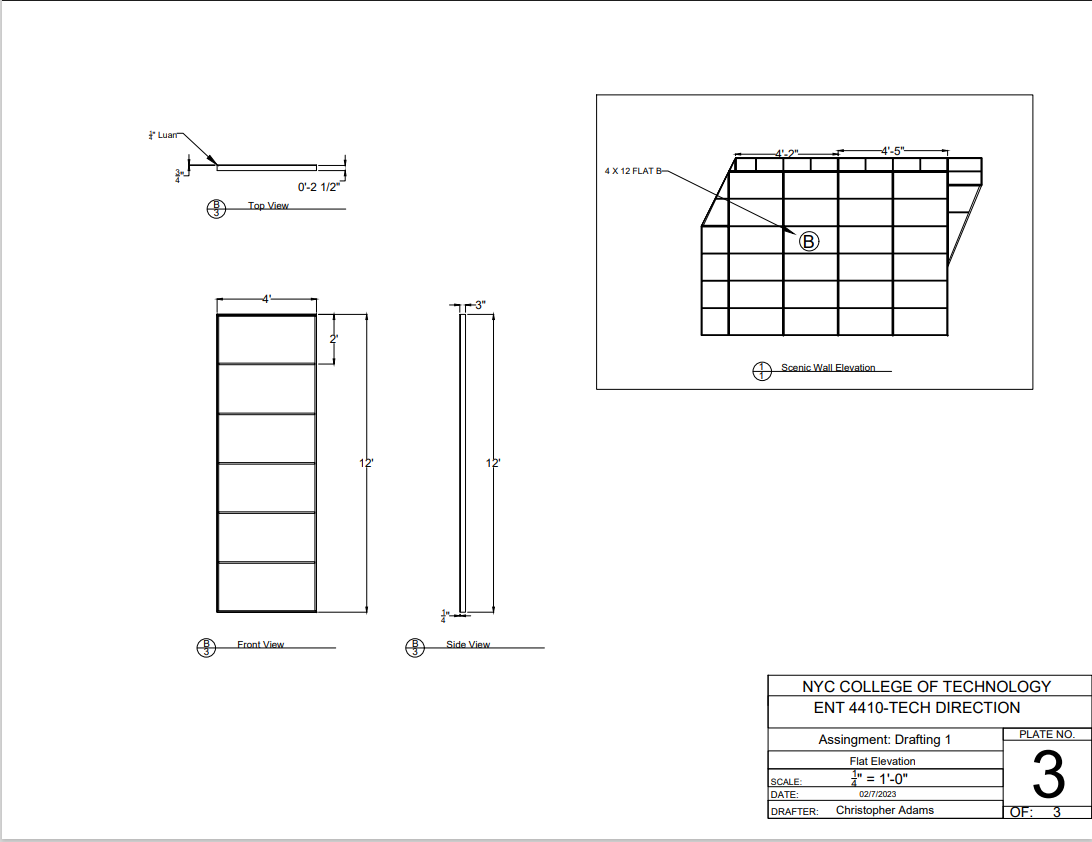
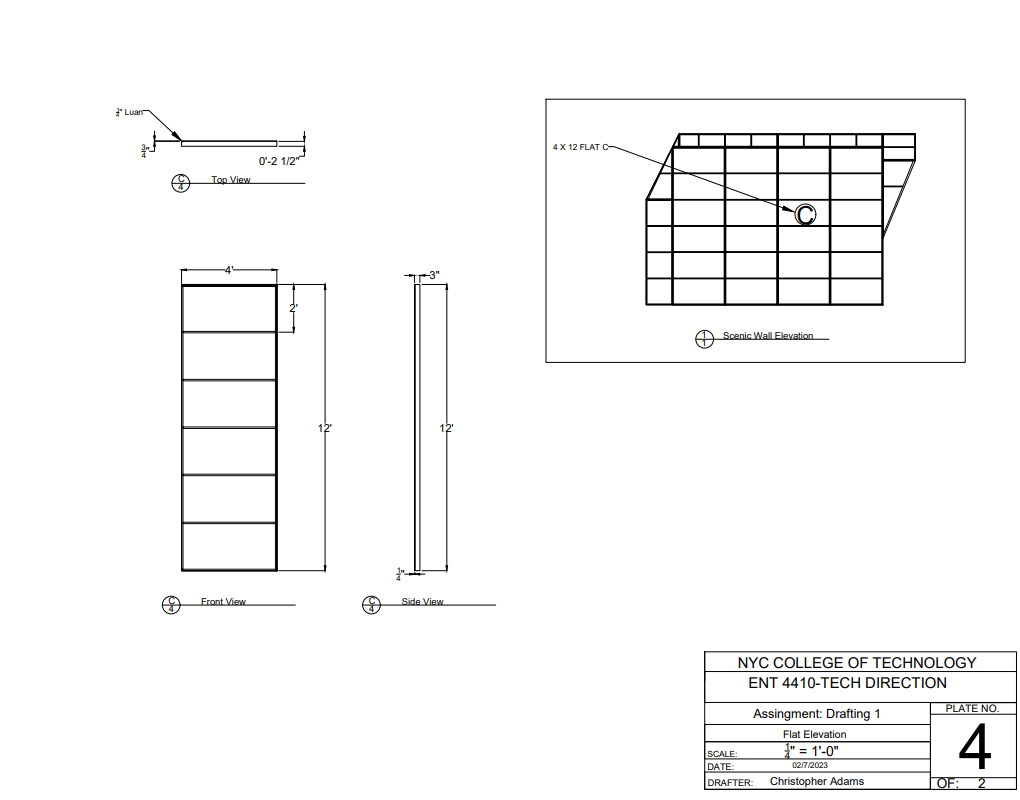
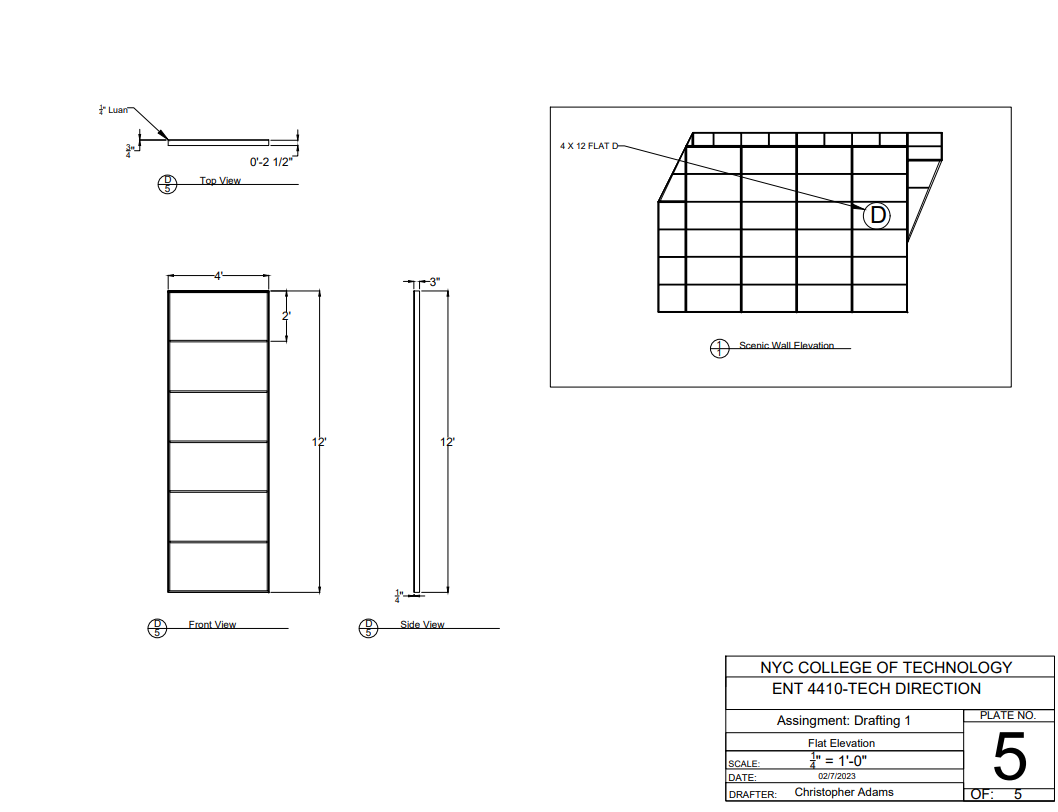
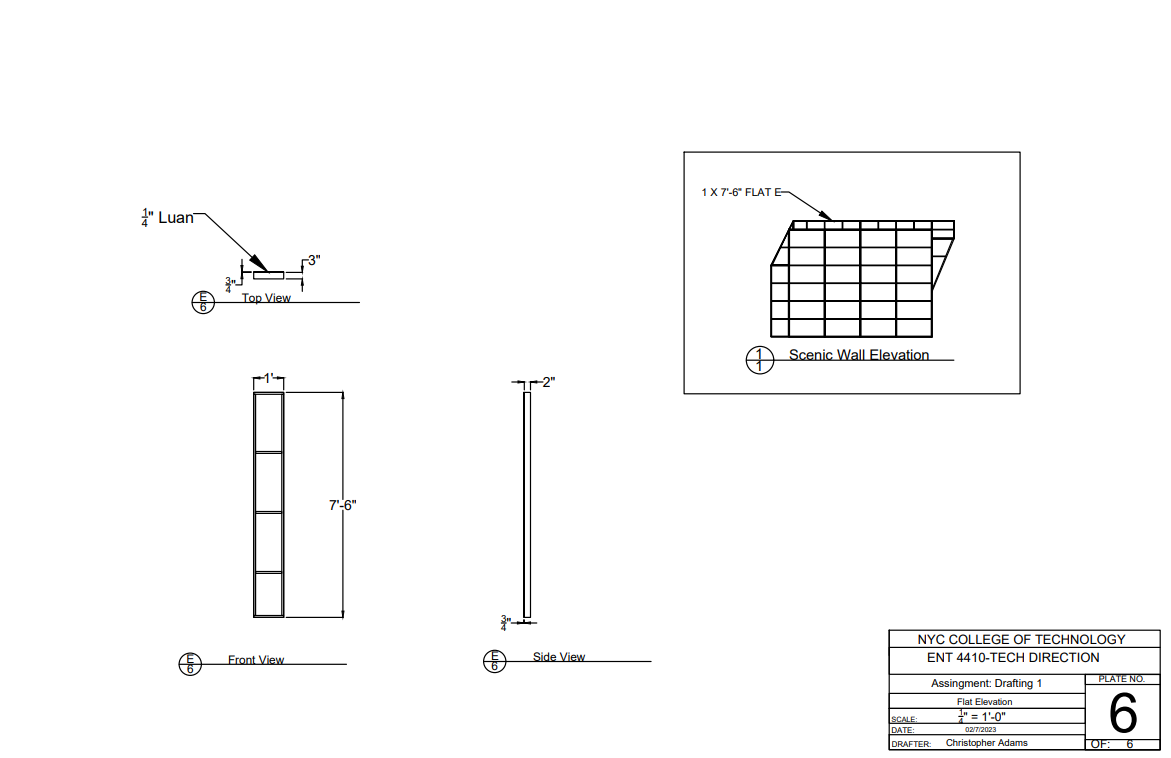
I made some changes to my technical drawings. The walls on the left and right originally had an elevation of 8′-0″. I made some adjustments, and changed the walls to 12′-0″.
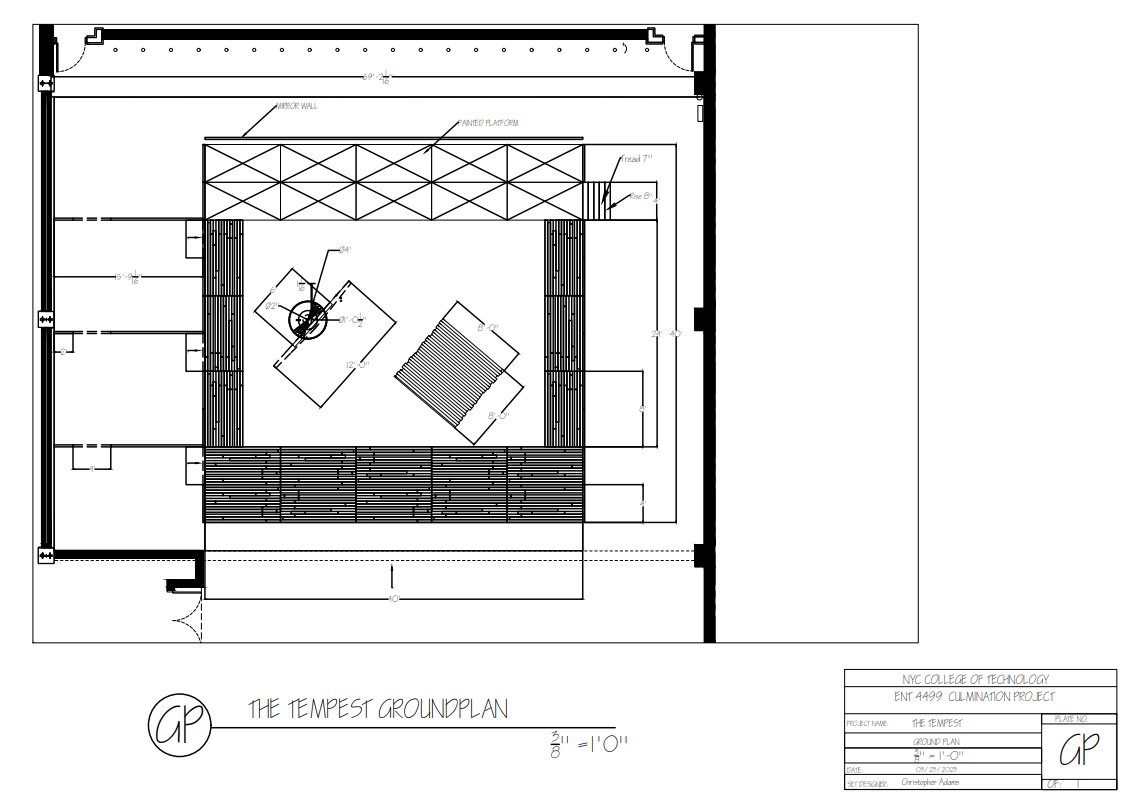

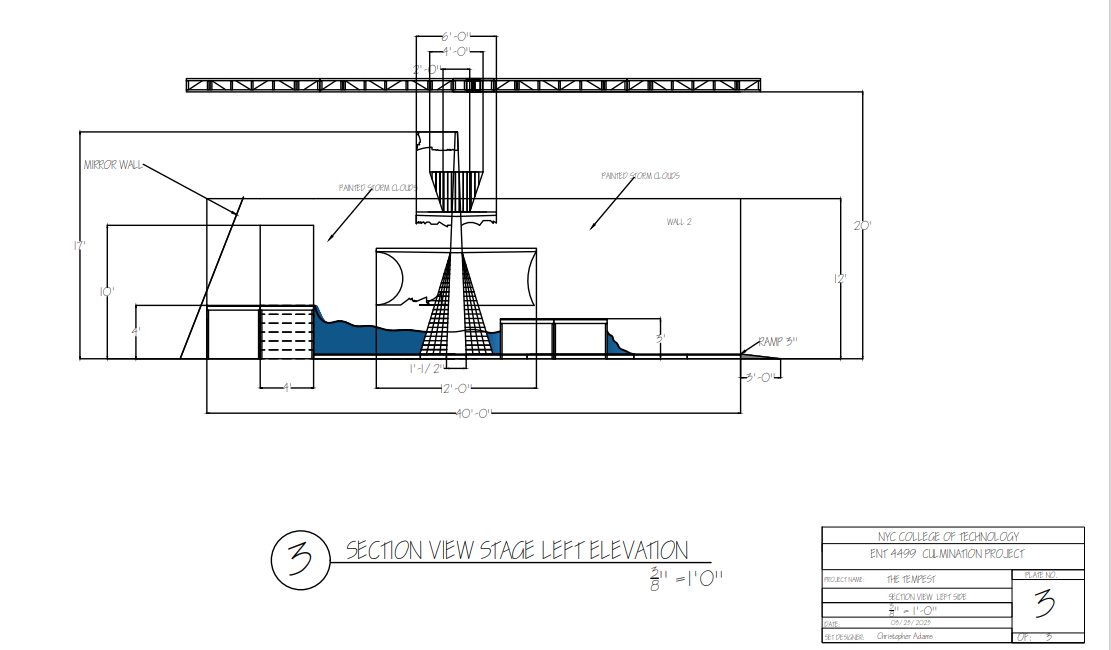

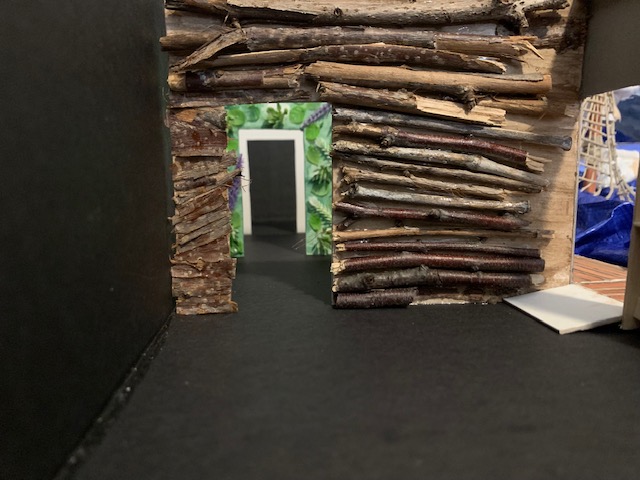
After a challenging few weeks of working on a set design for Act I of The Tempest, I can finally say it is completed. As challenging as it was, I found the overall process very enjoyable. Starting from scratch was the difficult part. Figuring out the overall look of the design took a while to make sense.
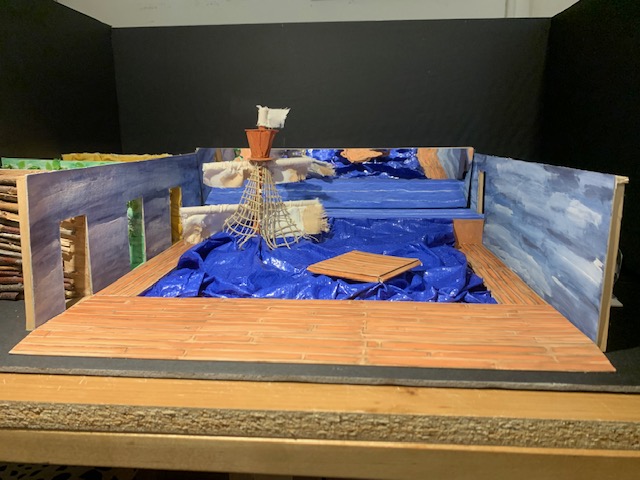
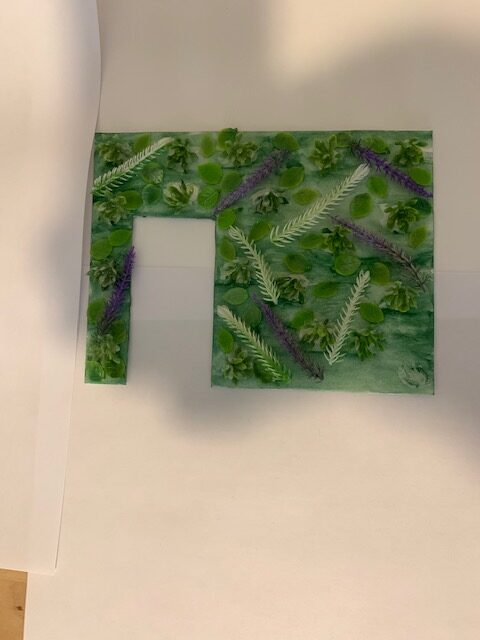
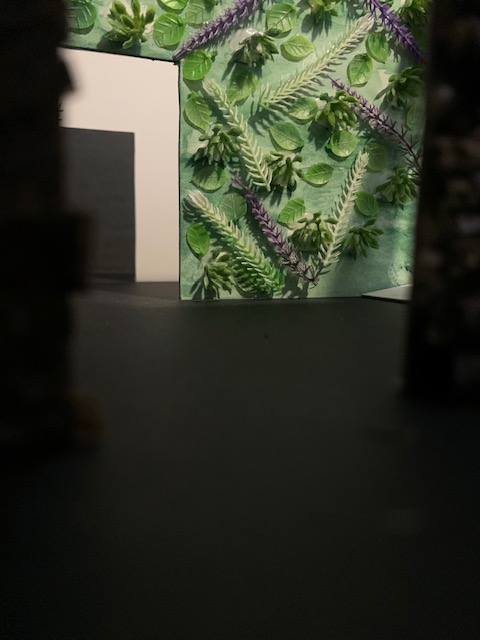
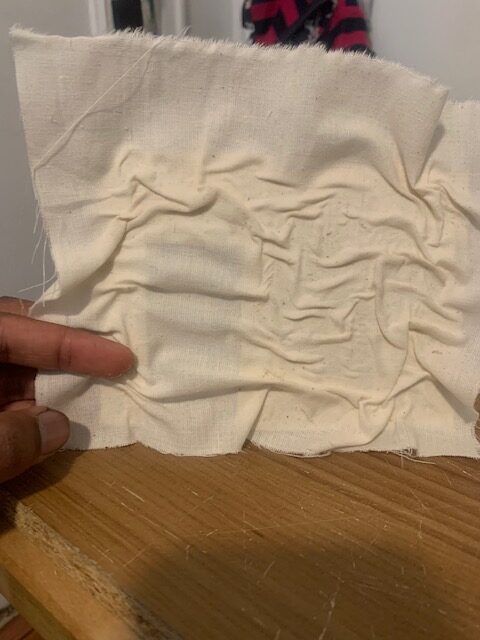
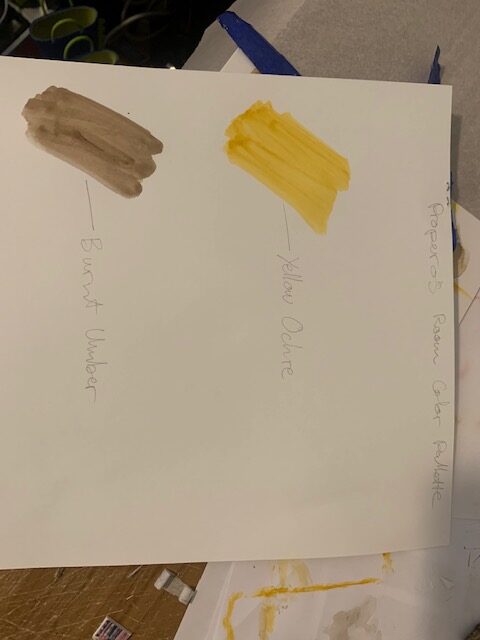
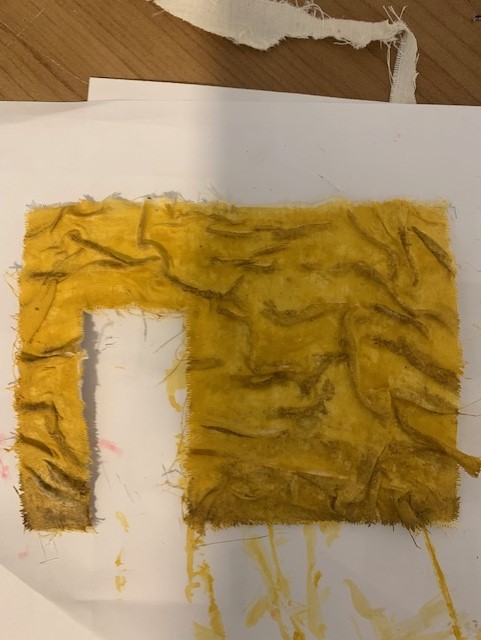
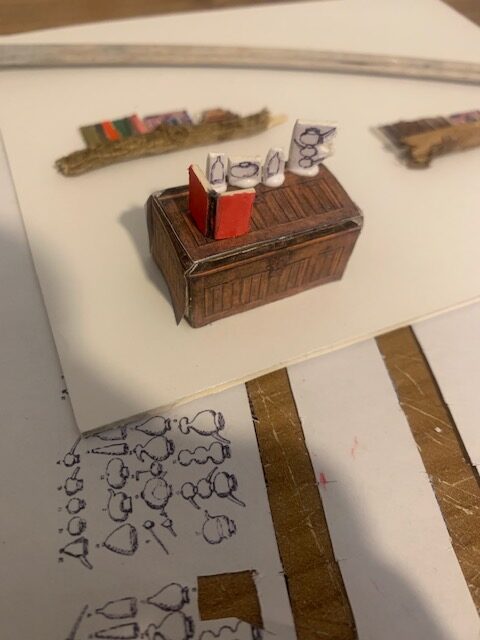
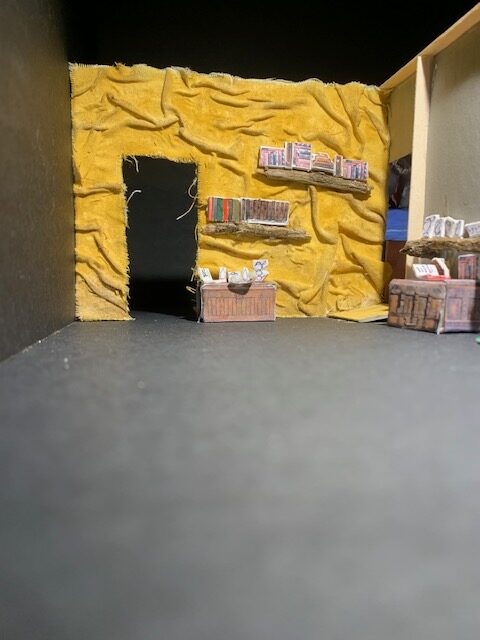
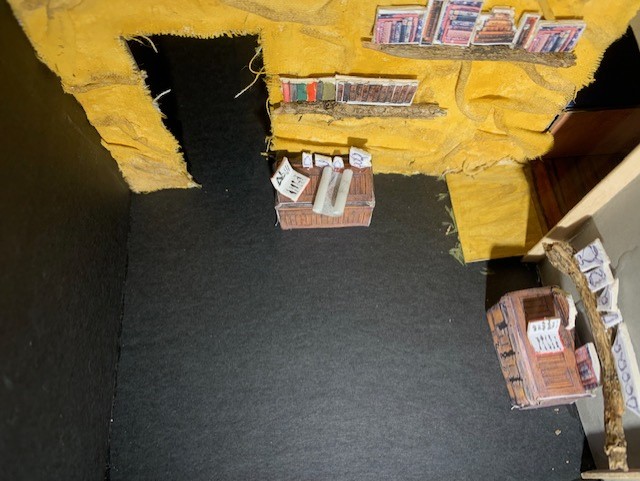
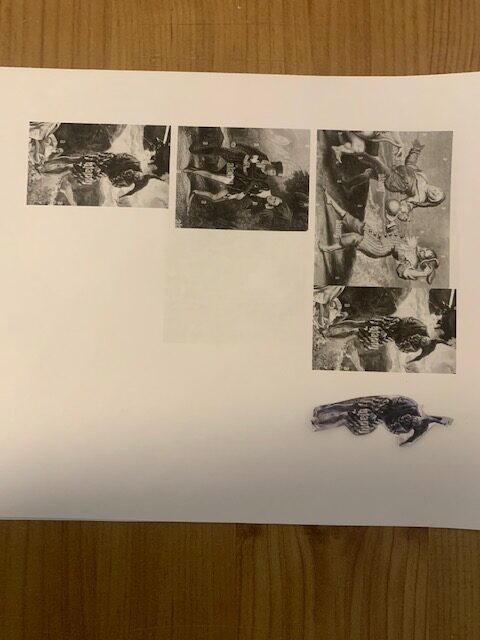
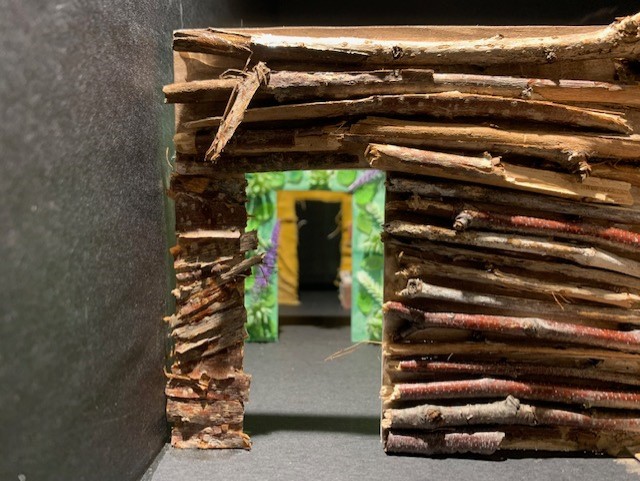
My focus for this project was on one scene, however, I wanted to include some basic layouts of what other scenes might look like. These rooms include textured walls, to give an overall feel for the theme of what a completed version might look like. For all of these themes, I drew from landscapes mentioned in the play. For the first room, the idea was to build a maze out of pieces of wood resembling driftwood. The second room has lush greenery, as mentioned by the character, Caliban. The last room is Prospero’s space, filled with magic books and scientific equipment used for his spells. I also included some 16th-century chest’s to use as make-shift tables. The walls are textured with glue, muslin, and paint. I photocopied and scaled down some images of old books, equipment, and stock images of people and characters from the play.