Gravity Forms for appointments
A useful component of the Gravity Form plugin is the ability to allow people to schedule appointments with you by visiting your OpenLab site, such as for tutoring or office hours.
1. First, activate Gravity Form under Plugins in the left-hand menu of your Dashboard.
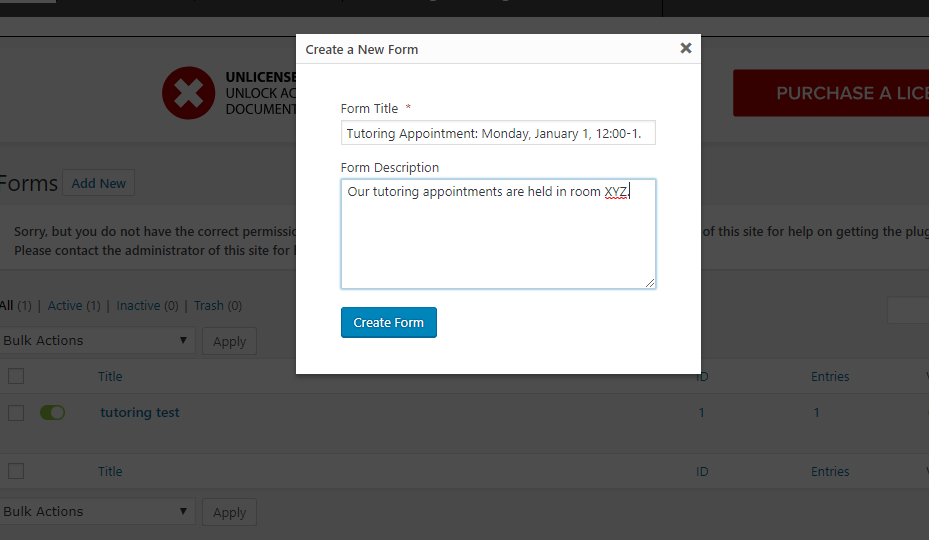
2. Go to Dashboard > Forms > New Form. Here, type in a title (for example, “Tutoring session on January 1, 2099, 1:00 p.m.-2:00 p.m.”) and description (for example, “Choose this spot, and we will confirm your appointment by email. The room number is Namm 000.”) > click Create Form.
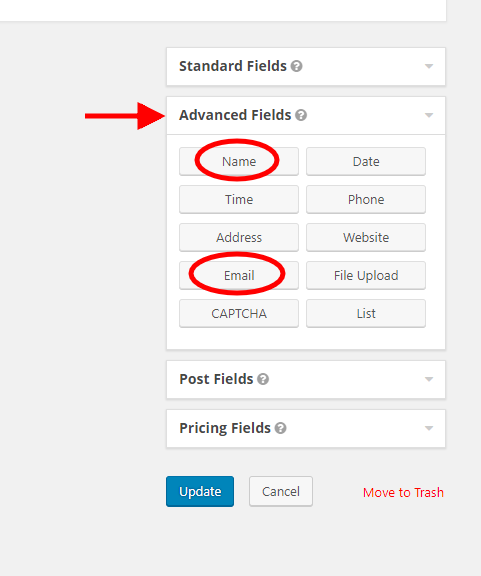
3. Go to Advanced Fields (on the right) > click Name & Email. These are the information that you want about the people who sign up for your appointments. You can also choose any other categories of information that you want to gather, such as a phone number.
The fields you choose will show on the left, like this:
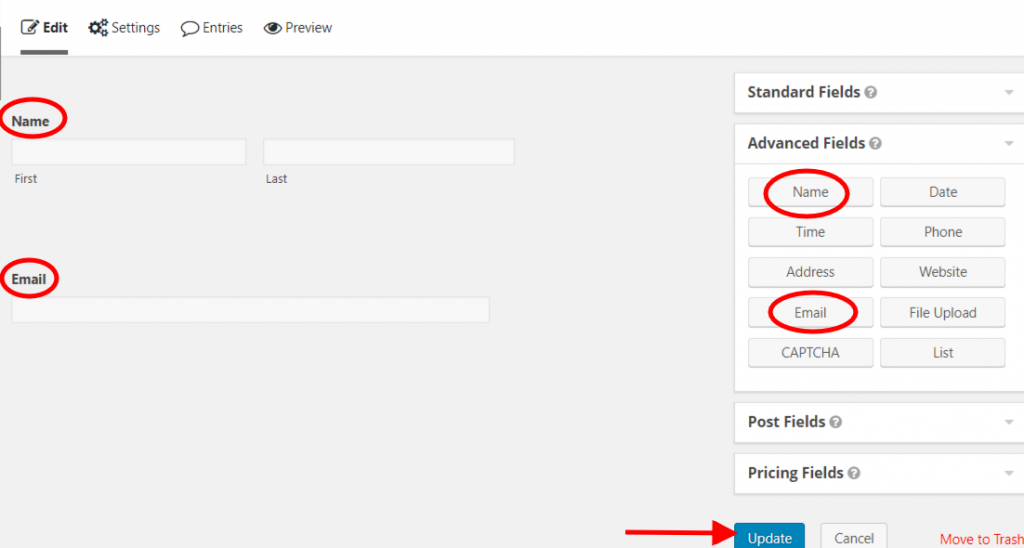
Make sure to click Update, the blue button on the lower right.
4. Repeat for each additional appointment that you want to offer.
5. Navigate to the page (or post) where you want the sign-up form to appear, via your Dashboard > Pages > [select the page you want] > Edit.
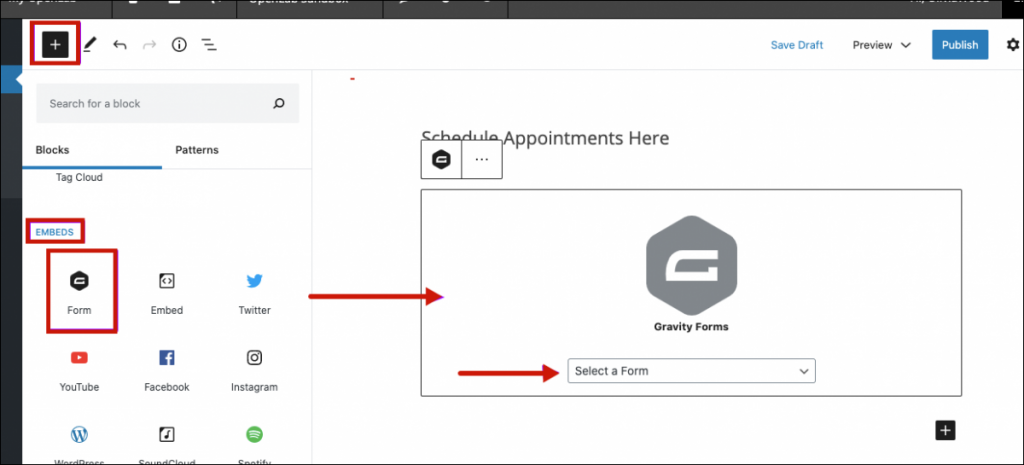
6. Add a Form block by adding a new block and choosing Form as the type. In the dropdown that appears, select the form you want to add in the dropdown, and you will see it appear in the block.
Repeat the process for any additional forms you want to add.
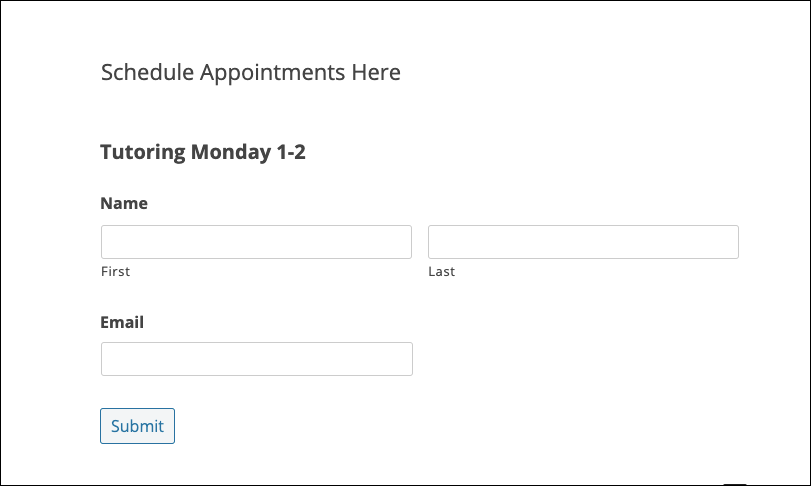
When you view the page on your site, it will look like this:
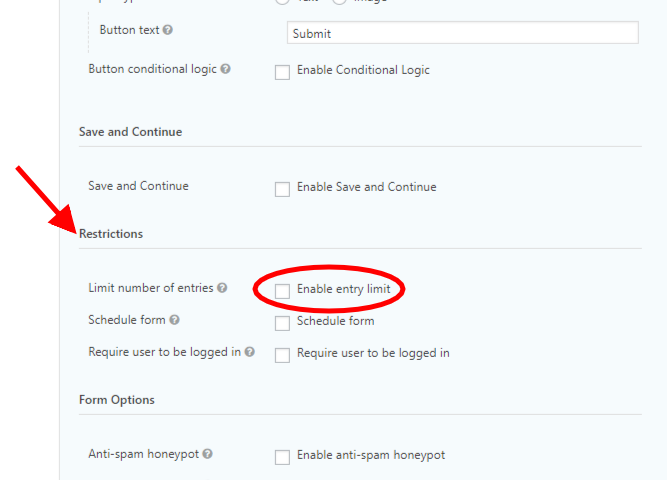
6. You can even add a limit to the number of people who are allowed to sign up for an appointment, in case you want to ensure one-on-one tutoring or office hours with no scheduling conflicts. To do that, go to Dashboard > Forms > [select the form you want] > Edit > Settings > Restrictions > Enable entry limit > [type your number in] Total entries > Update Form Settings.
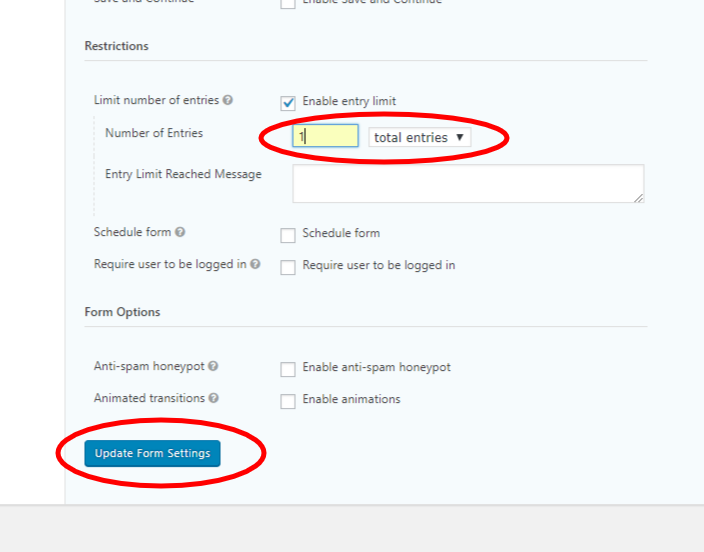
When the maximum allowed number of people sign up, the entry will disappear from your site, and be replaced with a message that says “Sorry. This form is no longer accepting new submissions.”
7. To see who has signed up for your appointments, go to Dashboard > Forms > Entries.
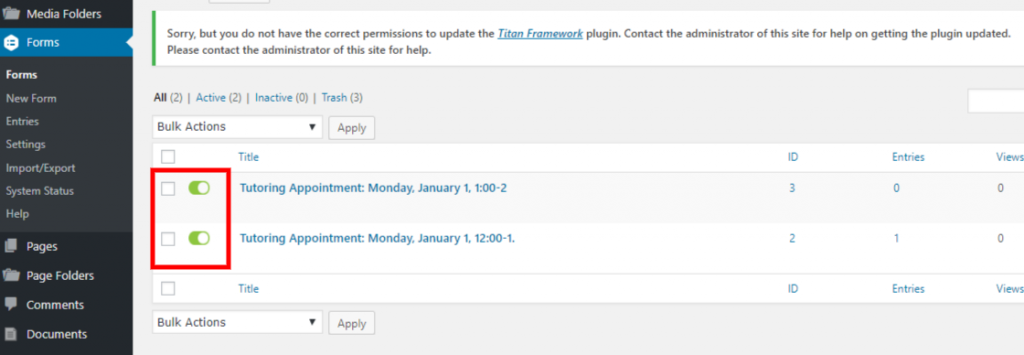
8. To hide or show the forms on your site page, go to Dashboard > Forms, and use the green slider. This can be useful if you have set a maximum sign-up total and you want to hide the “Sorry” message that appears on your site after the appointment has been filled.
Looking for Classic Editor help? You can find it here: Gravity Forms for appointments (Classic)


