Hand Drafting a Floor Plan – Time Lapse by Prof. M. Loo
Hand Drafting a Building Section – Time Lapse by Prof. M. Loo
Hand Drafting a Building Elevation – Time Lapse by Prof. M. Loo
General Step-by-Step Guide to Module 1 Drawing Assignment
Note: Follow dimensions and specific guidance of your professor
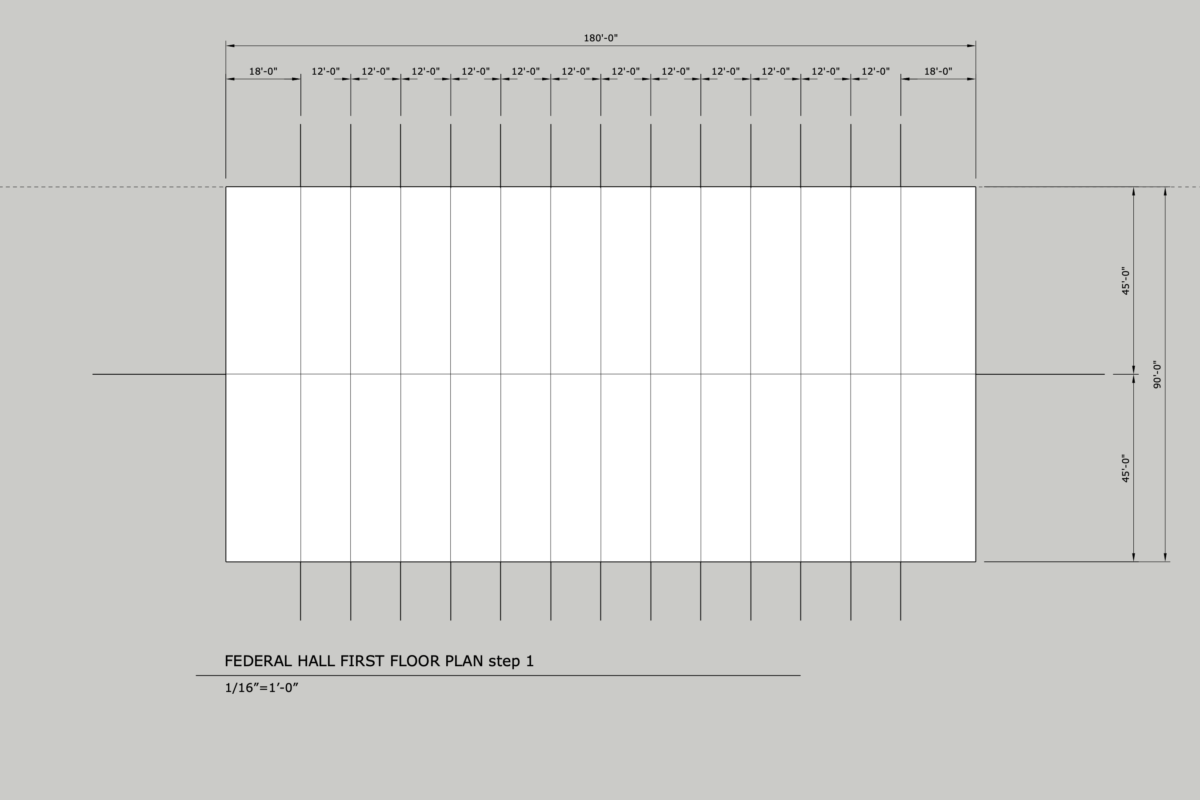
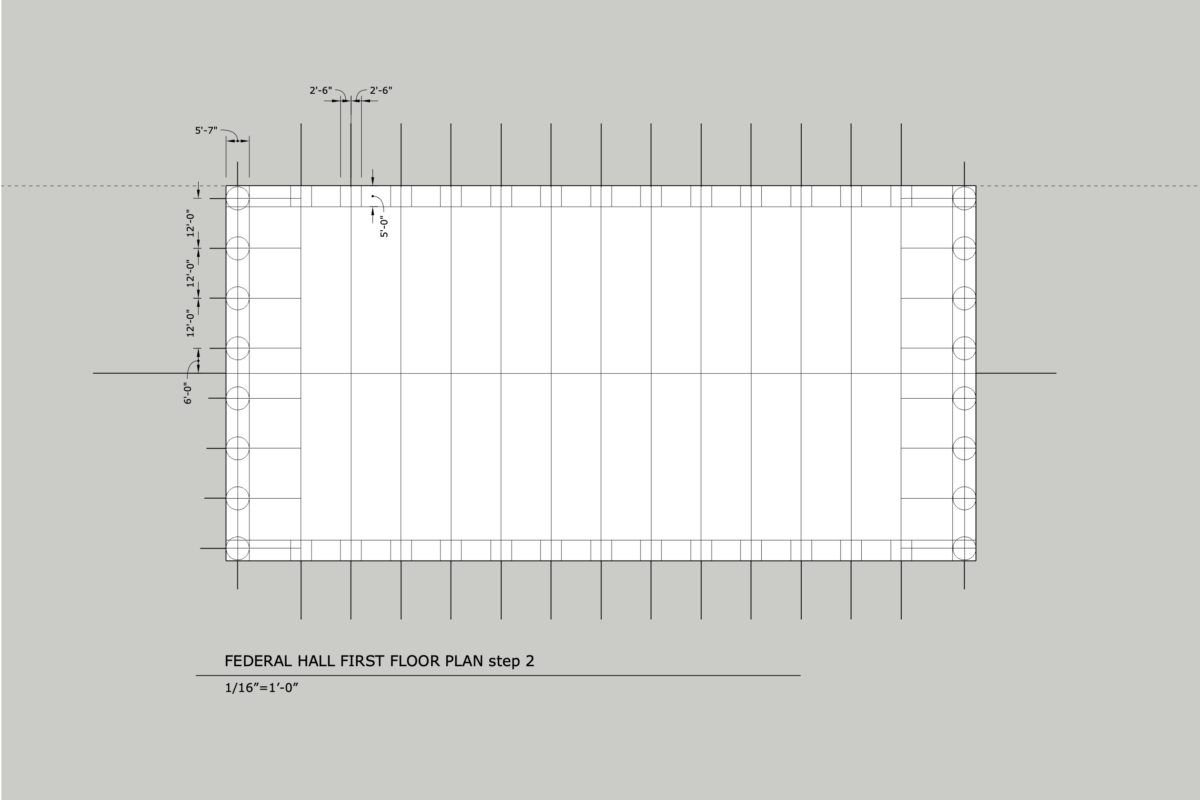
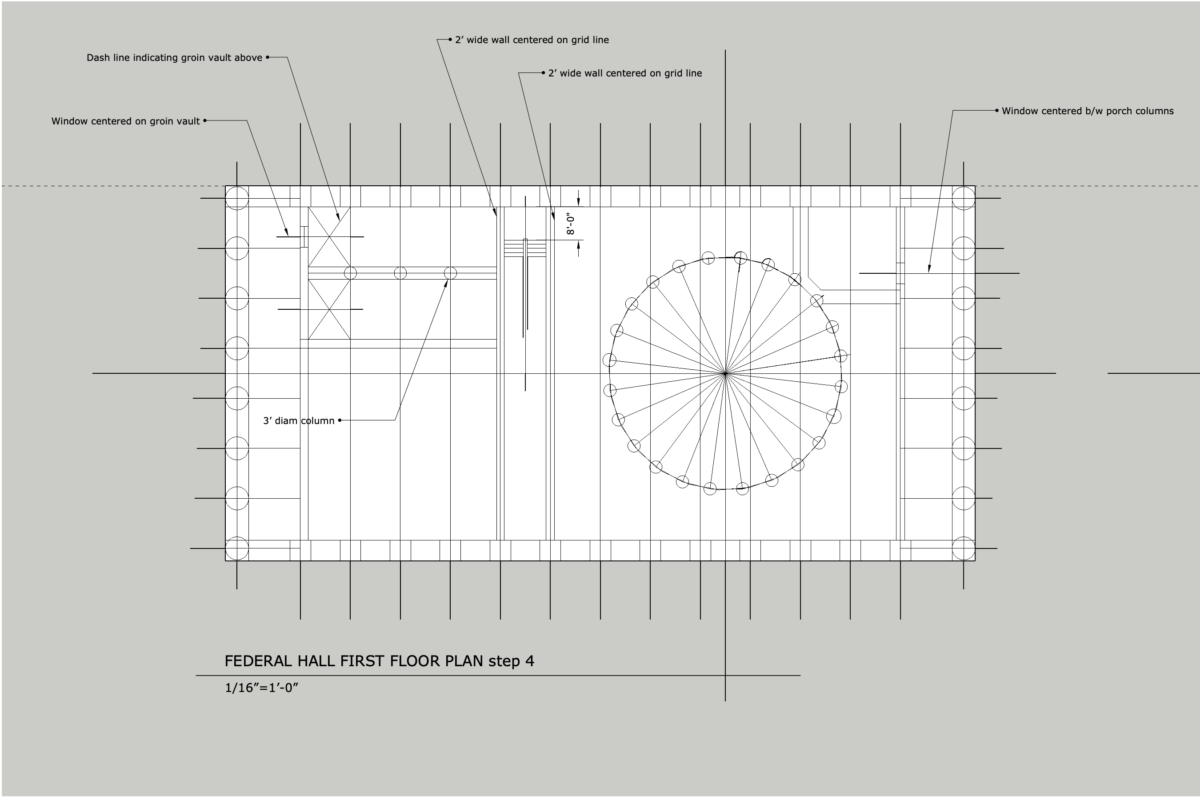
FLOOR PLAN: HOW TO GET STARTED
NOTE for PLAN: Only draw 16 of the 24 columns in the Rotunda. (4 at top, 4 at bottom, 4 at left and 4 at right)
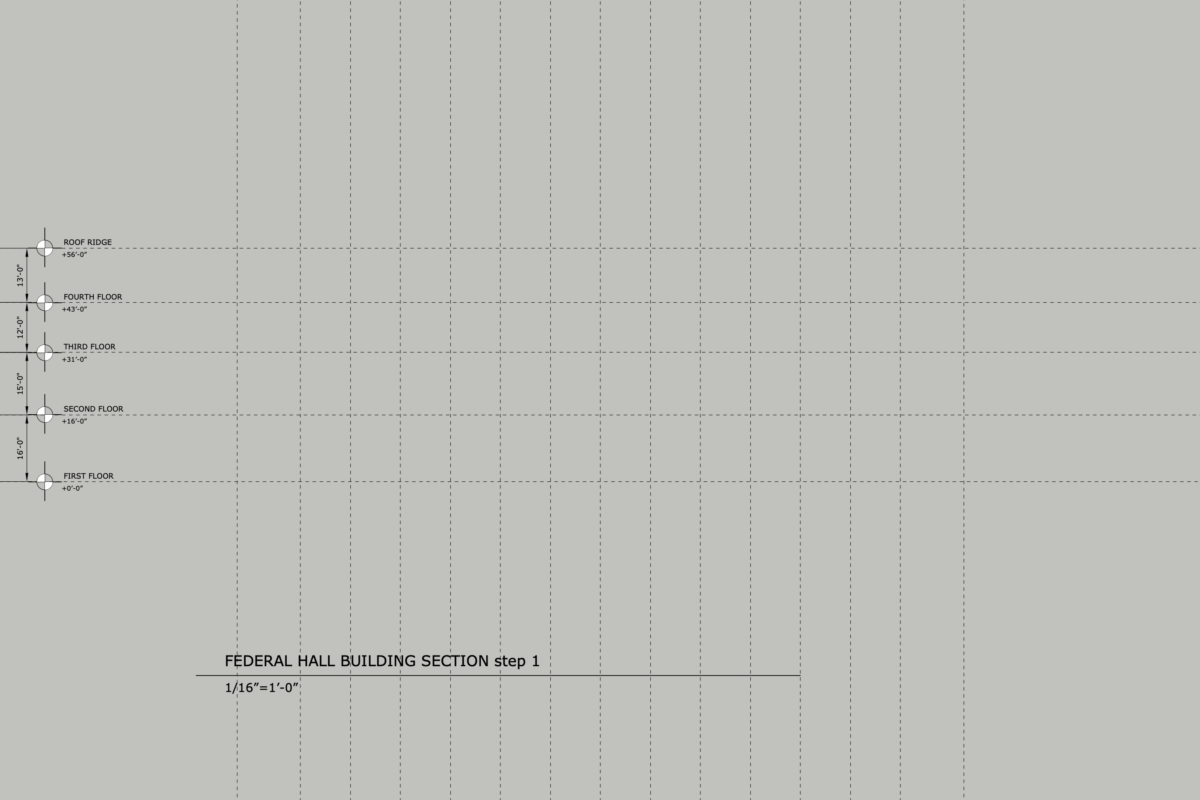
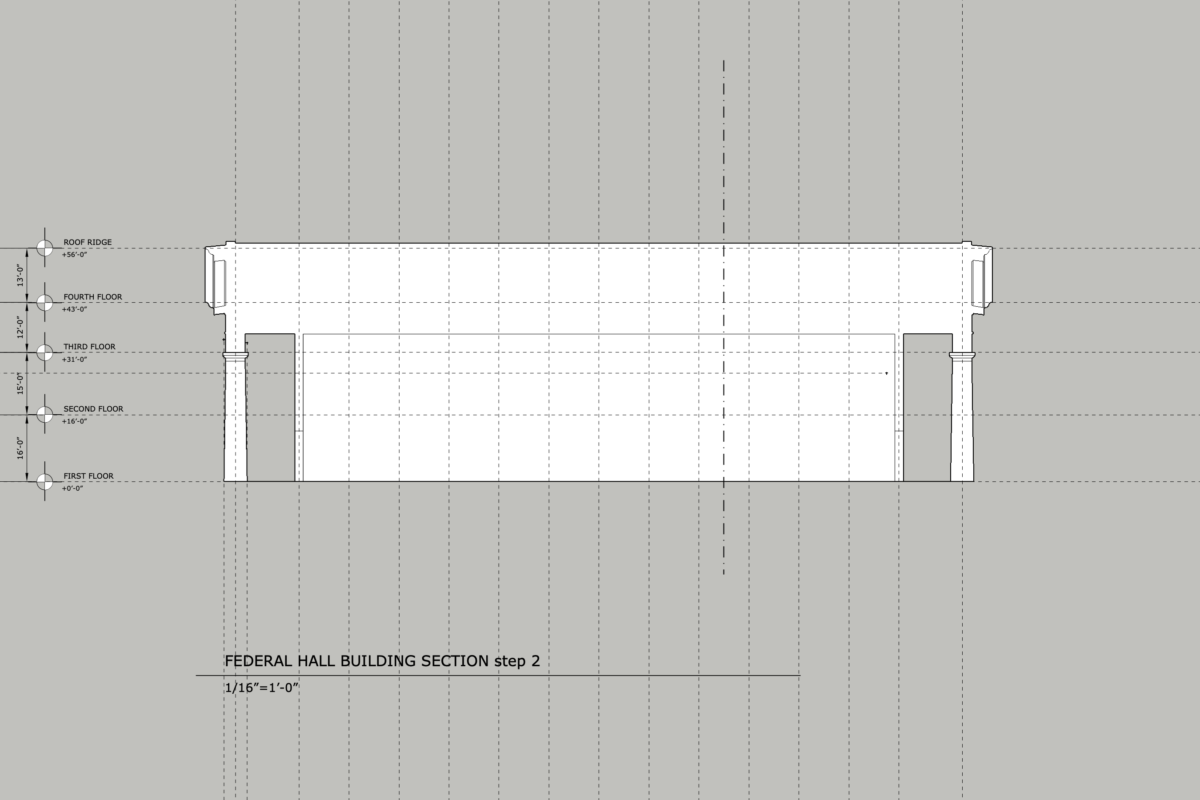
BUILDING SECTION: HOW TO GET STARTED:
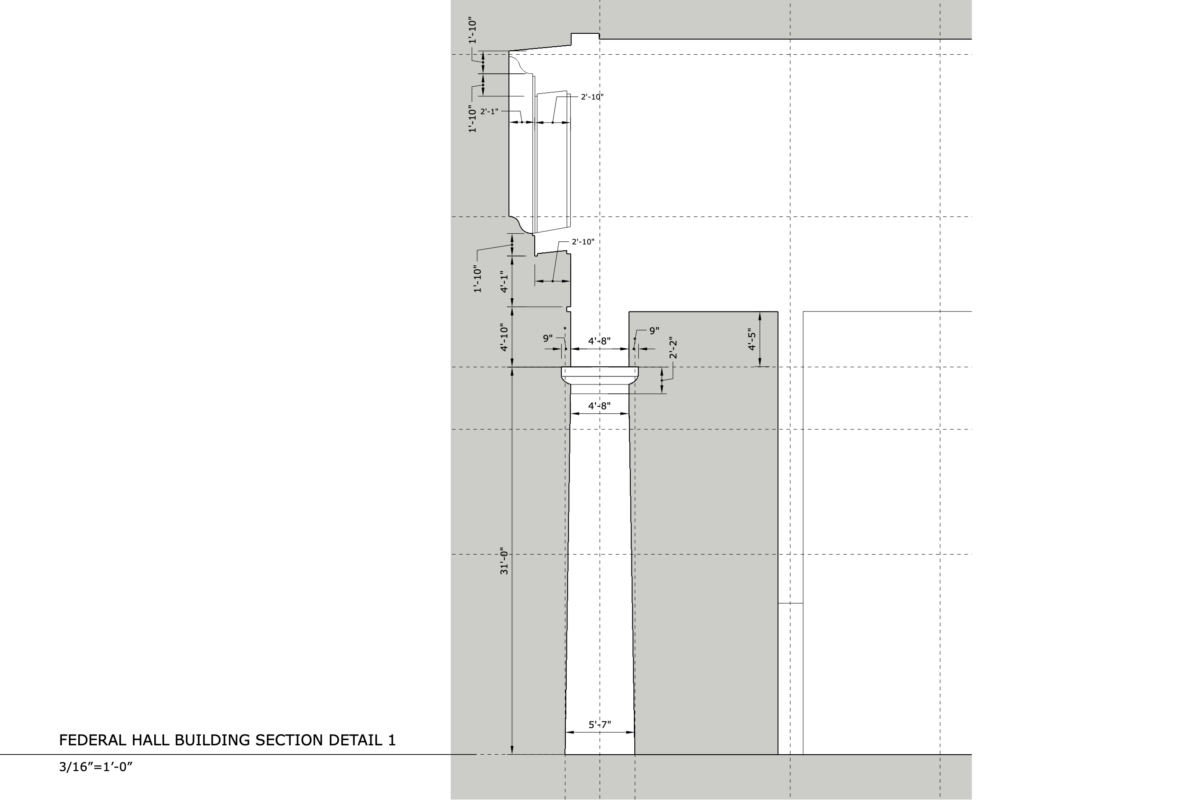
GUIDE TO SECTION DETAILS:
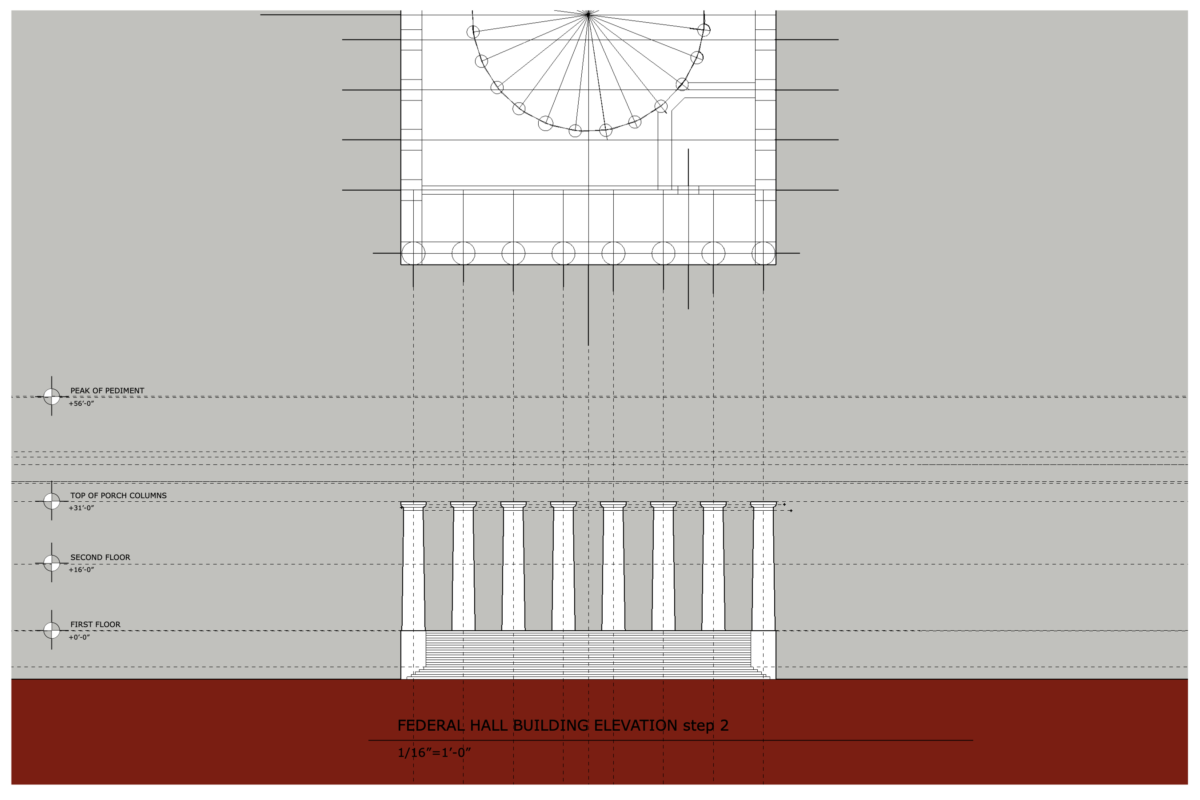
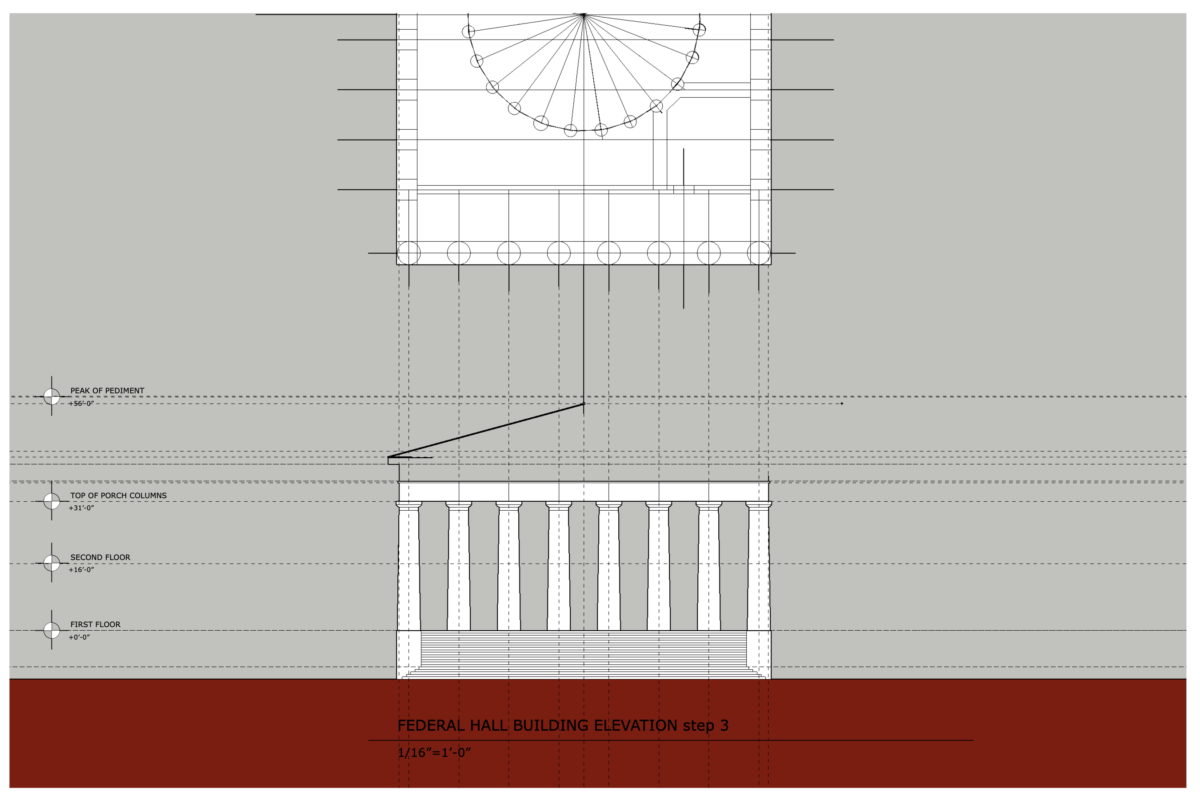
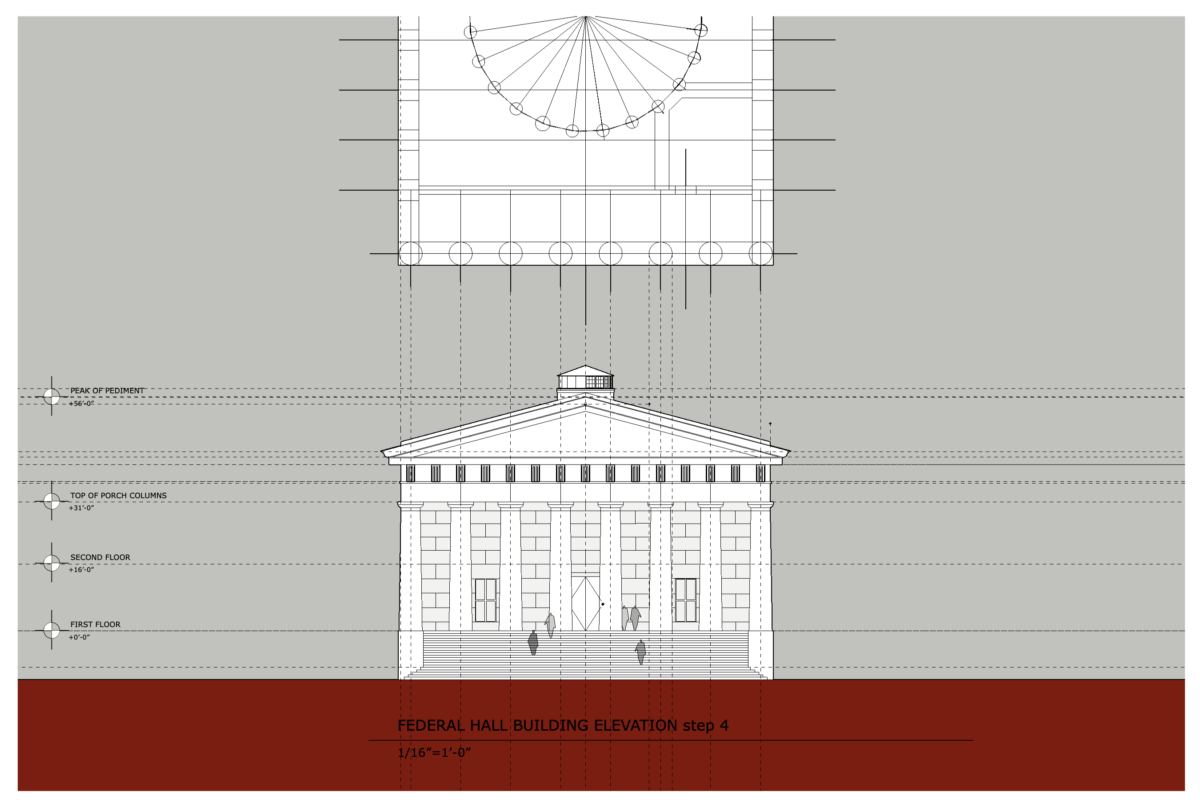
BUILDING ELEVATION: HOW TO GET STARTED:
Start your Building Elevation by taping your Building Plan to your board, rotated 90 degrees so you are facing the Elevation with the long set of steps. Transfer the plan elements by drawing vertical construction lines from Street level to the Roof line, working from right to left.Draw the heaviest lines at the First Floor and also the Street level. It’s more important to space your steps evenly rather that accurate to real dimension. The columns taper as the go up with about 6″ reduced dimension at every side of the column (About 1′-0″ per column from 5′-7″ diameter at the base to about 4′-8″ diameter at the capital.)
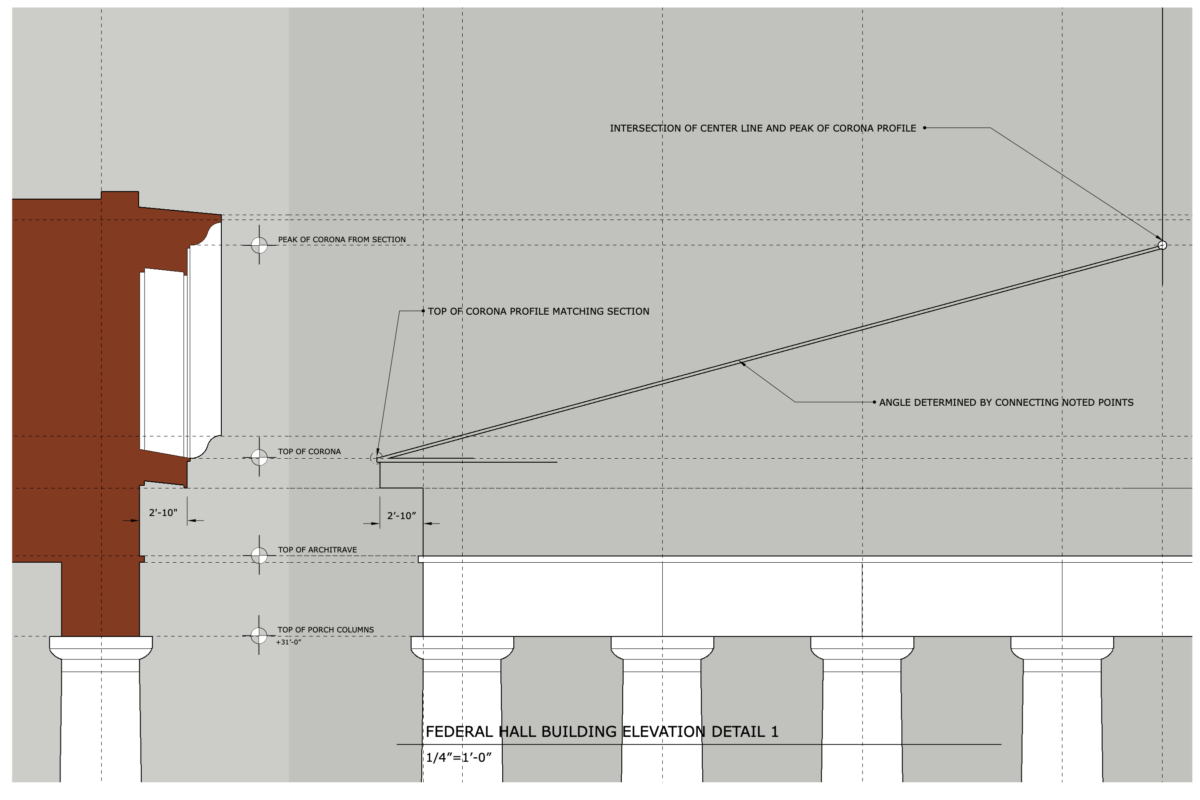
GUIDE TO ELEVATION DETAILS:
Credit: Jason Montgomery, author and creator of Building Technology 1 content
About
This Course Hub provides information and resources supporting all sections of ARCH 1231 Building Technology I