King – Due for Thursdays class – April 22nd

Assignment Review (all students)

  • Work on building families for both opaque wall and glass curtain wall
  • Work to develop sheet layout‐ adding additional views including
    • Wall Section at ½” or ¾”, Cropped wall section details at 1 ½”, larger details at 3” for coping
    • Wall section should show, parapet & roof slab, top of window, sill of window, level 2 slab connection, base condition @level 1, footing.
    • Plan details and coordinated elevation views of the following –
      • Inside corner, outside corner, window
          • Next class will be one‐on‐one critiques in break out rooms.
          • Next Tuesday April 28 we will have a graded pinup

Breakout! – In Class Cube Curtain Wall Assignment – King

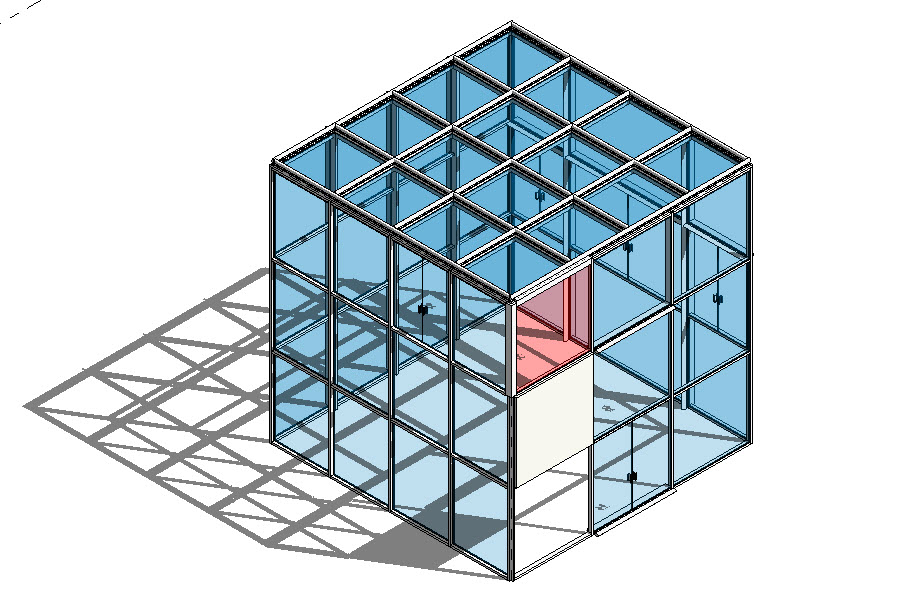
After demonstration of the in-class assignment (27′ glass curtain wall cube), the class will divide up into 5 break out rooms of 4 students each.Β  Complete the following in class exercise as a means to mastering Revit’s curtain wall commands while your professor visits each group.Β  Steps below…

    1. New Project > Architectural Template
      • Set Level 2 elevation at 27 feet
    2. Level 1 Plan View > Draw (Curtain Wall 1 type) – 27′ x 27′
    3. Divide up the facade into panels by defining grid- design is flexible
      • single grid line, grid line segment, all grid lines
      • Load all panel typesΒ (Insert > Family > Curtain Wall Panels)
      • Use both Glazed Panel, Empty Panel, Solid Panel
      • Copy Glazed Panel Type > Duplicate > Set it to red
        • Edit Materials > Glass > Duplicated Color > Set it to Red
      • Load door tops and replace panel with door
    4. Add Mullions –
      • Select mullion types as you please
      • Create Custom Mullion – from new profile
        • Family > Profile-Mullion
          • Basic Mullion Rectangle
          • Create custom fancy Mullion – ie. Sunscreen Device
    5. Glass Roof –
      • Control Slope- create flat roof – use Curtain Wall 1 type

INSTALLATION VIDEOS-TENLY LAW

TIME STAMPS:

0:03-0:12 SPIDER CLIP ASSEMBLY

0:16-0:26 GLASS PANEL ASSEMBLY

0:28-0:53 GLASS PANEL AND SPIDER INSTALLATION ASSEMBLY

TIME STAMPS:

1:36-2:35 STEEL FRAME INSTALLATION

2:42-2:53 LOWER STEEL WALL INSTALLATION

2:55-3:15 MORE STEEL FRAME INSTALLATION

3:17-6:06 REPITITION OF STEEL FRAME AND STEEL WALL PANEL INSTALLATION

Facade Material and Curtain Wall Installation

Metal Panels Installation Video

  • 0:13 : Tools
  • 0:40 : Rivet Attachment
  • 0:54 : Drilling Metal Base
  • 1:08 : Fastening Screws for Panel Attachment
  • 1:25 : Caulk Joint Attachment of Panels
  • 1:59 : Buildings with Panels

Curtain Wall Installation Video

  • 0:13 : Interior Framing
  • 0:22 : Glass Assembly
  • 0:33 : Thermal Barrier
  • 0:56 : Exterior Framing
  • 1:19 : Anchoring Assembly at Mullion
  • 2:02 : Installation of Glass Panels