HW4_DIY Studio

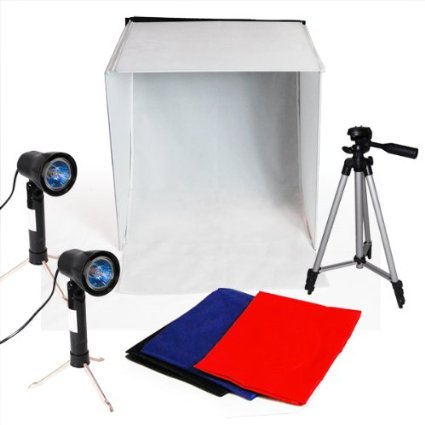
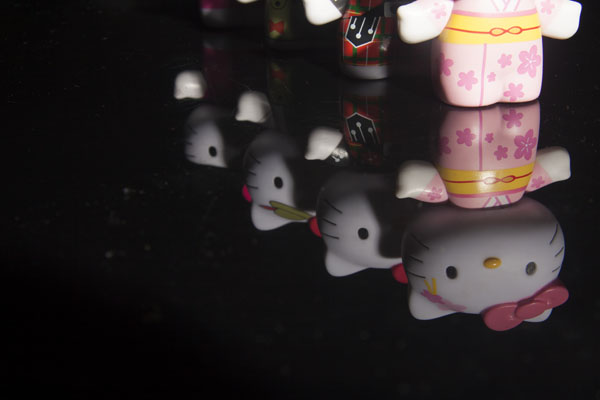
I decided to buy a DIY studio instead of building it. I was thinking about building but, it seemed tough I m not good at building things. I bought the 16″ LimoStudio photography photo studio lighting kit on amazon.com.

The lighting kit includes :

  • (1) LimoStudio 16″x 16″ photography tent studio light box
  • 4 colors non reflective fabric background with colors red, black, white and blue.
  • Can be transformed to convenient carrying bag
  • (2) Photography Studio Lamps
    Studio Quality 5000K Output
    120V 50W GU10 lamps for excellent and even color temperature and clarity
    Eliminates unexpected shadows
    Height adjustable maximum 9.5 “
  • (1)  LimoStudio 41″ Camera Camcorder Stand Tripod
  • (1) LimoStudio Nylon Carrying Case with Shoulder Strap included

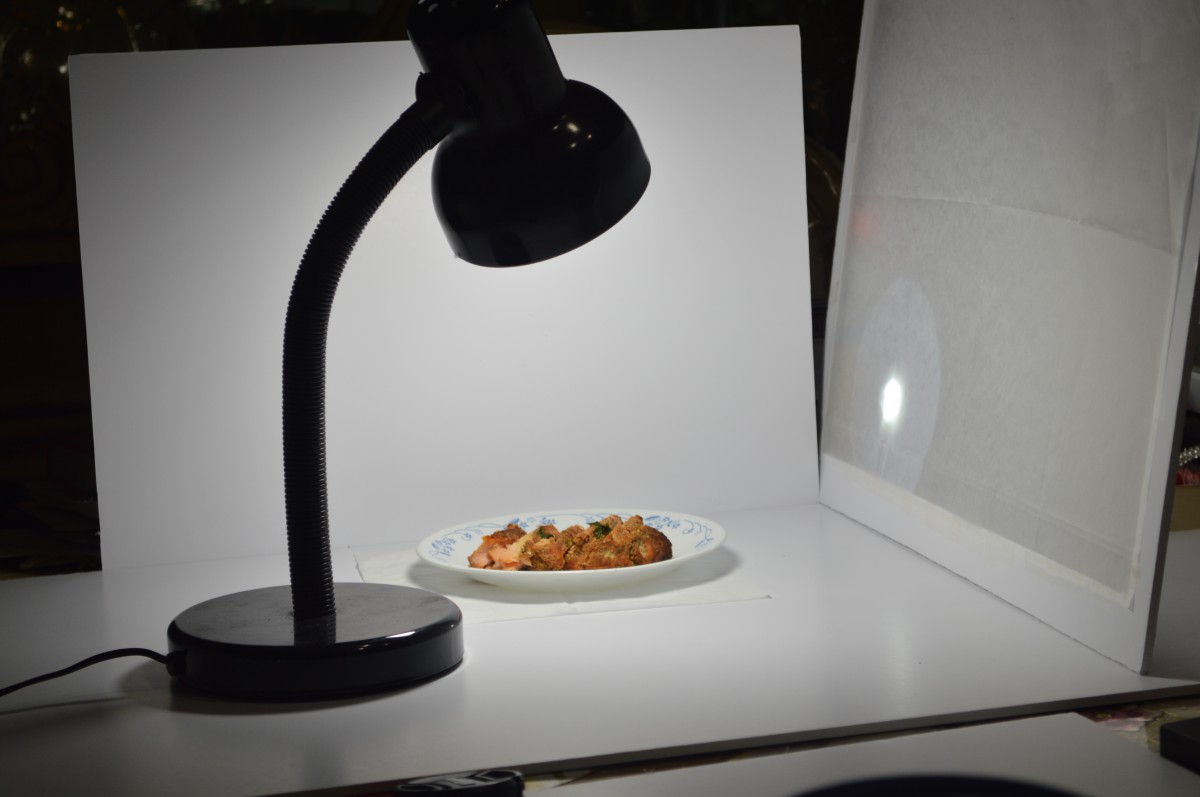
Tried for the Yum homework with the chocolate chip cookies. Works well and its easy to use I m satisfied with the product.

MiniStudio


Posted in HW4_DIY Studio | Leave a comment

LL7 – Direct Reflection

My group used the foam board and the blue board for the background and by positioning the strobe light. This is a way to control where the light hits the object and also by using the angle of incidence to get that angle of reflection we were looking for. This way you angle your object so the light projects towards the object. It will reflect at a parallel angle, which can be used on the subject. By, using direct light for each shooting so the object doesn’t appear to shiny so it doesn’t cause a glare. So, when we use the concept we will not have that hideous glare.


Posted in LL7-Direct Reflection | Leave a comment

DIY studio

The way I first started to develop my mini studio was buying two large white foam core and cutting a frame from it. Then i use a big sheet of tracing paper to cover two halves of the frames I had cut out  so that It can be used as the light umbrella. Thinking that I can make a box all around with it, it didn’t turn out right. So I went for another approach. I thought if I can use those two halves and stand it up in a triangular shape against a white foam core background, I can get a good shot of something. But then I realized that it wasn’t enough room for me to put an object in it with the limited small space there was. After that i finally figured out a way to set up my studio. I used another full sized foam core which made of the two halves as the base. Then I use another half foam core as the background wall and have one half of the foam core I had cut out as one of the sides for light to give off a soft light onto the subject. I used a flashlight to have light go through the light umbrella I made and i use a wired lamp to give light onto the studio platform. The lamp works out well because it is not harsh on the subject. It gives off a nice balance of white light on the surface of the studio.


my mini studio

Posted in HW4_DIY Studio | Leave a comment

LL7_DirectReflection_Wilbert

Using the backboard or a background, I can control the way light hits an object by using the angle of incidence to the angle of reflection. This concept insures that at whatever angle you project your light at, it will essentially reflect at a parallel angle, which can be used on the subject. Using a direct light in every shot, especially with a shiny object can cause glare.

Posted in LL7-Direct Reflection | Tagged | Leave a comment

LL5_LightingDirection_Wilbert

IMG_9643


My favorite about lighting direction is the difference you see in the shots, placement becomes key. The two shots I picked are very different from another. The background used in each photos factor major roles in their compositions. But what I think made them their own was the lack of movement from one another.  The pumpkin and candy corn almost seem to pop at you, but the skull on the other hand seems to be stationary, but the lack of light makes it seems as if it was levitating on it’s own. The orange radiance from the pumpkin reassures you that the skull is sitting still. If there was anything I would remember about this year’s Halloween, it would have been this shoot. I enjoyed myself.


IMG_9697

Posted in Uncategorized | Leave a comment

HW4_DIYSTUDIO_Wilbert

tri


For my at home studio shots, I decided that I would just purchase a box to gain a good grasp of what I was I diving into. A nice set that I found on Amazon is the Limo Photography Photo Studio Lighting Kit.


This product comes with the following items:

(1) x LimoStudio 16x 16 Photo Photography Tent Studio Light Box/Tent: 4 colors non reflective fabric background included

– can be transformed convenient carry bag itself

(2) x LimoStudio Photography Studio Photo Box Table Top Accent Light: Height adjustable Max 9.5″

(1) x LimoStudio 41” Camera Camcorder Stand Tripod

(1) x LimoStudio Nylon Carrying Case with Shoulder Strap included


Shipping was usually fast but I decided that since my phone would be my main shooter for these types of shots that I could grab an adaptor for the tripod that was included in the studio kit. The product was pretty much free with the order so in the end I believe it was well worth it and help solve solutions in the future. It is compatible with many modern phones, (except Samsung’s Note 3) even with cases.


The additional product:

(1) ChargerCity Multi Angle Adjustment Tripod Adapter & Easy-Adj


Posted in Uncategorized | Leave a comment

Toy Shoot

IMG_2308

I choose this photo becase it is interesting. It do not show the whole figure of objects instead of showing the relecation. The light is from the front therefore objects are bright, clean and not that much shadoe on them. Also, the way toys aline creates a leading line which draw people’s attention on it.

Posted in LL6-Contrast | Leave a comment

LL7-Direct Reflection

Controlling reflections is a key part of still life photography. How did you control the reflections off the metal grater today? What does “the angle of incidence is equal to the angle of reflection” mean?

Posted in LL7-Direct Reflection | Leave a comment

open lab

this is an example of the “bad childhood” the low key lighting makes the image feel engulfed in darkness. while the high contrast between where the light is focused and and the dark surrounding it almost gives this photo a feeling of hope.


Posted in Uncategorized | Leave a comment

LL6 CONTRAST


Bad childhood

So this first picture I believe has “The bad childhood” look. This is due to the high contrast and low key lighting.  The high contrast creates the heavy shadows making this photo look a bit scary and dark. To back it up  even more it looks even darker due to the Low key which is when the tones of the image are darker than the mid tone. Also, the fact that its zoomed in to the toys face and eyes making for a evil looking toy.


Happy childhood


This Photo is considered “The happy Childhood” because of the Low contrast and High key lighting. The low contrast light creates no shadows makes the photo soft and warm. Also the fact that  the tones are are brighter than the mid tones which also creates a happy warm feeling. The stuffed toys are also set close to each other and all have seem to be smiling which makes this the perfect happy childhood photo.

Posted in LL6-Contrast | Leave a comment