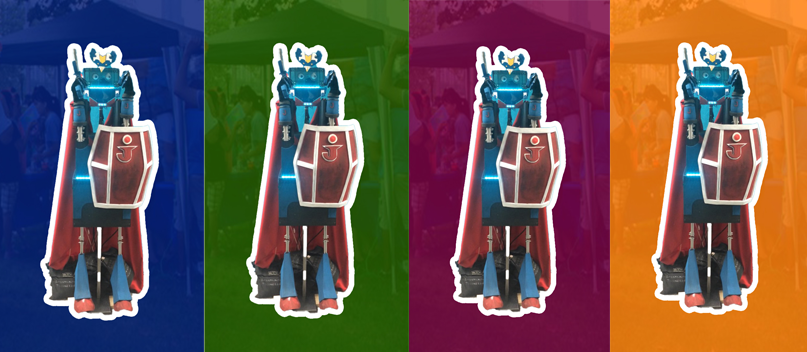
MR. J
SOUND ANIMATRONIC ROBOT
By: Sandra Patricia Mejias Vega

Project Description
Culmination Project – Creative technology applications
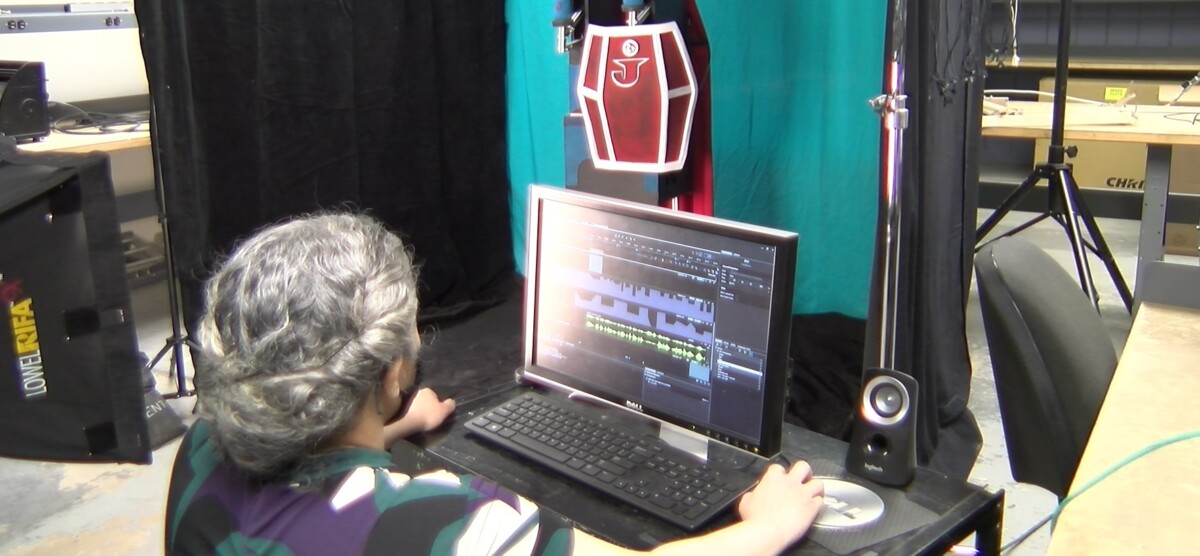
For my culmination project, I built an Audio – Animatronic Robot named “Mr. J”. This is a soldier that is an interactive game for kids where kids will follow the robot movements.
Please watch the video:
CULMINATION PROJECT PROPOSAL
PROJECT DESCRIPTION
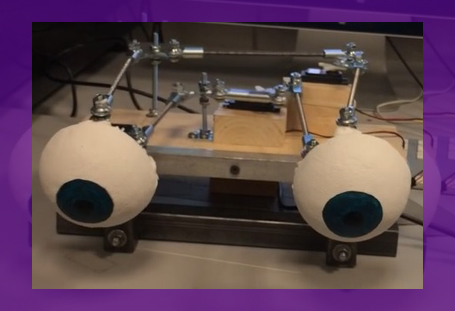
When I decided to study Entertainment Technology at City Tech, I wanted to improve my talents in order to provide a professional entertainment to others. My goal when I graduate from City Tech is to create Entertainment inside communities and in my job place. I have talents in scenery design, drafting and scenery construction. But, after I worked in Special Effects in technical production class, I discovered that kids love animatronics and characters that move inside the show. So, I discovered that I also have talents in Monster Shop, Animatronics and Show Control areas. So, I started with the question: How the things work? Later, I changed from video area to show control area in order to learn more about animatronics, and I did an Animatronic Eyes project during “ins and outs class”. So, for my Combination Project, I would like to build a sound Animatronic Robot Soldier using Weigl unit, that is the same unit that the school uses for Animatronic attraction.

METHODS
Story
To build the animatronic robot, I selected the story that is a song by Bear Hug Band named: Armor of God. So, The animatronic robot will follow this music game.
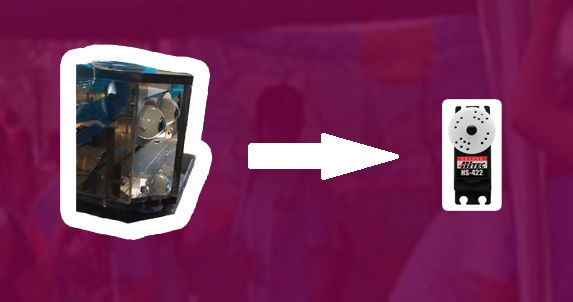
Then, I will build a structure that will be a head and body of the robot. The structure will have five mechanical areas that will allow the movement of eyes (left and right direction), mouth, one arm, and two legs of the animatronic. I will connect all of these to two servos, one electrical actuator, and two air cylinders, LED strip light, speakers that will be controller by a Weigl unit that will control the movements, light and sound of the animatronic robot. (This Weigl unit is used in Disney parks).
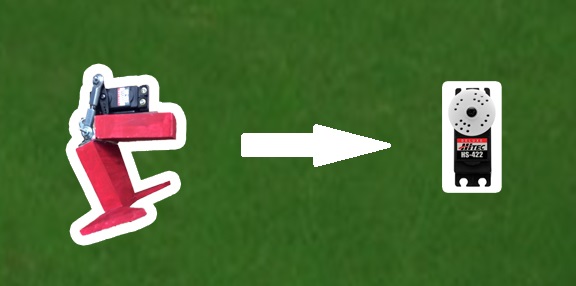
- Eyes (Left – Right movement) – Using a servo
2. Mouth (Open – Close movement ) – Using a servo
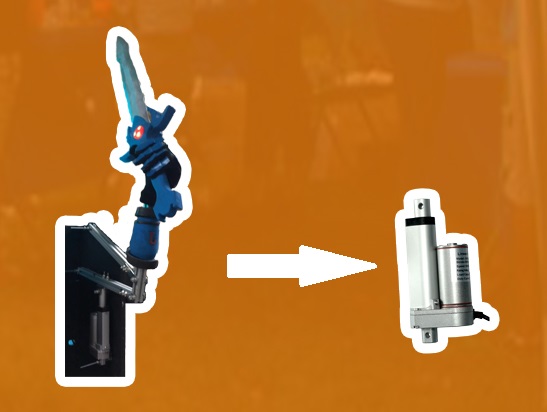
3. Right Arm (up / down movement) – Using an Electric Linear Actuator
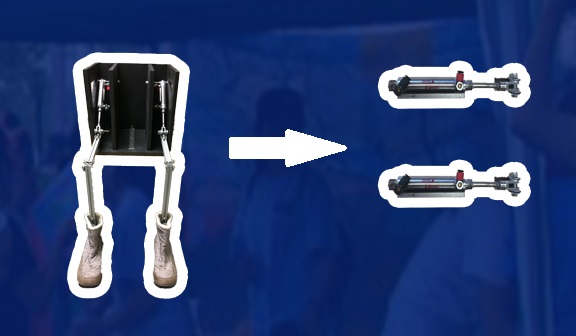
4. Right Leg (up / down movement) – Air Cylinder
5. Left leg (up / down movement) – Air Cylinder
6. LED light (On/off/changing colors) controlled by a decoder

7. Sound
For the props. I made all the props using EVA foam, plastics and fabrics.
*******************************************************************************************
The robot has four working areas:
Mechanical area. I will:
Research about mechanical motion of the robot
To make a design of the robot.
To make sketch of the robot and mechanical movements
To make CAD drawings of the mechanical movements.
To make a prototype of the mechanical movement of the eyes, mouth, arm and two legs.
To make a model of the body dimensions using a manikin.
To build the eyes mechanical movement left and right.
To build a acrylic box that contain the eyes
To build the mouth mechanical movement open and close.
To build a wood box that will contain the two arms with one electrical actuator in the right arm.
To build a wood box that will contain two legs with the air cylinder (two inches stroke) in each leg.
Electronic area. I will:
Get Weigl unit connected to computer using Weigl Configurator https://www.weiglcontrols.com/products/configuration-utility/
Set IP Addresses on Computer (192.168.111.14) and the Weigl Unit (192.168.111.13)
Connect via Ethernet cable
Scan for Weigl unit
Make sure is working
Get the servos wired in prototype form–includes wiring the power supply
Test the servo through the configuration program
Test the servo through Conductor software
Test the electrical actuator device to control one arm of the robot.
Test the air cylinders.
Clean up wiring/etc.
Program the show
Lighting area. I will:
I will install LED lights in the head, mouth and body of the robot.
I will buy LED Strip 12v
I will buy a Decorder to control the lights
12 VDC power supply
I will cut the LED light with a Scissors
I will put the lights where I need.
I will weld each LED Strip and I will join the strips with 4 pin extension cable.
Props area. I will:
The soldier robot will carry a helmet, shield, sword, chest, belt, shoes. All of these props will be making with EVA foam to cover the robot.
I will make some patterns in paper and later I will cut the foam with the patterns.
I will join EVA foam with cement glue.
I will add adhesive seal in areas where the glue does not join well.
I will clean the edges with a rotary tool.
I will paint with Plasti dip and later with acrylic paint.
PROJECT DELIVERABLES
- Sound Animatronic Robot Soldier – Video of the show.
- Documentation of connecting sensors to the Weigl unit.
- Test program demonstrating Weigl.
- Production Calendar
- Budget
- Drawings of building the mechanical structure.
- Photos during the construction of the animatronic robot.
- Poster
- OpenLab Portfolio.
PRODUCTION CALENDAR
ANIMATRONIC ROBOT – PRODUCTION CALENDAR SANDRA

REQUIRED SOURCES / BUDGET
| Mechanical, electronic costume materials | |||
| Product | Quantity | Price | Total |
| Scene Shop available hours during this pandemic time. | From the school | ||
| Tools that are in the scene shop like table saw, drill, etc. | From the school | ||
| Wood | From the school | ||
| Steel | From the school | ||
| Speakers | From the school | ||
| Two air cylinders (two inches stroke) | From the school | ||
| Two Valves for air cylinders | From the school | ||
| One air compressor | From the school | ||
| DMX cable adapter from 3 pins to 5 pins | From the school | ||
| DMX cable 5 pins | From the school | ||
| Weigl unit | From the school | ||
| Weigl procomander | From the school | ||
| Two 12 VDC power supply | From the school | ||
| Four 24 VDC ice cube control relay. | From the school | ||
| Four socket mount for relay. | From the school | ||
| 5VDC power supply | 1 | $ 30.00 | $ 30.00 |
| 2 servo units | 2 | $ 12.49 | $ 24.98 |
| Electrical Actuator | 1 | $ 38.95 | $ 38.95 |
| Servo extension cables | 1 | $ 9.99 | $ 9.99 |
| Electronic cables for Ethernet connection | 1 | $ 10.59 | $ 10.59 |
| Computer | 1 | $ 762.11 | $ 762.11 |
| Printer | 1 | $ 54.43 | $ 54.43 |
| LED strip – 12 VDC | 1 | $ 13.99 | $ 13.99 |
| Decorder | 1 | $ 19.99 | $ 19.99 |
| Welding soldering iron | 1 | $ 20.97 | $ 20.97 |
| 4 pin extension cable for LED strips | 1 | $ 9.97 | $ 9.97 |
| Solder wire | 1 | $ 20.40 | $ 20.40 |
| Hot glue gun | 1 | $ 3.00 | $ 3.00 |
| Acrylic glue | 1 | $ 20.00 | $ 20.00 |
| Eyes ball | 1 | $ 20.00 | $ 20.00 |
| Eyes mechanism | 1 | $ 152.98 | $ 152.98 |
| 10mm EVA Foam for Shield and Sor | 2 | $ 14.99 | $ 29.98 |
| Low Density Eva Foam 2mm, 5mm, 10mm | 4 | $ 9.99 | $ 39.96 |
| High Density Eva Foam for prop making | 1 | $ 7.99 | $ 7.99 |
| Scissors | 1 | $ 2.00 | $ 2.00 |
| Box Cutter | 1 | $ 1.00 | $ 1.00 |
| Dremel | 1 | $ 21.37 | $ 21.37 |
| Sand paper | 1 | $ 1.00 | $ 1.00 |
| Sewing Machine | 1 | $ 5.99 | $ 5.99 |
| Airbrush | 1 | $ 15.99 | $ 15.99 |
| Safety Glass | 1 | $ 2.00 | $ 2.00 |
| Acrylic paints | 5 | $ 0.89 | $ 4.45 |
| Flexi Filler | 1 | $ 4.99 | $ 4.99 |
| Contact Cement glue | 1 | $ 13.00 | $ 13.00 |
| Primer paint – Plasti Dip | 1 | $ 4.95 | $ 4.95 |
| Totals | $ 1,367.02 | ||
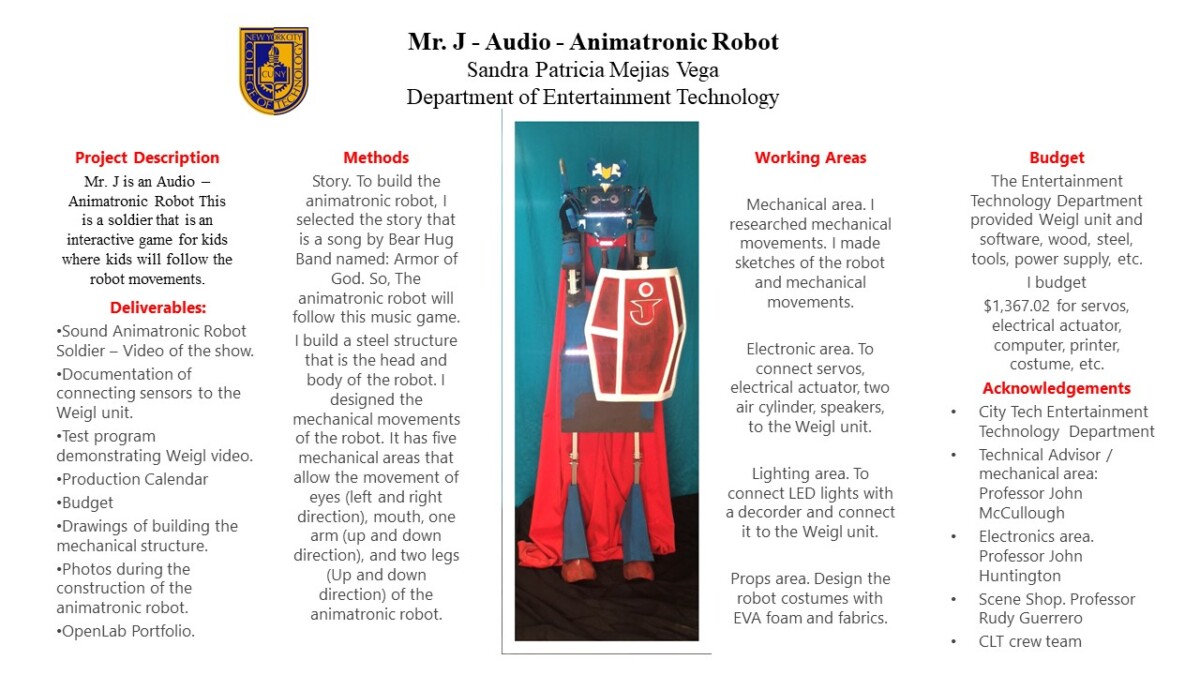
POSTER
CULMINATION PROJECT PRESENTATION
Link of the presentation:
SANDRA MEJIAS – CULMINATION PROJECT PRESENTATION
Link of the Culmination Project selected presentation:
CULMINATION PROJECT SELECTED PRESENTATION
Please watch the videos:
Link for Prototype arm / mouth:
Link for final arm:
Link for mouth:
CULMINATION PROJECT REFLECTION
Do not give up…!!! This was my phrase that I repeated to myself every time during my culmination project. When things did not happen as the way I planned: I did not give up…!!! I continued working in the project. When a new problem came, I had to find a new solution until I finished the project and I did not give up…!!!
So, for my culmination project, I created and I built an Audio – Animatronic Robot named “Mr. J” controlled by Weigl unit. This controller is used in Disney Parks and animatronics attraction at City Tech. The animatronic that I created is a soldier that is an interactive game for kids where kids will follow the robot movements according to the song.
The desire for animatronics started after I worked in special effects area during Technical Production class at City Tech, and I saw that kids love special effects and animatronics. So, I started to ask to professors: How the things work? I want to know it. This was my question that I asked to them many times. So, they recommended me to take three major classes: Monster Shop, Ins and Outs and Show control. So, I changed my track from video to show control because I wanted to learn animatronics.
So, during the class Ins and Outs, I discovered the “servo”. It was amazing to me that I can control a robot with servos. So, at that moment, I wanted to do an Easter Bunny animatronic because I wanted to create an Easter Show at City Tech. So, I started with an animatronics eyes that was controlled by Arduino microcontroller. So, making the eyes mechanism was challenge to me, but I wanted to learn it. I wanted to know how the things work and it was the process. So, at the end of the semester, I did an animatronic eyes with movements up and down, left and right using two servos and programed with Arduino codes.
Later, during Show Control class, I programed the woman character in the animatronic room. It was amazing for me to work with Weigl unit because this unit eliminated the Arduino programing codes, and I wanted to learn how I can make things to be controlled by Weigl unit. So, my first idea was to change the animatronic eyes from Arduino to Weigl unit. So, with the help of professor Huntington, we learned how to control servos with Weigl unit using a 9 pins cable.
Later, because the pandemic, I changed the animatronic project. I decided to build a soldier robot and not a Easter bunny. I made this change because robots can play in any season. Also, kids love robots, too. So, in my idea for the movements, I wanted that the robot moves the eyes, mouth, right hand, and two legs. In the beginning, I want that everything could be controlled by servos, but we discover that servos does not have enough force to control the arm and legs. So, we started to research about different equipment for the arm and legs that have enough force to lift them. We research solenoids, but solenoids does not have enough force to move the legs and arm, and other solenoids does not return to the original position. So, solenoids did not work for this project. So, professor McCullough recommended me to find electrical actuator, and it worked for the arm movement because it had slow movement. For the legs, I decided to use air cylinders because we have this equipment in the school and they were the only option with enough force to move the legs with a better speed.
So, when I finished the construction of the arm and legs boxes, I joined it to one metallic stand that I made before, but the result was an inclination of the stand because the weight. So, I had to find the solution the day before the presentation and with the orientation of prof, Rudy, I put and extra support to the stand.
During this process, I built a new animatronic eyes, with a small size and with only movements left and right controlled by one servo. Also, I created the mouth mechanism and with the help of professor McCullough, I improved the eyes and mouth mechanisms.
In addition, I included LED lights in the eyes, mouth and body. These lights were programed by Weigl unit, too.
Also, I designed and made all the costumes and props for the robot using EVA foam and fabrics. I did a color selection and I painted all the costumes and props with acrylic paint and metallic spray.
With this project I applied many knowledges that I learned from college during all the time that I was here, some of them are: welding, video, electric soldering, mechanical movements, AutoCad, wood cut, etc. And, I know that I will apply all of this knowledge in the future with new animatronic projects.
CULMINATION PROJECT AGREEMENT
CULMINATION MEETINGS WITH TECHNICAL ADVISOR