Everyone,
Today we started the Axonometric drawing for Module 2. As we discussed in class, you’ll need your detail Plan of the masonry wall to do your Axon drawing. Use your Section drawing of the wall for the heights you need. We will review all 3 drawings this Thursday April 23; those of you who are behind on your Plan and Section, now is the time to catch up. Information and links are below.
Here are the links to the videos we reviewed in class:
The 1st video demonstrates the construction of the masonry cavity wall layers, beginning with the CMU backup wall.
https://www.dropbox.com/home?preview=Federal+Hall_Axon_extrusions_20200416.mp4
The 2nd video demonstrates how to draw the axonometric without a parallel bar or T-square. The first step is to tape down your Plan, rotated using either a 45 or 30/60 degree triangle. Either one is okay. Tape a 2nd sheet on your Plan. Follow the video for this set up. Remember that in this type of Axon, your vertical lines stay perpendicular to your sheet of paper; and all the horizontal elements are parallel to your rotated Plan.
https://www.youtube.com/watch?v=JgHc4AsrALw&feature=youtu.be
For all drawings in this module, the scale is 1/2″=1′-0″. Below are the earlier links to draw the Plan and Section, re-posted here:
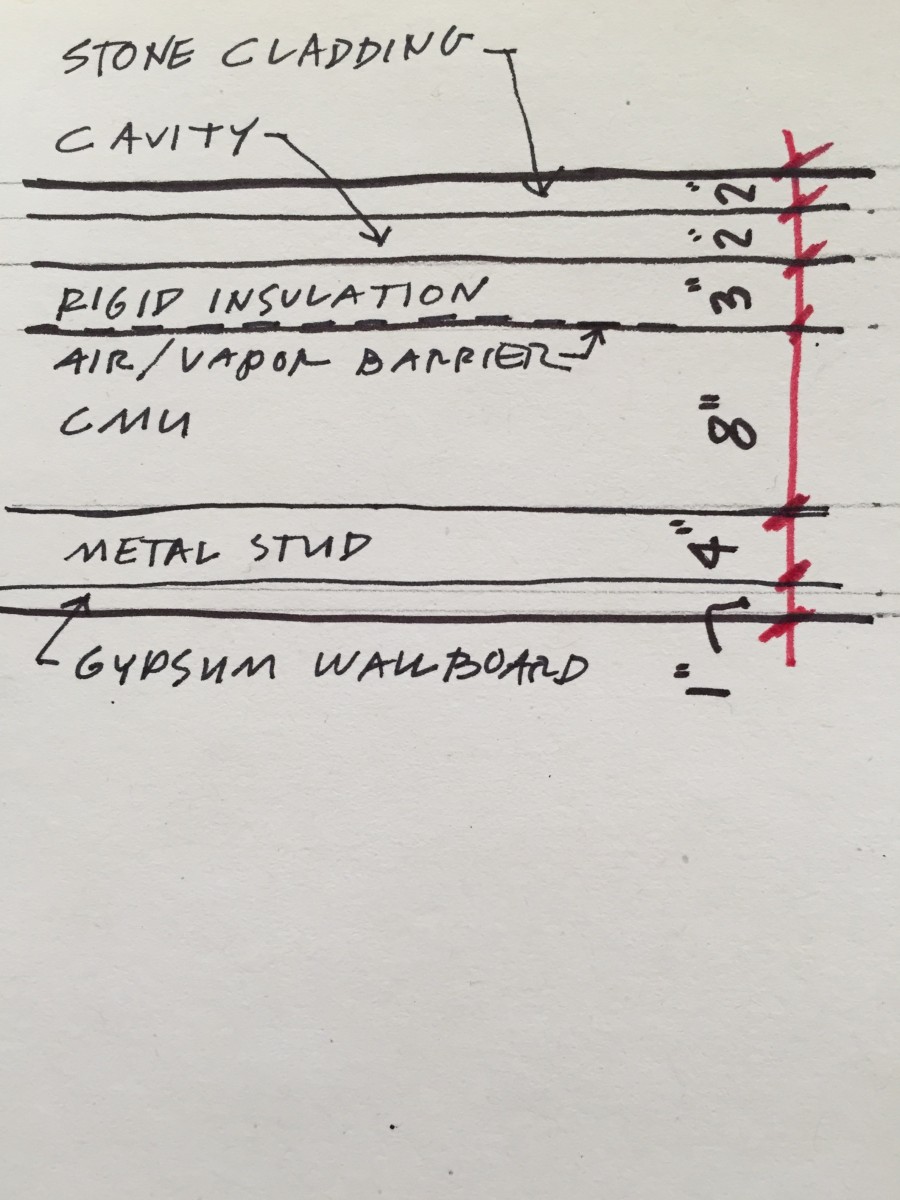
This is the sketch of the wall material thickness dimensions from the beginning of this Module, and the video on drawing the Plan:
https://www.youtube.com/watch?v=JpFd_EkA6hE&t=4s
Here is the sketch I uploaded last week with the material dimensions for the Section:


Leave a Reply