Table of Contents
Contents
Problem: Create black and white portraits that convey a mood or feeling using the rule of thirds, stable figure ground and a clear focal point.
Limits: Use a narrow value range in low (dark) key; achromatic grays
Materials: Sketchbook, pencils, Bristol Board 9×12″, acrylic paints, brushes, palette, rags, water container, photoshop
Concepts: Value, grayscale, achromatic, focal point, contrast, shadow, highlight, narrow value, broad value, high key, low key, open-value composition, closed-value composition, Rule of Thirds
Technical Skills: thumbnail sketching, painting techniques, photography & lighting techniques, digital tools
Design Process:
- Discover – Hand Portraits & Value Scale
- Define – Journalistic style Self Portraits
- Develop – Media Transformations – Paint and Pixel
- Deliver – Post and Comment
1. Discover
Research: Gordon Parks study and inspiration
Gordon Parks was an African-American Journalistic photographer, writer, director and composer who forged new ground in a art world dominated by white culture. For this project, Parks work can help inspire mood, a sense of compassion, expressiveness and deceptively complex composition.
Short news piece on Parks, PBS
- Write a two paragraph reflection on his life and what stands out to you most. What can you take from his life into your journey today as artists and designers? You can submit this at the end of the project.
- Use these three prompts, one alone or aspects of all three, to help frame your reflection on Parks life and works, and how he can influence you and/or others as art and design students.
- Voice: The Individual Voice as compared to the Collective Voice
- Context: Past events which affected Parks as compared to Present events which affect an artist in life and art/design.
- Communication: How can and does the Artifice and Artifacts of Art, such as a photograph, film, graphic design, allow us or teach us as humans to go deeper into life’s reality.
- Post 3 images into your Milanote Column as inspiration for Portrait photography
- Observe expression, lights and shadows, composition, figure/ground relationship etc.
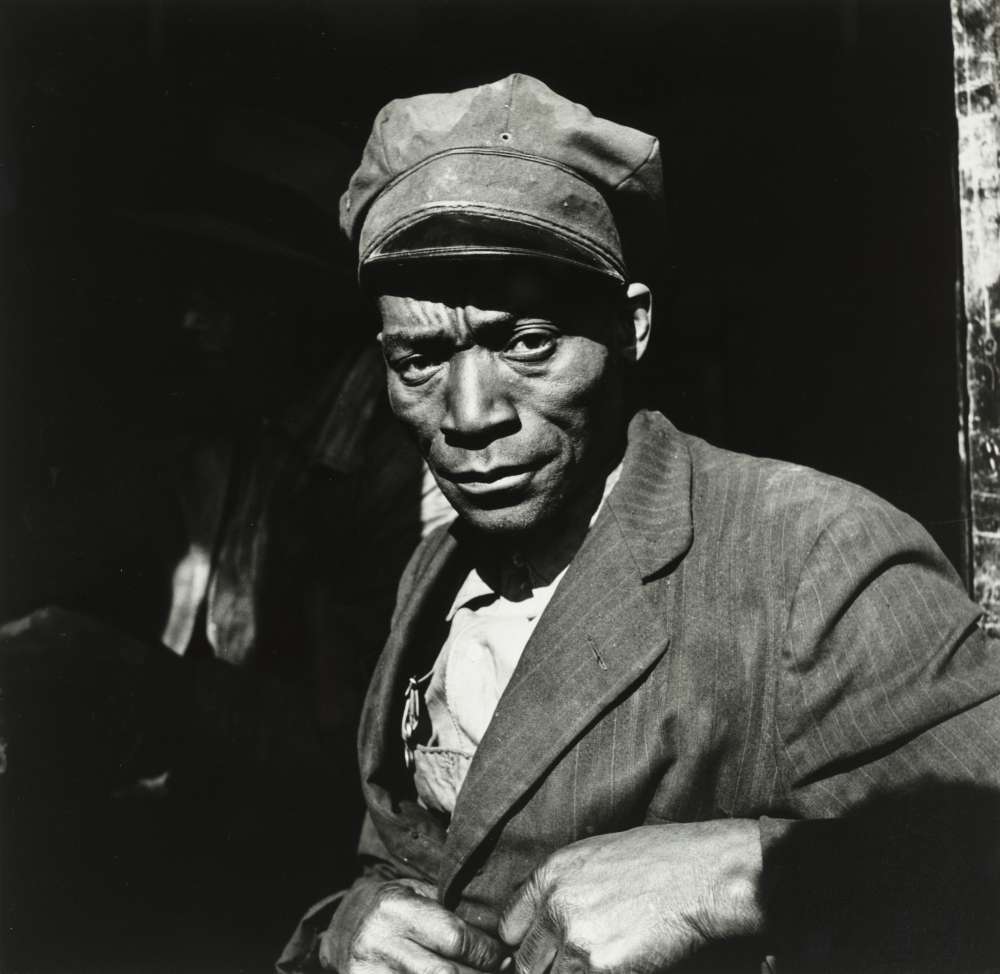
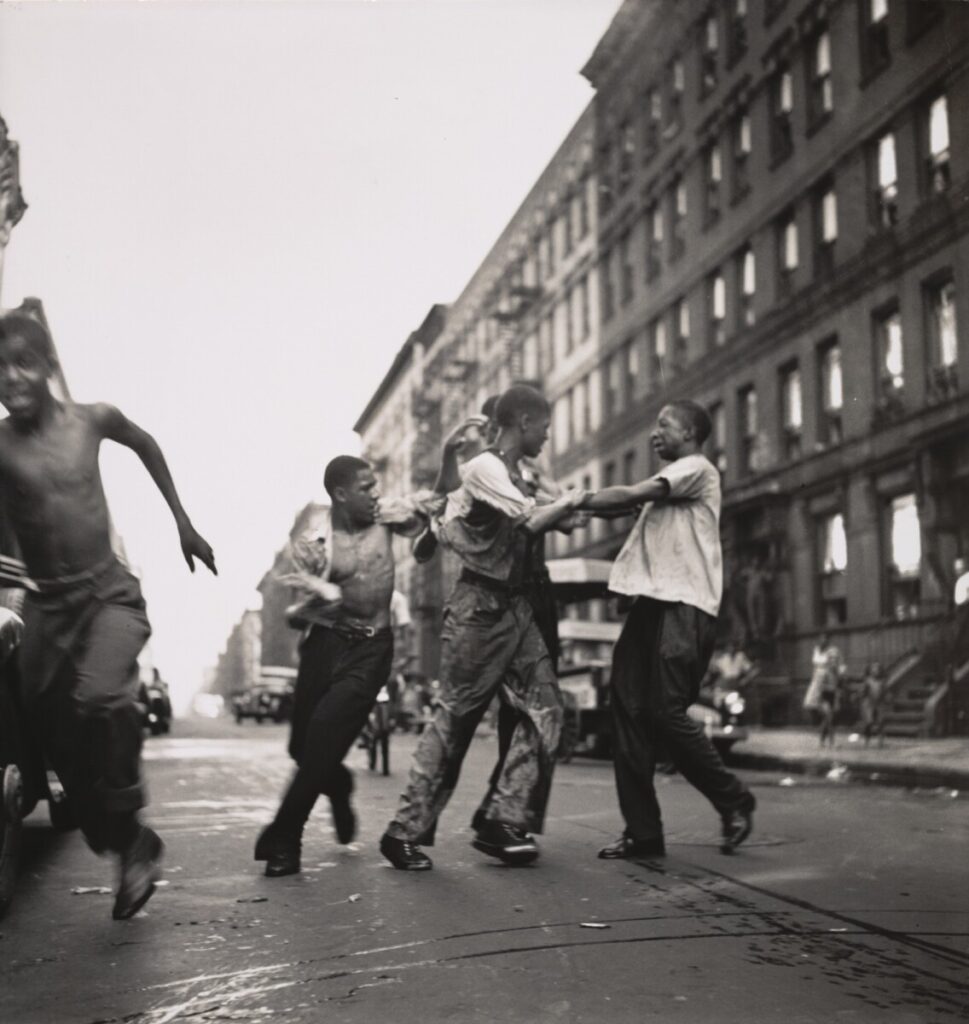
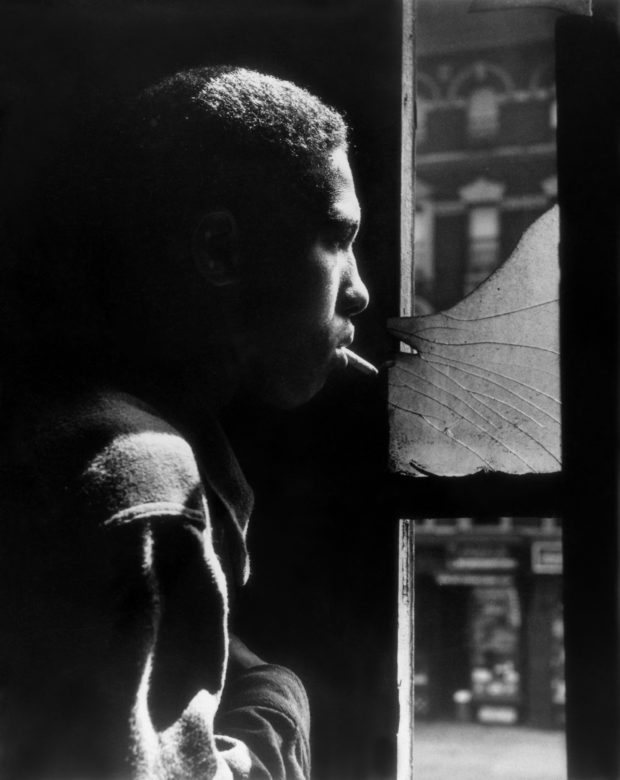
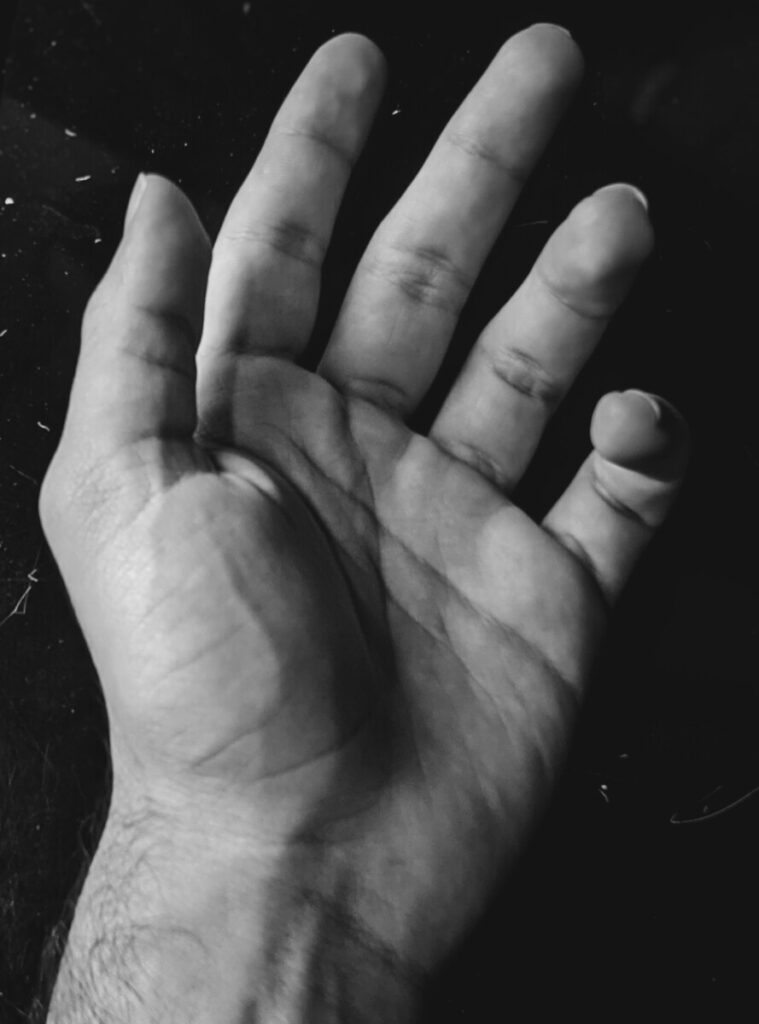
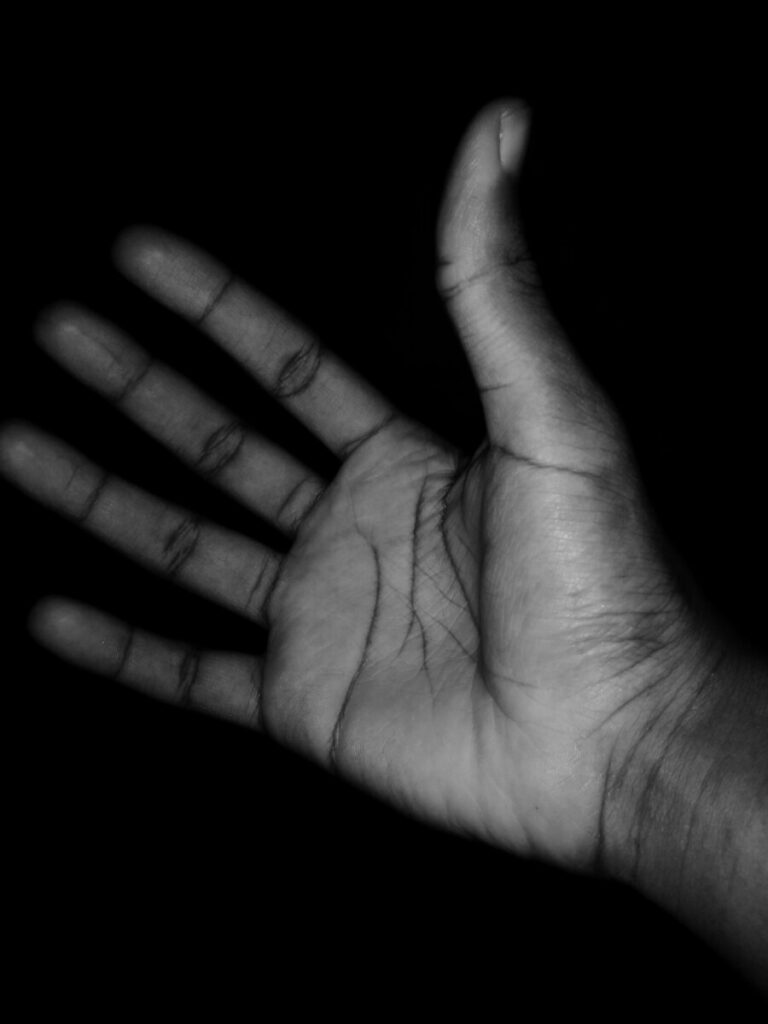
Hand Portraits
- Narrow value (light)
- Broad value (full value range)
- Narrow value (dark)
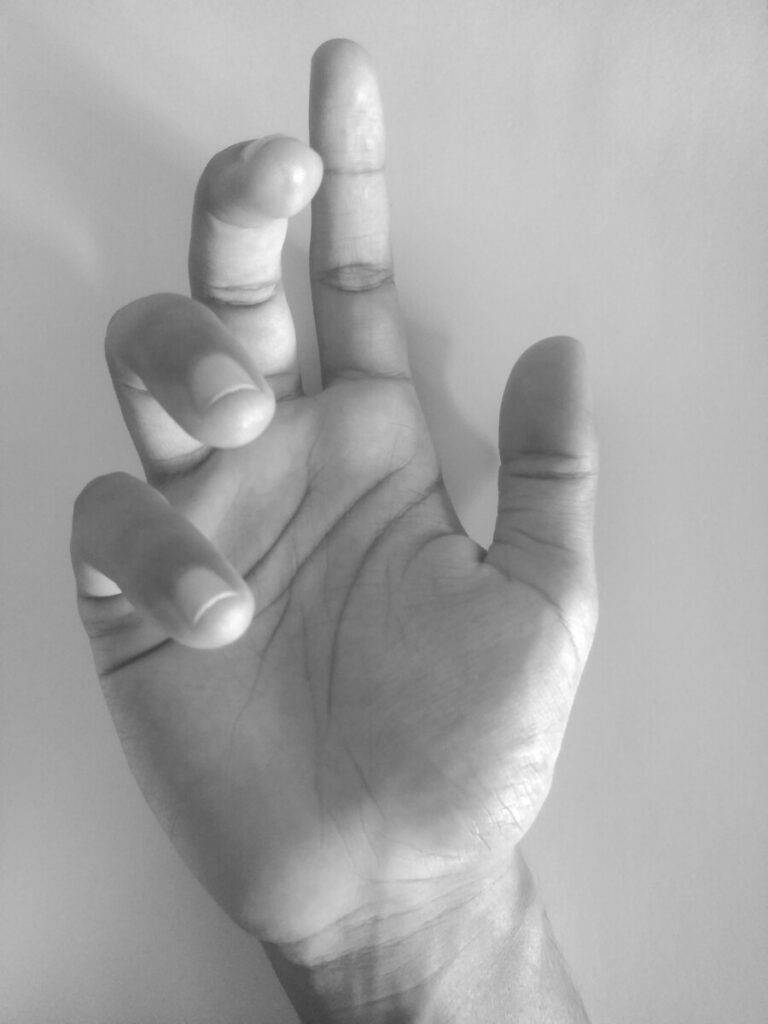
Please view this link: Light, Value and Gradation
- Using a camera or camera phone*, compose photographs of your hands with the following value ranges:
- (1) narrow value range / light – predominately light end of the grayscale
- (1) narrow value range / dark – predominately dark end of the grayscale
- (1) broad value range – spread across the grayscale (dark, middle, and light).
- If you have the ability to shoot with a grayscale, black & white, or noir filter, please do.
- Try to create an expression of feeling by how you hold your hand.
- Allow the value range: light, dark, broad to affect the mood.
* If you don’t have a camera, please partner with another student who does.
Value Scale
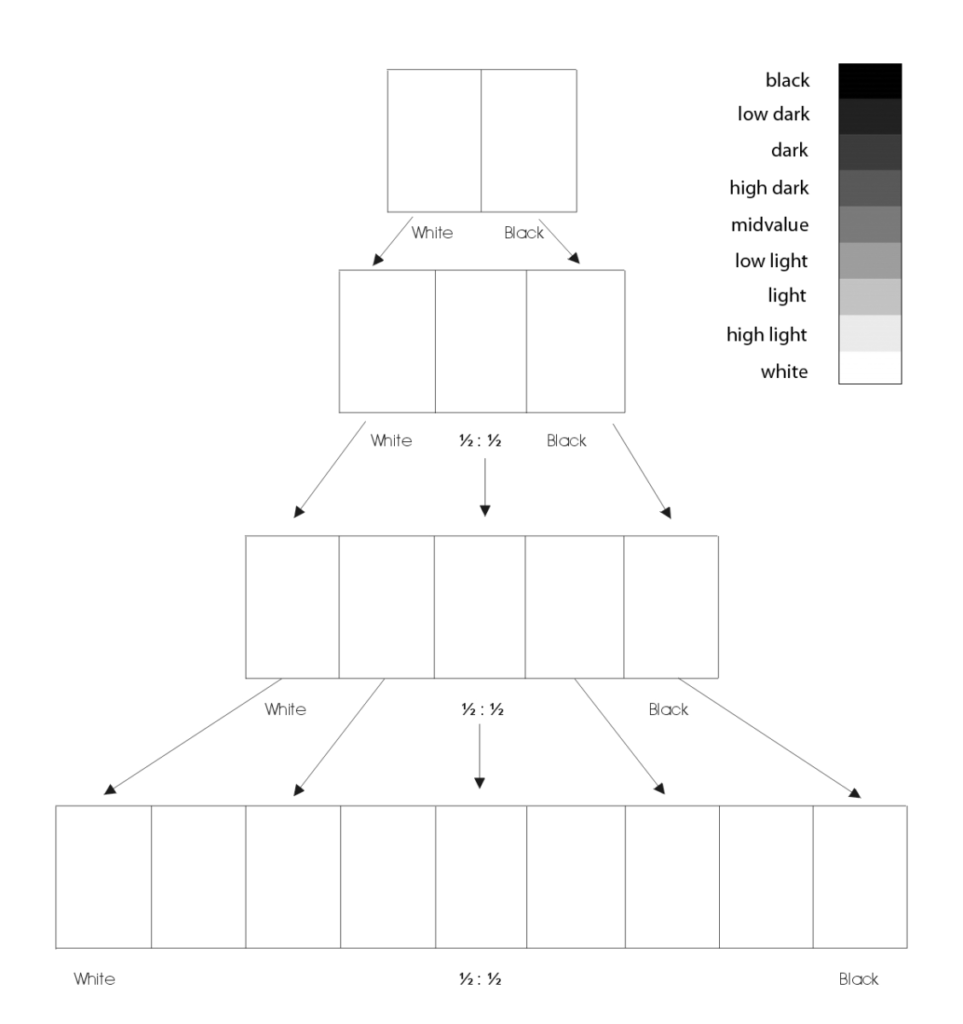
Complete the Achromatic Value Scale using a range of pencils (2H-5B)
- On the handout provided, complete the four scales starting with 2-step (black/white) and ending with 9-step.
- Your 9-step value scale should have black, low dark, dark, high dark, mid-value, low light, high light, and white.
2. Define
Vocabulary
- Value: Signifies the relative differences of light and dark
- Achromatic Value: Value with the absence of hue (color).
- Grayscale: The full range of values simplified into a graduated scale.
- Narrow Value Range: When the values congregate around the dark (low-key), middle (middle-key), or light (high-key) part of the grayscale.
- Broad Value Range: When the values are spread over the dark, middle, or light part of the grayscale.
- Shadow: Dark area of an object as a result of a disruption of the light source.
- Highlight: Portion of an object that receives the greatest amount of direct light
- Contrast: Occurs when elements are unrelated or dissimilar in value, size, shape, etc.
- Gradation: Occurs when elements incrementally (slowly) change in value, size, shape, etc.
- Chiaroscuro/Tenebrism: Forceful use of contrasting lights and darks, creating a dramatic mood.
- Film Noir: a cinematic term used to describe a visual style that emphasizes low-key lighting and unbalanced compositions.
- Focal Point: The elements or objects on which the viewer’s attention is focused.
- Rule of Thirds: A compositional guideline; an image is divided into nine equal parts by two equally spaced horizontal lines and two equally spaced vertical lines. Important compositional elements should be placed along these lines or their intersections to create tension, energy and interest, rather than simply centering the subject.
Value Portraits
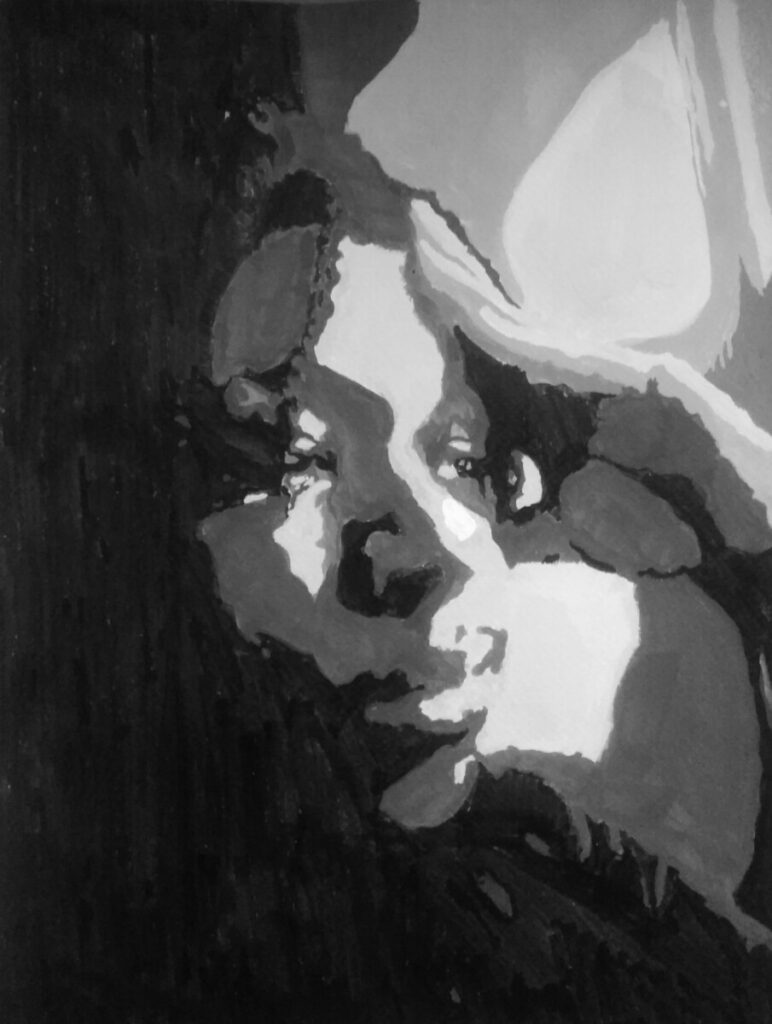
On your own or with a partner, take a series of closely framed, black & white/grayscale portraits that convey a distinct mood using both strong contrast and gradation of light and dark and a stable figure-ground relationship. Utilize the Rule of Thirds to create tension or energy in the composition. Avoid centering the subject (yourself). Keep Parks’ photos and life as inspiration when considering the character, tone and expression of the portrait. What feeling is generated or communicated from sitter to viewer?
- Post 3 of your portraits to the Milanote for critique. Through discussion you can choose your favorite image to develop.
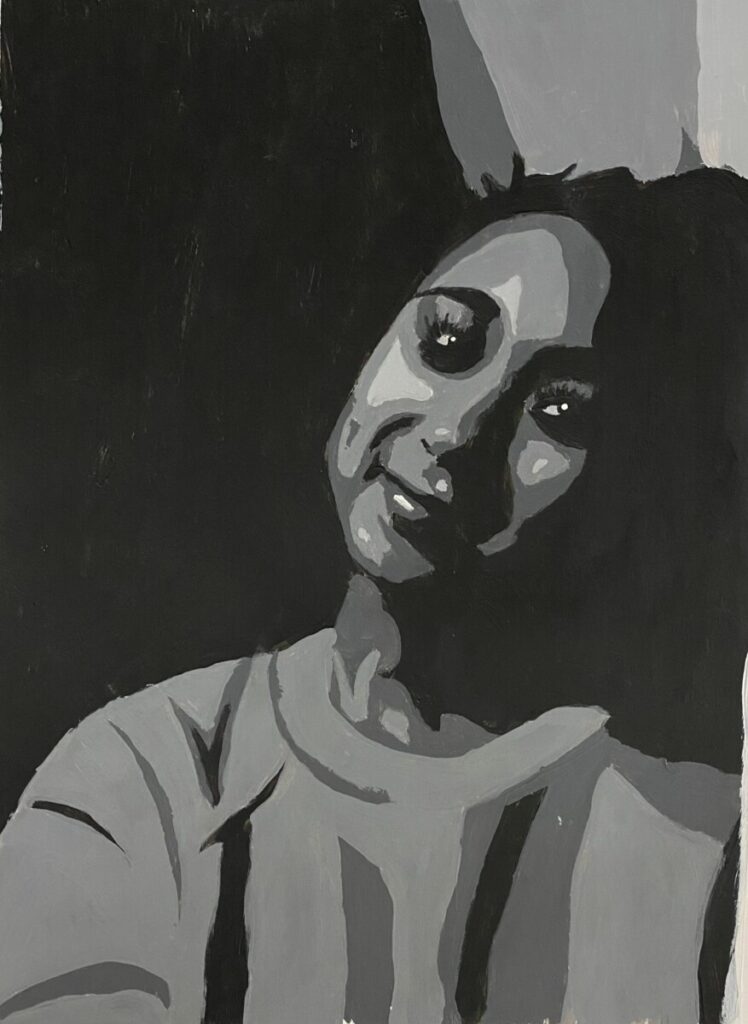
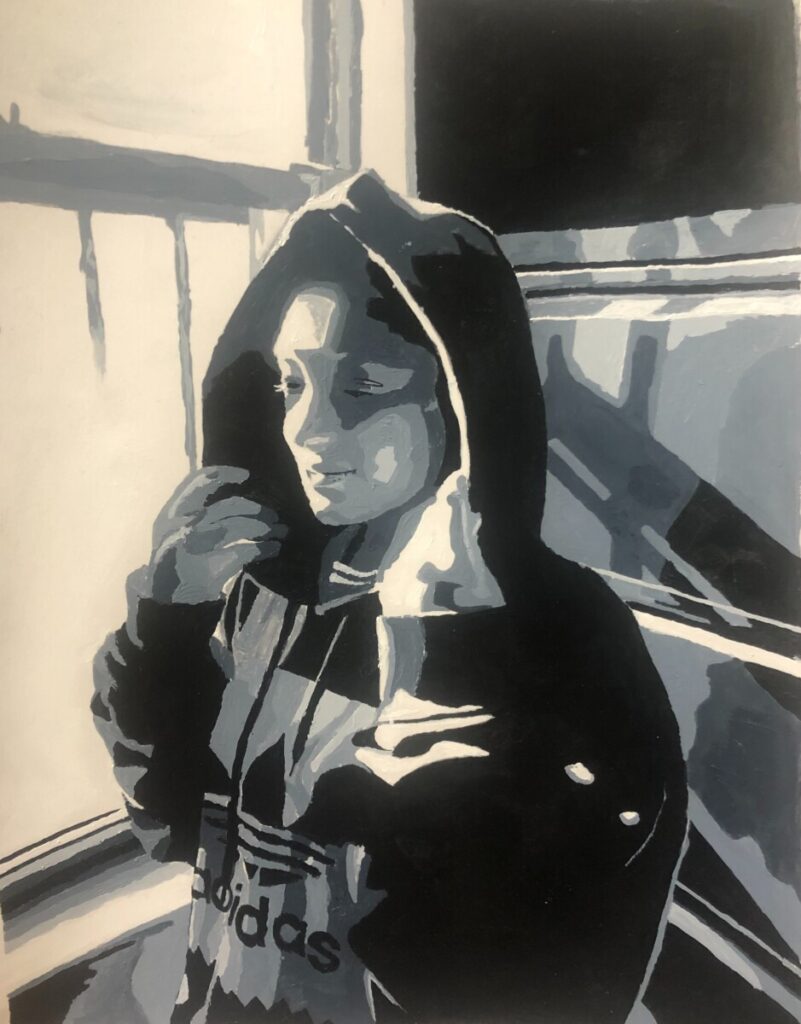
3. Develop
Painting Prep:
- Locate your original (highest-resolution) self-portrait and rename it: yourname-selfportrait.jpg.
- Open the file in Photoshop: File > Open
- In Photoshop, locate the Layers Palette: Window > Layers
- From the Adjustment Layer icon at the bottom of the Layers Palette, add a Posterize Adjustment Layer to simplify your values.
- Adjust to 2 levels. Save/Export file as yourname-selfportrait-2values.jpg
- Adjust until you have between 5-7 levels.
- You should be able to pick out light, midtone, and dark values.
- Save your file as yourname-selfportrait-posterize.jpg
- Print your portrait to tabloid paper at Staples or Kinkos/FedEx or any print shop.
- Make sure that “Scale to Fit Media” is NOT checked.
- Your image should be approximately 9″x12″ when printed so that you can trace it to Bristol.
Transfer to Bristol
- Using your posterized portrait printout, trace the outlines of the posterized lights, darks and midtones to a piece of tracing paper using a inking pen (.2 or .5).
- Then use the inked tracing paper and light table to transfer to bristol using a very light pencil.

 Bristol over trace, tape to window
 Trace to bristol in pencil
Painting on Bristol
- With your posterized printout as a visual reference, paint each value area using a range of black, white, and gray values. Use your Value Scale as a guide for matching value steps.
- NOTE: The paint will be lighter when it dries. Test your range of values on scrap bristol first.
- When you have completed your composition carefully protect all elements with a piece of clean tracing paper.
- Thoroughly mix paint before applying
- Fill in the range of values
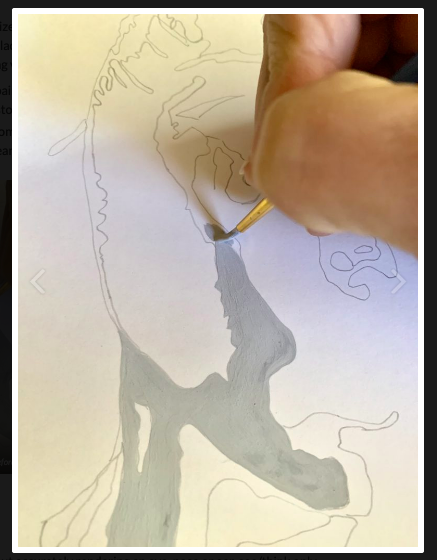
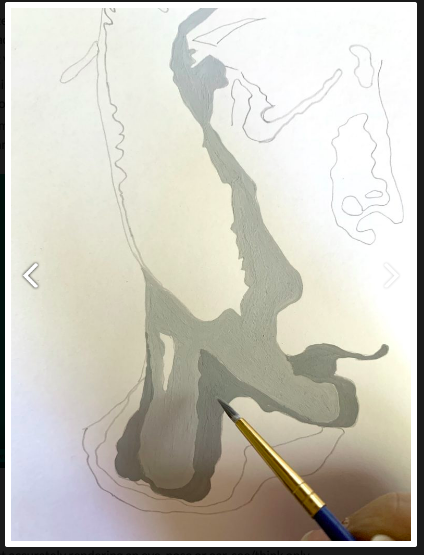
Painting Tips
- Do not worry about accurately rendering an eye, nose or ear, see/think only in terms of value and the boundaries of each value relationship.
- Notice how some values crossover shape boundaries into adjoining areas (open-value), while others are limited by the edges of the shape (closed-value).
- Remember protect your painting with tracing paper as you work. Paint is delicate and can easily pick up the dirt and oils from your hands.
- Before you apply paint to paper make sure it’s completely mixed in the palette to produce a flat consistent appearance. We want flat, blocks of paint without streaks or brush marks.
- Keep two containers of water, use 1 for washing your brushes and 1 for adding water to paint.
- Wash your brush after each value is mixed and applied.
- Use a paper towel or rag to get excess paint and water off the brush before mixing a new value.
3. Deliver
Critique
- Bring all parts of this project to class: Discover, Define, and Develop
- Be prepared to present, discuss and analyze your finished work in terms of concept, craft, what you learned, and the design process.
- State the following: your name, what you are presenting (title and design problem), which parts are successful and why, which parts are unsuccessful and why.
- Your peers and the professor will provide feedback. You will have an opportunity to revise your work based on the feedback to improve your work and your grade.
Documentation and Feedback
Submitting in your work
Follow the Submitting Your Work guidelines and include the project-specific details below:
- Post Title: Value Portraits
- Images: Organize your post to include all content from the three other Design Process phases for this project. Create headings for each phase and include images or a gallery, where appropriate:
- Written Project Reflection: In the Deliver section of your post, document your thoughts about this project. Think about what you learned, what you could have done better (planning, material use, craft), and how you will apply what you learned to your next project. Consider and respond to the comments made in class during the critique.
- Category and Tags:
- Category = COMD1100 Project #3
- Tags = Deliver, Value Portraits
REMINDER: You will receive a grade and comments from the Professor on this post. Without this post, you will not receive a grade.
Providing Feedback
Part of your Project grade is leaving well-written comments for at least one of your peers. Follow the Providing Feedback for specific guidelines for leaving constructive feedback.Search for:
CREATIVE COMMONS LICENSE
This site is curated and maintained by Prof. Jenna Spevack.
Except where otherwise noted, content on site is licensed under a Creative Commons Attribution-NonCommercial-ShareAlike 4.0 International License.
You are free to share and adapt the content on this site if you provide appropriate credit, provide a link to the license, and indicate if changes were made.


