Twenty Seventeen Theme
Twenty Seventeen offers many options for customization, including a full-page header image and large featured images on the homepage and other site pages.
Please note: Twenty Seventeen allows you to upload a video instead of an image for your header, but we strongly recommend against this since autoplay video is not accessible. Please see our post on Making your Work Accessible for more details.
In order to take advantage of the theme’s features, you will need:
- a high-definition image, at least 2000px width x 1200 px height for the homepage header and other featured images.
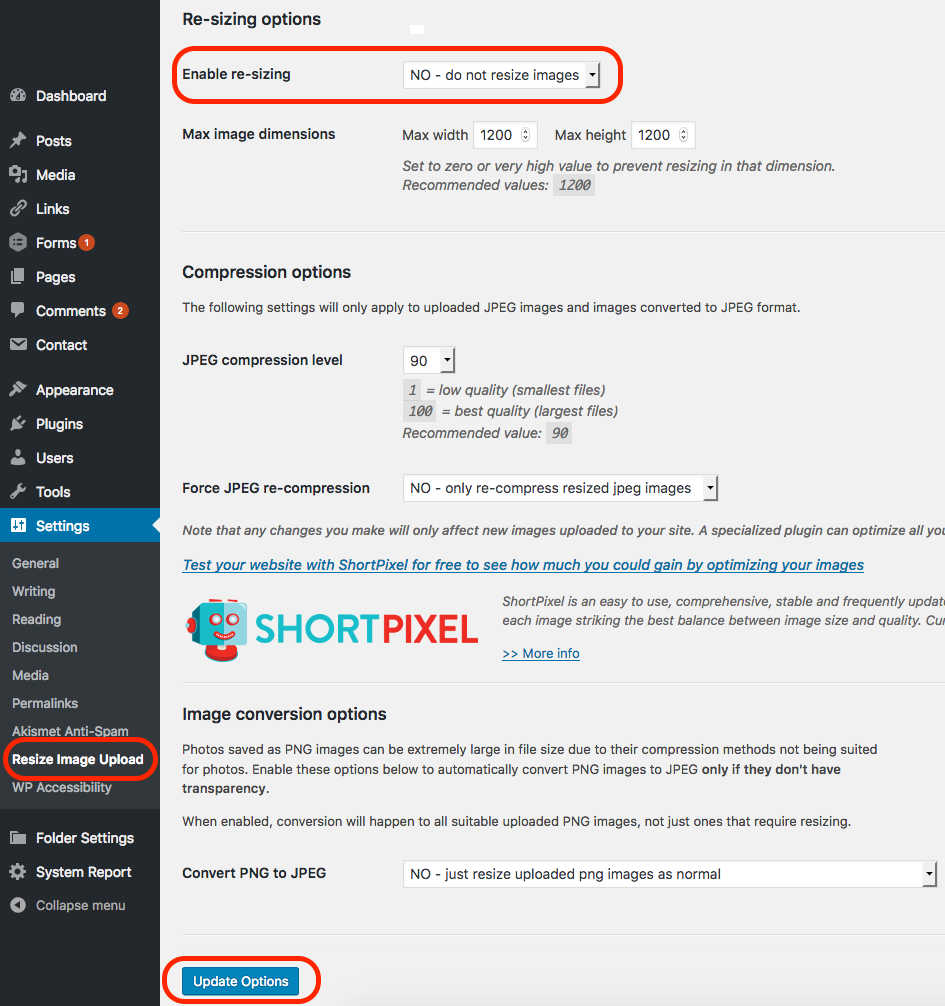
- Before you upload these images you’ll need to change the settings for the plugin called Resize Image After Upload, which is activated by default on all OpenLab sites. This plugin resizes all images uploaded to a maximum size of 1200 x 1200, which is smaller than what you’ll need for this theme. If the images are too small, they will look grainy or fuzzy on your site.
- Try to choose an image that will create a strong contrast with the site title. By default, the title and tagline are white, but you can change these to black if you’re using a light header image. Images that are too busy in detail or make the site title difficult to read should be avoided.
Change Plugin Settings
- Go to Dashboard > Settings > Resize Image Upload.
- Choose “NO – do not resize images” from the dropdown at the top of the page.
- Click the Update Options button at the bottom of the page.
Header image: Removing or Changing
You can add a custom header image, or you can remove the existing image and use the theme with no header.
Changing the Header Image
1. To upload a header image for the homepage, go to Dashboard > Appearance > Header.
2. Click Add new image.
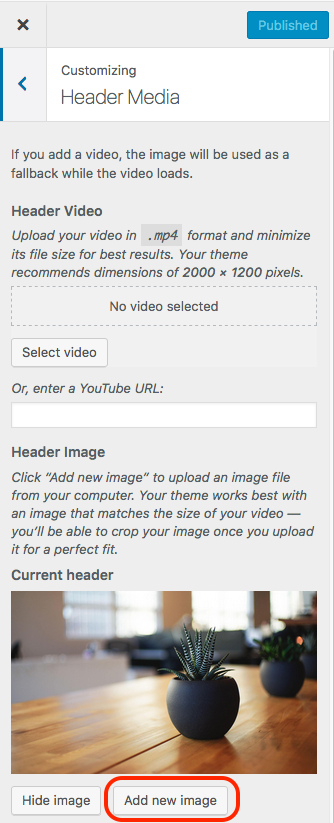
3. In the Upload Files tab, click Select Files and choose a file to upload. The image should be at least 2000px width by 1200px height.

- After the image uploads, add alt text (See Making your Work Accessible for more on alt text.) and click Select and Crop.
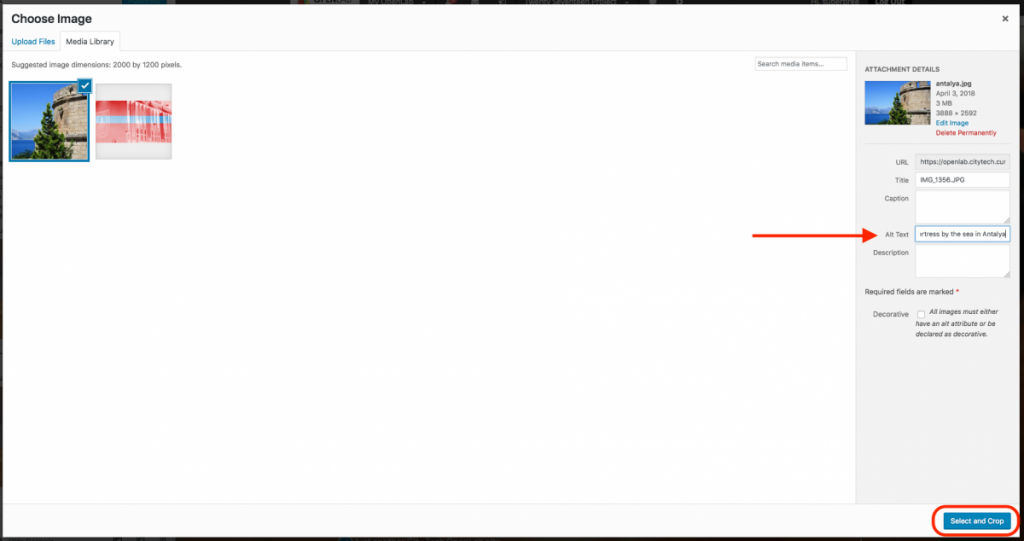
- Crop the image to your preferred dimensions. We advise using the suggested width and height, if possible, but you can change the section of the image to include in your crop. When you’re finished, click Crop Image.

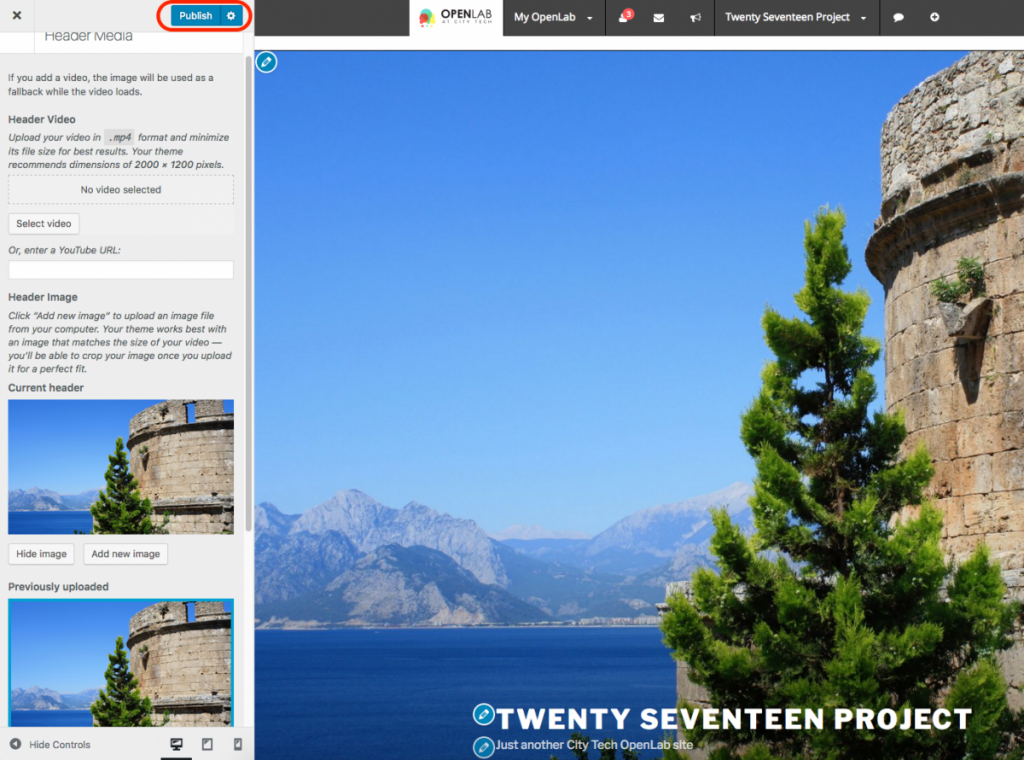
- When you’re finished, click Publish.
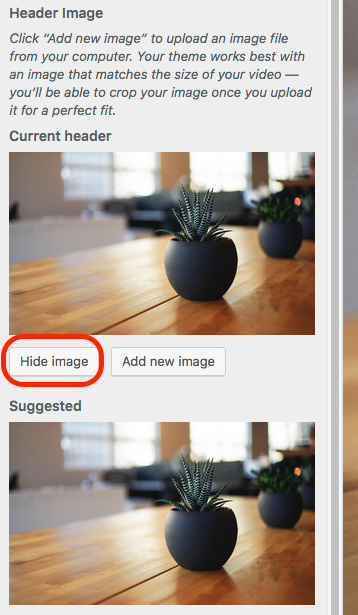
Removing the Header
- As above, go to Dashboard > Appearance > Header.
- Click Hide Image.
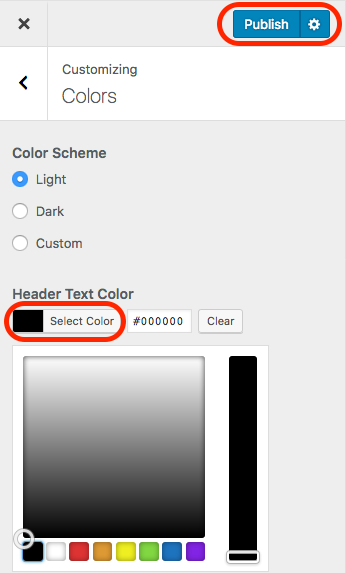
Site Title and Tagline Color
If you use a lighter color header image that doesn’t create a strong enough contrast with the default white site title and tagline, you can change the color to black, or another color.
- Go to Dashboard > Appearance > Customize, and click Colors.
- Under Header Text Color, click Select Color, and choose the color. To the right of the menu, you can preview what the color choices will look like on your site.
- When you’re finished, click Publish.
Featured images
You can set featured images for each page on your site. You can’t crop featured images for pages as you can for the header, so it’s best to crop the image ahead of time. Like the header image, the width should be at least 2000px, but the height is up to you, depending on how you want it to display on the page. If you want to set up the homepage like the demo, with a static homepage pulling from other pages on the site, you’ll want to keep your images the full suggested size of 2000px width x 1200px height.
- Go to the page where you’re adding the featured image.
- Look for the Featured Image box at the bottom of the right-hand side, click Set Featured Image.
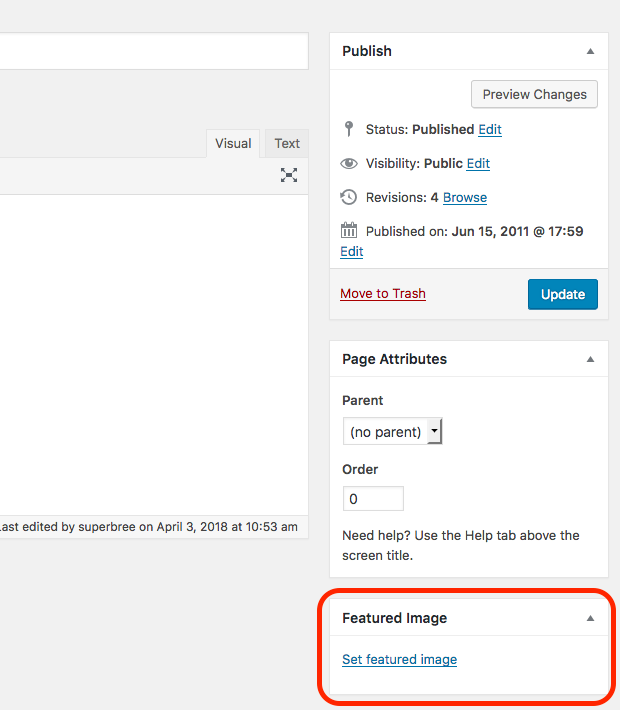
- As with the header image in the section above, choose the image you want to upload. After it uploads, add alt text (See Making your Work Accessible for more on alt text.) and click Set Featured Image.
- When you’re finished, click Update to add these changes to the page.
Menu
You will need to add a custom menu for your pages to appear in the primary navigation menu, which can be set up the same way you do with any other theme (review how to change the menu on your site) by going to Dashboard > Appearance > Menus.
The Top Menu is the primary navigation menu, found just beneath the header image. You also have the option of creating a Social Menu, where you can include social media links that will display as icons in the footer.
Homepage Customization
You can create a static homepage that doesn’t display blog posts on the home page, but creates sections that pull content from up to four different pages on your site.
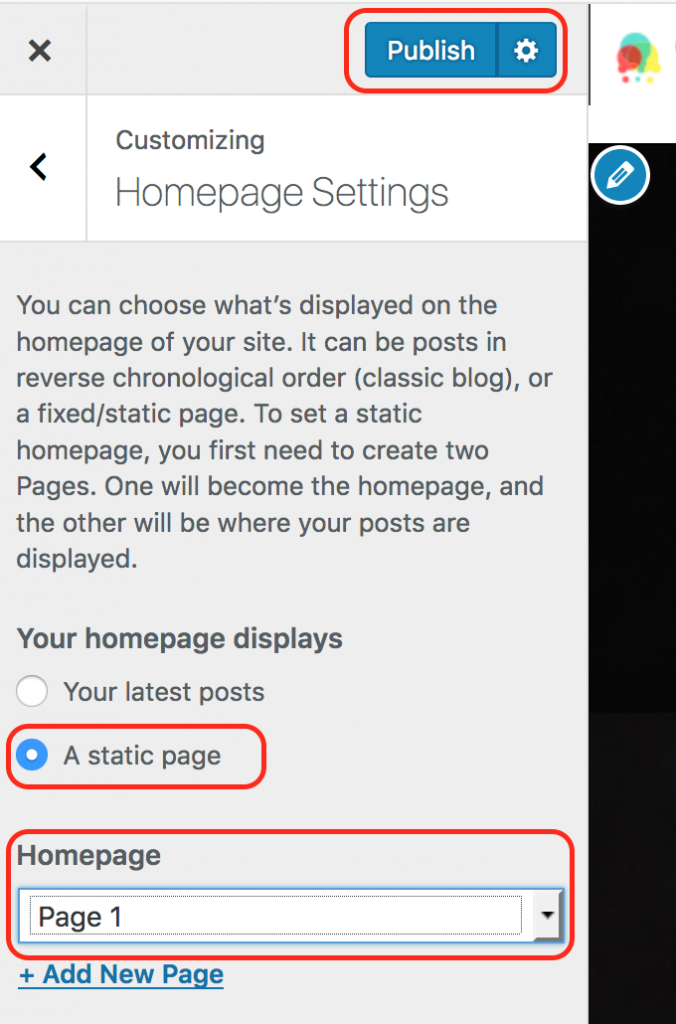
Static Homepage
- Go to Dashboard > Appearance > Customize > Homepage Settings.
- Under Your homepage displays, choose A static page.
- In the Homepage dropdown, select the page you would like to use. You can use just one page as your homepage, or you can set up sections with content from additional pages.
- When you’re finished click the Publish button.
Homepage sections
- After setting up a static homepage, go to Dashboard > Appearance > Customize > Theme Options. You can just choose one, or up to four pages to feature on the homepage.
- Under Front Page Section 1 Content, choose the first page you’d like to use. Do the same for as many additional sections as you wish.
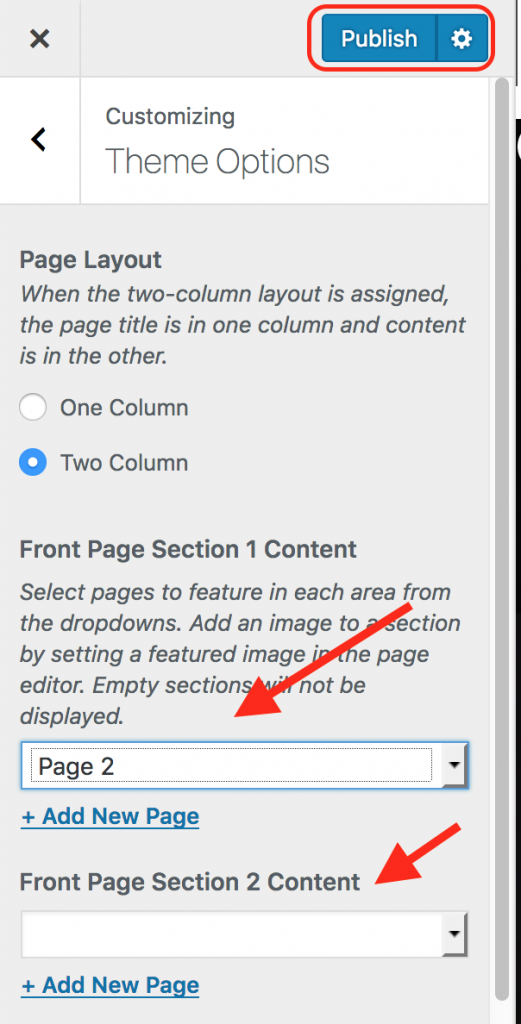
- You can also choose whether you want one or two column layout on the home page.
- When you’re finished click the Publish button.
You can see an example of what the static homepage with separate sections looks like on the Twenty Seventeen demo page.
For more information about all the features included in the Twenty Seventeen theme, including one vs. two column layout, pull quotes, post formats, and social icons, visit the Twenty Seventeen help page on the WordPress.org codex.
The following tutorials are also useful:
- https://premium.wpmudev.org/blog/twenty-seventeen-wordpress-theme/
- https://www.elegantthemes.com/blog/tips-tricks/twenty-seventeen-an-overview-of-the-new-default-wordpress-theme


