Changing the menu on your Site
With most themes, you can create custom menus on your site. Custom menus give you the option of modifying how viewers access the particular content on your site. For example, custom menus allow you to change where your page links appear on your site, they allow you to add drop-down menus, add links to external sites, and/or create category archives on your site (i.e., pages that aggregate all posts into a particular category).
You can watch the following short screencast on how to edit your site’s menu, and find step-by-step instructions below.
Editing Your Menu
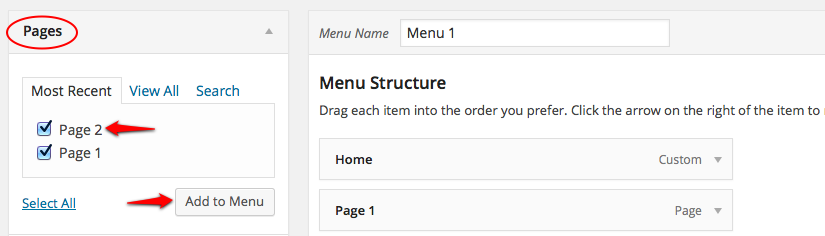
1. To edit the menu to your site, go to your site Dashboard and click Appearance > Menus in the left-hand menu. There are three main options for adding content to your menu: Pages, Links, and Categories. The “Pages” panel on the left side lets you select the pages from your site that you would like to add to your menu. Your default menu will already contain pages, but if you need to add additional ones, you can do so here. To do this, check the box next to the page (or pages) that you would like to add and click Add to Menu. Anytime you add something new or make a change to your menu, it’s always a good idea to click Save Menu.
2. The “Categories” panel lets you create a link in your menu to a category archive page, i.e., it aggregates all posts in a particular category onto to one page. To add a category to your menu, check the box next to the category that you would like to add and click Add to Menu. If you don’t see all your categories listed, click the “View All” tab.

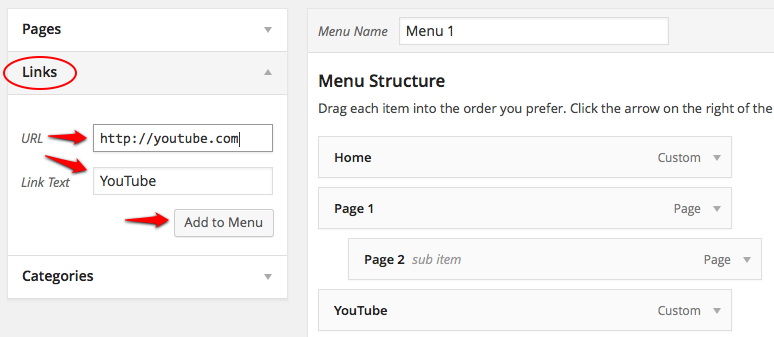
3. The “Links” panel lets you add links to external sites in your new menu. To add a link, type or cut-and-paste the web address of the site into the text box. Choose the label for your link and click Add to Menu.
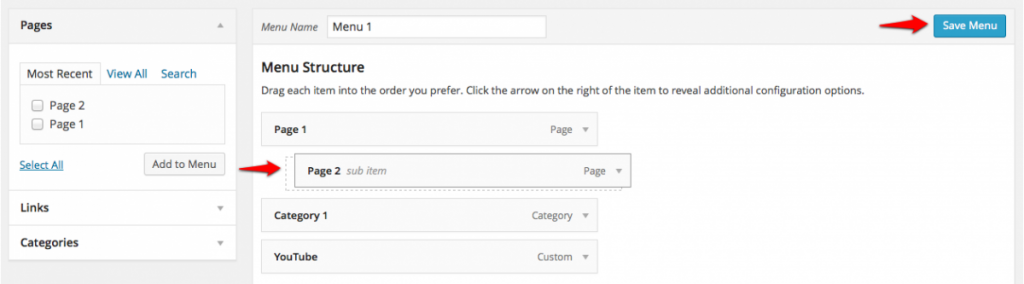
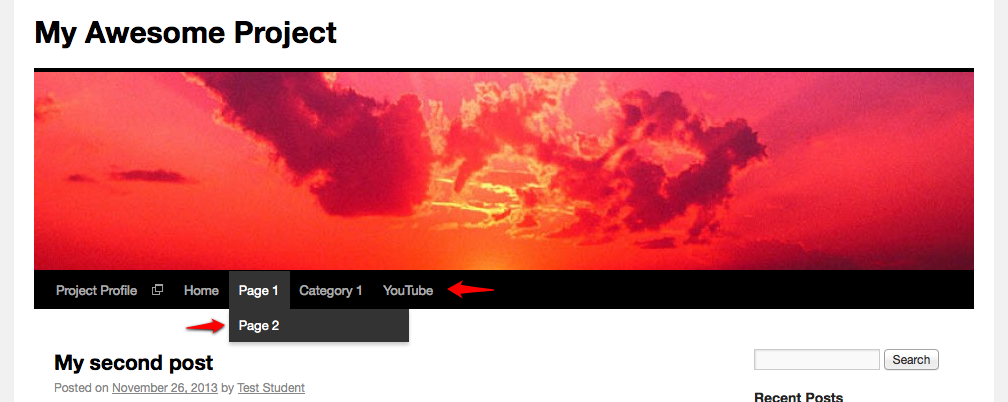
4. You can create pages and sub-pages on your menu by dragging and dropping the menu items in the order that you would like, and indenting any menu items that you would like appear in a drop-down menu. See example below:
5. Under Menu Settings, be sure to click the Primary Navigation checkbox so that your menu appears on your site.
6. When you have finished arranging your custom menu, remember to click Save Menu in the top right-hand corner of your screen.

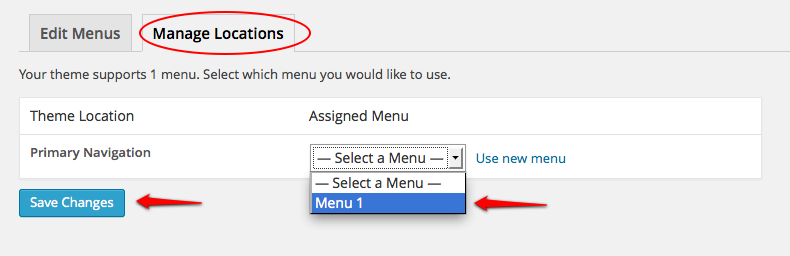
Manage Locations
1. If you don’t click the Primary Navigation checkbox, or if you change themes, your menu may not appear properly. To fix this, click on the Manage Locations tab at the top of the Edit Menus page. Choose your menu from the Primary Navigation dropdown and click Save Changes.