3D COMPOSITION
CLASS OBJECTIVES
Design skills: Become familiarized with fundamental design principles to create 3D form and communicate design intention. Learn to analyze and critique design work as an essential part of the iterative design process.
Practical skills: Modeling in basswood and soap with good craftsmanship and precision, 3D composition creation, measuring with a ruler, cutting sheet material (foam core)
CLASS DISCUSSION
A) Generating Form
• Intentionality in Design using fundamental design principles. Focusing on notions of proportion
and hierarchy; Dominant, subdominant and subordinate.
• Methods of connection / assembly . Understanding of tectonics and gravity.
• Creating 3D Composition: Knowing/understanding a composition from 360 degrees. Developing
good craftsmanship. Developing techniques/strategies specific to the manipulated medium/media
• Iterative testing: Critiquing your work. Critiquing others’ work. Identifying strengths + weaknesses.
Focused, systematic iterations
• Documenting development and sequence through photography
READING: Hannah, Gail Greet. Elements of Design: Rowena Reed Kostellow and the Structure of
Visual Relationships, pp.44-57.
B) Vocabulary
Vocabulary is essential as you create, critique and iterate your work. You will learn to specifically
communicate precise qualities about a single volume and the relationship between multiple volumes.
| Composition | Parallel | Axis |
| Proportion | Vertical | Symmetry |
| Scale | Horizontal | Assembly |
| Hierarchy | Primary, Secondary, Tertiary | Joint |
| Orthogonal | Dominant, Subdominant, Subordinate | Intersection |
| Perpendicular | Rectilinear | Overlap |
C) Photo Documentation
Why photograph a Model? – Documenting process and progress through photography
How to photograph a Model: setting up lights and backdrop, camera angle, image quality (resolution and focus.)
– Using your smart phone, auto settings (night, portrait, landscape), no flash
– Setting up lights: uniform minimal shadows, black back cloth, white or black drop cloth, etc.
– Downloading images from a memory card or by connecting the camera to the computer using
EXERCISE
1. Create
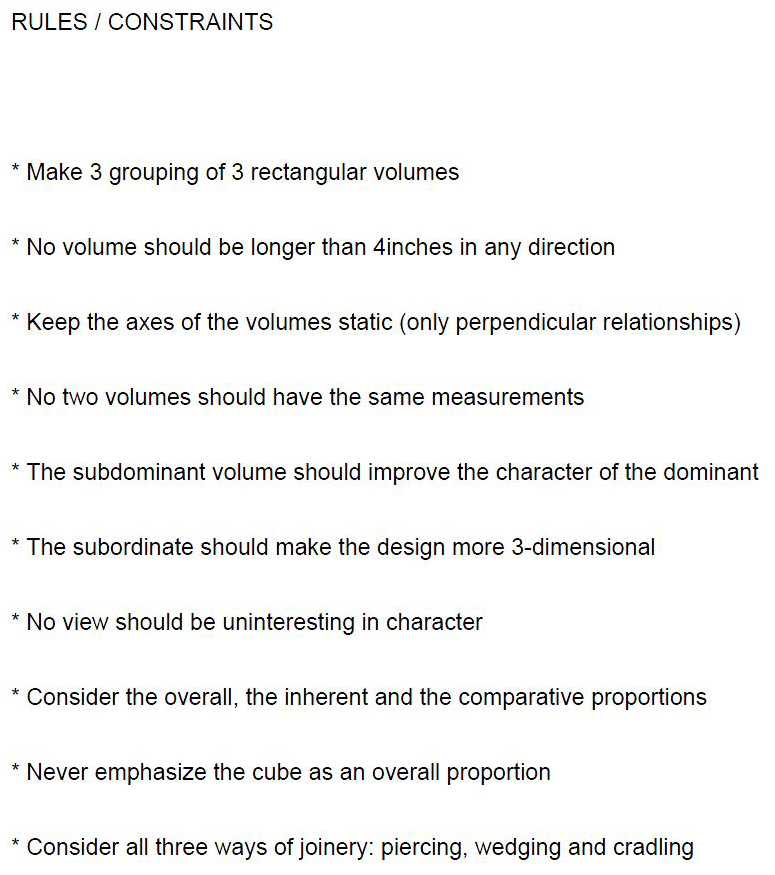
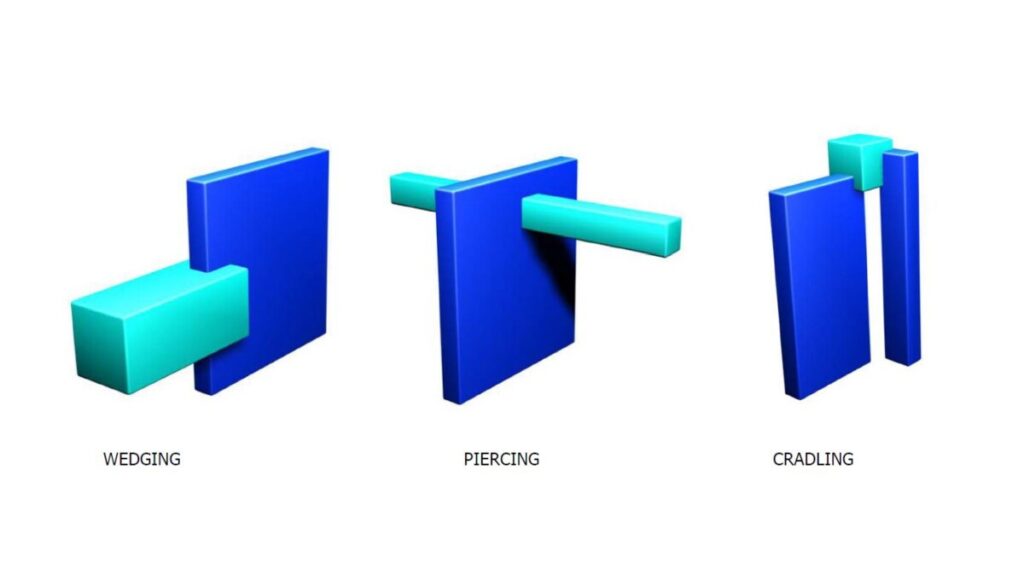
First using basswood blocks and white soap make 3 compositions. Each composition should consist of 3 elements: 2 basswood blocks and 1 soap block. Each element should be different in proportion and size. While the basswood blocks are rigid, the soap can be sculpted to allow joinery. With the soap, experiment with a series of rectangular elements (6 minimum) no larger than 4” in any dimension. Each one of the soap blocks should be an active connector (sculpt it orthogonally, so as to allow wedging and cradling onto the basswood blocks). Experiment with maximum and minimum dimensions.

2. Assemble
For each one of the 3 compositions, use the soap block to employ active connections to join /
secure the basswood elements with each other. Given that soap is heavier than basswood, how thin and how thick can the volumes be to support each other?Attach each composition to a ½” thick foam core base.

3. Critique
These volumes should be brought together to create visually compelling groupings of three.
Within each grouping, the dominant, subdominant, and subordinate part should be identifiable as
described in Elements of Design by Gail Greet Hannah.
a) Can I identify the dominant, sub-dominant and subordinate forms?
b) Do they actively engage each other?
c) What are my thoughts on the composition’s overall proportion? scale? Is the composition compelling
from all angles? (turn and view from all sides, including upside down
d) How’s my craftsmanship?
e) What can be changed to improve it?
4. Iterate
Rework any volumes and / or models as necessary to improve your composition. What strategies
have you developed to make this process more efficient?
5. Document
Take a digital photograph of each composition against a black or white background. Use
natural sunlight if possible to make clear shadows. Take three photos at bird’s eye view, three photos at eye level and three close-up photos. The total will be nine high quality photos of EACH composition for a total of 27 photos.
6. Diagram
Select your best photo of each model and create a trace paper overlay diagram explaining the
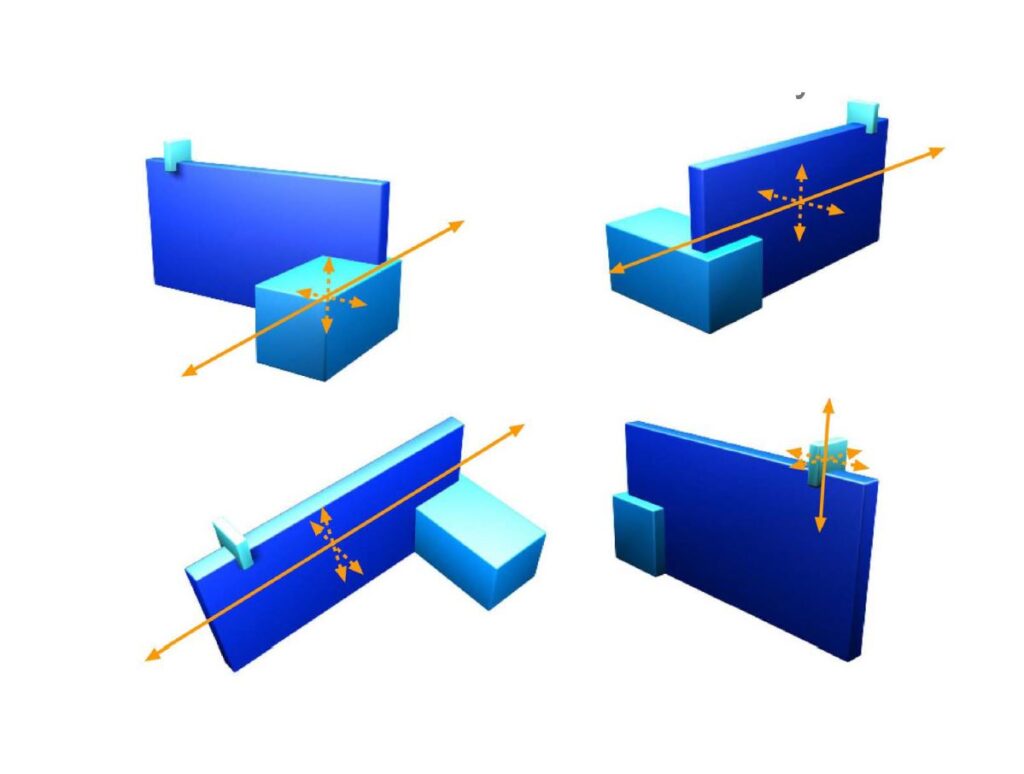
geometric structure of your groupings: trace the image. Identify the major and minor axis of each volume with a red pencil. Shade in the dominant volumes with a 2B (or softer) lead pencil. Label the proportions of each edge of your volumes as a ratio of length to width. You will have THREE final trace overlay diagrams.

DELIVERABLES
DUE: WEDNESDAY 09/30
- Three (3) study models (rectilinear compositions, see steps 1-4 above)
- One (1) final model
- Catalog of study model and final model images (using the photos from step 5 above)
In class:
- Select one (1) photo of each composition (total (3) photos 8.5 x 8.5″)
- One (1) diagram on Miro for each photograph from step 4 (total (3) 8.5 x 8.5″ diagrams)
GRADING PARAMETERS


