Foundation Drawing: Isometric and Oblique Drawings Hoa Vu

Oblique and Isometric Drawing 1Oblique and Isometric Drawing 2

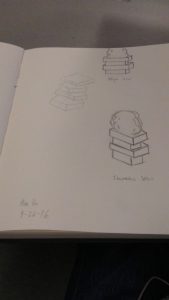
I don’t know why it isn’t showing up but I titled the drawings: Oblique and Isometric Drawing 1 and 2, respectively.

I guess the main point of doing these drawings is so that way we can figure out how to draw objects like that in that angle. I feel like often (especially in this class) we draw based on perspective so with this new skill we can probably do things like action figures or other items for the basic layout. I mean, in animation for instance, I would sometimes see for the 3D modules that they could rotate the character/object all around. I’m probably rambling now anyways but I think I explained myself to the point where your eyebrow isn’t shooting through the roof.

One thing that I struggled with was doing diagonals, like for the drawing on the right, the rabbit ears, especially in the isometric was a struggle.

I know that I posted this is kind of past its due date… but I really, really, really didn’t want to be the first person to post something here. It’s like a brand new couch. You feel iffy about sitting there because you don’t want to ruin it.


Uploading Instructions

Upload photographs of your assignment drawings from this semester in the Drawings Category on this site and also in your ePortfolio.

Be sure to give the drawings a title.  On our class site, write brief descriptions of the drawings, and be sure to reference the drawings’ titles.  Your descriptions should include what you feel the aim of each drawing was, what you learned from making it, and what was challenging to do.  Of course you may write other comments as well. For instance, you may ask questions for other students to answers.

How to Post to our class: On this class site, go to Post located on the left > Give your drawing a title in the subject line like this: Assignment 1, contour drawing: “My Converse Sneakers” > Write a brief description of the drawing in the Comments space > Just above your title click on the Add Media icon (it looks like a camera on top of a music note) and browse for your file > Click Insert > Click Drawings in the list of Categories on the right > Click Publish at the top right.

Your description should include what you feel the aim of the drawing was, what you learned from making it, and what was challenging to do.  Of course you may include other thoughts as well.

How to Post to your ePortfolio:  Go to Dashboard > New Page > Pages > Add New > Locate “Parent” in the Page Attributes > choose “Academics” from the pull-down menu. In the Title area of your ePortfolio, be sure to write the name of our class (Foundation Drawing) or our course code (COMD1103).  Also be sure to Publish, and invite me to join your ePortfolio.  In settings, be sure to state either “Public” or “Private>visible to City Tech members.”  Otherwise no one will be able to see what you’ve posted.

To take the photo, find a spot with even light so that you will have no shadows or strange light gradations across the drawing.  Frame the drawing so there is a small even frame on all sides.  Optimize the file, or reduce it to 72 dpi, with a file size no more than 1MB (about 8-9 inches on one side). Rotate it if necessary to it uploads right-side-up. If you have access to any photo-correcting program, see if you can increase the contrast so that delicate drawing lines are visible.