Problem 4

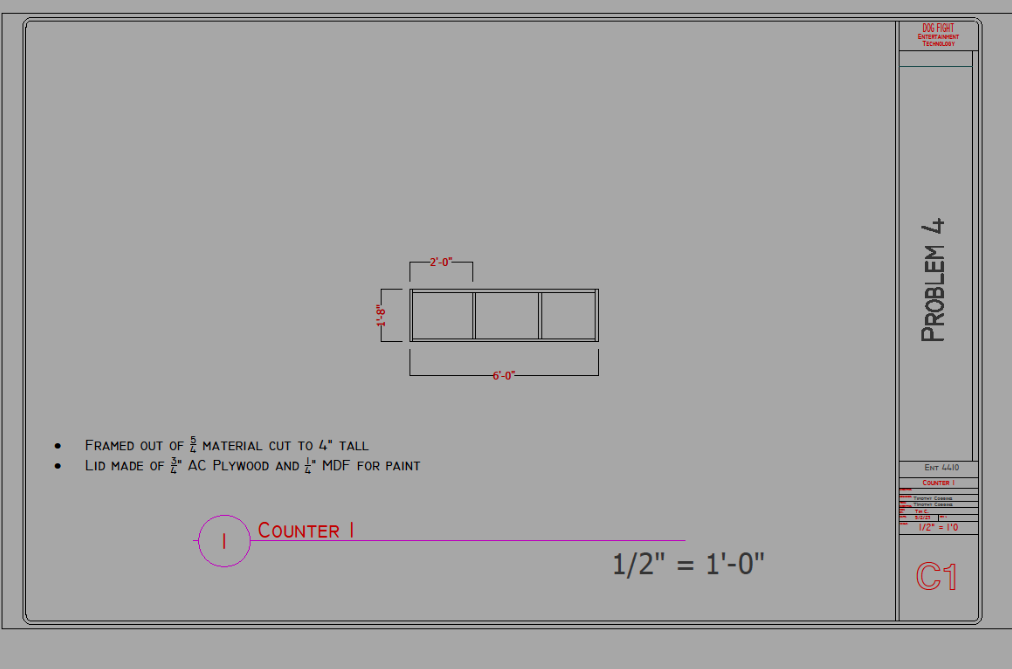
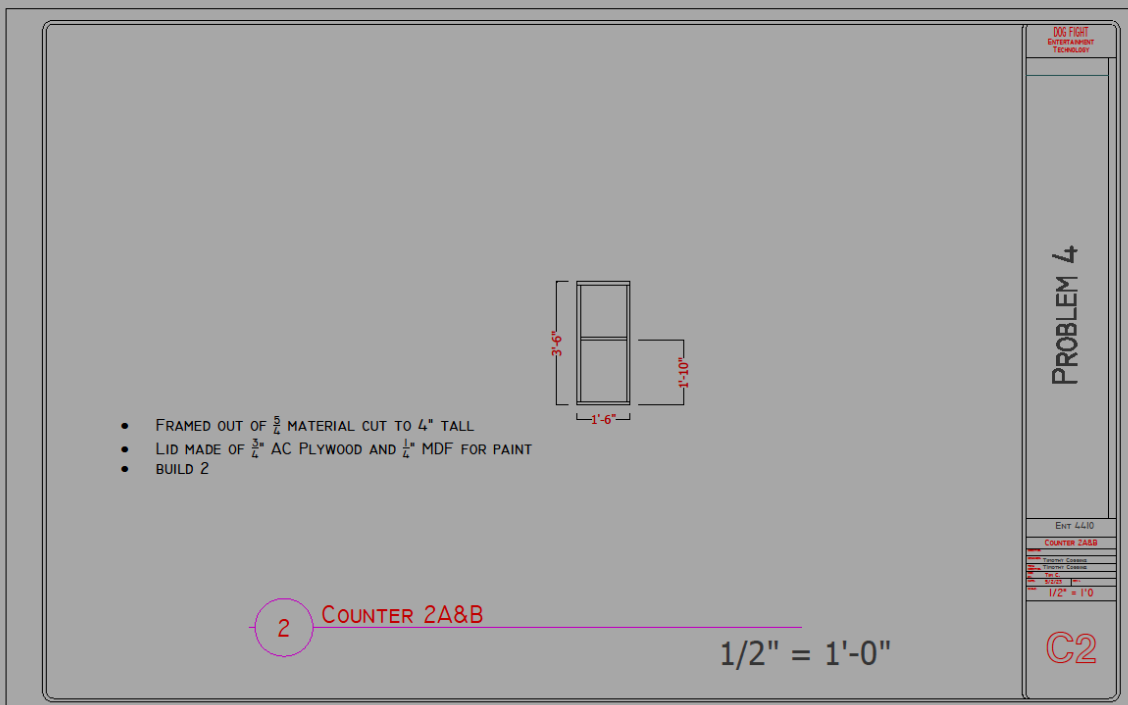
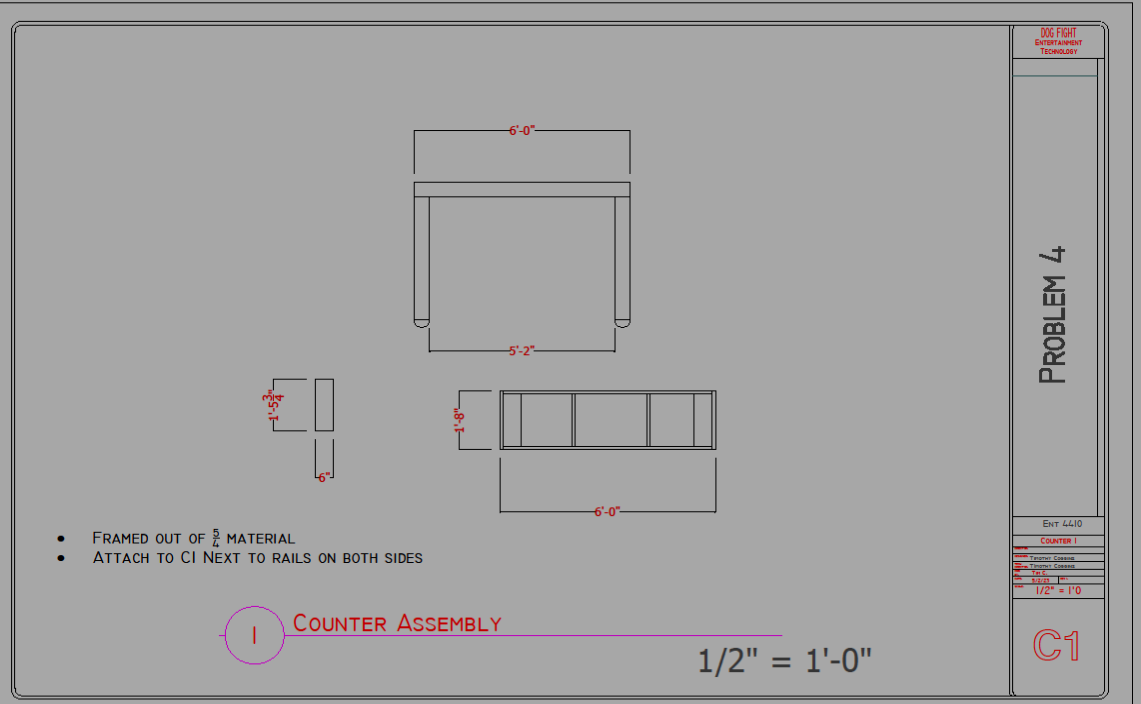
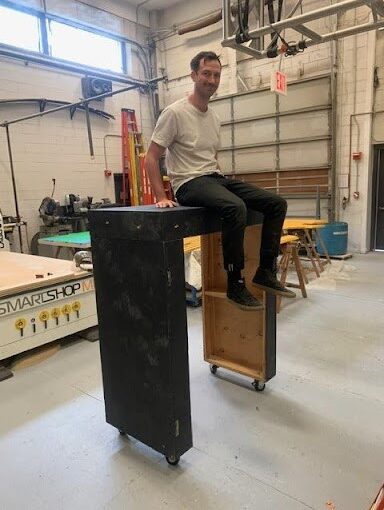
For problem 4 Chris and I were tasked with building two pieces from the play dog fight, a rolling counter and a platform bed. The rest of the set was being built by Showman Fabricators. Both pieces needed to be on casters and rolled around scenery elements on stage. The challenge for this problem was not the bed platform, it was the rolling counter. The bed is essentially a platform that is elevated and has pipe attached to it, it was not a very big deal to us, however the counter has to be free standing held up on two sides with nothing aiding it in the middle. For our first test we looked at what kind of caster solution we can use to hide the casters on the bed platform. We arrived at wagon breaks that retract and extend up and down with 3/8″ casters on the end. When they need to be moved they extend in the back of the platform and retracted when the platform is in place. For the rolling counter we were mainly concerned about it being able to withstand the weight of our actor. For our test we took 3 4×8 5/4″ platforms and joined them together with bolts and 5/4″. We were very worried that it would not withstand weight but it did very well. The 4×8 platforms were also close to our actual dimensions for the platform so it was a very successful test. We also attached casters that were omnidirectional to the the counter to see how it moved and it also went well. In case the 5/4″ failed we also planned to do a rabbet joint for the platforms to ensure extra security for the joining of the two pieces. Both pieces were to also be skimmed with 1/4″ Masonite to allow for the blue paint. We learned about how to tackle a problem as a team from different perspective and testing solutions. Managing our time appropriately was key, we had a lot of ideas initially but if something worked we immediately latched on to it rather then test every possible solution. Managing and outsourcing builds and communicating with other companies on load in times and etc is something we also learned about, as well as Showman the famous scenery shop.

Our rolling platform withstanding weight
Tech drawings of the counter 1-3 including assembly

Problem 3

Final Version of our wall
Another view of the wall

For Problem 3 Mike Colin and I were tasked with making this wall not shake at all when the door on the front was slammed. The door flat also could not have very large jacks for walking space and we could not put very much between the back wall and the flat. All of the set was also going to have this complex curved molding going all all around it. This problem was particularly hard for us because there was a lot going on, two separate issues compounded at the same time and none of us have experience building a curved flat or cutting complex shapes for molding. For the molding problem we had a two ideas. The first being we cut the shape of the crown molding once and then after shaping it out we use a machine to make a cast of the mold, then making the rest of the molding out of rubber. The other idea which we ended up going with was to make the molding out of foam and use a jig to cut the shapes using a hot knife. The jig idea worked out very well however the knife did break so we need to reiterate on our idea again. As for the wall we did one test where we slammed the door multiple times. It shook a lot on its own obviously so we needed to add reinforcement. First of all came the curved flat. We had never made a curved flat so we had to make a jig to get all of the angles right for the curve. Once all the framing members were assembled it took a bit top span the luan to fit the bend but it was got done. Along with the curved flat there was another 4×8 flat and the back wall that we had attached. With the two new flats we slammed the door again and it still shook. We attached jacks with sandbags and bracing to the top of all of the flats joining them together, and after slamming it again the wall did not move at all. Since this was about half the set we came to the conclusion that if we assemble the rest of the set with the same ratio of bracing, the set should keep the same level of rigidity. Regarding the calendar we had to work with multiple other teams and decide when was the most appropriate to build the set and such, so this was a challenge as well. Over all we gained a lot of technical skills such as making jigs, as well as working and communicating with other teams about load ins and coordinating schedules.

Jig schematic
Door with no bracing
Slam test 1
Jig
Final Door slam test
Assembly drawing
Budget
Calendar

Problem 2

Logo for the deck
Deck the logo was going onto

For problem 2 Mike Nesreen and I were tasked with the turnover of a two shows within 24 hours. On the Friday there was a concert being played with a talent show and the day after the Saturday there was the Haunted Hotel in which the scenery had to be completely black. The challenge for our team was how were we going to do the change over. Building the deck and stairs were no problem for us, but the turnover was the challenge. We had the idea of installing vinyl of the logo across the entire deck as the solution to this problem. We had a test piece to stretch the vinyl across the 3/4″ plywood and 1/4″ Masonite and it worked. Personally my biggest struggle since I was doing the drafting was the stairs. This was my first time drawing a stair case in CAD so I was unsure how to approach it or what the correct way to make it was so it can be structurally sound and span the most weight but I got it right and it came out well. We also included our total budget for the entire project including materials and hardware. As far as what knowledge we gained, we got a chance to work with a new material, vinyl as well as get experience with budgeting and trying to make schedules work on really tight timing. The purpose of the problem was to make us get used to using our time wisely and strategizing how to best use the time we had, if something similar were to happen in the field.

Instructions for vinyl installation
Budget
Long stair case in the back of the deck

Problem 1

Render of PB and J Sandwich

Final result of our PB and J sandwich

For problem one Chris and I were assigned to create peanut butter jelly sandwiches on a budget of $20 and to pay as much attention to detail as possible. When handed the design drawing and samples of what the sandwich should look like we both analyzed the images given to us very carefully. We noticed a couple things such as the kind of bread that was used, the texture of the peanut butter, the kind of jelly that was used, the way the sandwich was cut and finally the kind of plate it was plated on. We were very to the detail to make everything as clean and presentable as possible, including foil in the package to make sure the plate does not get dirty for presentation and so forth. We were also very scrutonous when it came to the instructions, being very meticulous and trying to ensure every detail was right. We were told that another person from the faculty would be making our sandwiches for us and Luke a CLT did ours and he took the instructions too literally, i.e if the our constructions said not to open the jar he did not do that. the result as above is not what we had imagined for the sandwich. We both took this as an lesson that you cannot account for the knowledge of the people who are being hired under us and what you may think is common knowledge may not be so common.