

-
Recent Posts
Recent Comments
- Chenhua Li on Steps to Metal Restoration Outline Picture
- Renata Budny on Welcome to RESD 1115 Fixed Prosthodontics I
- Yamilka Feliz on Welcome to RESD 1115 Fixed Prosthodontics I
- Renata Budny on Welcome to RESD 1115 Fixed Prosthodontics I
- Yamilka Feliz on Welcome to RESD 1115 Fixed Prosthodontics I
My first casting…

Raw casting: molar & inlay
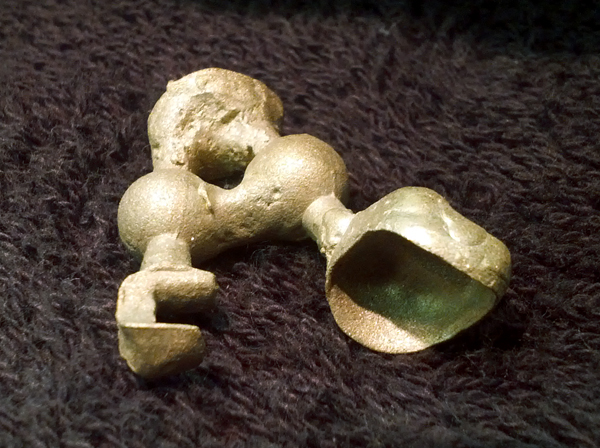
Raw casting: molar & inlay (another view)
Metal Restoration: First stage
Step by Step Guide: Metal Restoration: First stage
Caution: Wear lab coat, safety glass, gloves, mold mask.
Before Construction of Maxillary and Mandibular Master Casts, Obtain the sterilized final impression from the dentist. The case must include dentist signature, prescription, dentist instructions, and patient’s information such as name, age, and sex.
A. Construction of Maxillary and Mandibular Master Casts

1. Add water to clear plastic bowl. Add improved stone powder into the bowl and mix the content with plaster spatula. Insert the bowl in the vacuum mixer and start the machine. Remove the bowl. Spray the maxillary mold and mandibular mold with debubblizer and use the airgun to dry the molds. Setup a layer of newspaper.
2. Start and adjust the setting of the vibrator machine. Add a small amount of the improved stone content with plaster spatula at one corner of each mold. Let the mixture flow around the mold. Make sure the mixture flows well into important landmarks such as the cusp and ridges. Pour more improved stone content to fill the top of mold.
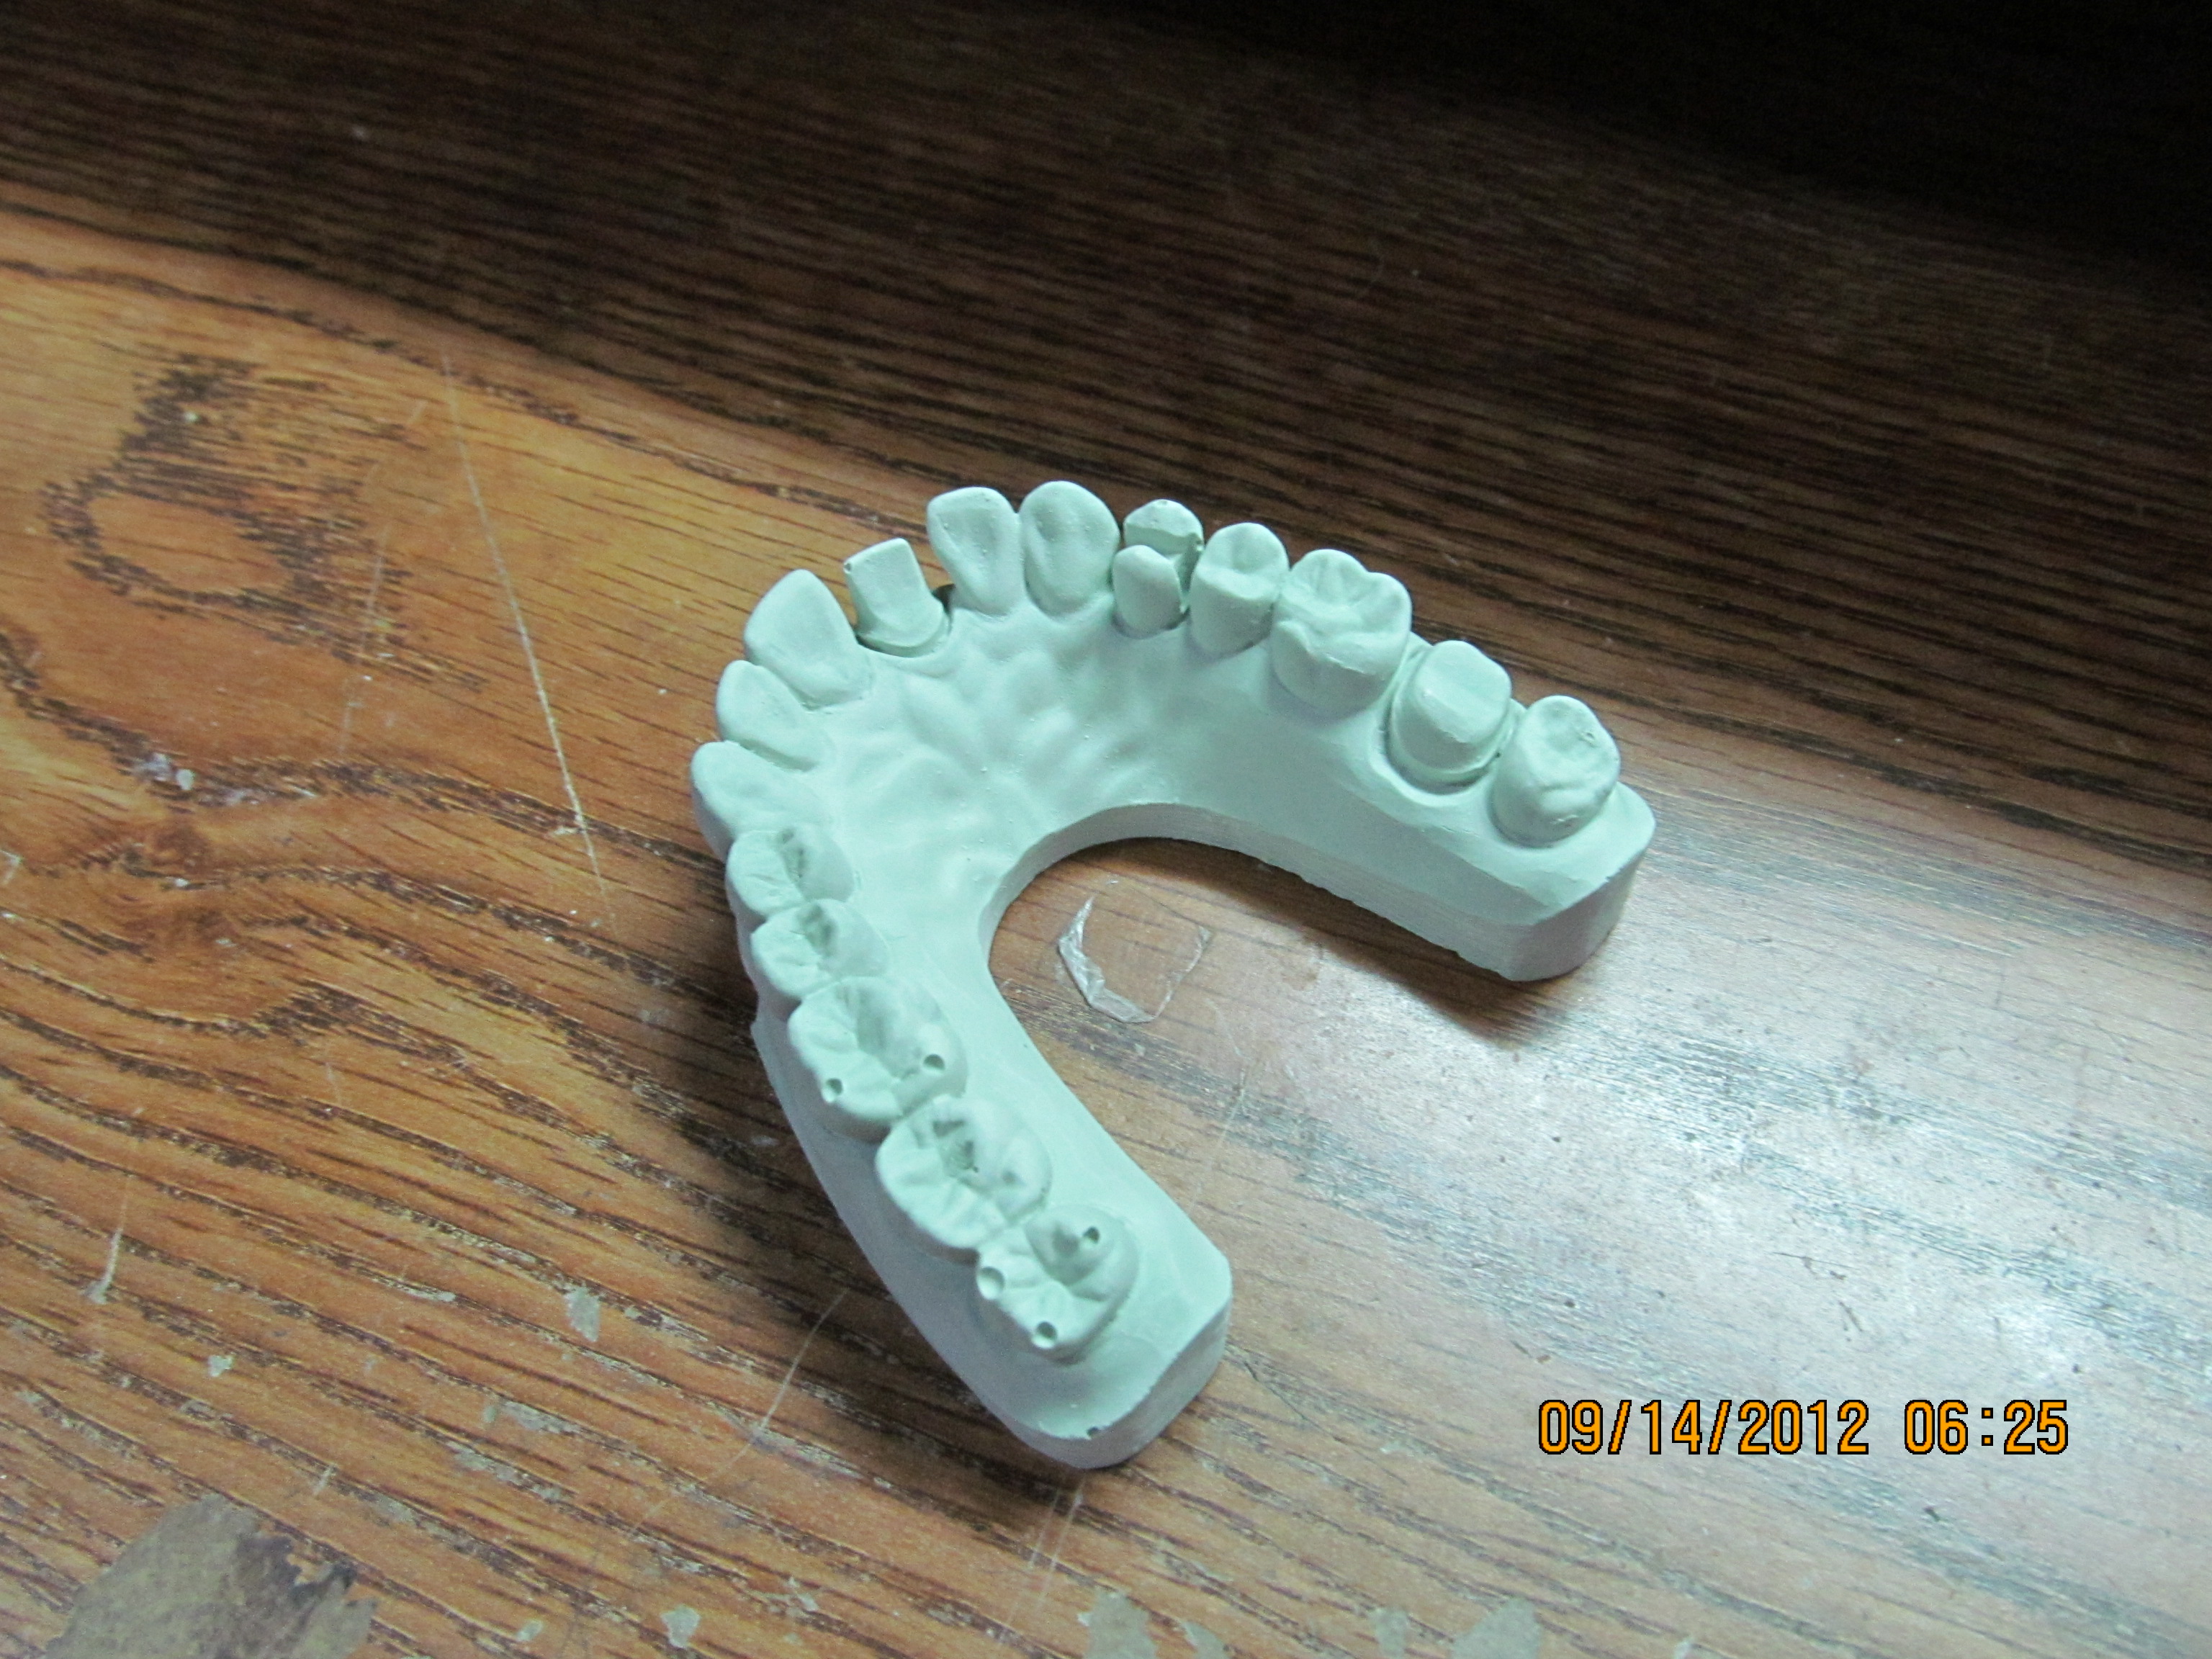
3. Let the molds sit for 25 minutes. Remove the both maxillary cast and mandibular cast from molds and wait 45 minutes. Construction of Maxillary and Mandibular Master Casts are completed.
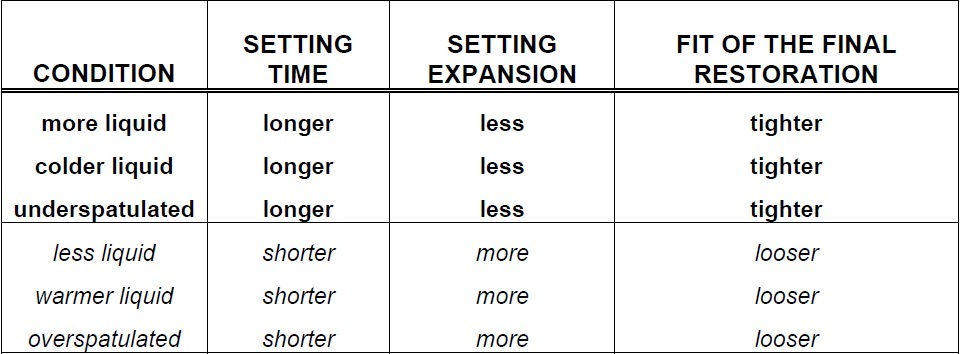 preparation- the tooth or teeth prepared by the dentist that will be restored
cast- positive reproduction of an area of the oral cavity, may reproduce hard tissue, soft tissue or both
maxillary cast- upper model
mandibular cast- lower model
preparation- the tooth or teeth prepared by the dentist that will be restored
cast- positive reproduction of an area of the oral cavity, may reproduce hard tissue, soft tissue or both
maxillary cast- upper model
mandibular cast- lower model
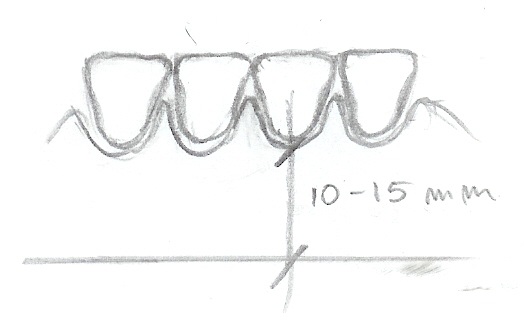
B. Model Trimming
1. Wet the models before trimming (To decrease the attachment of wet and dry stone particles). Maxillary and mandibular base surfaces should be parallel to horizontal plane.
2. Turn on the Trimming machine. Use two hands to guide the model into the Trimming machine. Trim the bottom and side of the master casts. Maxillary cast should be 10mm high from the bottom of the base to the gingival margin of the tooth. Mandibular cast should be about 15 mm high from the bottom of the base to the gingival margin of the tooth.
3. Use the air gun to dry and remove little stone particles for both master casts. Use the router to trim the inside of the both master casts. Model Trimming is completed.


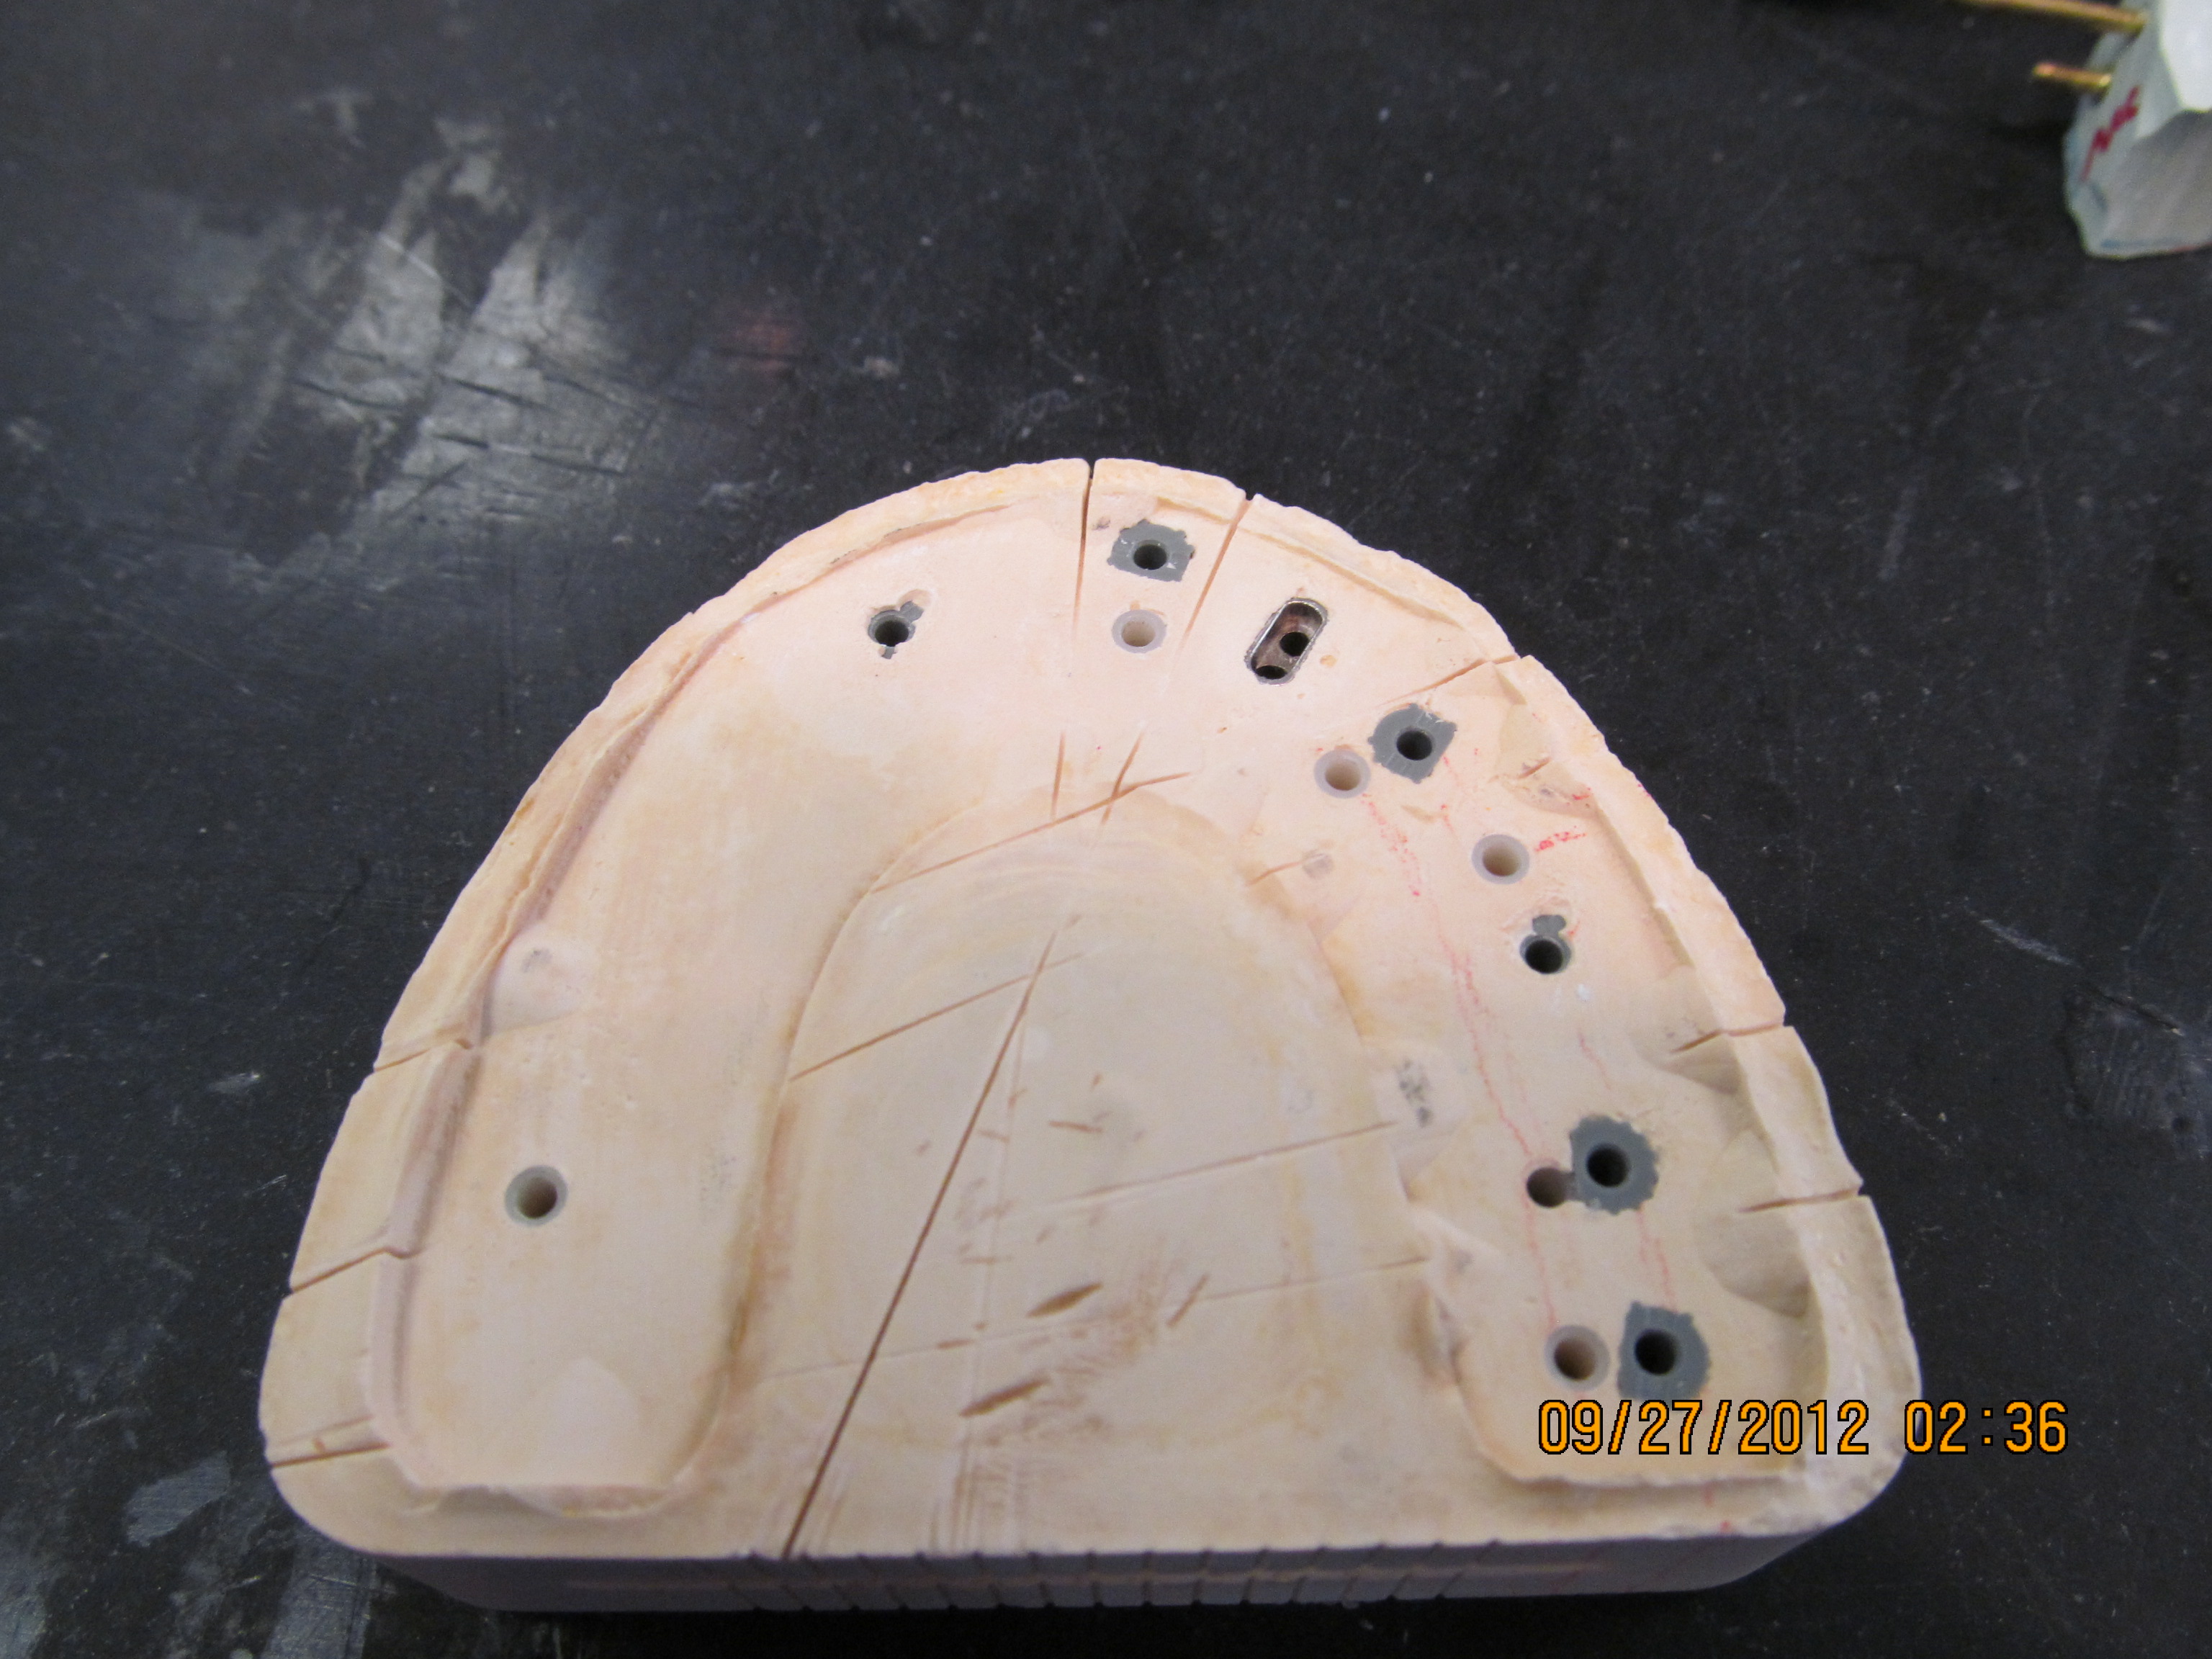
C. Pindex the maxillary master cast
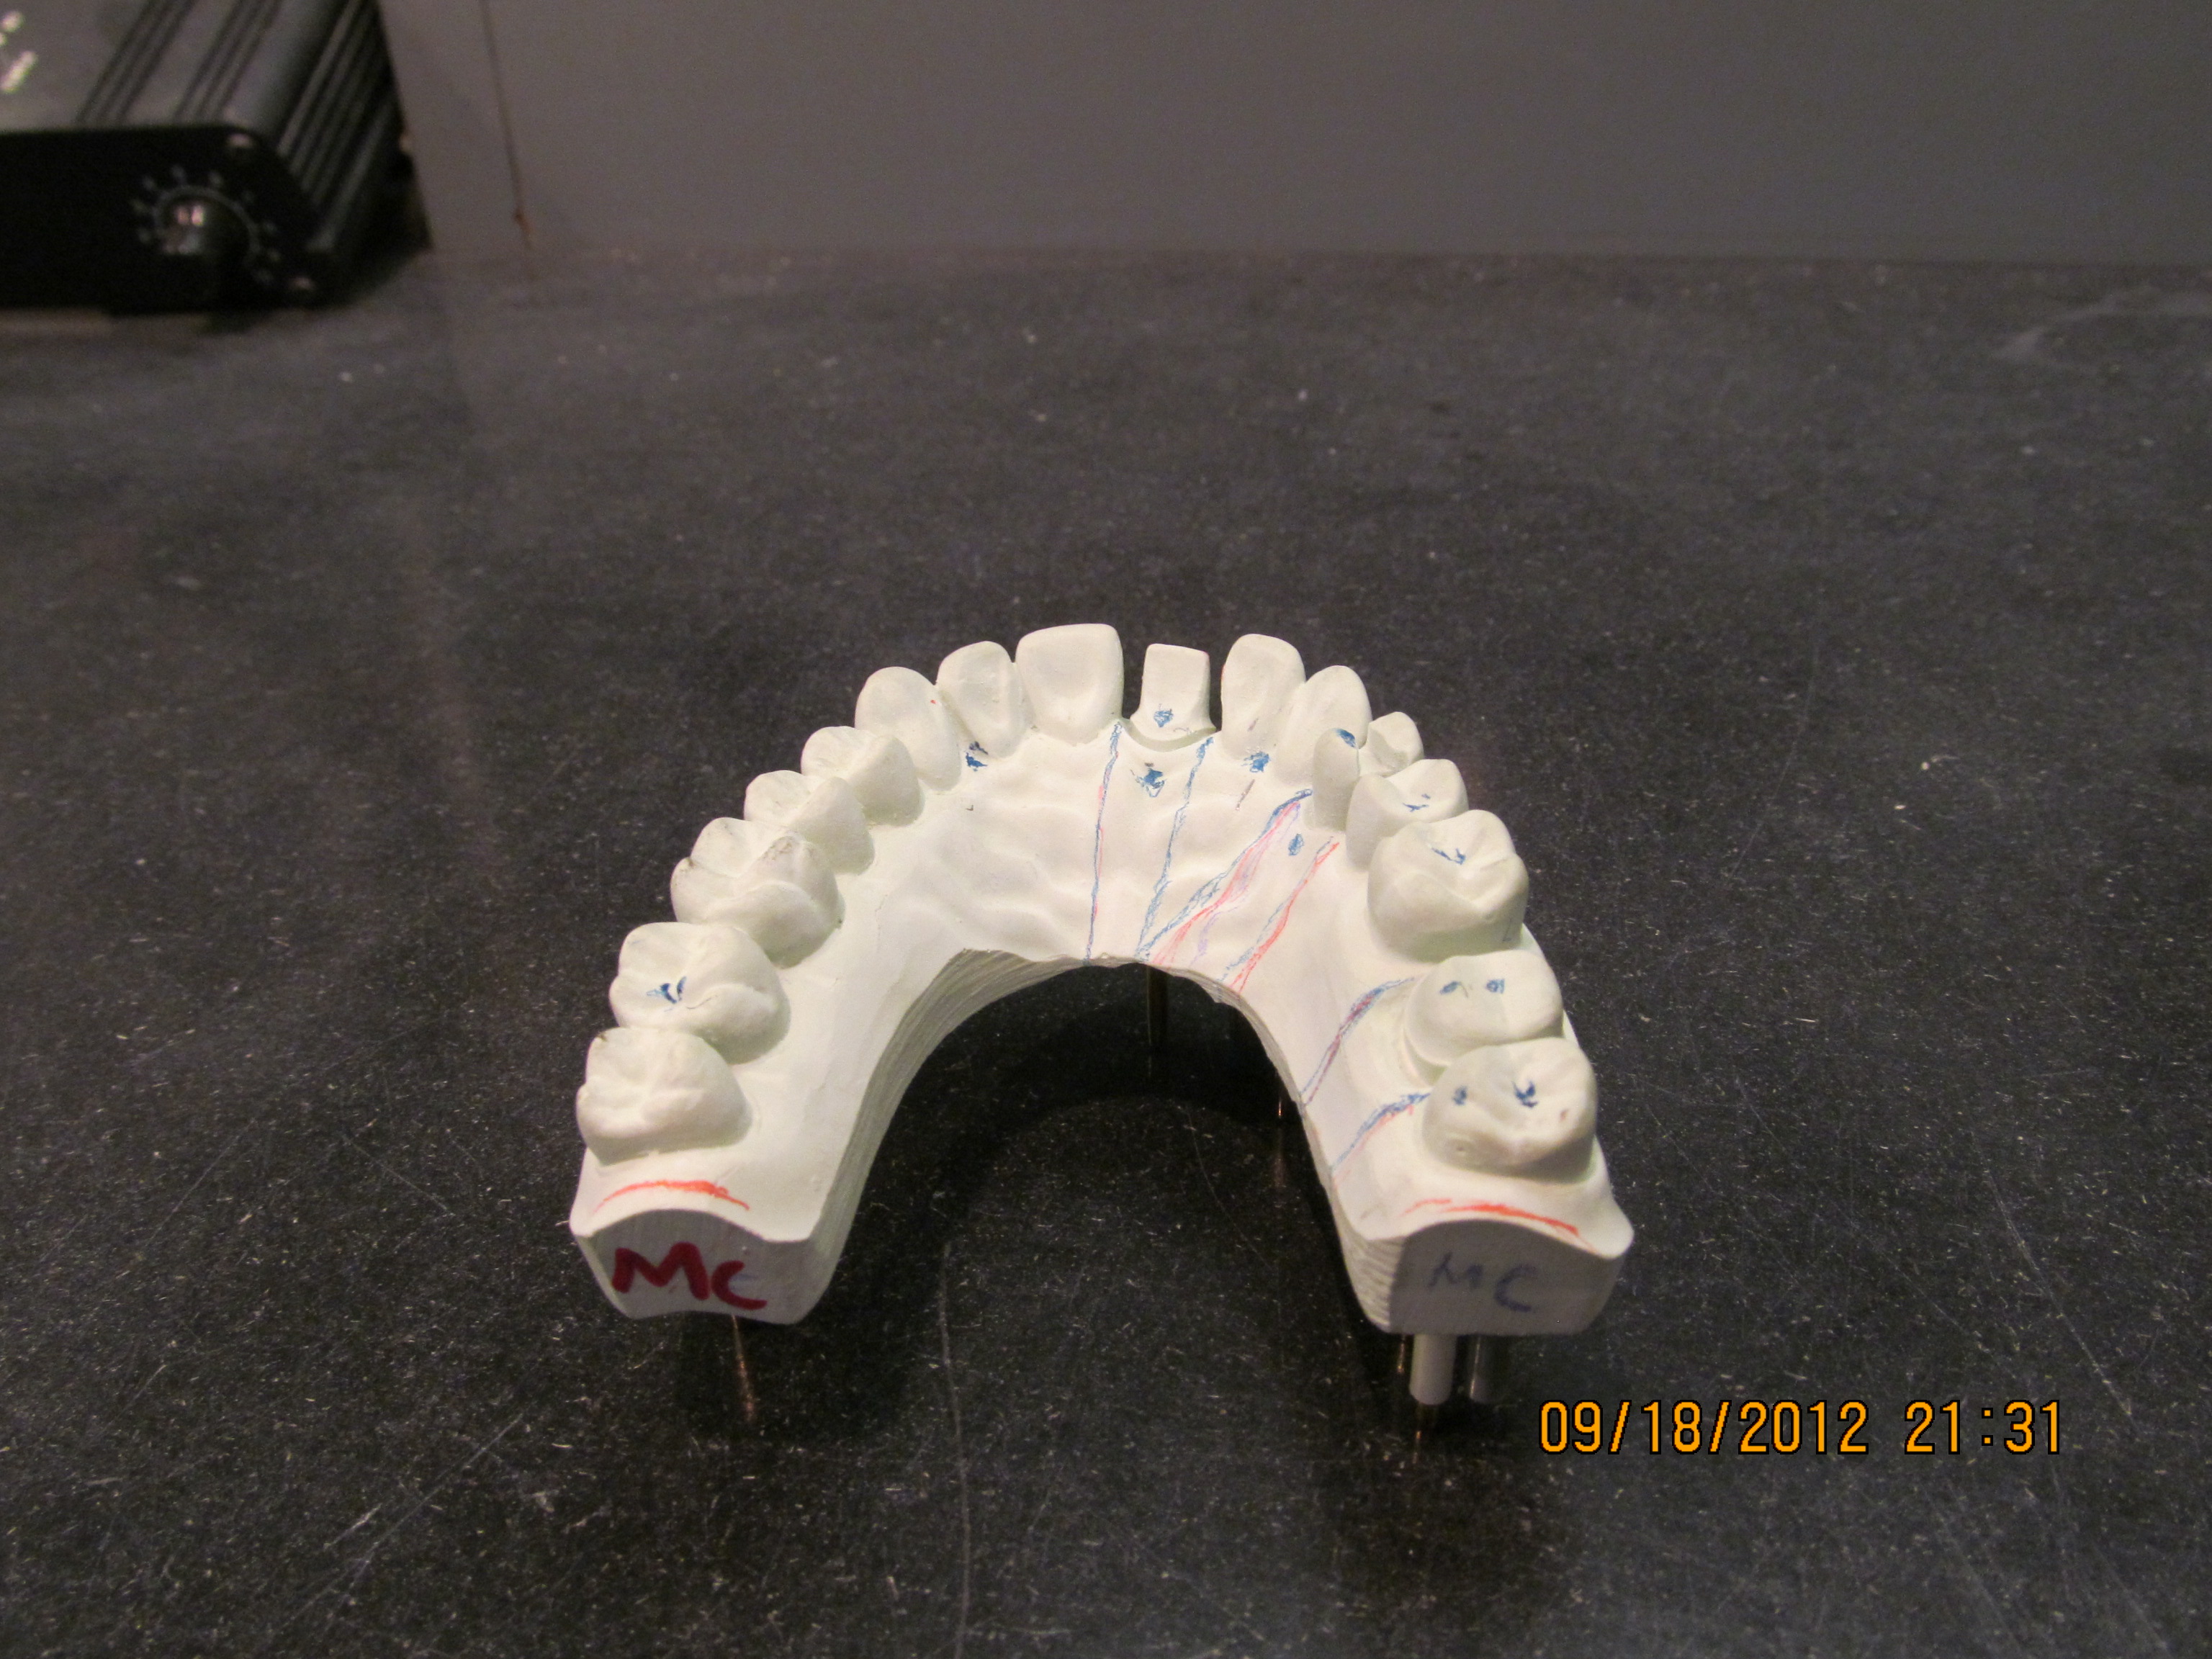

1. Use a blue pencil to mark pin hole area location. Use a red pencil to mark the saw lines.
2. Insert the master casts into the pindex machine. Align the laser light to the blue circles. Push the lever up to drill holes in the blue circles.
3. Use the handpiece machine to handpiece micromotor with bur to create notches for every saw line in the maxillary master cast.
4. Insert dowel pins and dual pins to the master casts. Mark sure the large pin and small pin are parallel to each other. Insert the correct sleeves to the respective pins. In my model, I use one dual pin for the both #10 and #11 teeth, and dowel pins for the rest of the teeth. Pindex of the model is completed.
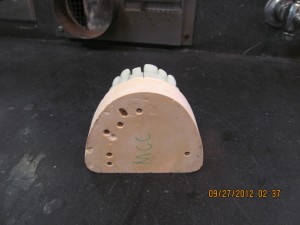
D. Base mold Construction
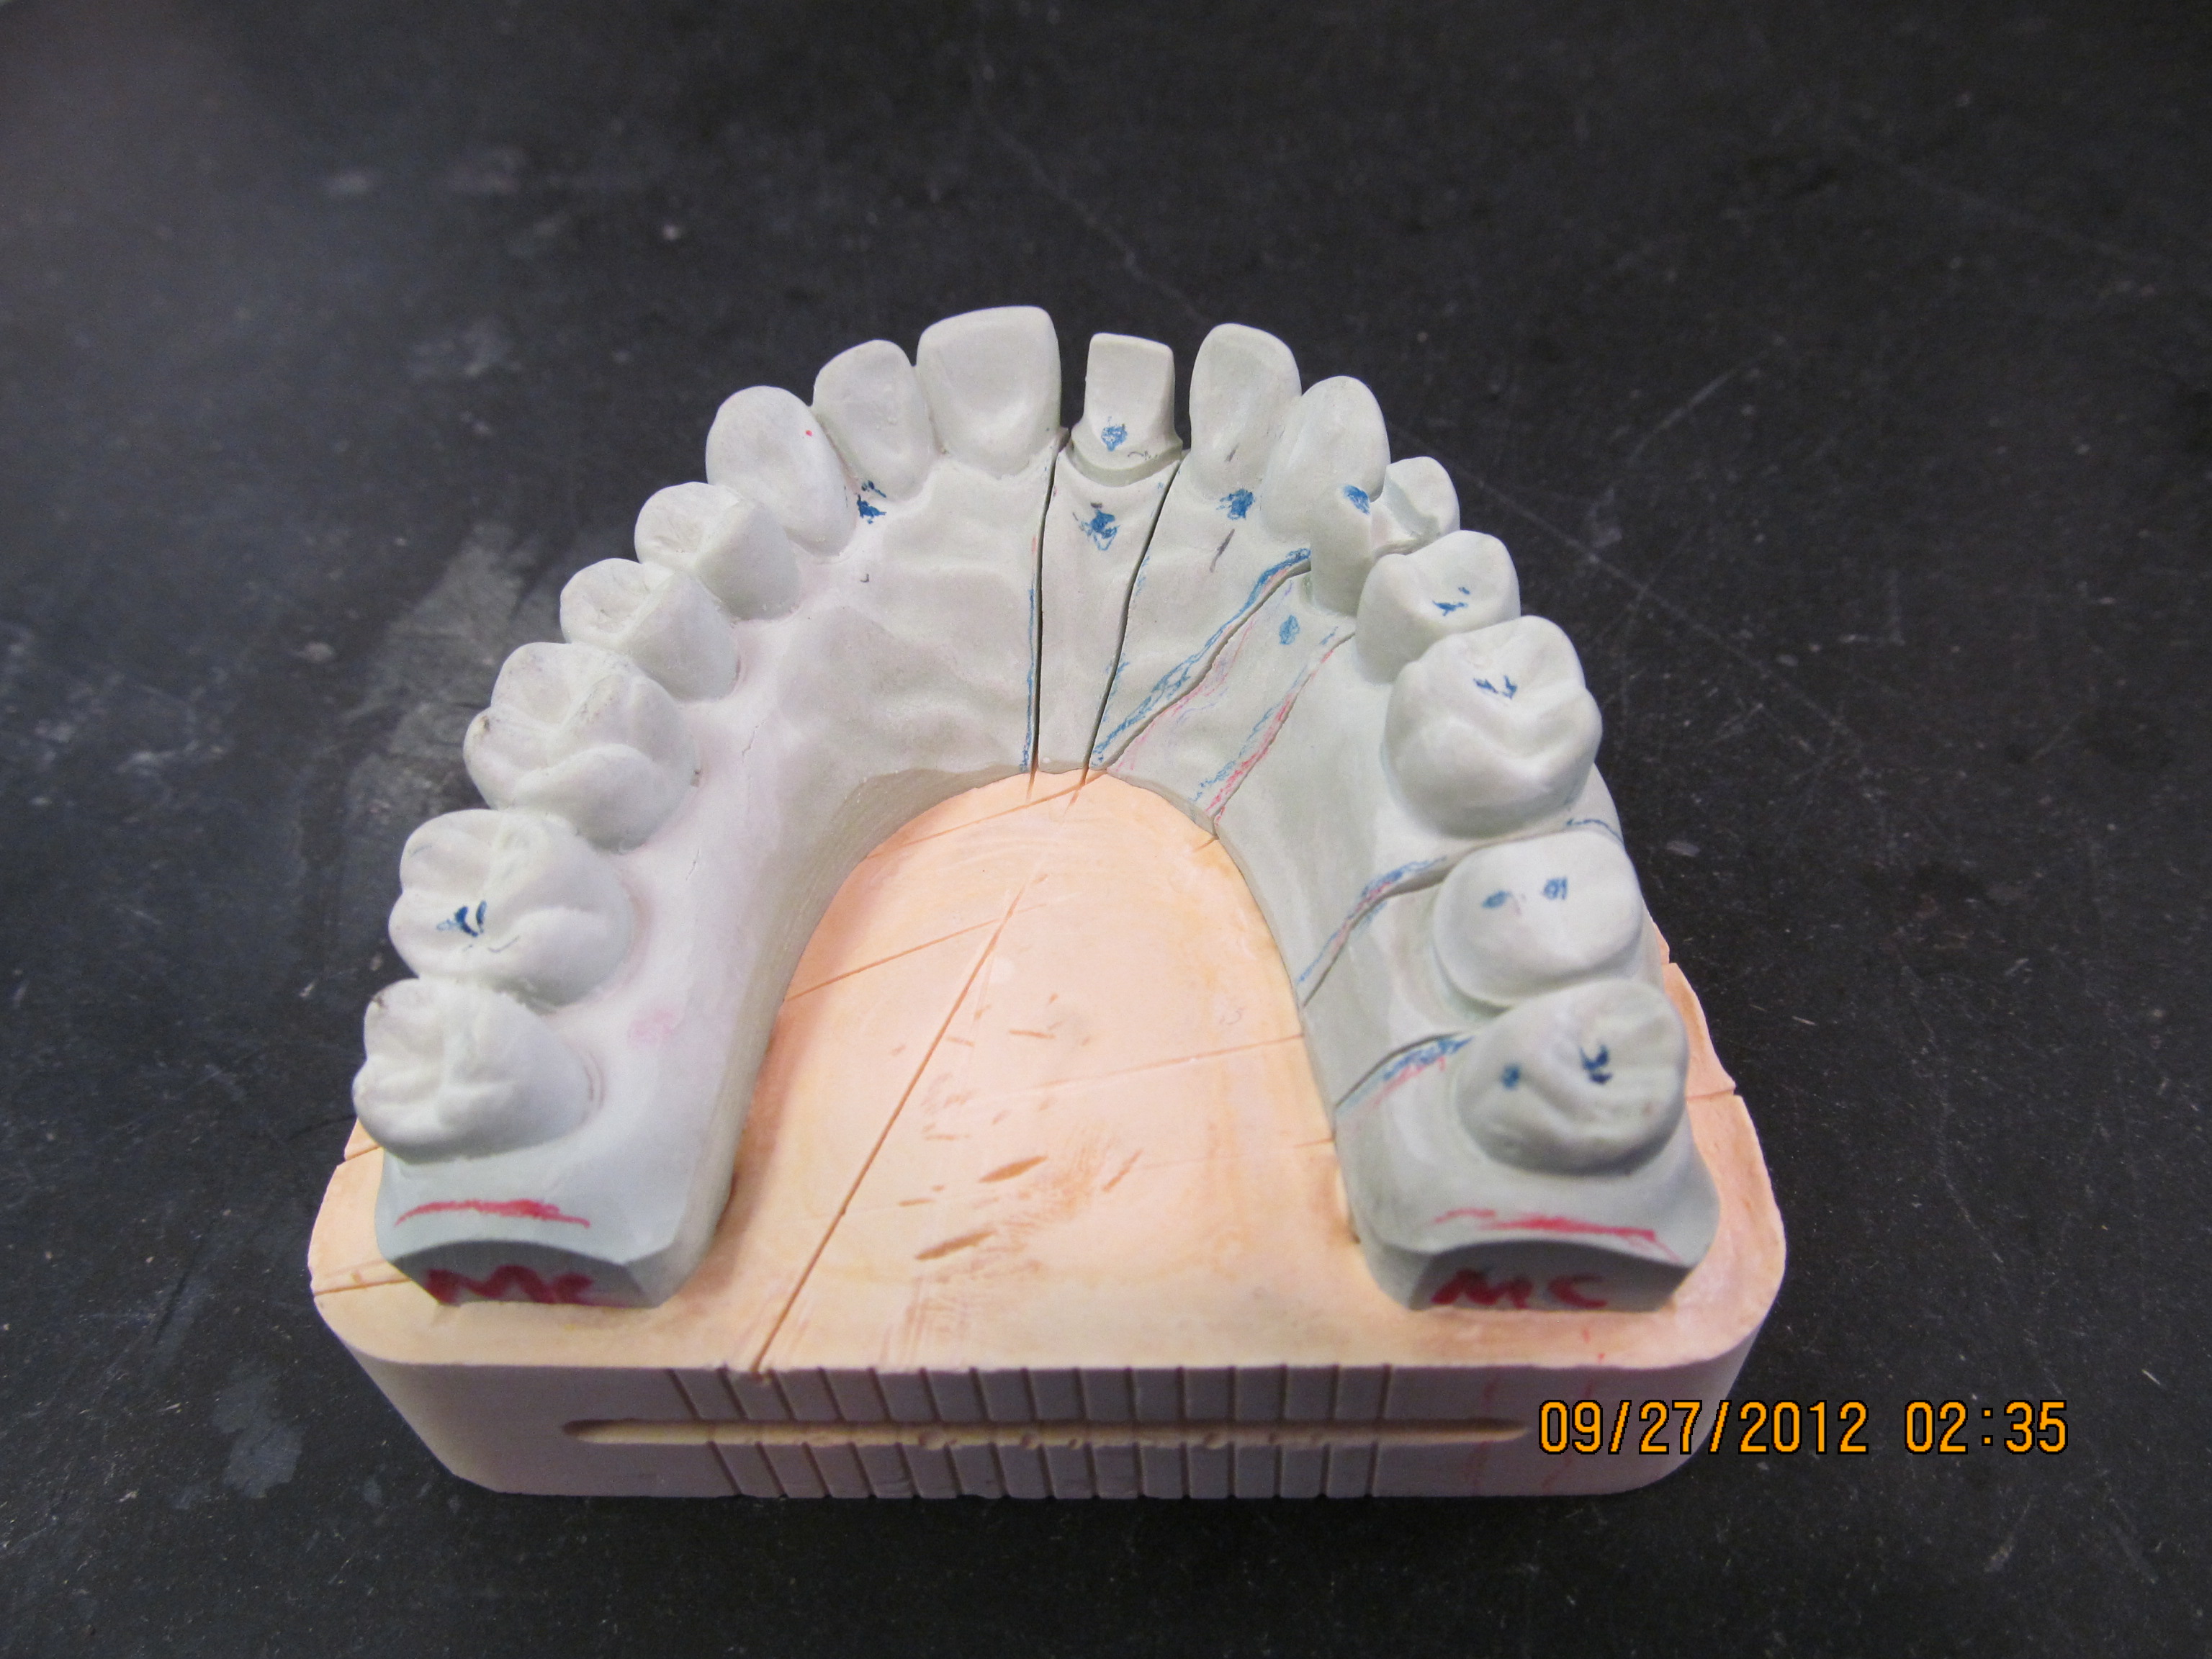
1. Insert both master casts into the respective mold bases. Add water to clear plastic bowl. Add Buff stone powder into the bowl and mix the content with plaster spatula. Insert the bowl in the vacuum mixer and start the machine. Remove the bowl.
2. Spray the maxillary mold and mandibular mold with debubblizer and use the airgun to dry the molds. Setup a layer of newspaper. Start and adjust the setting of the vibrator machine. Add a small amount of the buff stone content with plaster spatula at one corner of each mold. Let the mixture flow around the mold. Make sure the content flows well into the base mold. Pour more buff stone mixture to fill the top of mold.
3. Let the molds sit for 25 minutes. Remove the both maxillary model and mandibular model from molds and wait 45 minutes. Base mold Construction is completed.
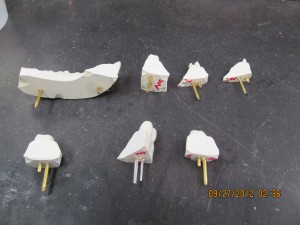
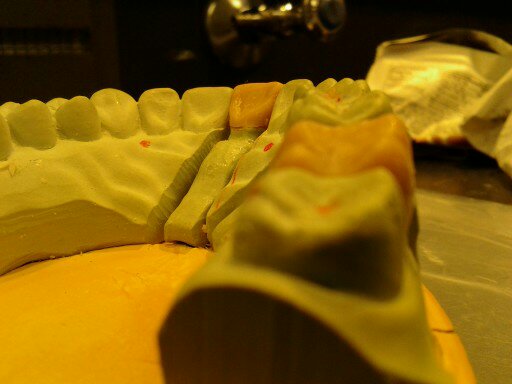
E. Die Sectioning
1. Cut the dies parallel to the red line carefully and slowly using a saw. Use the red lines as guidance. Do not cut the pins and teeth. Die Sectioning is completed.
References: Budny, R. (2011). RESD 1115 fixed prosthodontics I: laboratory section.
Posted in Uncategorized
Leave a comment
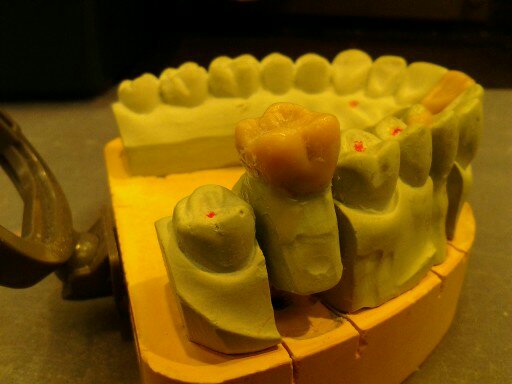
Metal Restoration: Second stage
F. Trimming and Ditching
 1. Gently remove the dies. Use the side of the red pencil to mark the margin of all prepared dies.
2.Use the pear shape bur with handpiece to remove the excess bulk to prepare space for ditching.
3.Use a Zahle wax carver cut excess stone around the margin while not cutting the margin. Trimming and Ditching is completed.
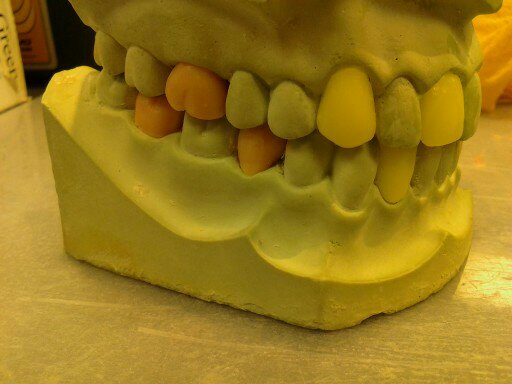
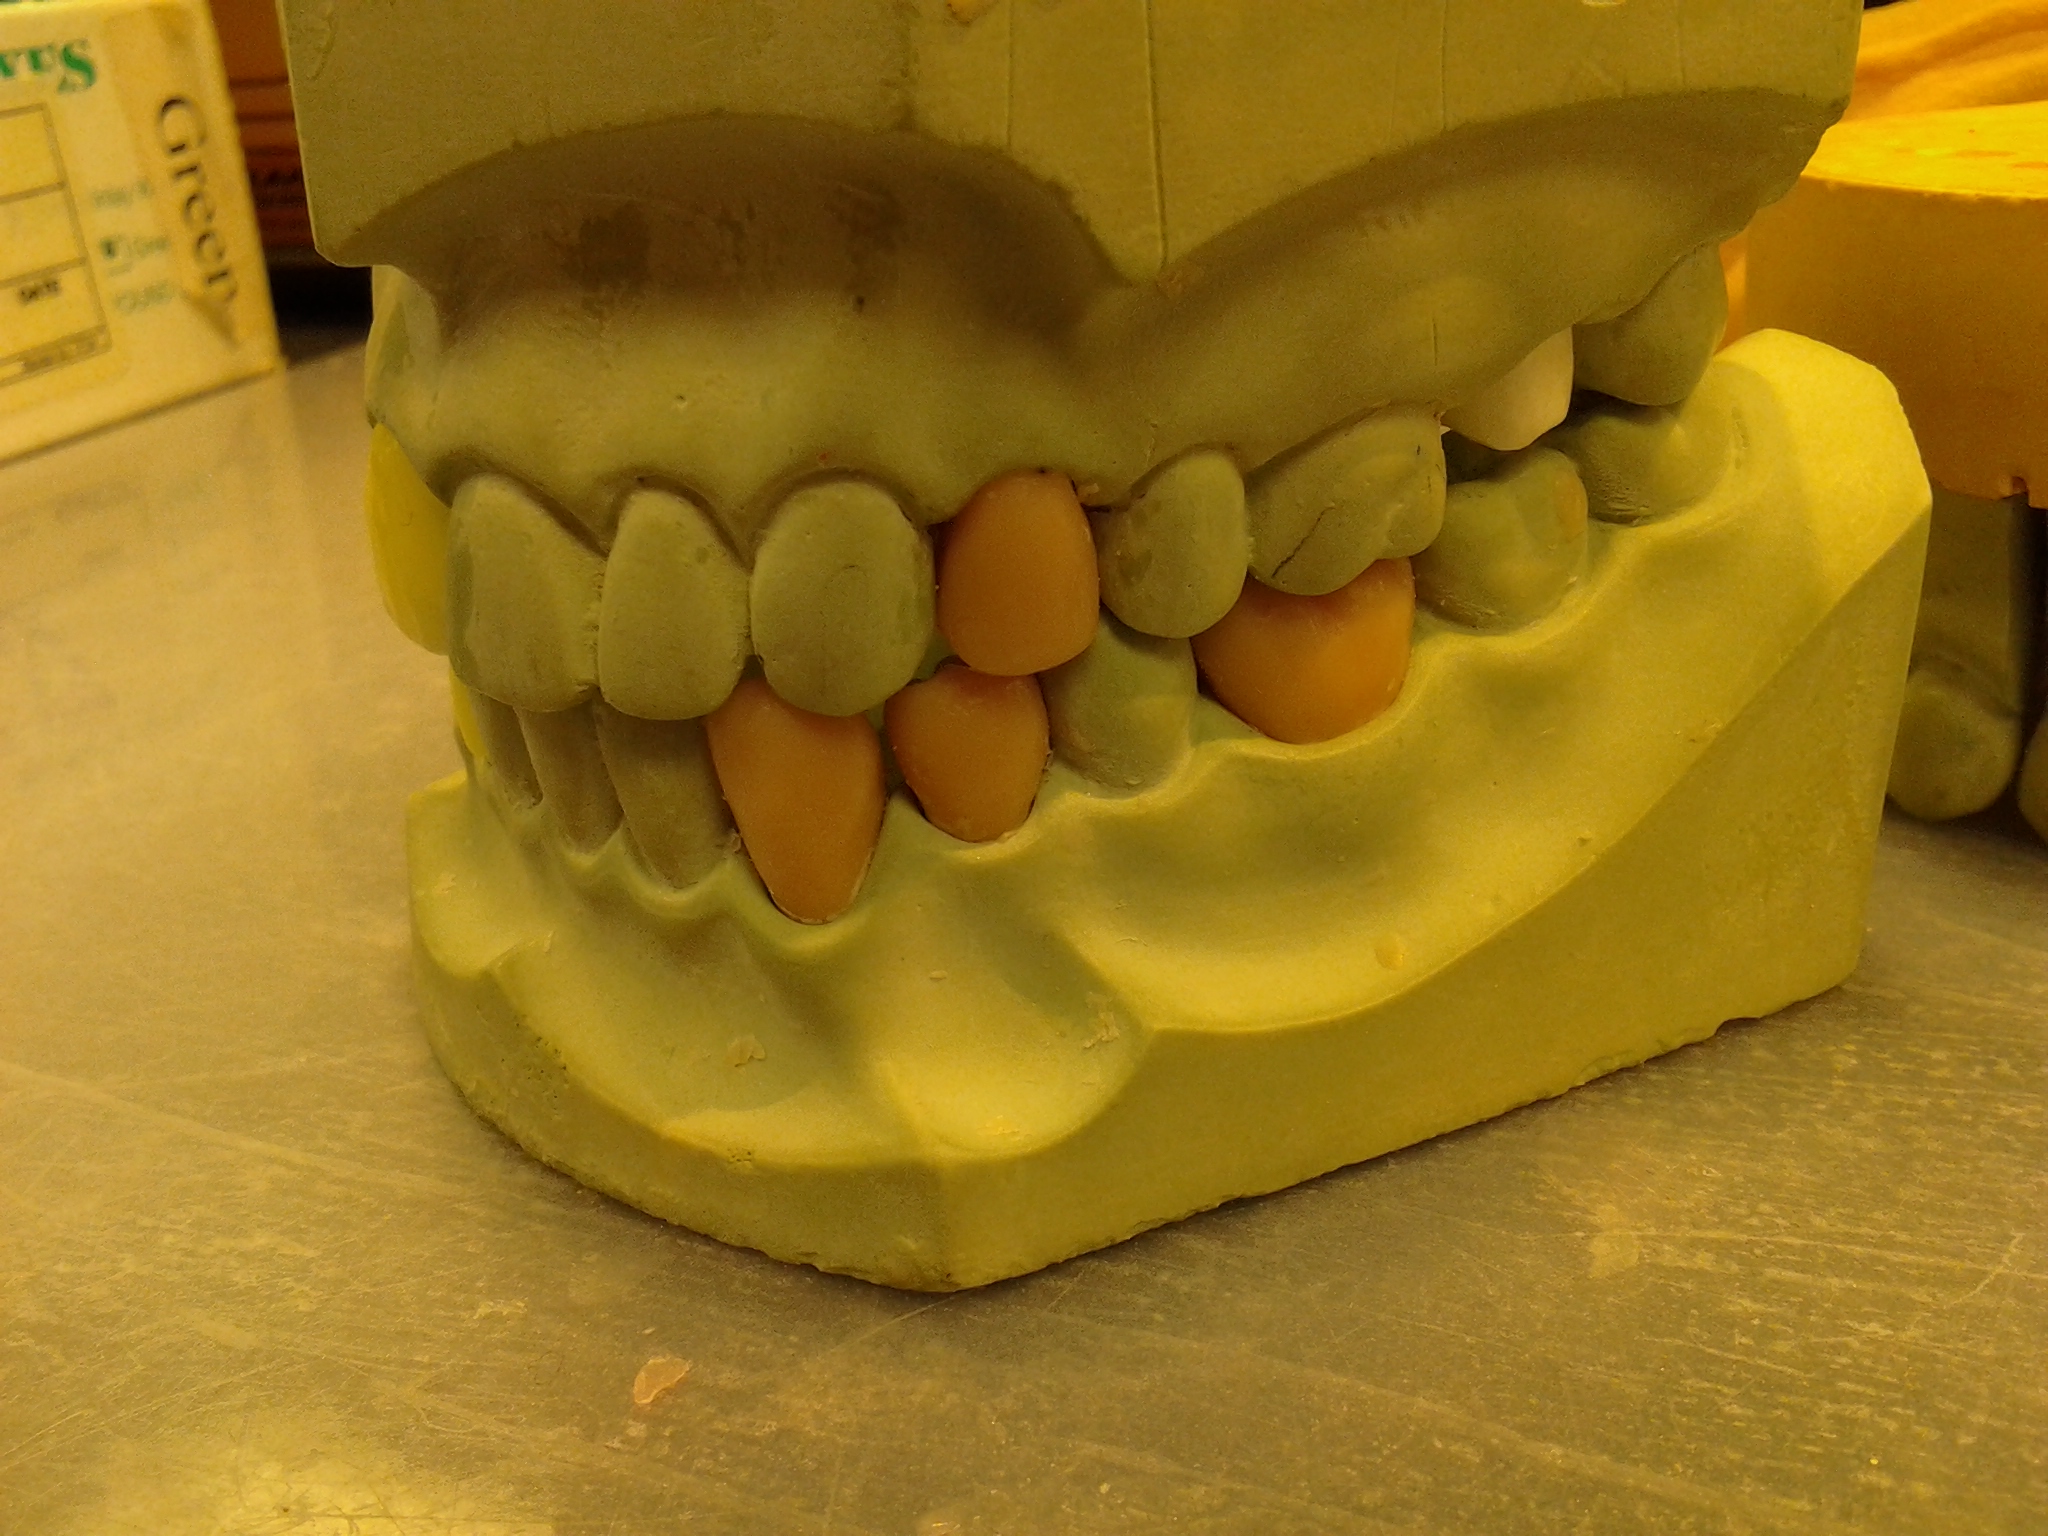
G. Bite Registration and Articulation
 1. Remove the prepared dies. During Articulation, hold the 2 cast together with one hand. Make sure that the casts are established in jaw relationship records (centric relation and centric occlusion).
2. Use heat cure glue from glue gun to connect the 2 working casts together. Attach the articulator to working casts using Loctite glue.
3. Let glue cure for 5-10 minutes. Use a suitable bur to remove excess stone to create space for the articulator if necessary. Rinse the die cast with cold water to extract the heat cure glue. Bite Registration and Articulation is completed.
H. Application of Die Hardener, Die Spacer, and Separator
 1. Apply Die Hardener to all the prepared teeth that cover the whole preparation and 2mm below the margin.
2. Apply one layer for silver die spacer and one layer of gold die spacer that is 1 mm above the margin. Apply a layer of Separator (Die Lubricant) to all the preparation teeth. Application of Die Hardener, Die Spacer, and Separator is complete.
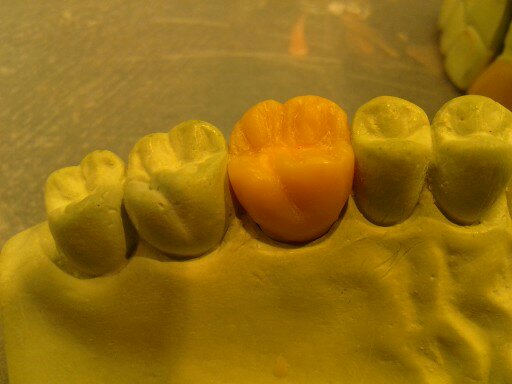
I. Full Crown Wax pattern
1. Use a combination of positive waxing (add small increments wax on the die) and negative waxing (remove wax on the die) for Inlay Waxing. Use the Renfert electric wax carver to create wax patterns such as 4 cusp cones, cusp ridges, marginal ridges, mesial and distal contacts areas, 4 axial ridges (2 labial axial ridges and 2 lingual axial ridges), primary anatomy (triangular ridges, central groove), and secondary anatomy (secondary grooves). Use multiple carvers to remove excess wax in bulky areas in the wax pattern. Don’t damage the margin. Full Crown Wax pattern is complete.
J. Inlay Wax pattern
1. Use a combination of positive waxing (add small increments wax on the die) and negative waxing (remove wax on the die) for Inlay Waxing. Use the Renfert electric wax carver to create wax patterns such as 2 cusp cones, cusp ridges, marginal ridges, mesial and distal contacts areas, 2 axial ridges (1 labial axial ridge and 1 lingual axial ridge), primary anatomy (Transverse ridge), and secondary anatomy(secondary grooves). Use multiple carvers to remove excess wax in bulky areas in the wax pattern. Don’t damage the margin. Inlay Wax pattern is complete.
K. Spruing Process


1. Choose the appropriate gauge for wax pattern. The sprue length should be about 6-9 mm. Use a pair of scissor to cut the sprue to 6mm. Heat the sticky wax with the 7A wax spatula and add the sticky wax to attach the wax pattern to the sprue.
2. Use the same technique to attach the sprue to the runner bar. The sprue should be set at 45 degrees angle perpendicular to the runner bar. Use the Renfert electric wax carver to add or remove sticky wax from the sprue. The sticky wax attached to the wax pattern and runner bar gauge should not be bulky enough to reduce the flow of the metal during the casting process.
3. Use the Renfert electric wax carver to heat the bottom of runner bar gauge and the ring base to secure the Spruing Construction with the ring. Add the ring top. Spray debubblizer into the ring and gently use the airgun. Measure the weight of the sprue construction using a precise electric weight scale. The weight of the sprue will determine the number of metal ingots that needs to be used. Spruing Process is complete.
M. Creation of investment mold
1. Read the instruction of the Investment bag. Use the 30 ml graduated cylinder to measure 29 ml of the Liquid. Open 2 bags of Investment and insert the investment into the clean whipmix vacuum bowl. Add 29 ml of the Liquid into the bowl. Use the plaster spatula to mix the contents. Insert the bowl in the vacuum mixer and start the machine. After the machine finish mixing the contents, remove the bowl. Transfer the investment mixture into the wax pattern.
2. Use the 7A wax spatula and vibrator to assist the flow of the investment. After the wax patterns are filled with investment mixture without bubbles, transfer the remaining of the investment into the ring. Let the investment sit for 10 minutes to complete the exothermic reaction. After the exothermic reaction is complete, twist the ring base and push out the investment mold. Creation of investment mold is complete.
N. Burnout
1. Turn on the ventilation unit. Calibrate the temperature of the Burnout Oven. Heat the oven up from room temperature to 1,600 degrees Fahrenheit at maximum temperature increment stage setting. Set the time elapse to 1 hour.
2. Insert the investment mold into the burnout oven. Close the lid and press start. After the burnout process is complete, open the lid and use the metal clamp to remove the investment mold. Turn off the machine. Open the window and let the investment mold cool down.
O. Casting Process
1. Examine the casting arm to check for detects and malfunction parts. Lift up the stopper. Rotate the Casting arm counterclockwise four times by placing both hands in the casting arm. Use the clamp to place the investment ring in the ring holder and crucible in the crucible holder.
2. Place 4 ingots of metal inside the crucible. Insert the gas line into the blue gas valve. Connect the oxygen line to the torch from the oxygen tank. Start on the flame from lighter to ignite the torch. Turn on the gas switch. Then turn on the oxygen switch at 20 psi pressure indicated at the pressure gauge. Put on the flare goggles for eye protection against the intense light generated from metal heating. Heat the metal ingots in the crucible until the metal is ready for casting. Remove the hands and torch from the casting station and close the lid.
3. Turn off the torch by turning off the oxygen switch. Then turn off the gas switch. Use the metal clamp to remove the investment ring while it is hot. Open the window and let the investment ring sit until it cools. Fasting Cooling allows small grains which causes the metal restoration to become stronger. Casting process is complete.
P. Finish
1. For divesting, use a wooden small hammer to strike the bottom side of the ring to remove the investment from the metal restoration. Do not strike the metal restorations. Use the sandblast machine on the metal restoration.
Q. Polishing
Posted in Uncategorized
Leave a comment
Wax up
wax up

Posted in Uncategorized
Leave a comment

