I hope you all enjoyed our site visit on Thursday, please upload any photos or videos you have to this folder to share with the class: https://www.dropbox.com/scl/fo/5xgakwtmx30ishwjaadwm/AGlUqM1A5LmO1v7HbC0lAWA?rlkey=el32wqyhrlhced6gpn9hjdk57&st=32ddtndz&dl=0
The final submission for the facades assignment will be 11/21 and will we break up the pin up over two days (11/21 & 11/26). This means we only have 3 more classes before the pin-up, so you will need to push hard to catch up with the modeling and drawings! To help you create a narrative for your facade systems, please complete a draft of this word document (you can download and edit it directly) by the next class: https://www.dropbox.com/scl/fi/4uy64qk30rv7q478g0a5r/ARCH2431-Building-Tech-III-Facade-Narrative.docx?rlkey=s28cziiz5c1kk4ksitxiu9f23&st=sb1kcnqk&dl=0
Additionally, the following is due for the next class (11/12):
- Draft narrative from word document linked above
- Rain Screen [FOCUS ON THIS]
- Panelization should be complete. If not, move on.
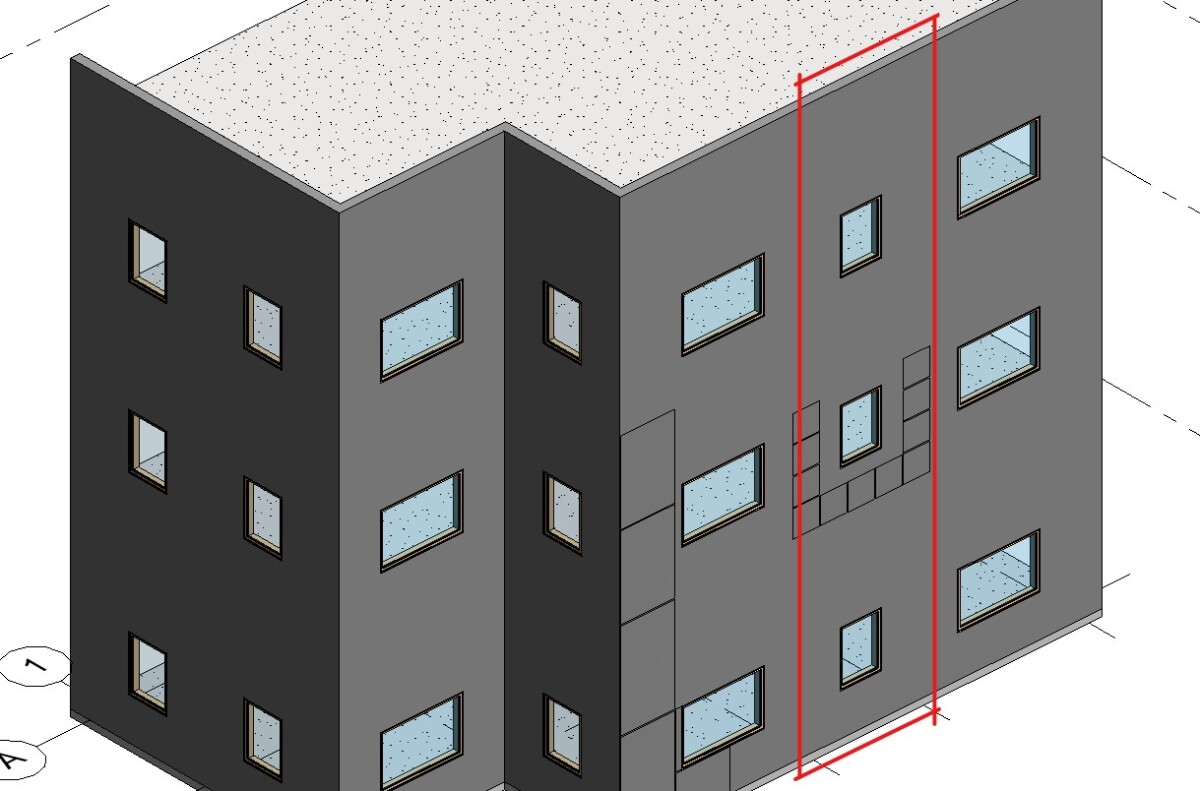
- Pick one vertical sliver of your rainsceen to model in greater detail showing the backup wall, subframing, and cladding attachments to your panel. The rest of the model can use a generic wall as a backup wall. This should go from the parapet down to the ground and should include a window (example below).

- The subframing and backup wall do not need to be a parametric model! Simply model the L-angles or Z-girts or hat channels as generic models!
- If your manufacturer does not include these details, look at your classmates’ research for examples or simply look online (Google) for examples of rainscreen cladding attachments. There are many manufacturers (ex. KnightWall, EcoCladding, Cascadia Clip, GreenGirt)
- See examples from this folder: https://www.dropbox.com/scl/fo/2b3d8w4nm7ntv7x5s1q87/ANrbUFr7GylKbYnk6lmyYRQ?rlkey=vus4yxrthuht8alm7dfu0zu2j&st=elo0rpjx&dl=0
- Set up views on your sheets including:
- 4 views of overall model
- Start this by working at 1/8″-1/4″ scale
- Dimension panel sizes and align your views
- 3d axon diagram
- 4 views of typical structural bay, including a window, as we saw in the example drawing set in class
- Should be at a larger scale than the overall model
- Details (1-1/2″ or 3″ scale):
-
- Typical vertical and horizontal joint
- Jamb/Head/Sill detail around the punched windows
- Outside corner
- Inside corner
- Parapet
- Base Curb detail
-
- 4 views of overall model
- Glazing (This should be done by now. If your parametric model does not work, then please model the elements individually directly in the file and move on)
- Set up views on your sheets including:
- 4 views of overall model
- Start this by working at 1/8″-1/4″ scale
- Dimension panel sizes and align your views
- 3d axon diagram
- 4 views of typical unit focusing in a structural bay as we saw in the example drawing set in class
- Should be at a larger scale than the overall model
- Details (1-1/2″ or 3″ scale):
- Typical vertical and horizontal joint at slabs
- This should include anchorage to the slab
- Outside corner
- Inside corner
- Parapet
- Base Curb detail
- Typical vertical and horizontal joint at slabs
- 4 views of overall model
- Set up views on your sheets including:


