Steel Building Case Study – Final Submission

POST ALL DRAWINGS IN MIRO BY THURSDAY’S CLASS, WE WILL BE PEER REVIEWING EACH OTHER’S WORK! The assignment deadline is Thursday, 12/19 as the semester is wrapping up! You will also have to upload your Revit and combined PDF file to Brightspace. 

PARTITION TYPES

  1. 2-hr fire rated
  2. 1-hr fire rated
  3. Non-rated wall
  4. Shaft wall
  5. Chase wall

DRAWINGS LIST

  • A-000 Cover sheet
    • Drawing List
      • Sorted by sheet number
    • 3d Image of building – isometric or perspective
    • Door Schedule
    • Large Title for Project
    • Titleblocks need Selfie, your name, sheet name/no, semester, course, professor
  • A-100 Series Foor Plans (Min. 2 plans for each person) 1/8″ scale
    • Walls as real wall types
      • no generic wall types
    • Wall Type Partition keys
    • Dimension String across plans to locate walls
      • Break strings at grid lines
    • Rooms names and Keys
    • Doors and door keys
      • matching the room numbering
      • key is parallel to the door leaf
    • Structural Grid with dimensions
    • Color Coded walls based on fire ratings
    •  
  •  A-200 Series Reflected Ceiling Plans (1 plan minimum)1/8″ scale
    • Ceiling pattern
    • Lights
    • HVAC Supply and Return
    • Room Names/Numbers with leaders
    • Color Coded walls based on fire ratings
    •  
  • A-300 Exterior Elevations and Building Sections 1/8″ scale
    • All facades (exterior elevations do not show levels below grade)
    • Designate materials
    • At least 2 building sections (building sections include levels below grade)
      • Add room names/numbers
  • A-400 Partition Types and Details
    • Notes
      • If you use a partition type you should include it on this sheet – but 5 is the minimum.
      • Walls may or may not include Sound Attenuation Blanket (Insulation) This is usually a sub-type as it does not affect fire rating.
      • Add annotations and dimensions
    • Partition Types sheet (minimum 5 partition types as listed above) min scale: 3″=1′-0″
      • 3 section details and 1 plan detail per partition type, follow the demo video for how this is to be done.
  • S-100 Structural Floor Plans 
    • Drawn at the same scale as the floor plans
    • Use the structural framing plan view template
      • Does not show walls, doors, rooms, etc.
      • If a wall is structural (foundation walls, shear walls, load bearing walls) then they are included
      • Grids with dimensions and angles as necessary
      • Shows floor slab with all slab openings (shafts, stairs)
      • Includes structural beams that hold up the floor (change detail level to at least medium for the beams to show)
      • Include Beam tags

Remember that plans and exterior elevations are to be 1/8″.  If you need to draw them at 1/16″ with callout of partial plans at 1/8″ then include both sheets. Ex:

  • A-101  (First floor plan at 1/16″)
  • A-101A (First floor 1/8 plan part 1)
  • A-101B (First floor 1/8 plan part 1)
Day 25 – Tuesday December 3rd

We are now into the final assignment of the semester, a library case study.

Complete the following for next class:

Model your building in Revit. Recommend following these steps when modeling:

  1. Add levels based on floor heights
  2. Add structural grid lines as discussed with your group mates (dimensioned at whole number intervals ex. 24′-0″) 
  3. Model floor slabs & columns
  4. Model generic, basic exterior walls to enclose your building (glass vs opaque using Revit’s default walls)
  5. Model interior walls and doors (one, main floor only)
  6. Tags for Rooms and Doors 

Create the following drawings and place it on a titleblock (you can reuse the 22×34 one from the Assignment 2 – Steel Connections or an alternate size if you’d like). Recommend 1/8″-1/4″ scale for these drawings. Print to PDF and post these on the Miro link above before class:

  1. First floor plan
  2. All elevations
  3. Two sections (long and cross)


Final Facade Submission & Final Assignment – Library Case Study

Happy Thanksgiving! Revised uploads for the facades assignment (rainscreen & glazing) should be uploaded to Brightspace and are due noon on Friday the 29th! Pay attention to what files should be uploaded for each submission on Brightspace.

Demo recordings for the facades assignment and introducing the new assignment have been uploaded to dropbox: https://www.dropbox.com/scl/fo/cqpg2cozh09e0mnzlzt9x/AHYdthG94N3GU60YowIma7I?rlkey=8c98o80ov5uazaqemf7bqibdt&dl=0

The final assignment is a drawing set case study of a steel structure library building.  You will work in teams to conduct research and to complete a case study presentation of the building.  The purpose of this presentation is to gather enough information for each team member to create their own independent set of Revit drawings.  (NO ONE IS ALLOWED TO SHARE REVIT FILES – Doing so will result in failure for the semester.)

Teams are broken up as follows (with contact information): https://www.dropbox.com/scl/fi/y02o2z6yw0wmpqalmvxkp/Research-Groups.pdf?rlkey=cl6m00nqo4stx9vag9328f3ht&st=l58qgqxm&dl=0

For next class, 12/3, your teams will make use of the following PowerPoint templates for your presentations. When signed into Dropbox, please select “Open in” and “Powerpoint for the web”, this will allow your entire team to work on the slides simultaneously. Follow the instructions on the first slide:

You will find starter information about these buildings on the OpenLab page below. It is expected you will do a great deal of additional research.

Notes about your presentations:

  • In this file add your initials to any page you contribute to.
  • Underline the initials of the person who will present each page.
  • Provide URL Link on each page to your sources.
  • You may want to copy pages if you need more than one slide in any topic.

A PDF copy of your presentation is due by Monday, 12/2, at 11:59pm uploaded to Brightspace. 

Day 20 – Tuesday November 12th

The final submission for the facades assignment will be 11/21 and will we break up the pin up over two days (11/21 & 11/26). Think about which day you would like to present glazing and which for rainscreen, and we will vote during the next class.

This means we only have 2 more classes before the pin-up, so you will need to push hard to catch up with the modeling and drawings! Everyone is greatly behind where we need to be. You will need to be strategic about what should be 3d modeled (only a limited extends necessary for your diagrams) and what can be drawn (screws,sealant, etc.).

For Thursday to be a productive class, you will need a draft completed of your rainscreen sheet along with your draft narrative. See the previous post for what drawings and details are expected. 

We will not have time to demonstrate modeling in class anymore, we will be focusing on assemblies and the drawings from now on. Refer to previous recordings for Revit demonstrations. Please contact me and we can schedule a Zoom session to review any modeling issues.

Day 19 – Thursday Nov 7th

I hope you all enjoyed our site visit on Thursday, please upload any photos or videos you have to this folder to share with the class: https://www.dropbox.com/scl/fo/5xgakwtmx30ishwjaadwm/AGlUqM1A5LmO1v7HbC0lAWA?rlkey=el32wqyhrlhced6gpn9hjdk57&st=32ddtndz&dl=0

The final submission for the facades assignment will be 11/21 and will we break up the pin up over two days (11/21 & 11/26). This means we only have 3 more classes before the pin-up, so you will need to push hard to catch up with the modeling and drawings! To help you create a narrative for your facade systems, please complete a draft of this word document (you can download and edit it directly) by the next class: https://www.dropbox.com/scl/fi/4uy64qk30rv7q478g0a5r/ARCH2431-Building-Tech-III-Facade-Narrative.docx?rlkey=s28cziiz5c1kk4ksitxiu9f23&st=sb1kcnqk&dl=0

Additionally, the following is due for the next class (11/12):

  • Draft narrative from word document linked above
  • Rain Screen [FOCUS ON THIS]
    • Panelization should be complete. If not, move on.
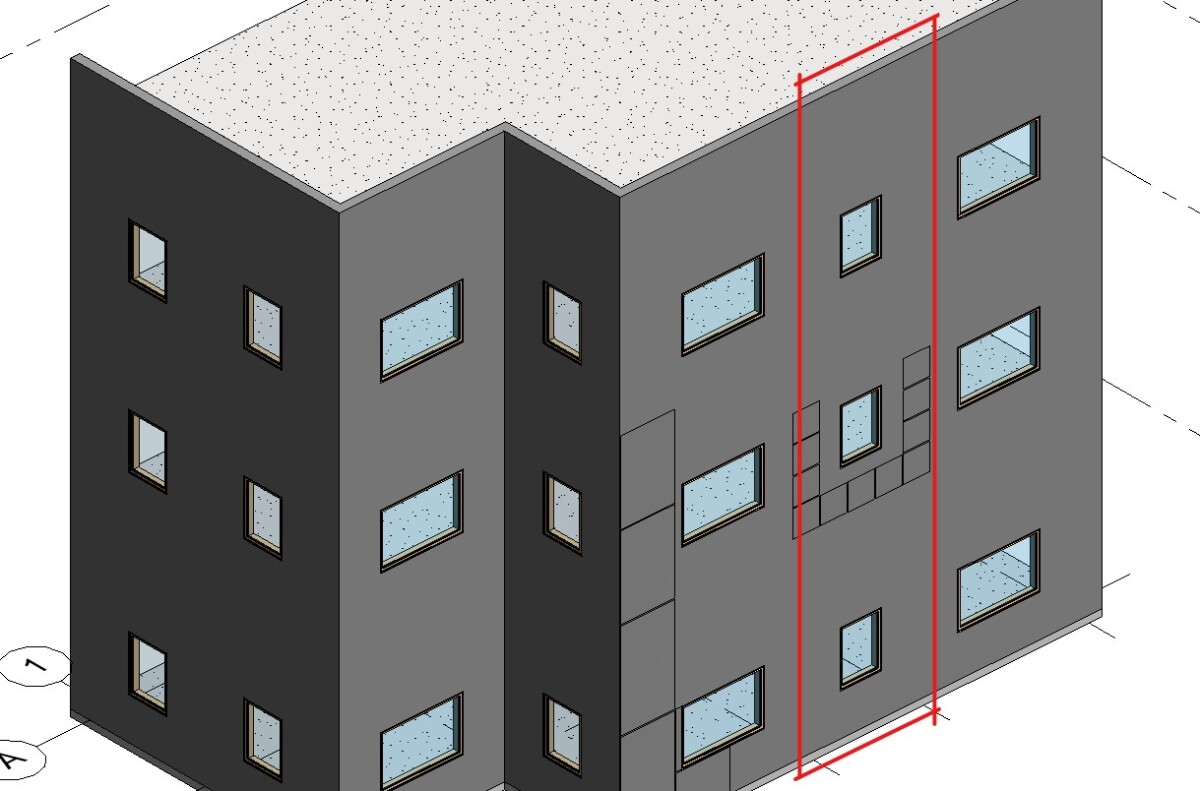
    • Pick one vertical sliver of your rainsceen to model in greater detail showing the backup wall, subframing, and cladding attachments to your panel. The rest of the model can use a generic wall as a backup wall. This should go from the parapet down to the ground and should include a window (example below).
    • Set up views on your sheets including:
      • 4 views of overall model 
        • Start this by working at 1/8″-1/4″ scale 
        • Dimension panel sizes and align your views
      • 3d axon diagram
      • 4 views of typical structural bay, including a window, as we saw in the example drawing set in class
        • Should be at a larger scale than the overall model
      • Details (1-1/2″ or 3″ scale):
          • Typical vertical and horizontal joint
          • Jamb/Head/Sill detail around the punched windows
          • Outside corner
          • Inside corner
          • Parapet
          • Base Curb detail
  • Glazing (This should be done by now. If your parametric model does not work, then please model the elements individually directly in the file and move on) 
    • Set up views on your sheets including:
      • 4 views of overall model 
        • Start this by working at 1/8″-1/4″ scale 
        • Dimension panel sizes and align your views
      • 3d axon diagram
      • 4 views of typical unit focusing in a structural bay as we saw in the example drawing set in class
        • Should be at a larger scale than the overall model
      • Details (1-1/2″ or 3″ scale):
        • Typical vertical and horizontal joint at slabs
          • This should include anchorage to the slab
        • Outside corner
        • Inside corner
        • Parapet
        • Base Curb detail


Day 18 – Tuesday Nov 5th

We will be meeting on site at 55 Willoughby St for the next class at 1:30pm. Please complete the emailed forms if you have not done so yet!

Due for next class:

  • Rain Screen [FOCUS ON THIS]
    • Finalize panelization to be within the max/min requirements based on your research. Pay attention to panel sizes around the fixed windows and use that as a guide (similar to structural grid for glazing). If you cannot find panel sizes information for your product, please let me know and I will give you default values to use.
    • Model generic backup wall at all locations and pick one side to model in greater detail using the studs, sheathing, waterproofing as demonstrated in class.
    • Set up views on your sheets including:
      • 4 views of overall model 
        • Start this by working at 1/8″-1/4″ scale 
        • Dimension panel sizes and align your views
      • 3d axon diagram
    • Sub framing will be further developed next class.
  • Glazing 
    • We have spent the last week diving deeper into various glazing systems.
    • Finish up modeling your systems and panelization should be complete.
    • Set up views on your sheets including:
      • 4 views of overall model 
        • Start this by working at 1/8″-1/4″ scale 
        • Dimension panel sizes and align your views
      • 3d axon diagram
      • 4 views of typical unit focusing in a structural bay as we saw in the example drawing set in class
        • Should be at a larger scale than the overall model
      • Details (largest scale):
        • Typical vertical and horizontal joint at slabs
        • Outside corner
        • Inside corner

Day 16 – Tuesday October 29th

The lack of progress and attendance is becoming UNACCEPTABLE!!! You must post your drawing progress for Thursday’s class. This is the 5th class for the facades assignment and some of you still have not shown any drawings for the glazing and rainscreen system. Points are being deducted from your assignments & midterm grade, and ultimately final grade, because of this.

DUE FOR NEXT CLASS (10/31):

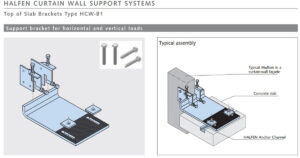
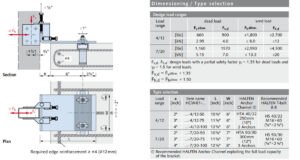
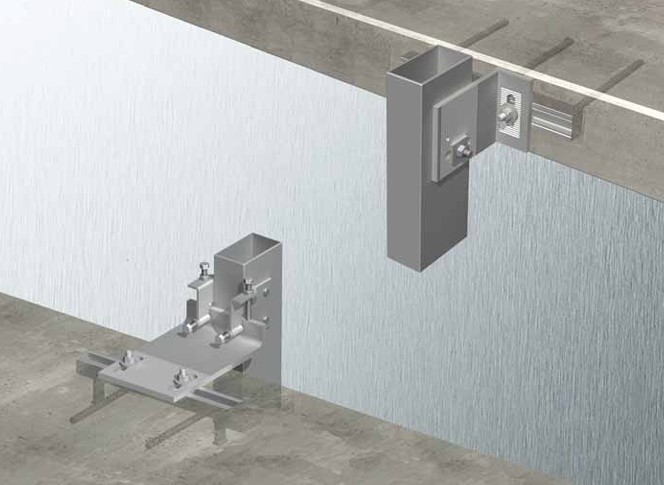
See the previous post for deliverables. In addition, we went over various glazing connections to the edge of slab and everyone should model the Halfen edge of slab connector for modeling practice (Regardless of glazing system selection), see product data dimensions below.

Day 15 – Thursday October 24th

WARNING: Everyone must post and show progress on Miro, only about a half of you have been posting. As a reminder, this assignment is worth a third of your final grade and these Miro pin-ups count towards that grade. There has been a lack of progress and momentum the last week which will lead to you falling behind.

REMEMBER THAT I WILL BE POSTING MID-SEMESTER GRADES NEXT WEEK BASED ON YOUR PERFORMANCE TO DATE

Complete the following in each of the two models (2 SEPERATE SHEETS):

  • Rain Screen
    • Finalize panelization to be within the max/min requirements based on your research. Pay attention to panel sizes around the fixed windows. If you cannot find panel sizes information for your product, please let me know and I will give you default values to use.
    • Set up views on your sheets including:
      • 4 views of overall model 
        • Start this by working at 1/4″ scale 
        • Dimension panel sizes and align your views
      • 3d axon diagram
    • This will be further developed next week
  • Glazing [FOCUS ON THIS]
    • We have spent the last week diving deeper into various glazing systems.
    • Finalize panelization and pay attention to the relationship of your system to the edge of slab. 
    • Model a typical parametric unit following the class demonstration. These models are checked and count towards the assignment grade. No matter which system you chose, they follow a similar ideology. Let me know if you are confused with how to approach these models. 
      • Layout this new family according your panelization. 
    • Set up views on your sheets including:
      • 4 views of overall model 
        • Start this by working at 1/4″ scale 
        • Dimension panel sizes and align your views
      • 3d axon diagram
      • 4 views of typical unit focusing in a structural bay as we saw in the example drawing set in class
        • Should be at a larger scale than the overall model
      • 4 views each of details (largest scale):
        • Typical vertical and horizontal joint at slabs
        • Outside corner
        • Inside corner

Day 14 – Tuesday October 22nd

FOR NEXT CLASS EVERYONE MUST POST THEIR PROGRESS ON MIRO

  • See the latest video recordings for plotting at 50% to improve graphics when uploading to Miro.
  • Finalize your research sheets and your panelization. Prioritize developing the glazing model based on your selected system (window wall or curtain wall)
  • Glazing: Pay attention to the relationship of your system to the edge of slab. Rainscreen: Pay attention to panel sizes and interface with the fixed windows. If you cannot find panel sizes information for your product, please let me know and I will give you default values to use.
  • Set up views on your sheets including: 4 views of overall model, 4 views of typical unit, 4 views of typical details, 3d axon diagram as shown in video recording.

Day 13 – Thursday October 17th

  • Due for next class:
    • Glazing System
      • Complete your research of your system
      • Use the curtain wall tool to place replace the generic wall
      • Add the gridline for horizontal transoms and vertical mullions
        • Be careful of placing horizontal transoms based on curtain wall versus window wall system
        • Vertical mullions should be rationalized with the structural grid and overall facade geometry
      • Add the mullion framing
      • MIRO Posting
        • Post your research reference details
        • Post your 4-views (elevation, plan, section, axon) and exploded axon diagram in MIRO
          • Consider 1/8″ or 1/4″ scale
    • Rainscreen panel system
      • Complete your research – find details and place these on a sheet
      • Create a standard panel with parameters based on manufacturer details
        • Do this based on your research about the panel 
        • Add materials to your panel
      • Place panel on facade and copy it both horizontally and vertically – cover all facades
        • Make sure to figure out the correct panel sizes
        • Consider how the window fits into the system
      • Make any other families that you can – you will need all the components
      • MIRO Posting
        • Post your research reference details
        • Post your 4-views (elevation, plan, section, axon) and exploded axon diagram in MIRO
          • Consider 1/8″ or 1/4″ scale