Neve Theme
Neve is a flexible and customizable theme that can be used for many different types of sites.
Enabling the Neve Theme
1. On your site Dashboard, go to Appearance > Themes.
2. At the top right corner of the Themes page, type “Neve” in the search bar. The Neve Theme will appear on the page.

3. Hover your mouse over the Neve block and you will see three options: Theme Details, Activate, and Live Preview.
4. Go to Theme Details if you want to read the full description of the theme. In Live Preview you can see how your site looks without having to activate the theme.
5. When you are ready, click Activate.

6. Neve will now be the active theme for your site.
Customizing the Neve Theme
This theme is highly customizable and has a lot of different options. Here we will cover a few things that may be most relevant for OpenLab members.
For more options, check out the Neve official documentation.
1. To get started, go to Dashboard, click Neve > Customize.

2. You will be sent to the main customizer page, where you will have access to the many options on the left while you get to see how your site changes on the right.

Layout > Homepage Settings
1. By default, the Neve theme displays your latest posts in your home page. If you prefer a static page that doesn’t include blog posts, click Layout > Homepage Settings and choose “A static page”.

2. Now you will choose a page to be your homepage and another one to display the posts. You can select among existing pages (like Homepage in the image below) or you can create a new one, by clicking Add New, typing the page name and clicking Add (like Posts page in the image below).

Site Title and Tagline
Below we will describe how to change the site tagline and/or the site title. When you first create a site, you will choose the title, but the tagline will be the default for the type of site you are creating (course, project, club, or portfolio). You will want to fill in your own information there. Or you may also find that you want to change the title as well.

1. Start by clicking Header.

2. Now click Change Logo.
3. Change the title and the tagline and click Publish. Your changes will now appear on your site.

Home/Posts Page Layout
You can change the layout of your home page, or the page where your posts appear.
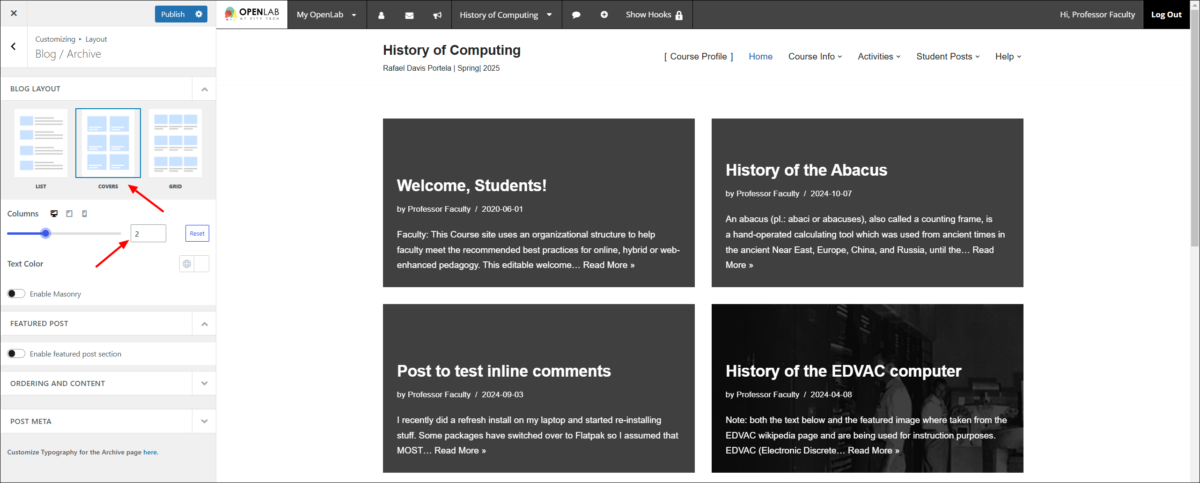
1. Go to Layout > Blog/Archive and click Blog Layout.
2. By default, your blog posts will be displayed as a grid, but you can change to Covers or to a List. You can also change the number of columns, by dragging the Columns slide.


Sidebar Layout
You can adjust the position and width of the sidebar on your site:
1. Go to Layout > Content/Sidebar and click Single Post.
2. You can change the width of the post by dragging the Content Width (%) bar. This will change the proportion of the page filled by the main post content. A larger percentage will mean a narrower sidebar and wider post content.
3. By default, your sidebar will be on the right, but you can select left, or choose full width if you don’t want a sidebar to be visible.

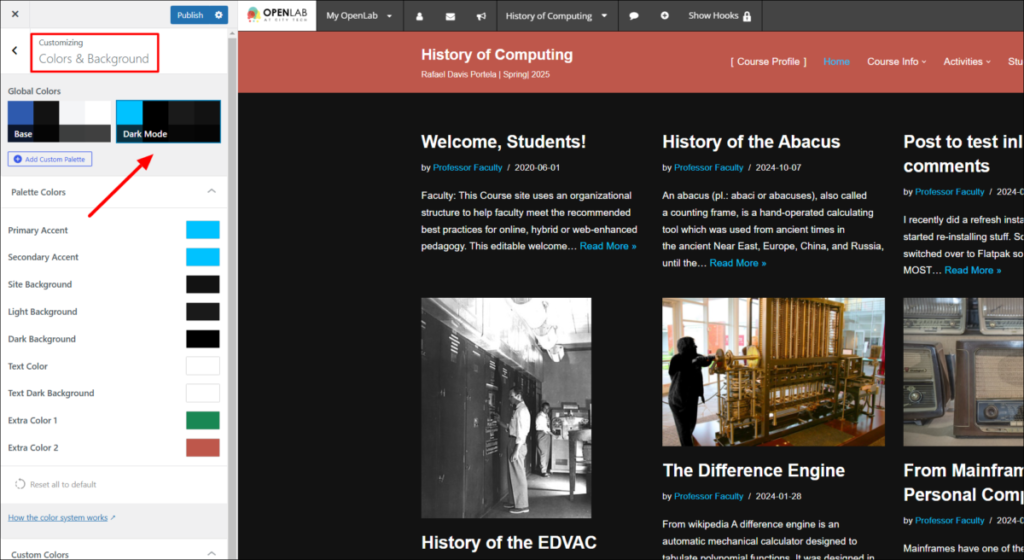
Dark Mode
Dark mode has become increasingly popular in recent years as a way to reduce eye strain and improve battery life. You can easily switch your site to Dark Mode in Neve.
Note: This is not an option for site visitors to choose. You as the site admin will decide if you prefer the site the default or dark mode, and all visitors will see it this way.
Go to Customizing > Colors & Background. In Global Colors, choose Dark Mode.
Header Layout
Neve gives you quick and easy options to change the layout of your site’s header – the top part with the image and menu.
1. Go to Header > Header Presets. You can click on the different header layouts in the Customizer panel and see how your site would look with them.
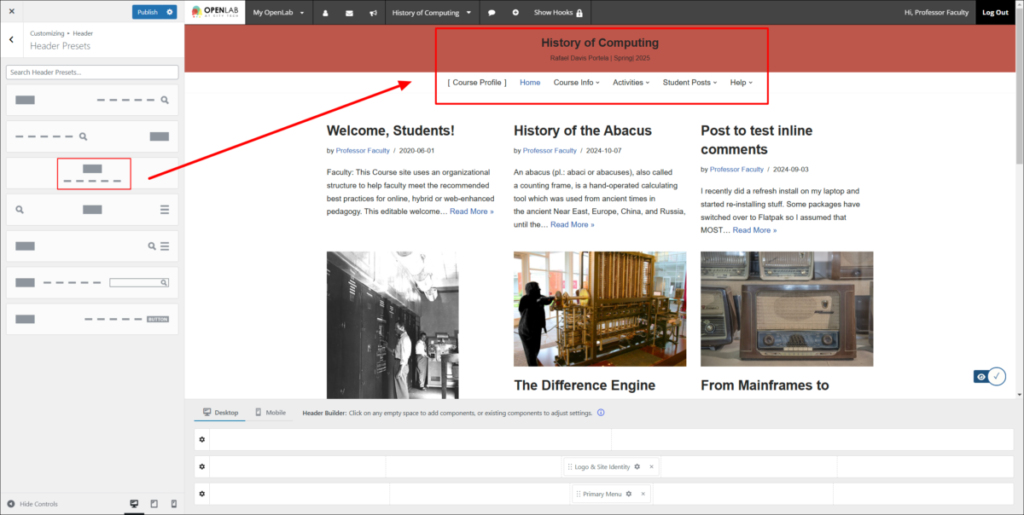
2. If you like one, select it and click Publish on the top of the Customizer panel. If you didn’t like any, click the X at the top of the panel and click OK when you get the message “The changes you made will be lost if you navigate away from this page.”


