Managing membership of a Course, Project, or Club
Go to the Profile Page of the Course, Project, or Club you administer, and click Membership in the right hand menu. You’ll find two main areas. The major portion of the page (where all the avatars are), and the submenu just above them where you can accept Member Requests, Invite New Members, Email Members, or change Your Email Options. We’ll deal with each of these in turn.
Main Area
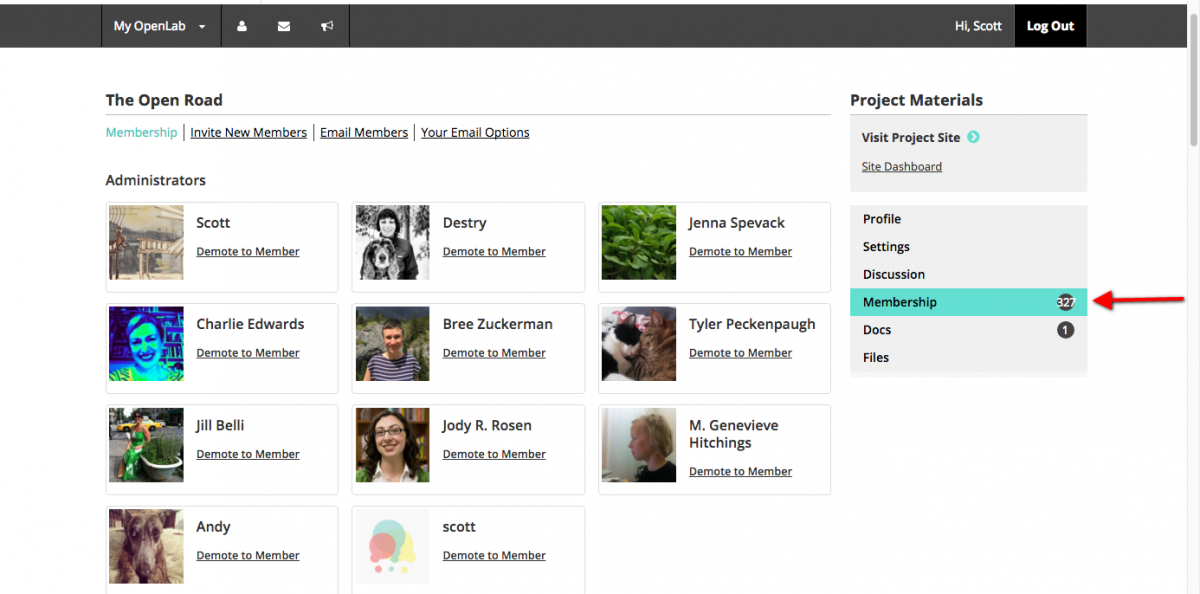
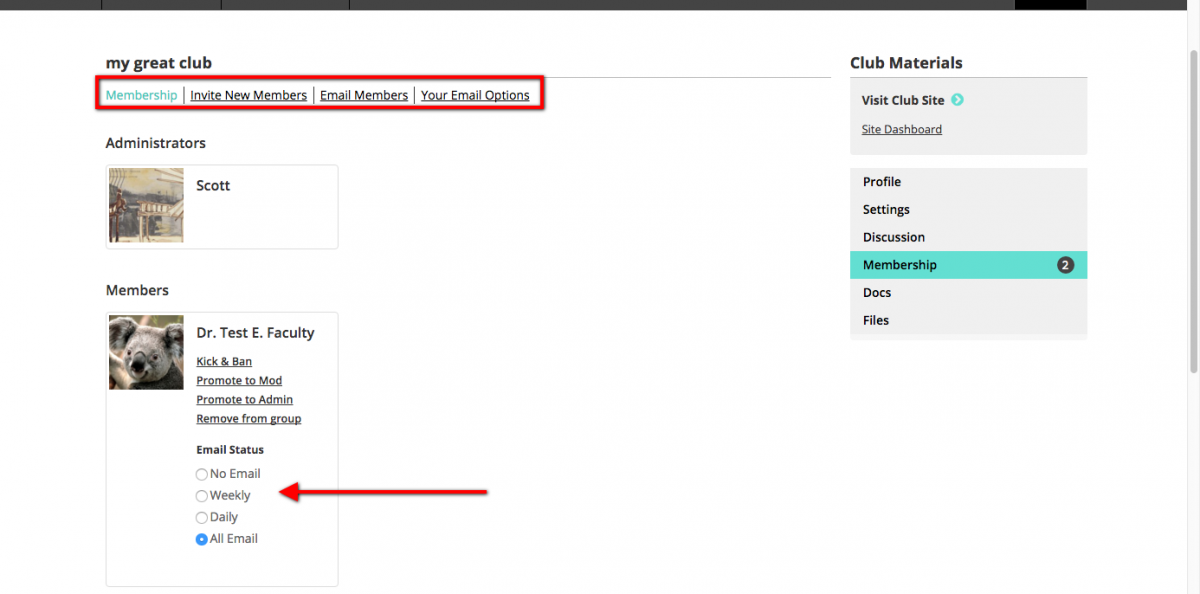
1. Here you will see all the members of your site, arranged by current role. You can change a member’s role (see more details in the section below).
2. You can also change the email settings for any member of the course, project, or club.
Managing Member Roles and Capabilities
There are two places to manage member roles and capabilities on your course, project, or club.
When you make changes in Profile > Settings > Membership these changes will affect roles on your site as well.
- To change a member’s role here, find the member you would like to change, then click on the role or action you want. The roles/actions include:
- Kick and ban – Removes the user from the course, project, or club until the admin unbans that user
- Promote to mod – Allows the user to serve as a moderator in the course, project, or club. A moderator can edit course, project, or club details; edit, close, and delete forum topics; and edit and delete docs.
- Promote to admin – Allows the user to serve as an admin. Admins can do anything a moderator can do, plus change course, project, or club settings (such as changing privacy settings and turning on and off plug-ins). They can also change the avatar, manage membership, and delete the course, project, or club.
- Remove from course, project, or club – Removes the user, but does not ban them. The user can rejoin or request membership without admin action.
The Profile and Site roles map as follows: Admin –> Site Admin, Mod –> Site Editor, Regular Member –> Site Author. Banning or Removing a member removes them from the site as well.
You can also change roles on the Site Dashboard that will not affect roles on the Profile. For example, you could change a member’s role on the site from author to editor. For instructions on how to manage roles on your site, please visit our page Managing Users on your Site.
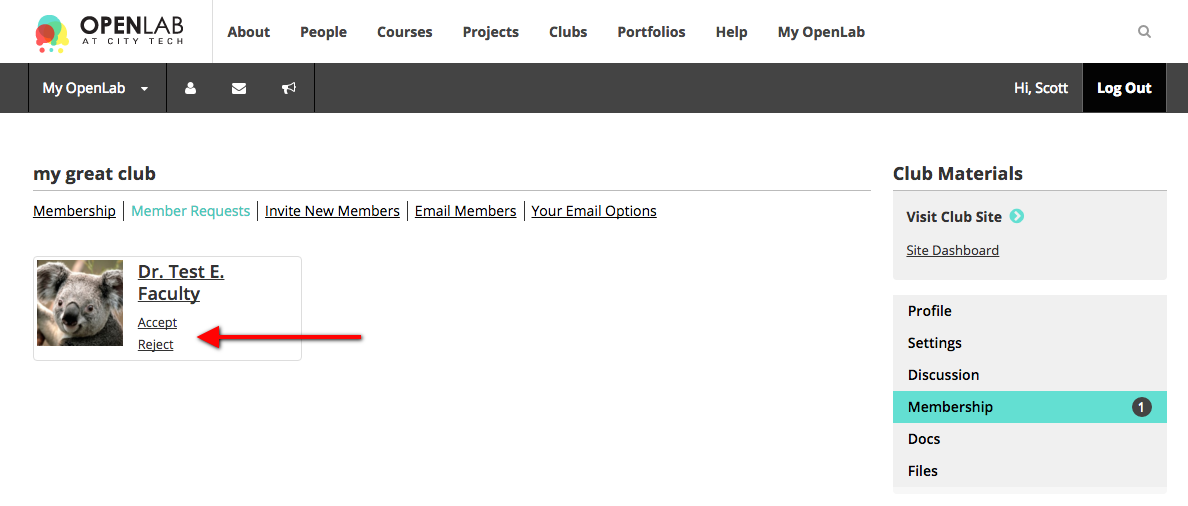
Accepting Member Requests
1. To accept (or reject) Member Requests, simply click Member Requests, then click Accept or Reject next to the requesting member’s avatar.
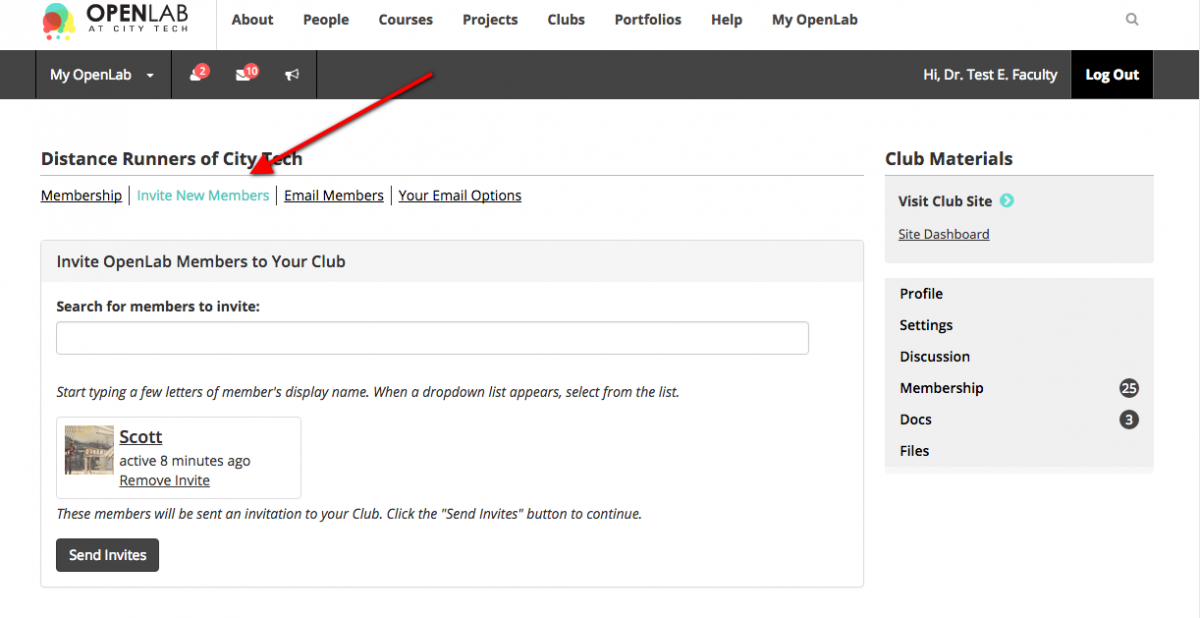
Inviting New Members
1. To invite new members, click Invite New Members. From there you’ll see two options for inviting OpenLab members to join your course, project or club: you can type their name directly into the search bar, or you can look for them in the drop down menu.
2. Once you’ve found them, click Send Invite.
Emailing Members
1. To email members, click Email Members. From there you’ll be taken to the page below, where you can fill out the subject, type the email, and then click Email this notice to everyone in the group. As you can see, this is only if you want to send an email to every member of the group. To email members individually, you’ll want to visit their profile.

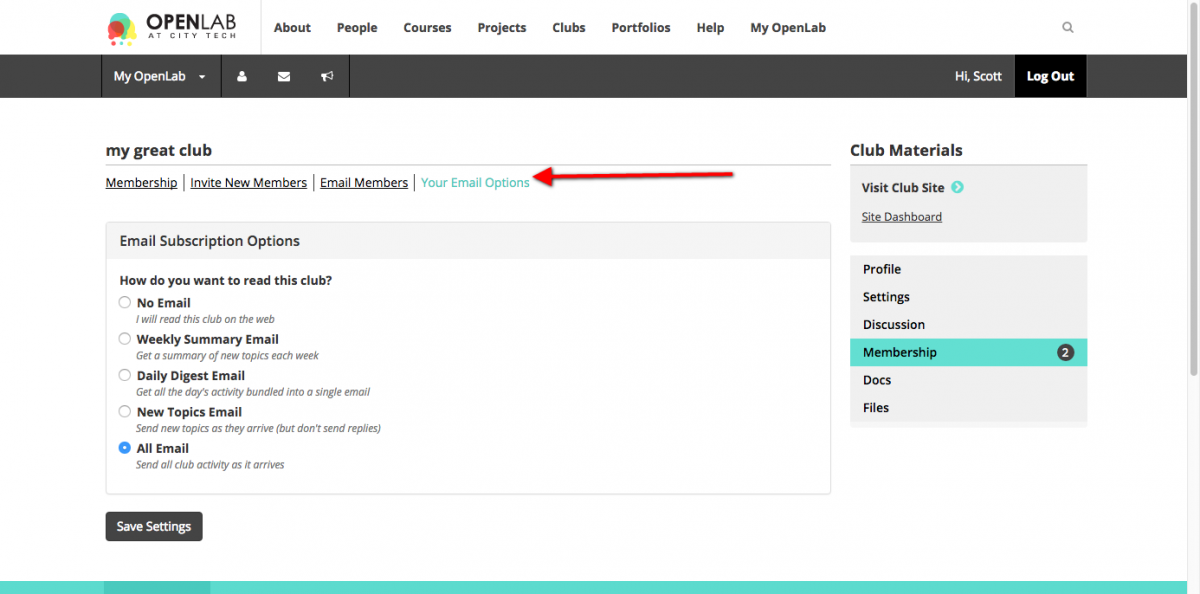
Changing Your Email Options
1. Clicking Your Email Options changes only how you yourself receive emails related to the course, project or club. If you want to adjust how members receive those emails, see above.