Categories & tags (Classic)
Categories allow you to further organize the content of your site. Careful categorization allows your site posts to be grouped together with other similar posts on your site. This, in turn, helps users to better navigate your site. Note that all site posts are filed under categories. If you do not create your own post categories, all of the posts on your site will be placed in the default category, “Uncategorized.” In general, once you create categories, and assign posts to those categories, these categories do not change.
Tags can also help users better navigate your site. A tag is a keyword (like “elections” or “civil liberties”) which describes some or all of the content of a post, and a post may have several different tags. Similar to categories, tags will group posts together with similarly tagged posts. Tags can also be displayed in a “tag cloud.” A tag cloud is a visual representation of the tags on your site, where tags that are most often assigned to posts appear larger in text size (and vice versa).
Categories
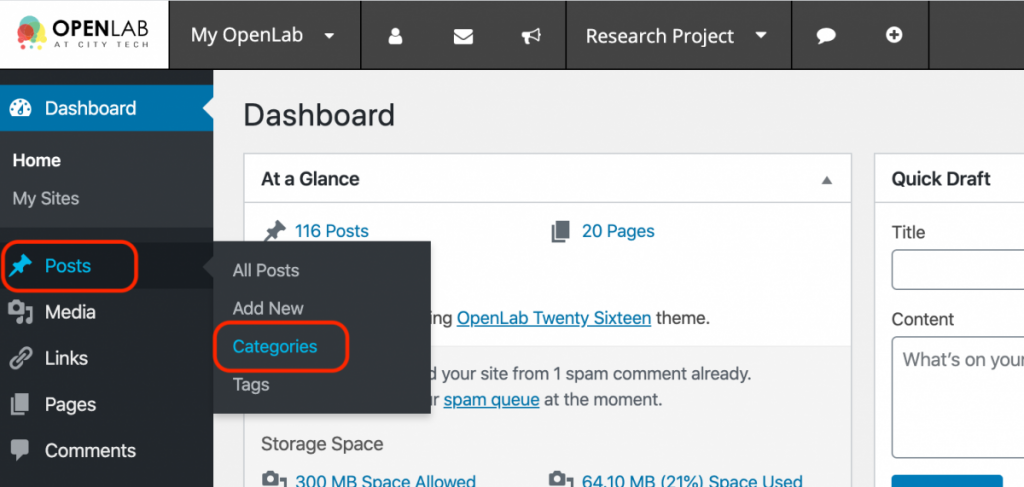
1. You can add categories by going to your site Dashboard and clicking Posts > Categories in the left-hand menu.
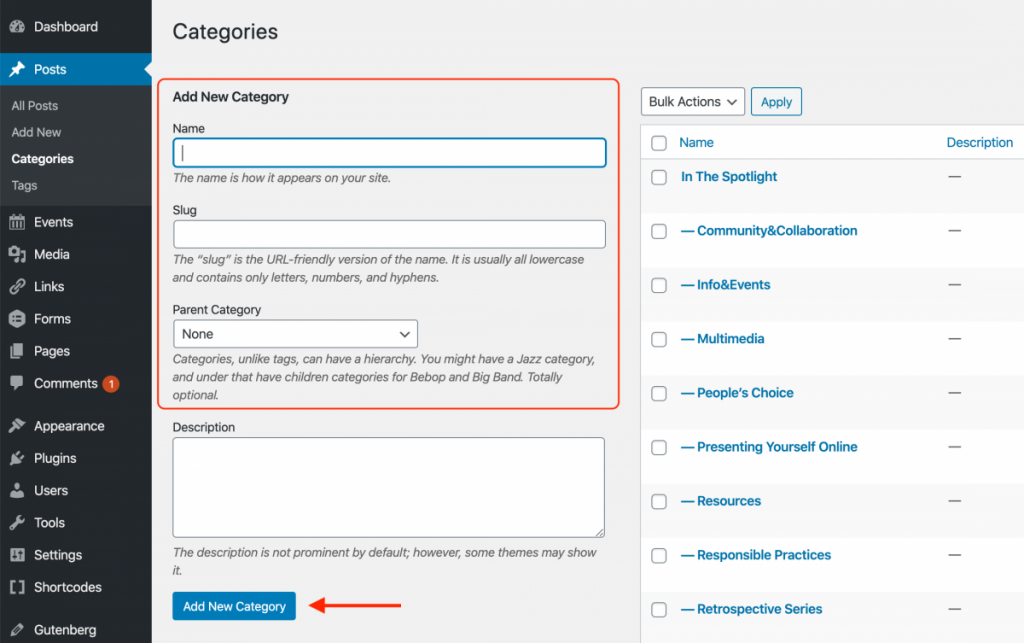
2. On the following screen, assign a name to your new category and click Add New Category. You can also optionally assign a “slug” for your category and/or a “parent” category. The slug is what appears in the URL for the category archive page, and will be automatically generated from the category name if you don’t change the slug. For more information about assigning slugs and/or parent categories, click Help > Overview > Documentation on Categories at the top right-hand corner of this same screen.
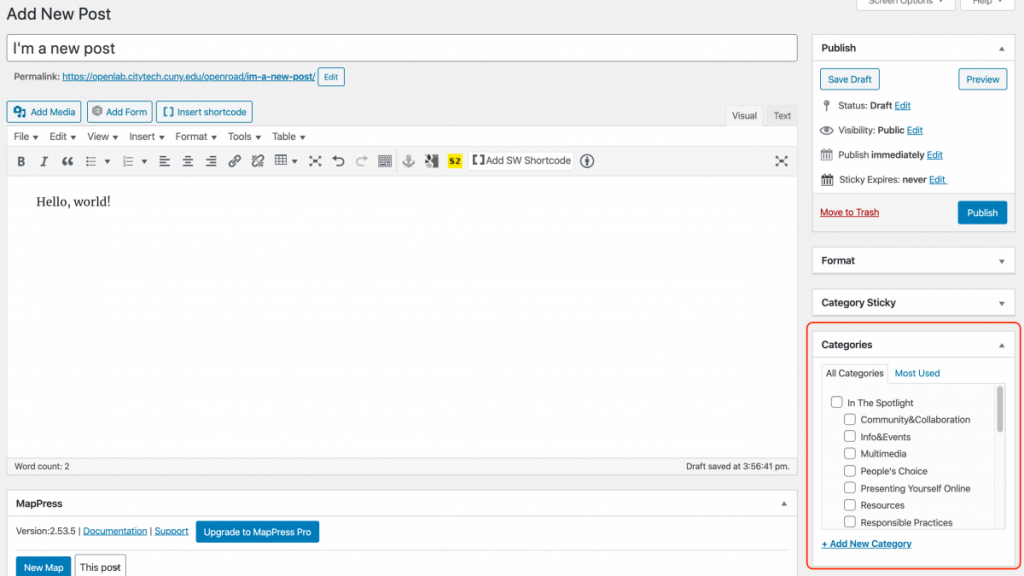
3. You can assign a category to a post on your site by creating a new post or editing an existing post. Check the box next to the appropriate category in the “Categories” box on the right-hand side of the page. You can also add categories here, by clicking + Add New Category at the bottom of the Categories section. When you’re finished with the post, click Publish, and the category will be assigned to your post.
4. To edit a post category, edit the post, make any necessary changes to the category, and click Publish.
Tags
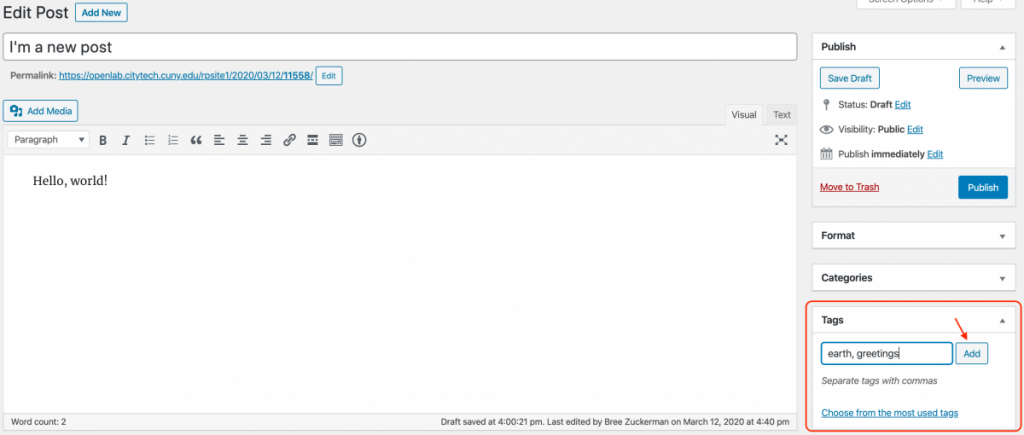
1. To assign a tag to a post on your site, go to your site Dashboard and click Posts > Add New. After you have finished adding content to your post, type in the tags of your choosing into the text box in the “Tags” box on the right-hand side of the page, and then click Add. After you publish the post, the tags will be added to your post. If you would like to remove an assigned tag, hover your cursor over the tag title in the “Tags” box, and click the red “X” that appears.
Help information adapted from Qwriting.org at Queens College.


