TablePress
For more information, check out the plugin developer’s very thorough documentation and FAQs.
Create a table and add it to a post
1. Activate the TablePress plugin.
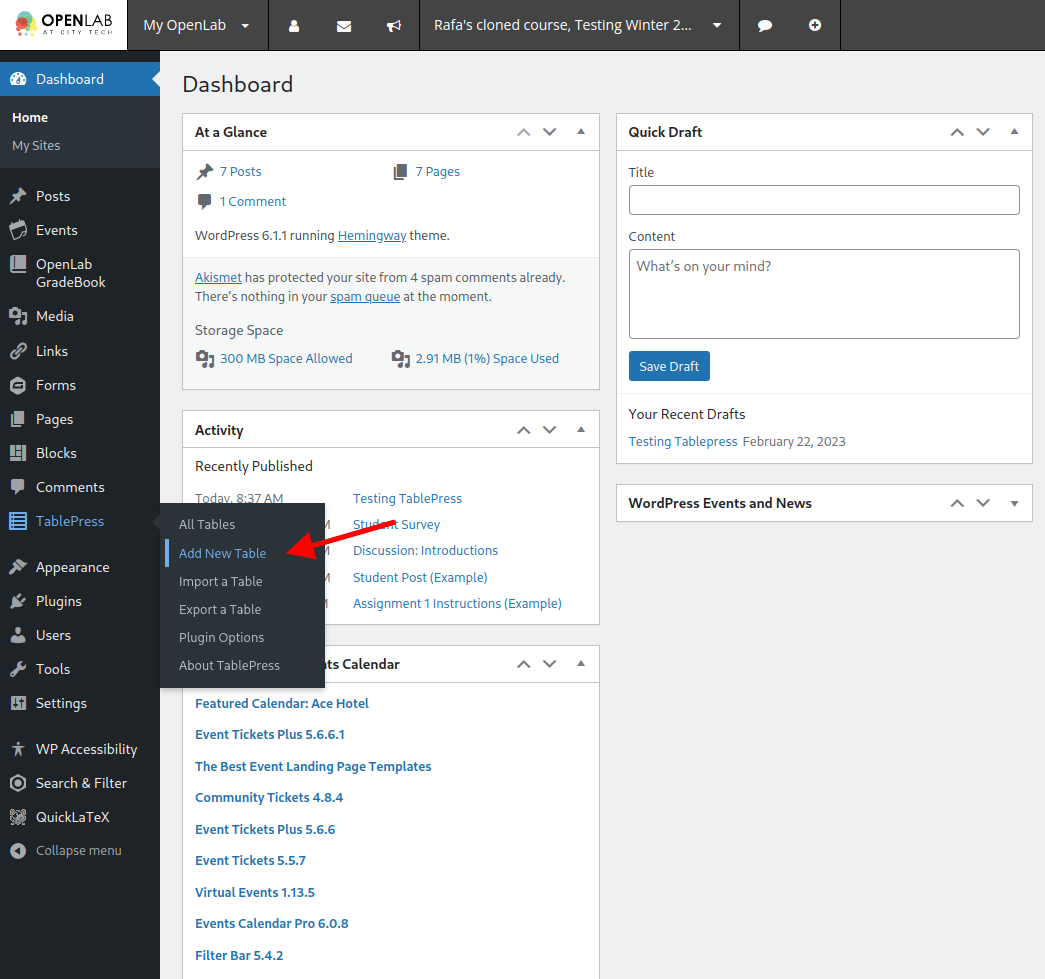
2. On your site’s Dashboard, click TablePress > Add New Table in the left sidebar.
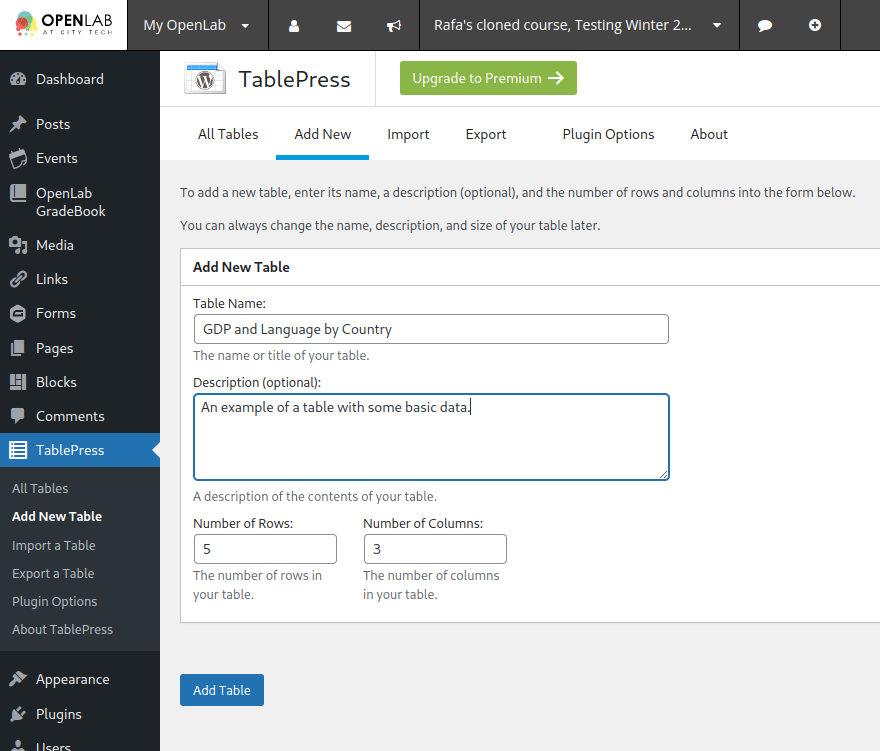
3. Add the table name and choose the number of rows and columns. Click Add Table.
4. In Table Content, click a cell and start typing its content. When you are done, click in the next cell to add content. To modify a cell that already has content, double-click it.

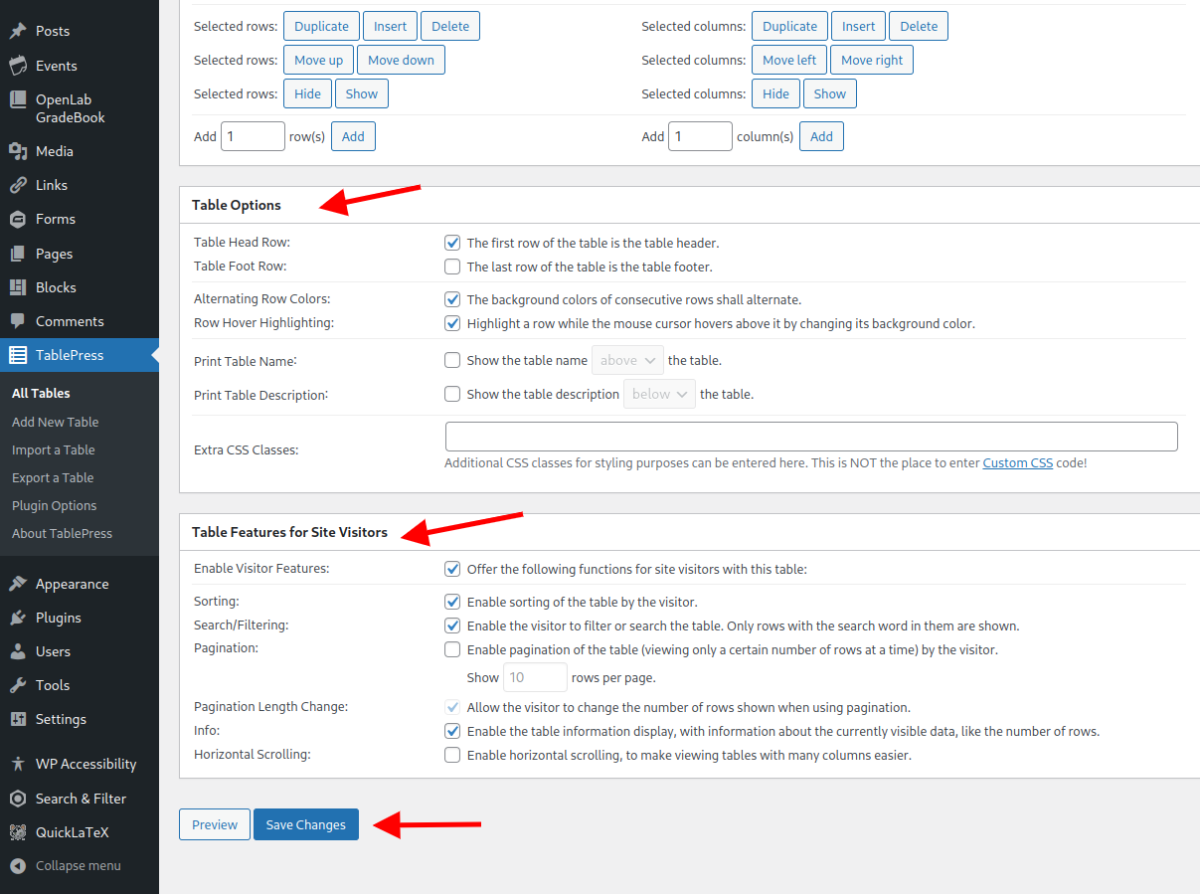
5. Tables will automatically consider the first row to be the table header. Clicking on a cell in the header row allows people to sort the table by that value. To change these or other options, scroll down to Table Options > Table Features. When you are done, click Save Changes.
6. Now your table is ready to be added to a post or page. Go to the post or page where the table will be included, or create a new one.
7. Add a new block by clicking the plus symbol [1] and type “TablePress” in the search bar [2]. Click TablePress Table when it appears in the list[3].

8. Select the table you want to add in the Block Settings Sidebar. If you have multiple tables with similar names, you can find a table’s unique ID in Dashboard > TablePress > All Tables.

9. Your table will appear in the page or post after it is published.

Import a table
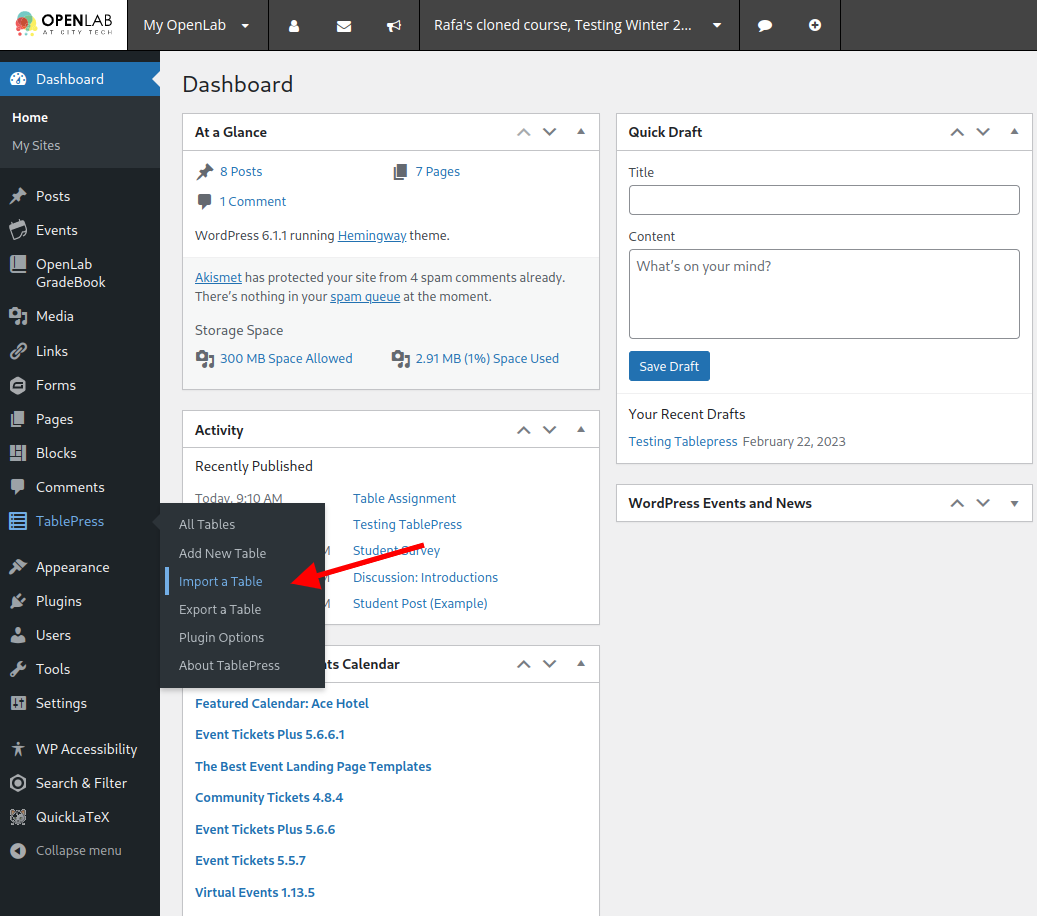
1. Go to your site’s Dashboard and click TablePress > Import a Table in the left sidebar.
2. In Import Tables, click the Select Files area to select a file, or drag one into it.

3. Alternatively, if the table is hosted online, select the URL option in Import Source, and fill the File URL field.
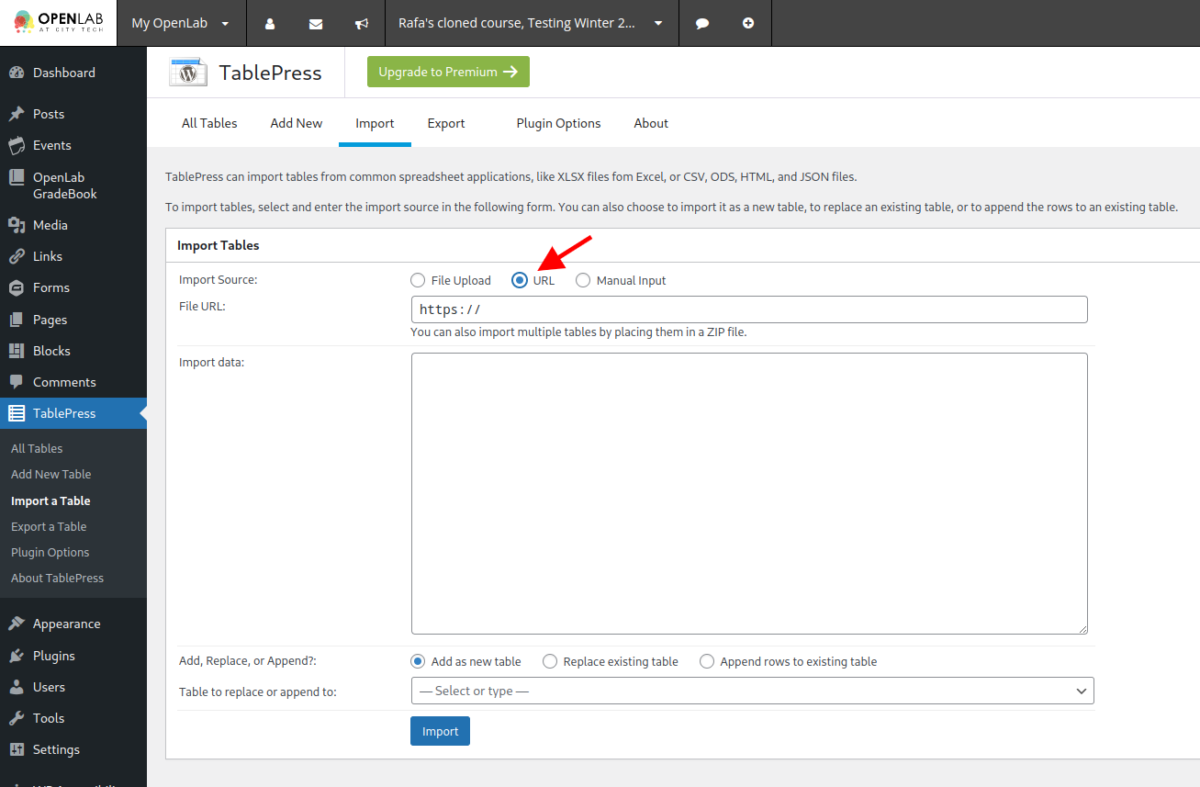
4. The imported table will be added as a new table. You can also choose to replace an existing table or add (append) your new table to an existing one . Select your intended option and click Import.

5. Your table is now ready to be added to a post or page. Before doing this you can also make changes to the table content, options, or features, in the same way as when you create a new table from scratch.


