Easy Table of Contents Plugin (Classic)
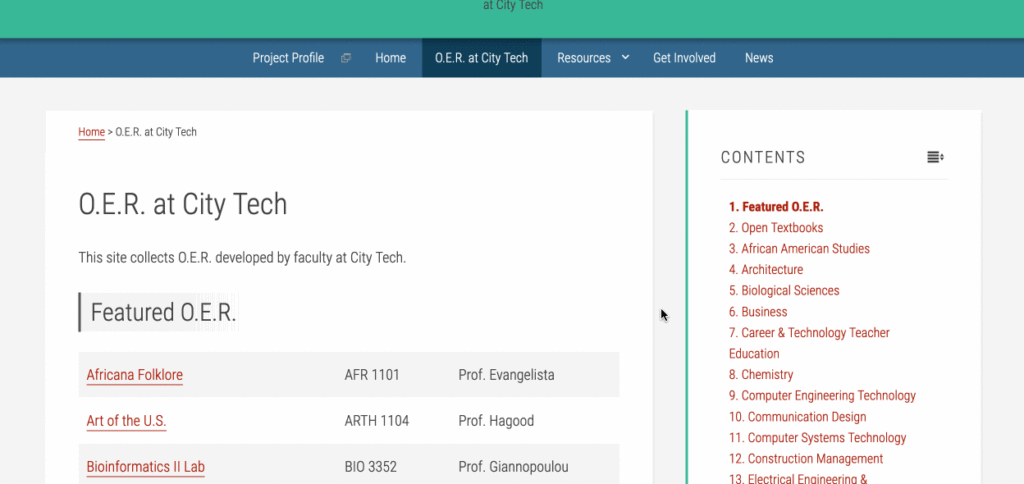
This plugin allows you to create a table of contents (TOC) for pages and posts on your OpenLab site. Visitors to your site can click a link in the TOC, which allows them to jump down to that section on the page. Adding a TOC to a page can be especially useful for lengthy pages, such as a syllabus.
1. Activate Easy Table of Contents under Plugins in the left-hand menu of your Dashboard.
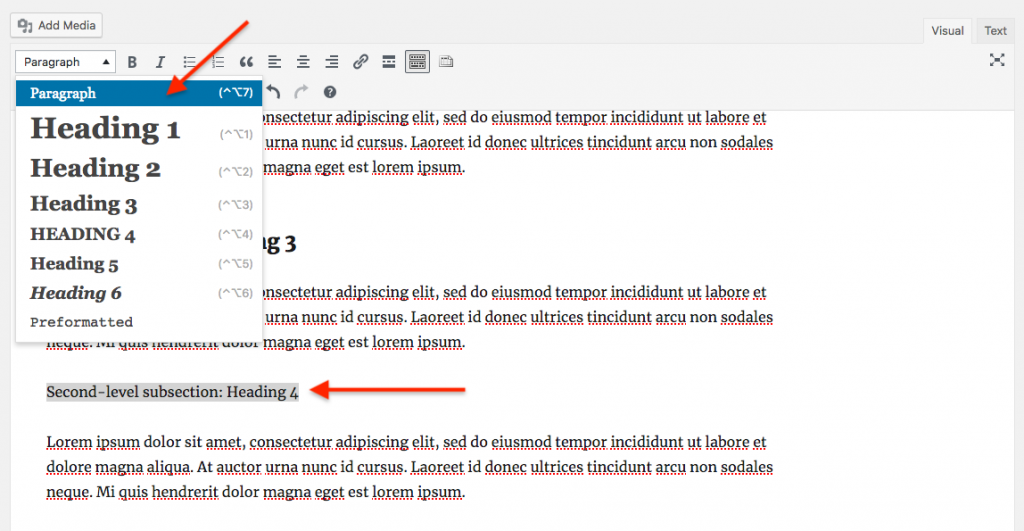
2. If your page is not already divided into sections, think about how you want to organize the content into different sections. Make sure that each section has a section title that uses your theme’s Heading styles, e.g. Heading 1, Heading 2, Heading 3.
3. To create a heading, highlight the text you would like to use as a heading, and in the dropdown menu showing the word Paragraph, choose a heading. Headings are hierarchical, with Heading 1 the largest and Heading 6 the smallest. You can choose any heading you like, however the best practice is that they should appear in logical order, with just a single Heading 1 on any page.
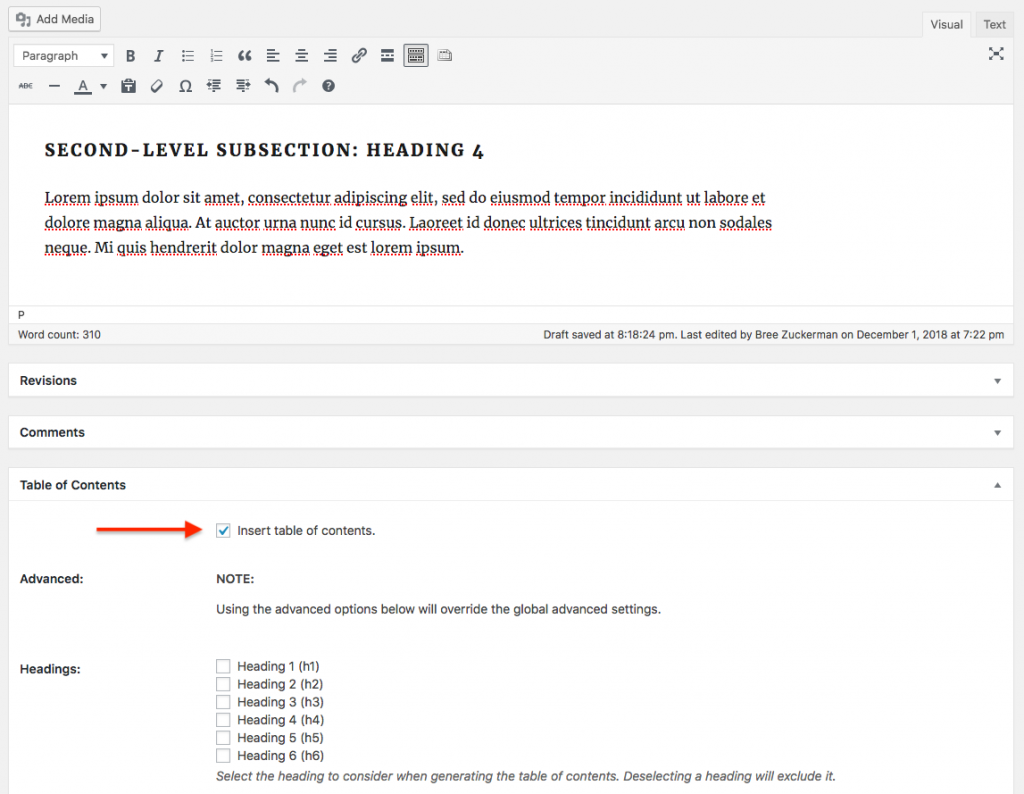
4. Once you’ve organized your headings, scroll down beneath the page editor to find the Table of Contents options. Choose the option to Insert table of contents. Click Update (or Publish if it’s a new page) to save your changes.
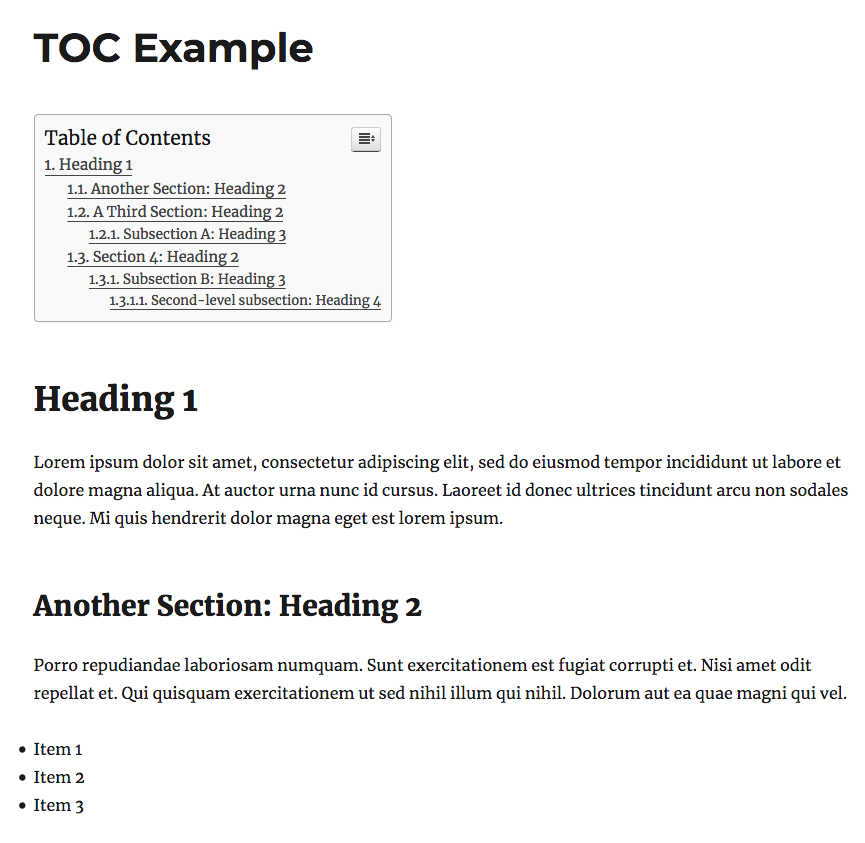
5. You won’t see a table of contents when viewing your page content in the Dashboard editor, but when you view the page on your site, you will see the TOC appear. If you don’t see a TOC, that means you have fewer than four headings on your page. By default, the TOC plugin is set to appear when there are four or more headings on a page. You can either add additional headings (if that makes sense given the content on your page) or change the plugin settings to appear when there are fewer than four headings. Plugin settings are described below.
Easy Table of Contents Settings
1. To change the plugin settings, go to Dashboard > Settings > Table of Contents. To change the number of headings required for the TOC to appear on a page, change the number in the dropdown for Show when 4 or more headings are present.
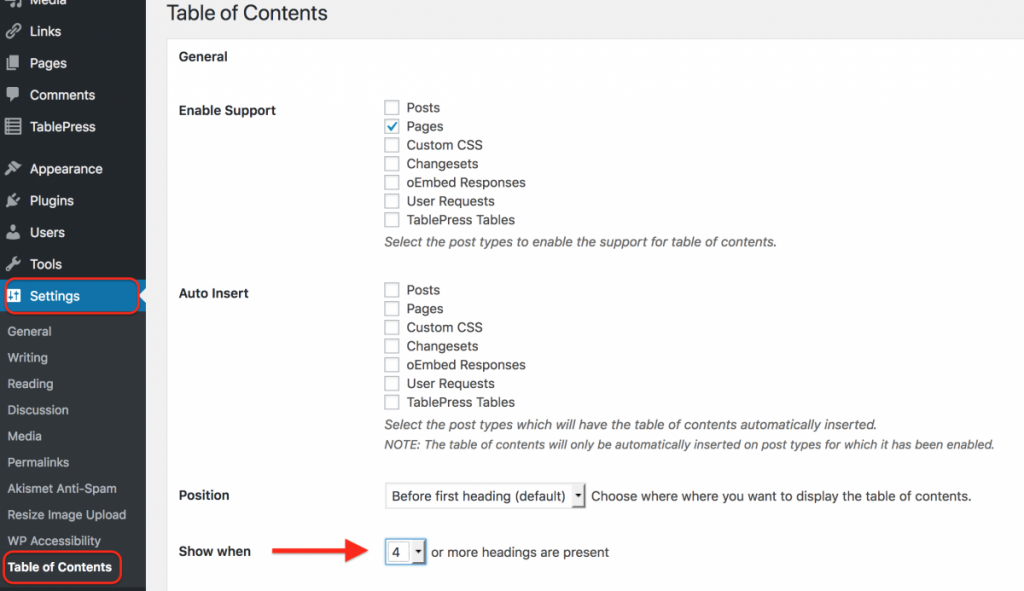
2. Some of the other settings that may be relevant are:
- General
- Enable Support: By default, a TOC will appear on pages, but you can include posts and other special post types.
- Auto Insert: You can automatically insert a TOC on pages or posts, meaning you won’t need to click Insert table of contents on individual pages.
- Position: changes where the TOC appears on the page. The default “Before first heading” probably makes sense for most cases, but it can be changed.
- Display Header Label and Header Label: The default header label is “Table of Contents” but you can choose whether to display a label at all, or can change the text of the label displayed.
- Toggle View: allows site visitors to choose whether to expand or hide the TOC contents.
- Initial View: determines whether the TOC is minimized by default, with the option for site visitors to expand.
- Show as Hierarchy: The hierarchy option means that subheadings will be nested under parent headings, but you can choose a non-hierarchical display.
- Counter: determines how headings are numbered in the TOC.
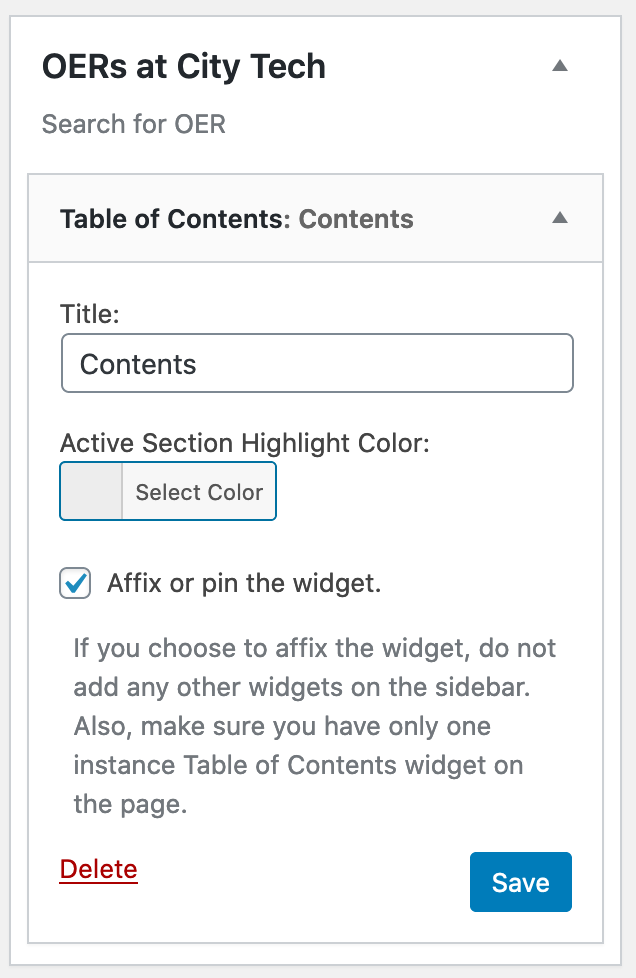
Widget
You can add a TOC widget to your sidebar that will display the TOC for the page you are currently viewing. You can also make it “sticky,” meaning that it remains with you in the same place as you scroll down the page. As you scroll, or jump to different sections, the current section you are in is highlighted in the widget. It will show the appropriate TOC for the page you are viewing.
1. Add the widget by going to Dashboard > Appearance > Widgets, and clicking on Table of Contents. Choose the sidebar where you want the widget to appear, and click Add Widget.
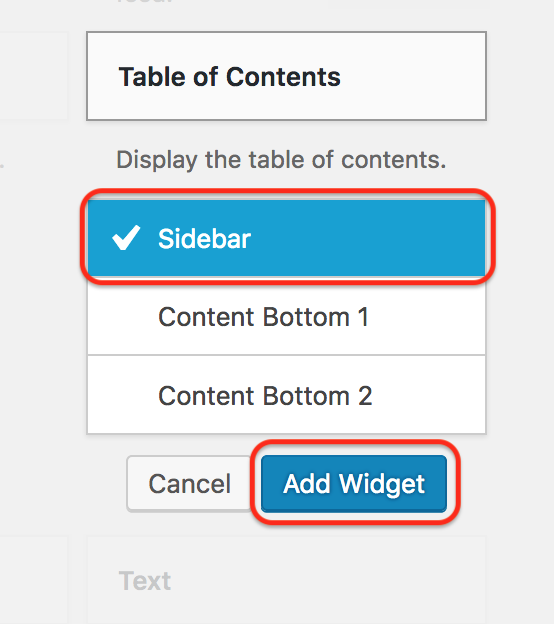
2. You can choose a title for the widget, and if you want it to be “sticky,” check the box next to “Affix or pin the widget.” Click Save when you’re done.