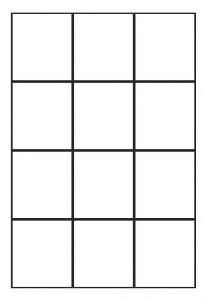
1- Take 20 rubbings of found textures. No letters, words or pictures or symbols such as arrows. Use only black crayon. They must each cover (at least) an area 2” wide x 2.25” long. Select 12 units out of the group to work with and set them up 3 units wide and four units down. Keep 2” for each width and 2.25″ for each length. Be sure to fill the area of each unit beyond the measure. You will then be able to cut a clean unit of 2″ x 2.25″ exactly.

2- Select the best textures. Glue them precisely next to each other 2” wide x 2.25” long. No gaps. No visible pencil marks on or near edges to the units once cut.
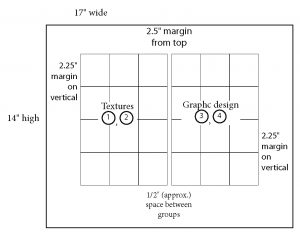
Use 14″ x 17″ Bristol paper. Place the textures on the left half as shown in the diagram.

3- Trace and transfer them to an area of the same size immediately to the right. (As demonstrated in class). Making figure/ground and 50/to/50 white to black decisions on all units traced. (Use the approved plan decided in class.) Allow only a 1/2” margin (approx) between the left and right hand group.
4- Go over the transferred lines with marker and fill the traced parts in black either ink or marker. Be careful to pay attention to the shift in black to white as in the plan. Make sure each unit’s solution allows a 50/50 ratio of black to white with the appropriate amount of the background trading places with the white . Be precise in your craft. Try to consider which of these units are working together.
See if you can find larger ideas coming from the limitations given to you. What other ways would you like to use what you have learned?
Also use the pdf of Project 3 in sidebar to print out.


