
The arduino has 13 Digital In/Out pins. We are first going to start by connecting one LED to the Arduino. We are connecting the long leg(anode) to pin 2 of the arduino. The short leg(cathode) is going be connected in series to a 220-470 ohm resistor to ground.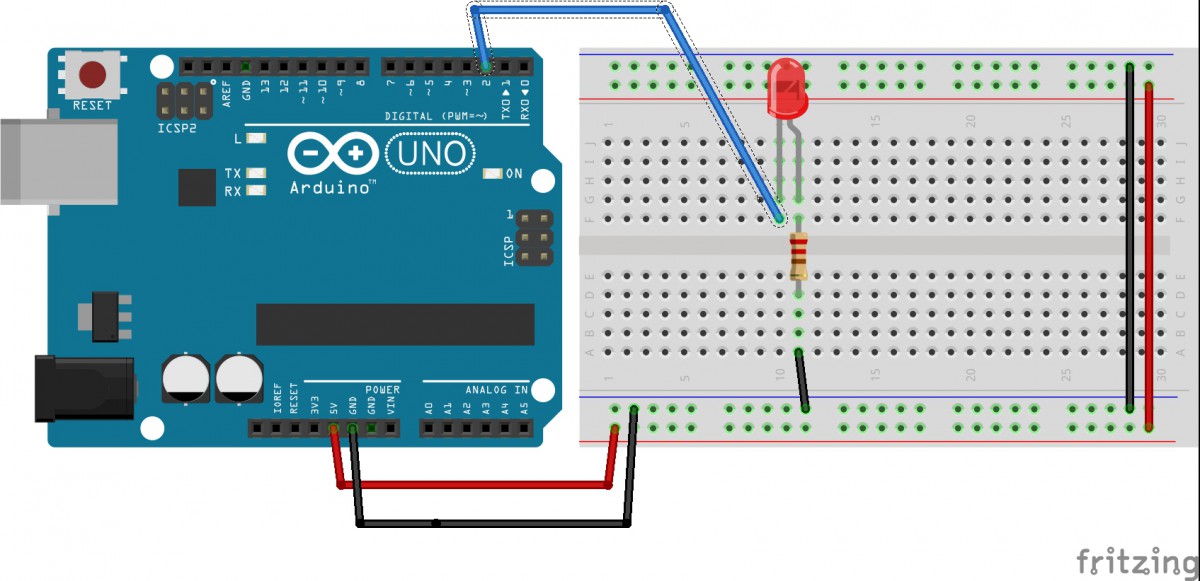
We are now ready to program the arduino board. We are going to write and example to blink an LED.
// the setup routine runs once when you press reset:
void setup() {
// initialize the digital pin as an output.
pinMode(2, OUTPUT);
}
// the loop routine runs over and over again forever:
void loop() {
digitalWrite(2, HIGH); // turn the LED on (HIGH is the voltage level)
delay(1000); // wait for a second
digitalWrite(2, LOW); // turn the LED off by making the voltage LOW
delay(1000); // wait for a second
}
Now we are going to upload our code:
- Press the Check Mark to compile and check for errors
- Connect your Arduino via USB A-B Cable
- Choose the board you are going to upload to: Tools=>Board=>Arduino Duemillanove w/Atmega 328
- Choose your Serial Port
- On OSX or Linux it will start with /dev/tty.#####
- On a PC it will display as COM#
- Select the Right Arrow next to the check mark to upload your code. The computer will upload your code through the Serial Protocol.
serial communication is the process of sending data one bit at a time, sequentially, over a communication channel or computer bus.

