I have created a brief PowerPoint presentation, summarizing my blog. In this PowerPoint I will explain the purpose of Future Delights, some post I have written and a series post I’ve created. Anyone interested may take a look. Click here to view the PowerPoint: Future delights blog
Category: Uncategorized
My trip to “MoMA, The Museum of Modern Art,” was a great experience. The exterior of the building was very modern; glass windows and doors. There were colorful lighted trees surrounding the museum and the atmosphere was very clean. The interior of the building was very modern as well; sculptures hang from the ceilings, screens of projections everywhere and the place was extremely clean. The name “The Museum of Modern Art,” really sets its meaning for the building, it is very modern in many aspect and unique in its designs.
This building also consists of eight floors, on every floor there are helpful pamphlets and customer service representatives. On the first floor there was a checkroom where visitors may leave their coats and bags as they looked around the museum, I found that quite helpful. Every floor is unique in its own way because every floor has its own different field of art work statues. The second floor consist of “Prints and Illustrated Books,” from the 1980s to now. The third floor has “Drawings, Photography, Architecture and Design.” The fourth and fifth floor contains “Painting and Sculpture I and II,” from the 1940s to 1980s. As for the sixth floor, it is a “Special Exhibitions,” also known as the gift shop. Finally, the last two floors are the basements of the museum; they are the “Theatre Gallery I, II and III.”
This museum was great and all however, the only thing that upset me was the guards there. The guards kept following me as I looked through the gallery, it made me feel very uncomfortable. Another thing that annoyed me was that every time I took pictures from a well distanced position, the guards would come over and tell me not to get too close. I know my distance and I know the rules therefore, I will follow them, it felt like the guards were being racist. My recommendation would be to allow the viewer’s more space to view the art works and if the guards are so afraid of people touching the work then provide a boarder guides.
Besides the guards, everything in the museum was perfect. MoMA is a very exciting museum and I would recommend anyone interested in modern art to visit. Click here: http://www.moma.org/
My influential angel will be my sister, she encourages me to keep on doing what I like and never stop trying. Every time I complete and art work, no matter if it’s a project or just for fun, I would always show her. Ever since I began to draw, my sister has always been there to support me.
One of my major turning points was decided with the help of my sister. It the beginning of college and I must pick my major ahead of time so I won’t make any mistakes. There were two paths I had to pick; one goes into fashion design which meant I have to transfer out and the other is to go into graphic design. After doing lots of research the conclusion was; fashion design is a very competitive field and was mostly marketing instead of designing and graphic design varies to many other fields, such as advertising and animation. Therefore, with the help of my sister my decision was made, I stayed in City Tech and continued my education in graphic design advertising.
Since I wasn’t able to get professorial lessons due to some private reasons, I had to learn a lot of stuff myself. One of my favorite things to draw was animation and one way I taught myself was to study an art work and copy it myself, after being familiar with the drawing I would change it up with my own designs. However, this technique was not giving me much improvement until, I got my own computer. I started searching for drawing and software lessons and the best video blog I found was on YouTube; animation blogger: https://www.youtube.com/channel/UCno-YPZ8BiLrN0Wbl8qICFA and fine art blogger: https://www.youtube.com/channel/UCaapxaQKJFJ6XC56CHgeTzw
Computer Animation: 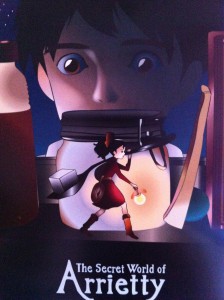
Photography: 
Painting: 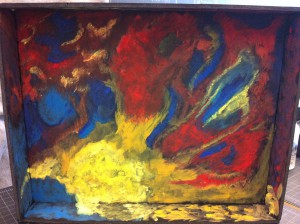
My interest towards the art field vary a lot, I don’t necessarily like animation alone, I am interested in fine art, sculpture, jewelry design and much more. Since I was interest in so many divisions of art, I tried all of them and completed many pieces as well. However, I was still unable to decide on only one field of art major. Therefore, graphic design was the prefect major for me because I get to do vary fields of art work without any limitations.
I have viewed a few bloggers blog and found a blog quite interesting, it is the graffiti blog created by Hansel Vallejo. Click this link to view his blog: https://openlab.citytech.cuny.edu/designyourview/who-am-i/ . After viewing his blog I have written a little comment of my own about what an artist would need to create graffiti. My guest post is quite simple; it explains to artist what tools to use for different situations. However, the main purpose of this post is to encourage those people with graffiti interest to visit and learn as much as possible from this blog. To view my post and learn more about this blog click here: https://openlab.citytech.cuny.edu/designyourview/
In digital art you wont need many supplies such as pencils, papers, inks, paint, or anything of that sort because it has all been made digital. Instead you will need a different set of supplies and although there are less supplies but they can be very very expensive.
To begin in digital drawing you will need …
- A computer either a PC Or a Mac OSX
- You will need a drawing tablet. (these come in many varieties) such as a cintiq or a intuos tablet
- Drawing software such as Corel Draw, or Photoshop
According to Pauline Van De Ven, “A digital painting is created on the computer using a graphics program, a virtual painting box with brushes, colors and other supplies. The box contains instruments that do not exist outside the computer, and which give a digital artwork a different look and feel from an artwork that is made the traditional way. Once finished, the painting is digitally transmitted to a traditional physical carrier, such as canvas, paper, polyester etc.”
Many viewers may experience difficulty in drawing the hands. This is a common problem many people have, in this post I will demonstrate how to draw hands and provide you with the best link I know.
First off it is best to draw a few hands alone before adding it to any character’s body.
Step 1
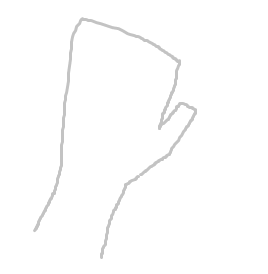
Draw a shaped outline of how you would like your hand to look or act
Step 2
Note where you would like your palm to start and end
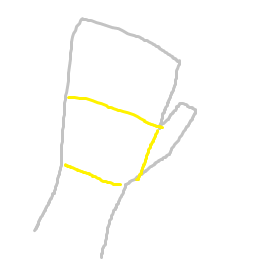
Step 3
Mark the shape of the fingers
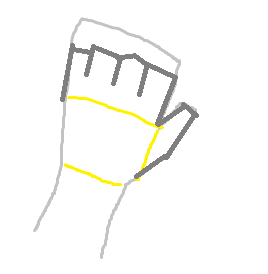
Step 4
Outline the shape of the fingers
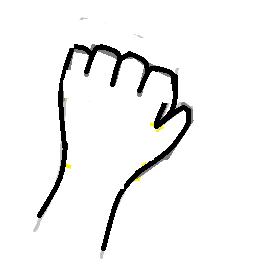
Step 5
Add the details, it will be easier if you form the same position with our own hand and use it as reference
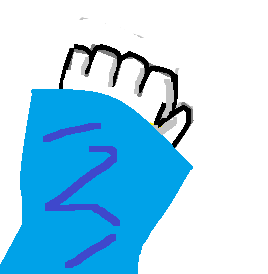
After being at ease with drawing different types of hands, one may put it in action. Present it on a full body drawing and continue from there. Hands can be difficult because they demonstrate so much acting and feelings within a character. However, with lots of practice anyone can be a great artist.
https://www.youtube.com/watch?v=CHZLop6fd3o&feature=c4-overview-vl&list=PLCD2CF65888663986
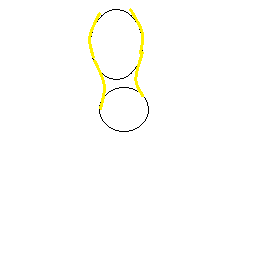
Finishing our post on the head, we should move on to the body. A anime character’s body can be beautiful or exaggerating depending on how you like your character to be.
Trying drawing standing up figures first, it is the easiest to begin with.
Step 1
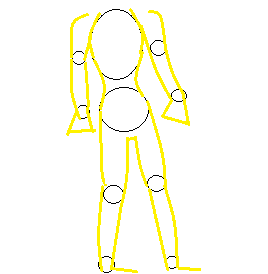
Draw an oval under the head and a circle underneath the oval a distance of 2 -3 centimeters apart.
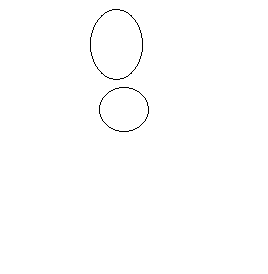
Step 2
Then connect them with a curve line for the body.
step 3
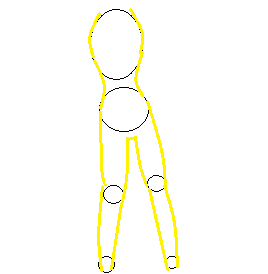
Both legs should contain 2 smaller circle half length from the big circle and from each other.
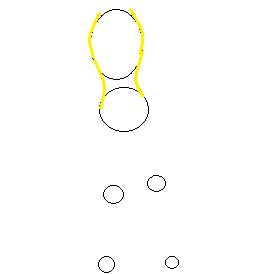
Step 4
Finally connect them with a curve line.
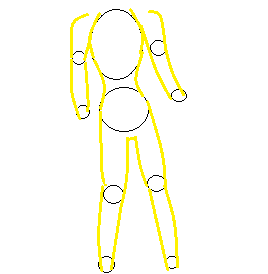
Anime body’s can be as long as you like, short as you want or proportional. This here is the average shape and size.
Step 5
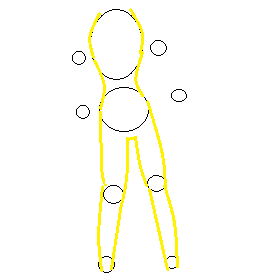
For the arms they are the same as the legs but not as long. Both arms contain 2 small circles half length apart from each other. The first circle lined a little but below the breast and the second along the hip.
Step 6
At the end connect them with a curved line.
Step 7
Lastly for the hands, just draw a trapezoid and your done.
In an anime drawing there will be lots of curves because we want it to be beautiful, on less your ideal anime character is tough and wearing an armor then it will be straights lines most of the ways.
The following link will show you a better description.
Female: https://www.youtube.com/watch?v=_VtBuFYvsW8&list=SPCD2CF65888663986
Male: https://www.youtube.com/watch?v=dFuFwpGfbYU&list=SPCD2CF65888663986
Many people wonder, how can I be a good Anime drawer? Many would say practice, yes that us true but what do you need to practice. Well this series will show you step by step in becoming a well developed animation creator from the body to clothing them.
First step is drawing the head, the head proportion to an anime character is quite important. The face shows the most expressions therefore, work on the head, face and other contents you would like to add.
Step 1
Draw a circle

Step 2
Draw two V shape line on the bottom of the circle, where you want your character’s chin to be

Step 3
Draw a curves cross across the face where you want the eyes n line of the nose to go

Step 4
Outline the shape of the face, as if it would be chubby, round or skinny.

Step 5
Draw the eyes, nose and mouth occurring to your liking.
Here is a link that I believe is a great help.
Female: https://www.youtube.com/watch?v=zGsPO6Fzzr0
Hi, my name is Jenny Wang. I am currently in my sophomore year, attending New York City College of Technology. My major is graphic design. I have worked as a sales associate from senior year of High School to freshmen year of college. I am well prepared for communicating and interacting with future companies or working conditions. My leadership skills are presented during my high years; I formed a Chinese yo yo club and was nominated club president. I have worked for 2 years as sales associated my communication skills with different ethics have developed very well.
My major is Graphic Design with a minor in animation.I am hoping to get a job as Graphic Designer. I have taken Adobe Illustrator, In Design, and Photoshop courses during my years in college to become a Graphic Designer.I chose to study in Graphic Design because I believe I have the potential to create unique designs for the new line of styles in this empire.
In order to well prepare myself for future job opportunities, I will in applying for internship during the summer in the New York area. I have always had great interest in designing and I am also discovering the high desire I intend to have for the designing industry. In the future I am hoping to combine all my knowledge of the two disciplines I achieve to find myself a dream career.
Finding blog ideas are simple, you just have to find the thing that interests you enough that will make you to want to share it to others. Blogging is like sharing something with a friend or explaining something to your family.
My ideas come from the things around me; people, animals and environment. These are the best idea giver because they are always there and always the most natural. People can inspire you with how they look and what they do. Animals are good idea givers because they are all different in a way that will make them special only to you. Lastly, the environment is the grand giver of ideas, it’s always changing yet, it gives humans the best views the earth can offer.
My main theme is artistic blogs I prefer to write about historical art piece and explain about the meaning behind it. Fashion blogs are mostly based on clothing, jewelry and shoes. Fashion in a blogging service is very popular; it is what most people in for online. The more advice and information posted on a site, the greater the views will rise. In essence, these are my concepts of finding blog ideas.

