The Events Calendar
This plugin allows you to create and display a calendar of events on your site. To use these features, first activate The Events Calendar under Plugins in the main menu of your dashboard.
If you want detail beyond what’s listed here, you can consult the plugin author’s new user primer.
Create an event
The following has been adapted and/or copied from the plugin author’s knowledgebase. Following these steps will help you create a new event.
- Go to the Dashboard of your site.
- Find Events in the left-side menu.
- Under events, click the Add New link.
- The event creation form looks very much like the post creation form. Give your event a title and description the same way you would give a post its title and content.
- Below the title and description box, there are some event-specific fields:
- Time and date — Start/End — the date and time when the event begins and ends. Clicking into a date field will bring up a calendar for you to select your desired dates. You can also type the date using the format YYYY-MM-DD. You can select a time from the dropdown, or type one in. If the “All Day Event” box is checked, you can’t give a time for your event. The “All Day Event” checkbox is for when a specific time frame is not meaningful.
- Event Venue — If this is your first time using The Events Calendar, you’ll see this list of fields for creating your first event venue. If you’ve created a venue for a previous event, you’ll have the option of selecting an existing venue from a drop-down menu (you may also type into the search box to narrow your options). Entering a new venue name and selecting the Create option from the menu options will display the new venue form fields below, allowing you to create a new venue for your event. Provide a name for the venue and any optional address details – if you like – a contact phone number and website. The last two checkboxes control whether a map should be shown to visitors and/or a link to a map should be displayed. It’s also worth noting that you don’t need to create (or use) a venue. If you prefer not to specify a venue, simply move on to the next section.
- Organizers — Like the venue details, you can select any pre-existing organizer details that you have already entered. Just as with the venue details, specifying organizers is optional. When adding an organizer, all fields are optional.
- Event Website — You can provide an associated URL for the event. This is mostly useful if you are coordinating with a third party.
- Event Cost — If there is an admission cost, you may use this field to inform your users of it. Currency symbol is for you to indicate what currency the cost is listed in (for U.S. dollars use $, for euros use €, etc.). You can specify whether the currency symbol should appear before or after the amount (e.g. $5 vs. 5$).
- You may want to give your event tags or categories, which works the same as with posts (but note that you need to create a distinct set of categories for events).
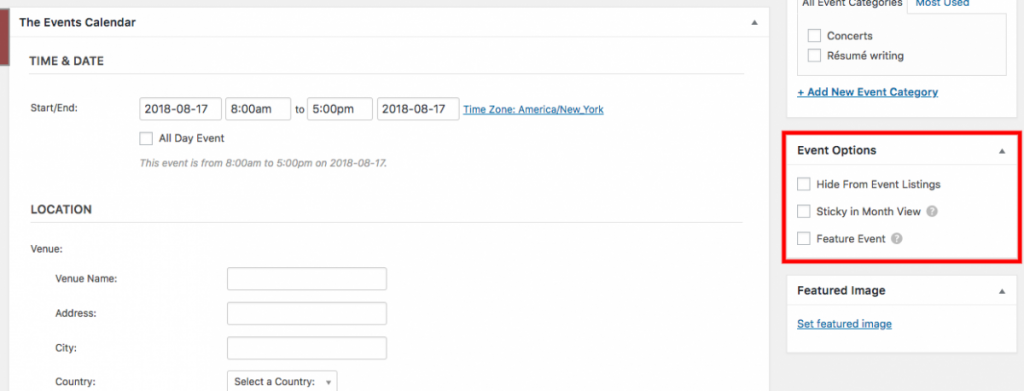
- You may also want to check one or more of the boxes in the Event Options metabox: Hide from event listings, sticky in month view (forces the event to be listed first for its given day), or feature event (event is highlighted; also interacts with an “Event List” widget setting).
- Save and publish, just like a post! You’re done.
Create an event category
You can organize your events into categories, allowing you to display only certain events on a calendar page. This works just like it does for posts, but there is a separate set of categories for events. To create an event category, navigate to Events > Event Categories in the main dashboard menu.
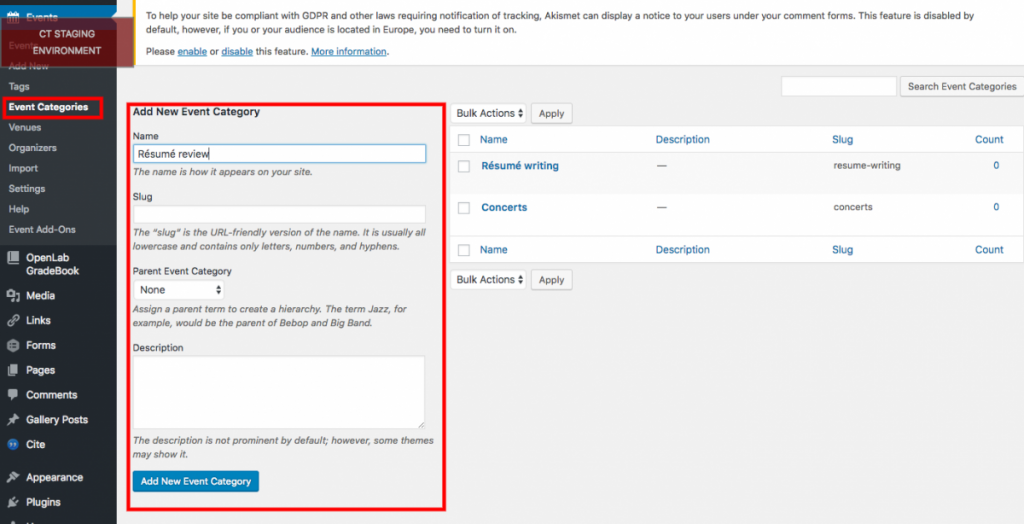
This will bring up a form for creating new event categories, and a list with details of your existing categories, if there are any. Only the name is required, but a slug will be generated automatically to serve as the category’s URL. Special characters will be removed or replaced, so you may want to specify a slug in the case where your name contains non-URL friendly characters.
Link to the calendar
The following has been adapted and/or copied from the plugin author’s knowledgebase.
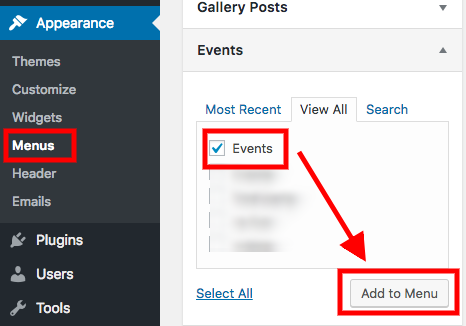
You may want to provide a link to the calendar on your menu. In your dashboard, select Appearance > Menus. On the left hand side along with the usual meta boxes for Pages and Categories you’ll see Events and Event Categories.
To add a link to your calendar from the Menu Builder, click View All in the Events meta box. At the top of the list you’ll see an option for Events. Check the box and then click Add to Menu. That will make a link to whatever is your default calendar views.
To add a link to a specific event, select the event from the Events meta box and click Add to Menu.
To add a link to a category of events, select the categories from the Event Categories meta box and click Add to Menu.
Display an events widget
You can display an abbreviated list of events in any widget area that your theme provides (e.g. a sidebar or footer). To do so, follow these steps:
1. In the main dashboard menu, go to “Appearance → Widgets.”
2. Find the widget called “Events List” in the list of available widgets, and drag it into the widget area of your choice.
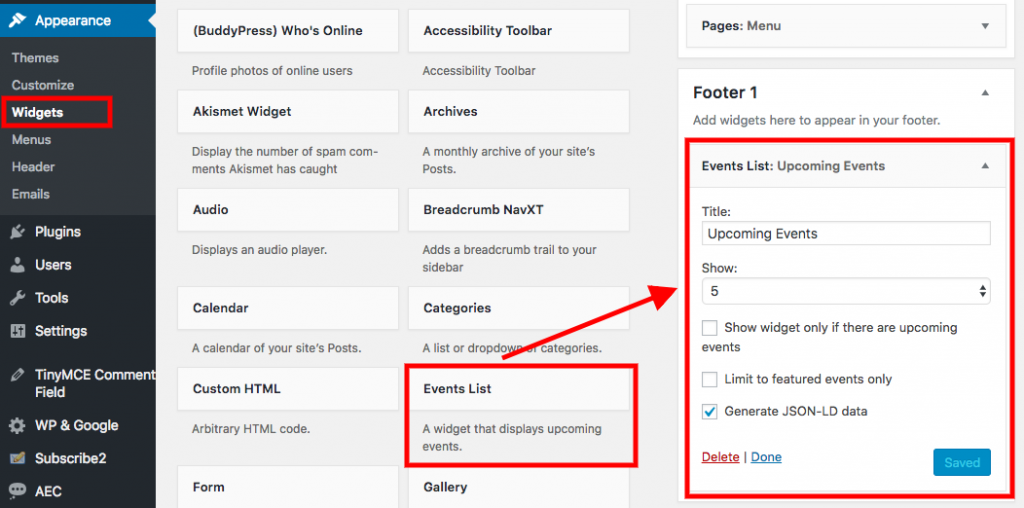
3. Specify a title for the widget, if you want one displayed above the event list.
4. Specify a number of events to list.
5. Checking the “Show widget only if there are upcoming events” box will hide the widget when there are no future events.
6. Checking the “Limit to featured events only” box will make it so only events that have the “Feature Event” checkbox selected under “Event Options” will be displayed.


