Multi-Factor Authentication
For security reasons, we recommend using Multi-factor authentication with your OpenLab account. This will prevent someone logging into your account if your passwords are stolen. You can enable and/or disable multi-factor authentication anytime in your account settings.
To get started, you will need an Authenticator app. If you already have one, feel free to use it (The Microsoft Authenticator app is the recommended one for CUNY email and works fine here as well). If you don’t have an app that you already use, 2FAS (https://2fas.com/) is a free open source app that is available for both iPhones and Android phones. It is the one we will use as an example in this guide. The steps will be similar if you have a different app.
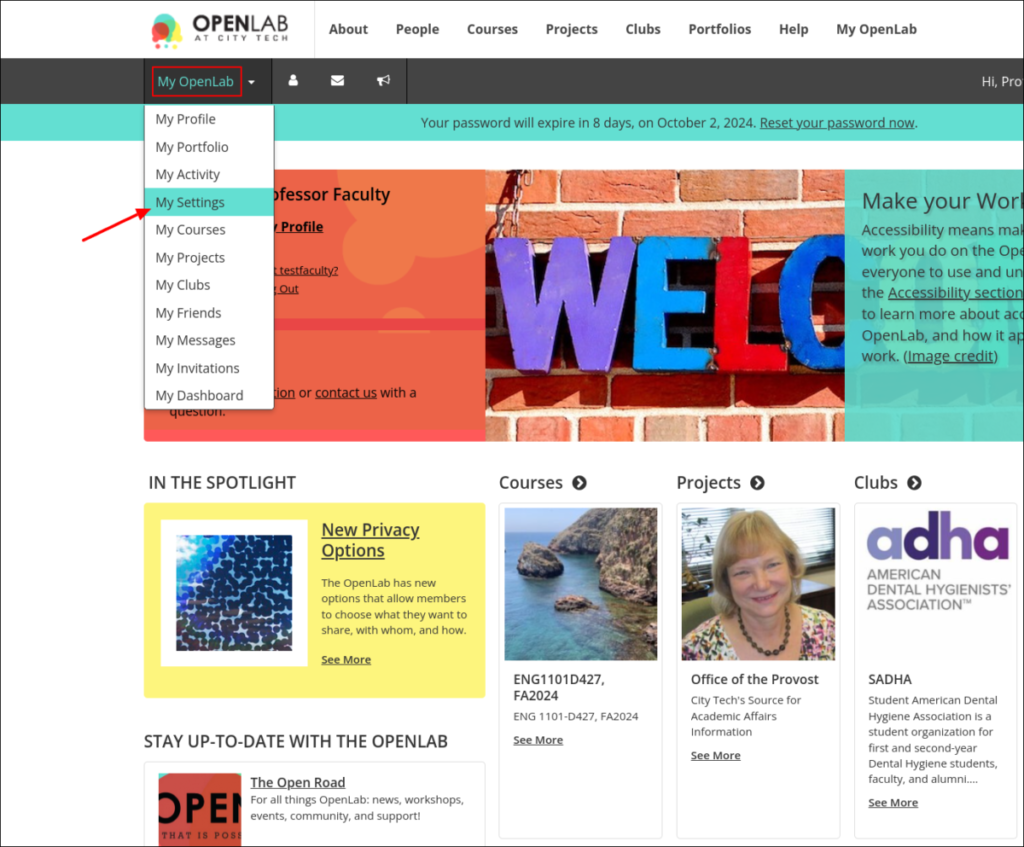
1. Go to My Openlab > My Settings.
2. In Account Settings, scroll down to the Two-factor Authentication section.
3. Click the checkbox to enable the Authenticator app.
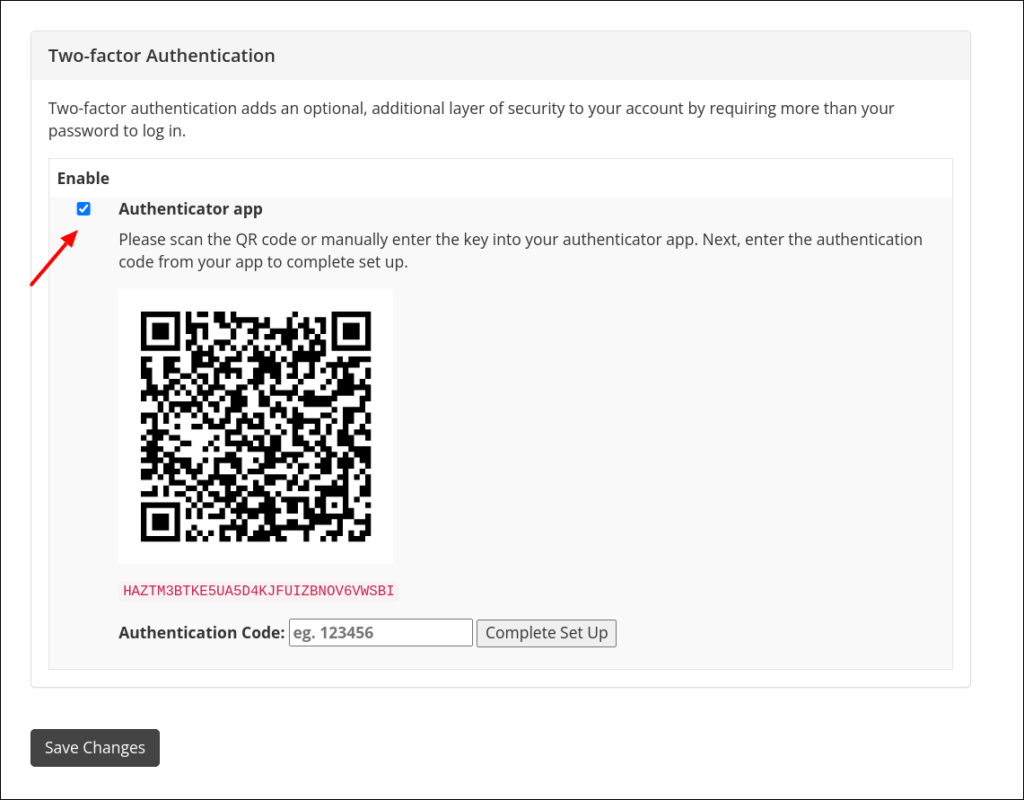
4. Open your Authenticator App to add a login for the OpenLab.
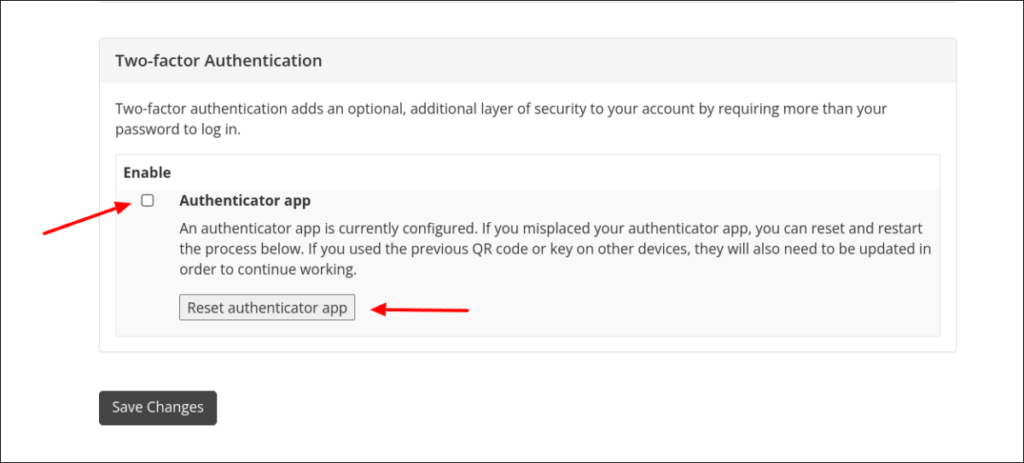
Note: the exact steps to pair your authenticator app with the OpenLab login will differ depending on the app you are using.
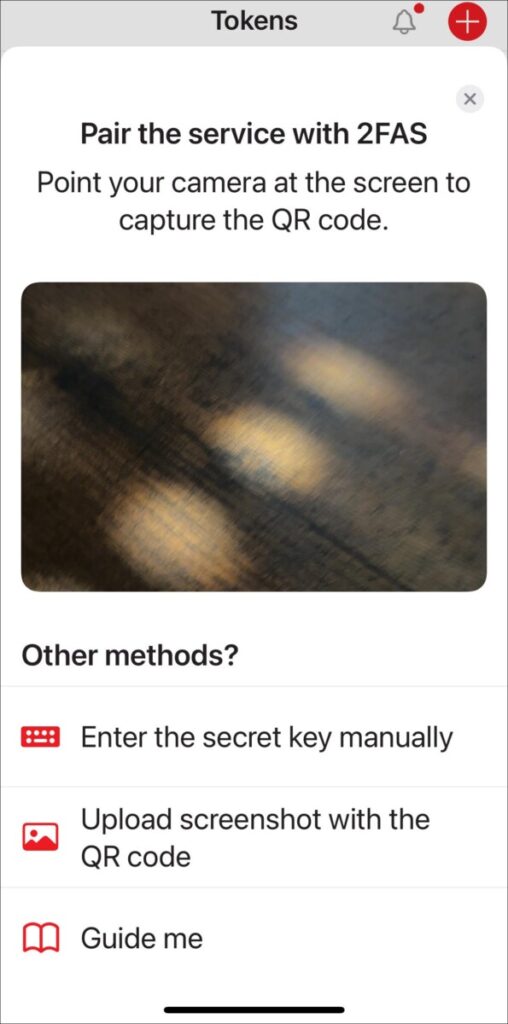
5. Click Pair new service or the + button.
6. Point the camera to the QR code in the OpenLab settings page.
5. Your app will generate an authentication code. Type it in the OpenLab settings and click Complete Set Up.
Notice that there is a timer by the side of the code. Once the time is up, the app will generate another code and restart the timer. You need to do the step above with the current code, before the timer is over.
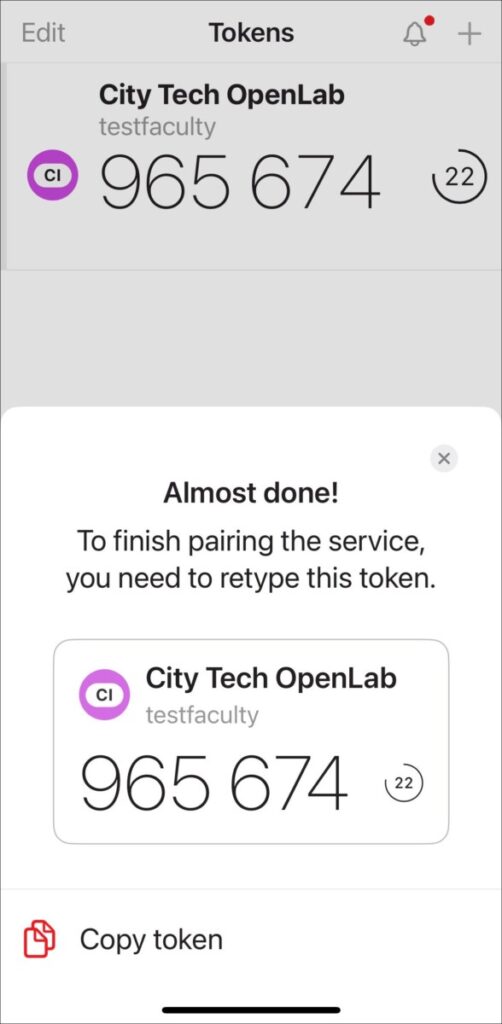
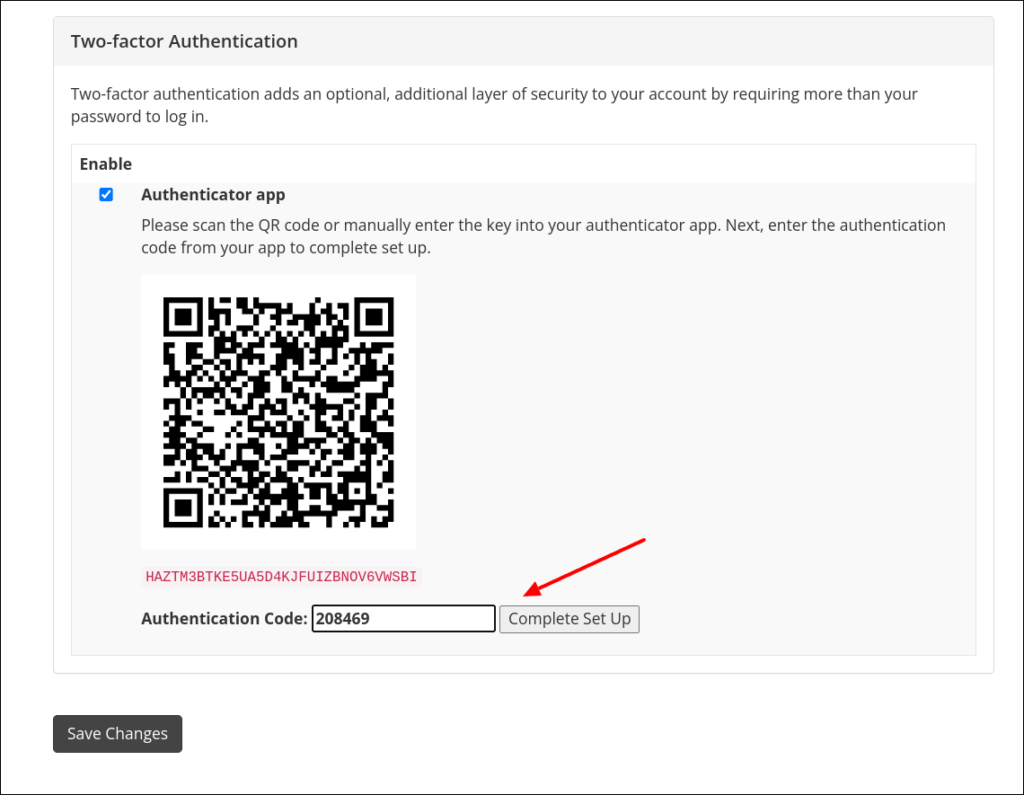
6. Multi-factor authentication is now on. Whenever you try to login, it will prompt you to a page to add a code. You will need to get the code from your app and enter it when prompted by the OpenLab.
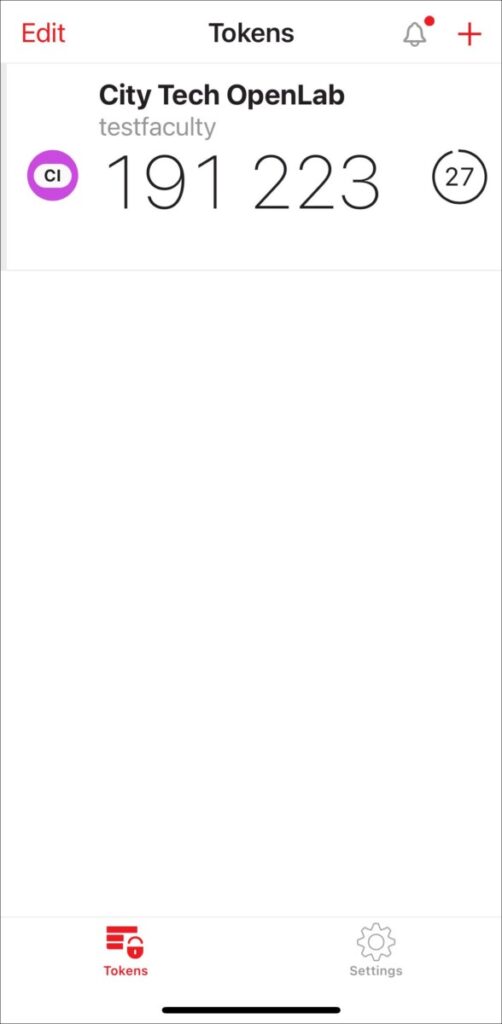
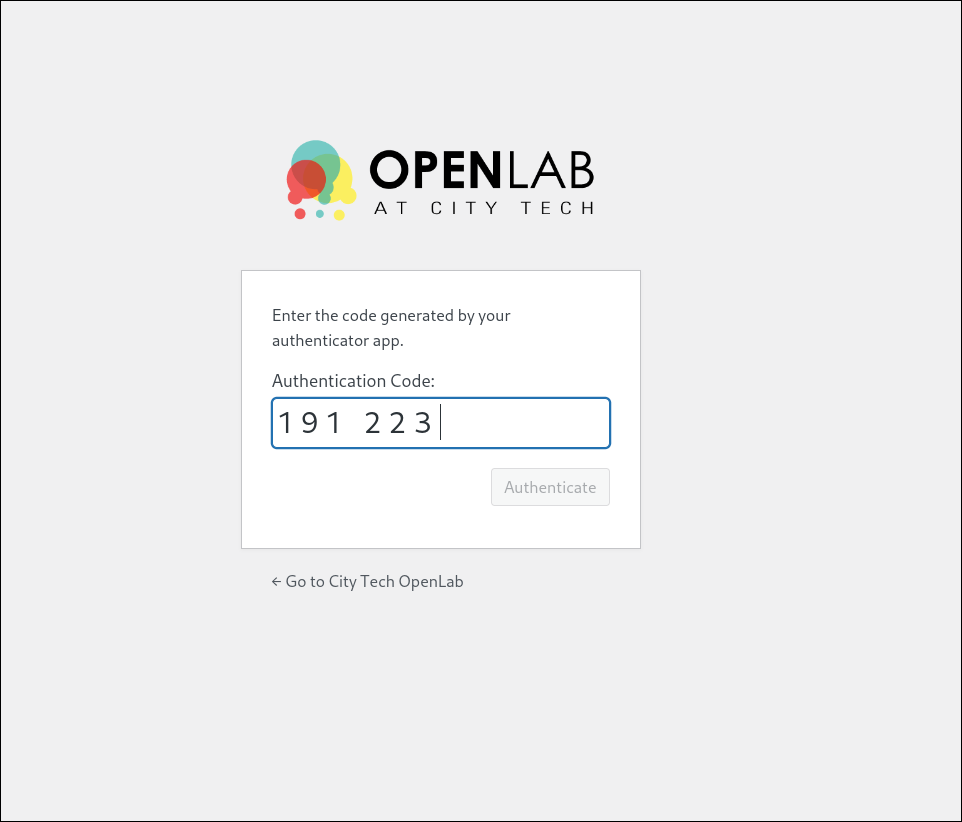
7. If you need to disable multi-factor authentication, go to My Openlab > My Settings again and uncheck the Authenticator App box. If you want to pair with a different app, click Reset Authenticator App to start over.
